My husband took a bite of one of these small-batch pumpkin banana muffins, stopped mid-chew, and just looked at me. That look said everything — the one where they’re trying to figure out exactly what you did differently. I knew I’d cracked something good. It was a Tuesday afternoon, nothing special, just me staring at one sad, overripe banana on the counter next to half a can of pumpkin puree left over from a weekend project. Two lonely ingredients that didn’t make sense on their own but practically begged to be combined.
I almost made another loaf of banana bread (I have a habit of falling back on that when I need to use up bananas, honestly). But the pumpkin was sitting right there, and I thought — why not? The result was so much better than I expected. These muffins came out tender, perfectly spiced, and just sweet enough without being heavy. That first batch disappeared in two days, and I had to make them again just to write down the measurements properly.
Sometimes the best recipes come from using up what’s left in your fridge, you know? This one stuck because it works for real life — when you want something warm and homemade but don’t need a dozen muffins staring at you from the counter. It’s the kind of recipe that makes you feel like you pulled off something special with almost no effort. And honestly? That’s my favorite kind of baking.
Why You’ll Love This Recipe
These small-batch pumpkin banana muffins solve a very specific problem: you want fresh, homemade muffins but don’t want to commit to a full batch. I’ve tested this recipe four times to get the moisture balance just right — pumpkin adds tenderness, banana adds sweetness, and together they create something that’s more than the sum of its parts.
- Small Batch Perfection : Makes exactly 6 muffins, which means no waste and no temptation to eat a dozen (unless you want to, no judgment here).
- Simple Ingredients : You probably have everything already — flour, sugar, eggs, oil, and those two key ingredients that need using up.
- Perfect for Fall Mornings : Great for cozy breakfasts, afternoon snacks, or packing in lunchboxes alongside some easy turkey and cheese pinwheel wraps for a complete meal.
- Crowd-Pleaser : The pumpkin-haters in my house didn’t even realize they were eating pumpkin. That’s how well the banana balances things out.
- Unbelievably Moist : The texture is what gets people. It’s not dense or gummy — it’s light, tender, and stays moist for days.
What makes this recipe different from every other pumpkin muffin out there is the ratio. Most recipes lean too heavy on one flavor or the other. I spent time figuring out the exact balance where neither ingredient overpowers the other. The banana keeps the pumpkin from tasting too earthy, and the pumpkin keeps the banana from being too sweet. It’s comfort food that comes together in under 30 minutes, and it’s the kind of muffin that makes you close your eyes after the first bite. Perfect for when you want something homemade without the fuss.
What Ingredients You Will Need
This recipe uses simple, wholesome ingredients to deliver that moist, flavorful texture without any complicated steps. Everything here is a pantry staple or something you likely have in your fridge right now.
- All-purpose flour – 1 cup (120g). The structure of the muffin. I use Gold Medal or King Arthur for consistent results. Spoon and level your flour — don’t scoop straight from the bag or you’ll end up with dense muffins.
- Granulated sugar – ⅓ cup (65g). Just enough sweetness without making these taste like cupcakes. You can reduce to ¼ cup if your banana is very ripe.
- Light brown sugar – 2 tablespoons (25g), packed. Adds moisture and a subtle molasses note that plays well with the pumpkin. Dark brown sugar works too if that’s what you have.
- Baking soda – ½ teaspoon. The main leavening agent. Make sure it’s fresh — test it by dropping a bit into vinegar; it should fizz immediately.
- Baking powder – ½ teaspoon. Gives them a little extra lift so they dome nicely on top.
- Salt – ¼ teaspoon. Don’t skip this — it balances the sweetness and brings out the pumpkin flavor.
- Ground cinnamon – 1 teaspoon. The backbone of the spice blend. I prefer McCormick or simply organic for stronger flavor.
- Pumpkin pie spice – ½ teaspoon. If you don’t have this, use ¼ teaspoon nutmeg and ¼ teaspoon ginger instead.
- Pumpkin puree – ½ cup (120g). Not pumpkin pie filling — make sure you grab the 100% pure pumpkin. Libby’s is my go-to for consistent texture and moisture content.
- Ripe banana – 1 medium, mashed (about ½ cup or 120g). The riper the better — brown spots are ideal. A very ripe banana gives more sweetness and better moisture.
- Large egg – 1, room temperature. Brings everything together. If your egg is cold, place it in warm water for 5 minutes before using.
- Vegetable oil – 3 tablespoons (45ml). Keeps these muffins tender for days. Canola or avocado oil work great too. Melted coconut oil works if you’re out of vegetable oil.
- Vanilla extract – 1 teaspoon. Pure vanilla makes a difference here, but imitation works in a pinch.
- Milk – 2 tablespoons (30ml). Any milk works — dairy, oat, almond. Adds just enough liquid to bring the batter together without making it runny.
- Optional mix-ins – ¼ cup chocolate chips, chopped walnuts, or dried cranberries. I’ve tried all three and honestly, chocolate chips are my favorite.
Equipment Needed
You don’t need a fancy kitchen to make these small-batch pumpkin banana muffins. Here’s what you’ll actually use:
- Muffin tin – A standard 12-cup tin works, but you’ll only fill 6 cups. If you have a 6-cup mini muffin tin, that works too — just reduce baking time to 12-14 minutes.
- Mixing bowls – One medium bowl for dry ingredients and one large bowl for wet ingredients. I use glass Pyrex bowls because they’re easy to clean and don’t hold odors.
- Whisk – For combining dry ingredients evenly. A fork works in a pinch but a whisk is better for breaking up flour clumps.
- Rubber spatula – For folding the batter together without overmixing. This is non-negotiable — a wooden spoon can overwork the batter and make muffins tough.
- Measuring cups and spoons – Dry measuring cups for flour and sugar, liquid measuring cup for oil and milk. It matters more than you think.
- Muffin liners – Paper liners make cleanup easy and keep muffins from sticking. If you’re out, grease the tin well with butter or cooking spray.
- Cooling rack – Lets air circulate so the bottoms don’t get soggy. If you don’t have one, transfer muffins to a plate after 5 minutes and flip them on their sides.
- Ice cream scoop or cookie scoop – Not required, but it gives you evenly sized muffins every time. A 2-tablespoon scoop works perfectly for this batch.
I bought my muffin tin from a discount store for $8 and it’s still going strong after three years. You really don’t need expensive equipment for good baking.
Preparation Method
Preheat your oven to 350°F (175°C). Line 6 cups of your muffin tin with paper liners or grease them well. This step matters — I once forgot to line the tin and spent 20 minutes chiseling muffins out. Learn from my mistakes.
Step 1: Mash the banana
In a large bowl, mash your ripe banana with a fork until it’s mostly smooth with a few small lumps. You want about ½ cup of mashed banana. If you have more, that’s fine — just reduce the milk slightly. If you have less, add an extra tablespoon of milk to compensate. The banana should be spotty brown for maximum sweetness. Green bananas won’t give you the same result.
Step 2: Combine wet ingredients
Add the pumpkin puree, egg, vegetable oil, vanilla extract, and milk to the mashed banana. Whisk everything together until smooth and well combined. The mixture should look uniform with no streaks of egg or oil. If your oil separates a little, keep whisking — it will come together. This takes about 30 seconds of consistent whisking.
Step 3: Mix dry ingredients
In a separate medium bowl, whisk together the all-purpose flour, granulated sugar, brown sugar, baking soda, baking powder, salt, cinnamon, and pumpkin pie spice. Whisk for about 20 seconds to make sure the leavening agents and spices are evenly distributed. This step prevents biting into a pocket of baking soda later — trust me, it’s not pleasant.
Step 4: Combine wet and dry
Pour the dry ingredients into the wet ingredients. Use your rubber spatula to fold everything together gently. Stir just until you no longer see dry flour — about 10 to 12 strokes. A few lumps are perfectly fine. Overmixing at this stage develops gluten and makes muffins tough and dense. The batter should look thick but scoopable, like a slightly thicker pancake batter.
Step 5: Add mix-ins (optional)
If you’re using chocolate chips, walnuts, or dried cranberries, fold them in now with 3 to 4 gentle strokes. Don’t go overboard — you want them distributed evenly without overworking the batter. I usually save a few chips to press on top of each muffin before baking for a prettier presentation.
Step 6: Fill the muffin cups
Divide the batter evenly among the 6 prepared muffin cups. Each cup should be about ¾ full. An ice cream scoop makes this easy and ensures even sizing. If you don’t have one, use two spoons — one to scoop and one to scrape. The batter will be thick, so don’t worry if it doesn’t level itself out.
Step 7: Bake
Bake at 350°F (175°C) for 16 to 19 minutes. Start checking at 16 minutes by inserting a toothpick into the center of a muffin. If it comes out clean or with just a few moist crumbs, they’re done. If the toothpick has wet batter on it, give them 2 more minutes and check again. The tops should be golden brown and spring back when lightly pressed.
Step 8: Cool properly
Let the muffins cool in the tin for 5 minutes. This allows them to set so they don’t fall apart when you remove them. After 5 minutes, transfer them to a wire cooling rack. Don’t leave them in the tin longer than 10 minutes or the bottoms will get soggy from trapped steam. Let them cool completely if you’re adding any glaze — warm muffins will melt it right off.
Step 9: Enjoy warm or at room temperature
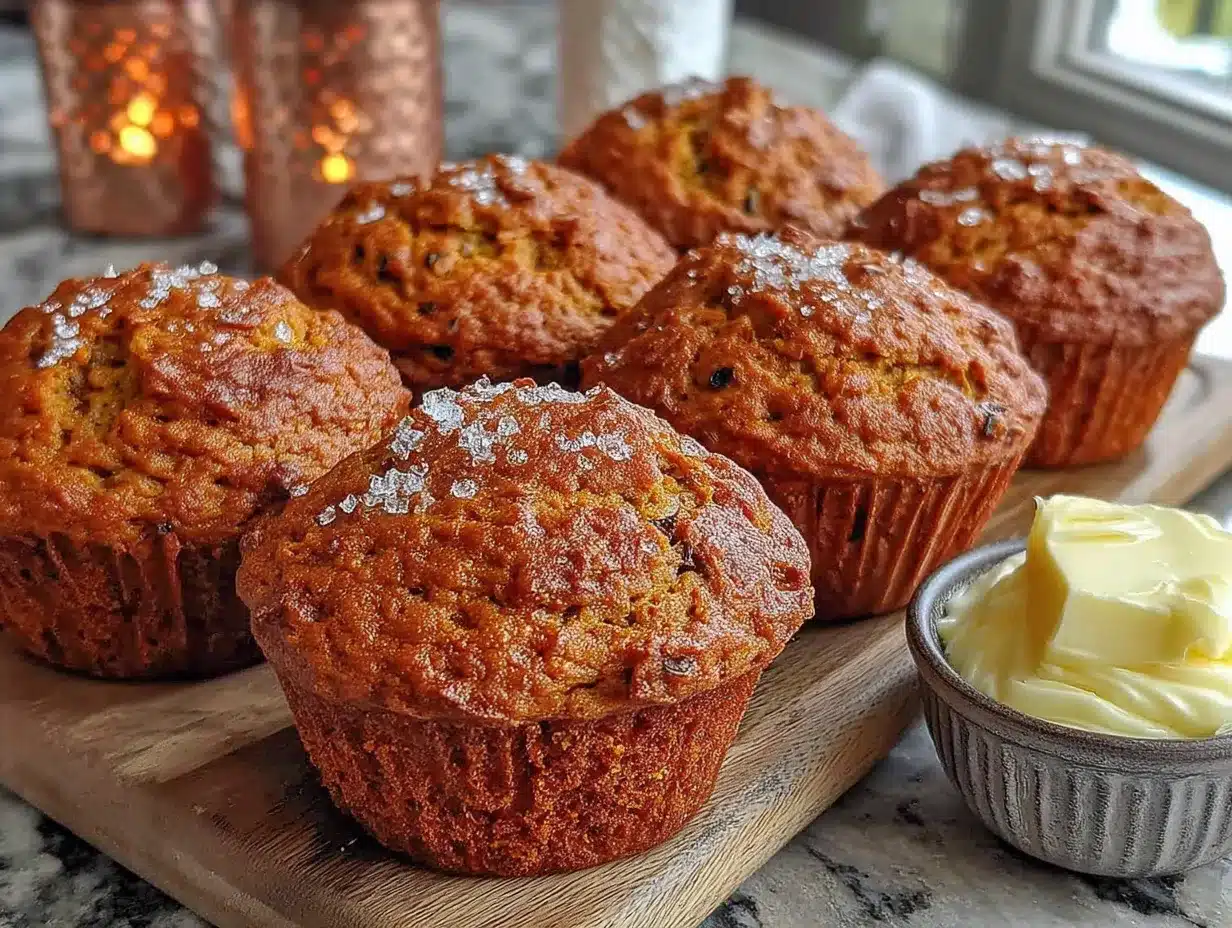
These muffins are incredible warm, with a pat of butter melting into the center. But they’re equally good at room temperature the next day. The texture actually improves after a few hours as the moisture distributes evenly throughout the crumb.
Cooking Tips & Techniques
I’ve made this recipe more times than I care to count, and I’ve learned a few things the hard way. Here’s what I wish someone had told me:
Don’t overmix the batter. This is the number one mistake people make with muffins. Mix until the flour disappears and stop. Those lumps are your friends — they’ll bake out in the oven. Overmixed muffins turn out tough and rubbery, and there’s no fixing that after they’re baked.
Room temperature ingredients matter. Cold eggs and cold milk can make your batter seize up, especially when combined with the cold pumpkin puree. Take everything out of the fridge 20 minutes before you start. If you forgot, place the egg in a bowl of warm water for 5 minutes and microwave the milk for 10 seconds.
Check your oven temperature. Ovens run hot or cold more often than you’d think. I burned my first batch because my oven runs 25 degrees hotter than the dial says. An inexpensive oven thermometer costs about $7 and saves you from guessing. If your muffins are browning too fast on top but still raw in the middle, your oven is too hot.
Use the right banana. I cannot stress this enough — the banana needs to be spotted brown or even mostly brown. A yellow banana won’t give you enough sweetness or moisture. If your banana isn’t ripe enough, you can speed things up by baking it at 300°F for 15 minutes until the skin turns black. Let it cool before mashing.
Measure flour correctly. Scooping your measuring cup directly into the flour bag packs in extra flour and makes dry muffins. Instead, fluff the flour with a spoon, then spoon it into your measuring cup and level it off with a knife. This simple habit changed my baking completely.
Rotate the pan halfway through. Ovens have hot spots. Rotating the muffin tin halfway through baking ensures even browning. I forgot to do this once and ended up with muffins that were golden on one side and pale on the other.
Variations & Adaptations
One of the best things about this recipe is how flexible it is. Here are some variations I’ve tried and loved:
Gluten-Free Version : Substitute the all-purpose flour with a 1:1 gluten-free baking flour blend. I’ve used Bob’s Red Mill and King Arthur with great results. Add 1 tablespoon of milk since gluten-free flours tend to absorb more liquid. The texture will be slightly more tender, but still delicious.
Dairy-Free Version : Use any plant-based milk — oat milk gives the best texture, but almond and soy work too. Replace the butter in any glaze with coconut oil or vegan butter. These muffins are naturally dairy-free if you skip the butter topping anyway.
Vegan Version : Replace the egg with a flax egg (1 tablespoon ground flaxseed mixed with 3 tablespoons water, let sit for 5 minutes). Use maple syrup instead of honey if you’re adding any sweetener. The muffins will be slightly denser but still moist and flavorful.
Lower Sugar Option : Reduce the granulated sugar to ¼ cup and skip the brown sugar entirely. Add an extra tablespoon of maple syrup or honey to the wet ingredients. The muffins won’t be as sweet, but the banana and pumpkin provide enough natural sweetness to satisfy.
Chocolate Lover’s Version : Add ¼ cup of mini chocolate chips to the batter and sprinkle a few on top before baking. Dark chocolate chips balance the sweetness beautifully. This version disappears fastest in my house, every single time.
Spice It Up : Add ¼ teaspoon of ground ginger and a pinch of cloves for a warmer spice profile. Sometimes I add a pinch of black pepper — it sounds weird, but it actually enhances the pumpkin flavor without being detectable.
Muffin Top Version : Use a muffin top pan or just fill the cups to the very top and bake for 14 minutes. You’ll get crispy edges and soft centers — basically the best part of any muffin.
I’ve also tried making these as mini muffins for easy mini muffin tin egg bites for toddlers — just reduce the baking time to 10-12 minutes and you have perfectly portioned snacks for little hands.
Serving & Storage Suggestions
These small-batch pumpkin banana muffins are incredibly versatile when it comes to serving. Here’s how I like to enjoy them:
Serving temperature : Warm is best. Pop a muffin in the microwave for 10-15 seconds if it’s not fresh from the oven. The warmth brings out the spices and makes the texture even more tender. For a special treat, split one in half, toast it lightly in a skillet with butter, and drizzle with honey. It’s like a whole new dessert.
What to serve with them : A pat of salted butter is classic and perfect. Cream cheese spread works beautifully too — the tanginess cuts through the sweetness. For breakfast, serve alongside scrambled eggs and fresh fruit. For a snack, pair with a hot cup of coffee or chai tea. They also make an excellent addition to a brunch spread alongside easy rainbow fruit kabobs kids love for a colorful presentation.
Storage instructions : Store muffins in an airtight container at room temperature for up to 3 days. Place a paper towel at the bottom of the container and another on top to absorb excess moisture. If you stack them, put parchment paper between layers to prevent sticking. Do not refrigerate — the refrigerator actually dries out baked goods faster than room temperature.
Freezer instructions : These muffins freeze beautifully. Let them cool completely, then wrap each muffin individually in plastic wrap. Place them in a freezer-safe bag or container. They’ll keep for up to 3 months. To thaw, leave one on the counter for 30 minutes or microwave for 20-25 seconds. I always keep a stash in the freezer for busy mornings.
Reheating methods : Microwave for 15-20 seconds for a quick warm-up. For a crisper exterior, reheat in a 300°F oven for 5-7 minutes. The air fryer works great too — 300°F for 3 minutes gives you that just-baked texture.
How flavors develop : Honestly, these muffins taste even better on day two. The spices mellow out and meld together, and the moisture distributes more evenly throughout the crumb. If you can resist eating them all on day one, you’re in for a treat.
Nutritional Information & Benefits
Per muffin (based on 6 servings, without mix-ins):
- Calories: 195
- Total Fat: 8g
- Saturated Fat: 1.5g
- Cholesterol: 31mg
- Sodium: 210mg
- Total Carbohydrates: 28g
- Dietary Fiber: 2g
- Sugars: 13g
- Protein: 4g
Health benefits of key ingredients : Pumpkin is packed with vitamin A, which supports eye health and immune function. Bananas provide potassium, which helps regulate blood pressure and muscle function. The cinnamon in this recipe has anti-inflammatory properties and may help with blood sugar regulation. These muffins also contain fiber from both the pumpkin and banana, which aids digestion and keeps you feeling full longer.
Dietary considerations : This recipe is naturally nut-free (unless you add walnuts). It can easily be made gluten-free, dairy-free, or vegan with the substitutions listed above. The sugar content is moderate compared to bakery muffins, which often contain double the sugar. For a lower-carb option, reduce the sugar further and use almond flour with an extra egg.
Potential allergens : Contains wheat (gluten), eggs, and milk. If you’re serving these at a gathering, it’s always good to label them or ask about allergies beforehand.
I personally love that these muffins feel indulgent but aren’t loaded with excessive sugar or fat. They’re the kind of treat you can feel good about eating for breakfast or packing in a lunchbox. And if you’re looking for more wholesome baked goods, my easy one bowl chocolate zucchini muffins no mixer follow the same philosophy — real ingredients, real flavor, no fuss.
Conclusion
These small-batch pumpkin banana muffins have become my go-to recipe for so many reasons. They use up ingredients that would otherwise go to waste, they come together in under 30 minutes, and they deliver that cozy, homemade taste that makes you feel like you’ve got it all together. The combination of pumpkin and banana creates something genuinely special — moist, tender, and perfectly spiced without being heavy.
I love that this recipe doesn’t demand a lot from you. No stand mixer, no complicated techniques, no hunting down specialty ingredients. It’s the kind of baking that fits into a real afternoon — between school pickup and dinner prep, or on a lazy Sunday morning when you want something warm with your coffee. The fact that it only makes six muffins means you get to enjoy them fresh without feeling obligated to share with the whole neighborhood. (Though you might want to anyway, because they’re that good.)
I’d love to hear how these turn out for you. Did you add chocolate chips? Try the gluten-free version? Serve them warm with butter for breakfast? Drop a comment below and let me know — your tweaks might inspire someone else’s next batch. And if you’re looking for another small-batch treat to use up seasonal produce, don’t miss my perfect small batch fig jam with vanilla bean — it’s the perfect companion for these muffins.
Happy baking, friends. Make something that makes your kitchen smell amazing today.
Frequently Asked Questions
Can I make these into mini muffins?
Absolutely! Grease a mini muffin tin and fill each cup about ¾ full. Bake at 350°F for 10-12 minutes, checking at 10 minutes. You’ll get about 18 mini muffins from this batch. They’re perfect for lunchboxes or toddler snacks.
Why did my muffins turn out dense?
Overmixing is the most common culprit. Mix the batter just until the flour disappears — a few lumps are fine. Another possible cause is using too much flour. Make sure you’re spooning and leveling your flour, not scooping directly from the bag. Old baking soda can also cause density issues.
Can I use fresh pumpkin instead of canned?
Yes, but you’ll need to roast and puree it first. Fresh pumpkin has more water content than canned, so you may need to drain it through a cheesecloth or paper towel for about 30 minutes to remove excess moisture. Otherwise, your muffins might turn out soggy.
How do I know when the muffins are done?
Insert a toothpick into the center of a muffin. If it comes out clean or with a few moist crumbs, they’re done. Wet batter on the toothpick means they need more time. The tops should also spring back when lightly pressed and be golden brown around the edges.
Can I double this recipe?
Yes, this recipe doubles beautifully. Simply multiply all ingredients by two and bake in a full 12-cup muffin tin. The baking time stays about the same — 16 to 19 minutes. You can also freeze half the batch for later if you don’t need a full dozen right away.
Pin This Recipe!
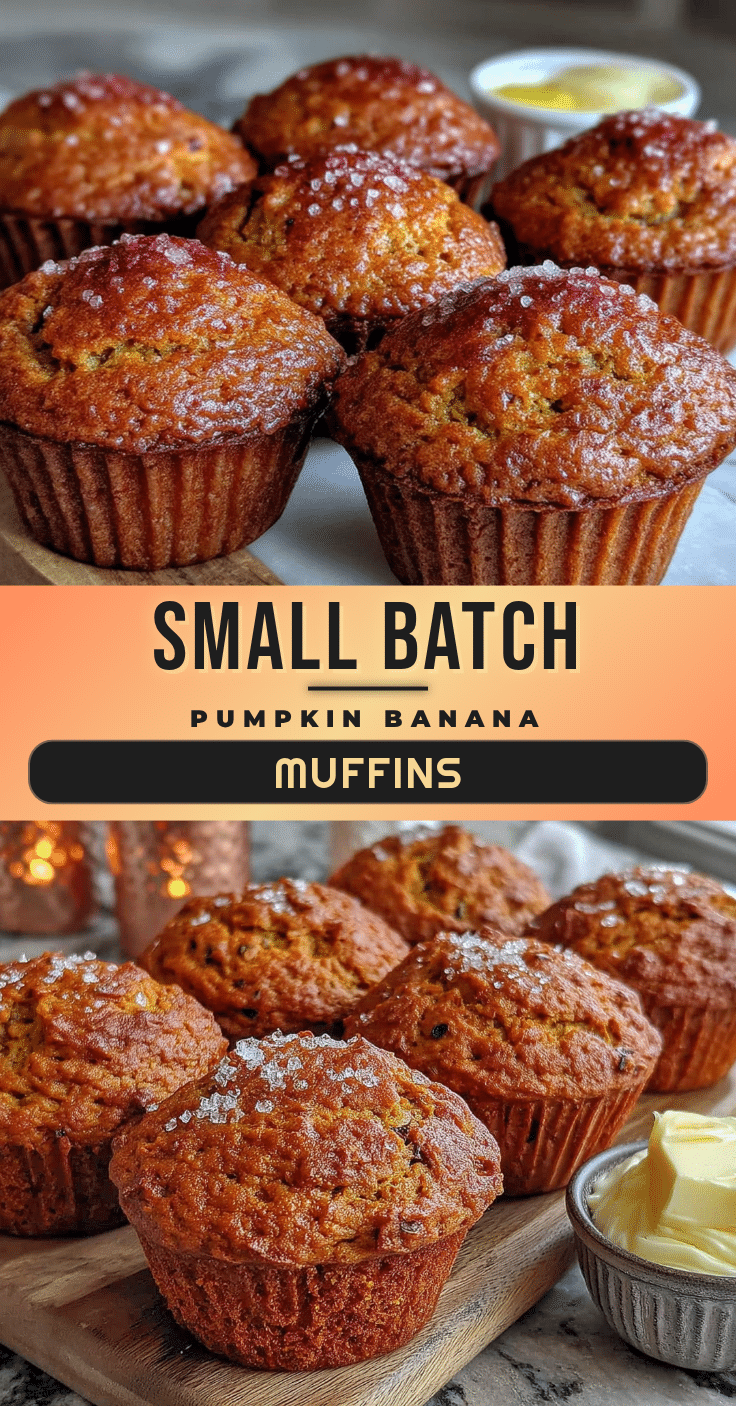
Small-Batch Pumpkin Banana Muffins – Easy Moist Recipe

These small-batch pumpkin banana muffins are tender, perfectly spiced, and just sweet enough without being heavy. Made with simple ingredients, they come together in under 30 minutes and make exactly 6 muffins—perfect for cozy breakfasts or afternoon snacks.
- Prep Time: 10 minutes
- Cook Time: 16-19 minutes
- Total Time: 26-29 minutes
- Yield: 6 muffins 1x
- Category: Breakfast, Snack
- Cuisine: American
Ingredients
- 1 cup (120g) all-purpose flour
- ⅓ cup (65g) granulated sugar
- 2 tablespoons (25g) light brown sugar, packed
- ½ teaspoon baking soda
- ½ teaspoon baking powder
- ¼ teaspoon salt
- 1 teaspoon ground cinnamon
- ½ teaspoon pumpkin pie spice
- ½ cup (120g) pumpkin puree (100% pure, not pie filling)
- 1 medium ripe banana, mashed (about ½ cup or 120g)
- 1 large egg, room temperature
- 3 tablespoons (45ml) vegetable oil
- 1 teaspoon vanilla extract
- 2 tablespoons (30ml) milk (any kind)
- ¼ cup chocolate chips, chopped walnuts, or dried cranberries (optional mix-ins)
Instructions
- Preheat your oven to 350°F (175°C). Line 6 cups of a muffin tin with paper liners or grease them well.
- In a large bowl, mash the ripe banana with a fork until mostly smooth with a few small lumps (about ½ cup).
- Add the pumpkin puree, egg, vegetable oil, vanilla extract, and milk to the mashed banana. Whisk until smooth and well combined, about 30 seconds.
- In a separate medium bowl, whisk together the all-purpose flour, granulated sugar, brown sugar, baking soda, baking powder, salt, cinnamon, and pumpkin pie spice for about 20 seconds.
- Pour the dry ingredients into the wet ingredients. Use a rubber spatula to fold gently just until no dry flour remains—about 10 to 12 strokes. Do not overmix; a few lumps are fine.
- If using mix-ins (chocolate chips, walnuts, or dried cranberries), fold them in with 3 to 4 gentle strokes. Reserve a few to press on top of each muffin before baking.
- Divide the batter evenly among the 6 prepared muffin cups, filling each about ¾ full.
- Bake at 350°F (175°C) for 16 to 19 minutes. Start checking at 16 minutes by inserting a toothpick into the center of a muffin—if it comes out clean or with a few moist crumbs, they’re done.
- Let the muffins cool in the tin for 5 minutes, then transfer to a wire cooling rack. Do not leave in the tin longer than 10 minutes to prevent soggy bottoms.
- Serve warm or at room temperature. For best flavor, enjoy with a pat of butter or cream cheese.
Notes
Don’t overmix the batter—mix just until flour disappears. Use a very ripe banana (spotted brown) for best sweetness and moisture. Spoon and level flour for accurate measurement. Rotate the pan halfway through baking for even browning. Muffins taste even better on day two as flavors meld. Store in an airtight container at room temperature for up to 3 days. Freeze individually wrapped for up to 3 months.
Nutrition
- Serving Size: 1 muffin
- Calories: 195
- Sugar: 13
- Sodium: 210
- Fat: 8
- Saturated Fat: 1.5
- Carbohydrates: 28
- Fiber: 2
- Protein: 4
Keywords: pumpkin banana muffins, small batch muffins, easy muffin recipe, moist pumpkin muffins, fall baking, 6 muffins, pumpkin banana bread muffins


