The kitchen was a mess, and honestly, my patience was running thin after a chaotic afternoon juggling everything on my to-do list. I glanced at the calendar—4th of July was creeping up fast, and I hadn’t planned a single dessert for the family gathering. Fireworks, barbecue, and all the usual fanfare, but no sweet treat to match the vibe. That’s when I remembered a quick idea sparked during a grocery run: why not whip up something red, white, and blue without turning on the oven? No-fuss, no-heat, just fresh flavors and that patriotic pop everyone loves.
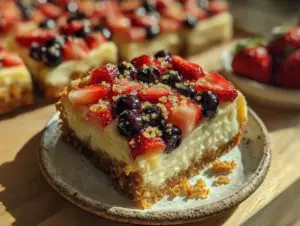
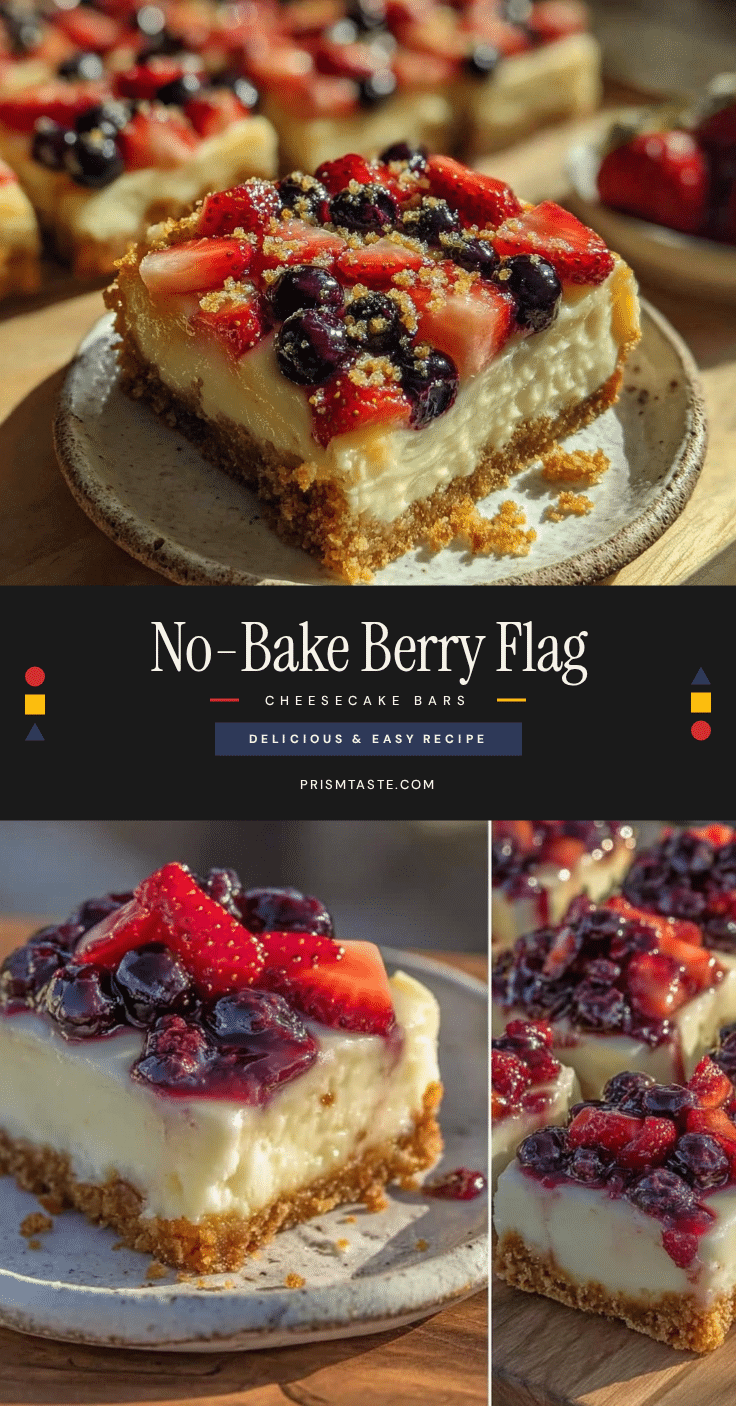
So, in the spirit of last-minute saves, I threw together these Easy No-Bake Berry Flag Cheesecake Bars. The bright berries reminded me of the sparkling Independence Day sky, and the creamy cheesecake filling added that smooth, comforting bite that everyone seems to crave after a day in the sun. I wasn’t sure if the kids would go for it (blueberries can be hit or miss), but the bars disappeared faster than I expected—proof that a little simplicity and color go a long way.
There’s something quietly satisfying about a dessert that doesn’t demand much but still feels festive. These cheesecake bars stuck with me because they bring a little joy and ease to the table, especially when you’re short on time but still want to impress. I keep thinking about how great they’d be alongside a crisp grilled corn salad or after a plate of tangy sticky honey garlic chicken thighs. It’s the kind of recipe that invites you to relax, savor, and maybe even linger a little longer at the picnic table.
Why You’ll Love This Recipe
Honestly, this Easy No-Bake Berry Flag Cheesecake Bars recipe has become my go-to for casual celebrations and last-minute get-togethers. It’s one of those desserts that looks like you put in a ton of effort but requires barely any prep. Here’s why you might find yourself making it over and over:
- Quick & Easy: You can have these bars ready in under 30 minutes, perfect for those spontaneous summer parties or when the oven feels like a no-go zone.
- Simple Ingredients: No fancy or hard-to-find items here. Most of the ingredients are pantry staples or fresh berries you can grab at any market.
- Perfect for Patriotic Celebrations: The red, white, and blue design makes it a festive centerpiece for 4th of July, Memorial Day, or any summer bash that calls for a bit of sparkle.
- Crowd-Pleaser: Kids and adults both seem to love the creamy cheesecake texture combined with juicy berries. I’ve never had leftovers!
- Unbelievably Delicious: The smooth, tangy cheesecake layer pairs beautifully with the fresh berries and crunchy crust—nothing artificial, just fresh summer flavor.
What sets this recipe apart is the no-bake method paired with a classic flavor combo. The crust uses graham crackers crushed just right, holding together without fuss. The cheesecake layer is light but rich, and arranging the berries into a flag pattern adds a fun, festive touch without extra work. I remember trying a version with blended cottage cheese once (not this one!), and it just didn’t hit that creamy mark. This recipe keeps it classic and simple, and honestly, that’s why it works.
Whether you’re trying to impress a crowd or just want a dessert that feels like summer in every bite, these cheesecake bars have that easy charm and unmistakable flavor that makes you close your eyes and smile after the first taste.
What Ingredients You Will Need
This recipe uses simple, wholesome ingredients to deliver bold flavor and satisfying texture without the fuss. Most are pantry staples, and the fresh berries bring in the season’s best. Feel free to swap berries based on what’s fresh or your preferences.
- For the Crust:
- 1 ½ cups graham cracker crumbs (about 10-12 whole crackers; I prefer Honey Maid for consistent texture)
- 6 tablespoons unsalted butter, melted (adds richness and helps bind the crust)
- 2 tablespoons granulated sugar (balances the buttery flavor)
- For the Cheesecake Filling:
- 16 ounces (450g) cream cheese, softened (use full-fat for best creaminess)
- ½ cup powdered sugar (for smooth sweetness)
- 1 teaspoon vanilla extract (real vanilla, not imitation, really lifts the flavor)
- 1 cup heavy whipping cream, cold (whipped to soft peaks for that fluffy texture)
- For the Berry Flag Topping:
- 1 cup fresh strawberries, sliced (bright red and juicy)
- 1 cup fresh blueberries (firm and plump for the blue section)
- Optional: ½ cup raspberries or blackberries for extra texture
If you want to make it dairy-free, swap cream cheese with a plant-based alternative and use coconut cream instead of heavy cream. For a gluten-free crust, almond flour or gluten-free graham crackers work well. In summer, I sometimes swap fresh strawberries for frozen ones thawed and drained, which works in a pinch.
Equipment Needed
To make these Easy No-Bake Berry Flag Cheesecake Bars, you don’t need a ton of fancy gear. Here’s what I use and recommend:
- 8×8-inch (20×20 cm) square baking pan — glass or metal works fine; glass lets you see the layers nicely.
- Mixing bowls — at least two, one for crust and one for filling.
- Electric mixer or hand mixer — whipping the cream to the right texture is key, so a mixer makes things easier.
- Spatula — for folding the whipped cream gently into the cream cheese mixture.
- Measuring cups and spoons — for accuracy, especially with sugar and vanilla.
- Food processor (optional) — if you want ultra-fine graham cracker crumbs, though a rolling pin and zip bag work just as well.
I’ve made this with a whisk and a bit of arm muscle before, but the texture isn’t quite as fluffy. If you don’t have an electric mixer, a sturdy whisk and patience can still get the job done. Also, a silicone spatula is a budget-friendly multitasker that I swear by for no-bake recipes. Keeping your cream cheese at room temp is easier when you have some kitchen patience and a cozy corner for it to sit.
Preparation Method
- Make the crust: In a medium bowl, combine 1 ½ cups graham cracker crumbs, 6 tablespoons melted butter, and 2 tablespoons sugar. Mix until the crumbs are evenly coated and hold together when pressed. Press the mixture firmly into the bottom of your 8×8-inch pan, creating an even layer. I like to use the bottom of a glass to press it down flat—it helps avoid cracks or crumbles later. Chill in the fridge while you prepare the filling (about 10 minutes).
- Prepare the cheesecake filling: In a large bowl, beat 16 ounces softened cream cheese with ½ cup powdered sugar and 1 teaspoon vanilla extract until smooth and creamy — about 2-3 minutes on medium speed. Scrape down the sides to avoid lumps.
- Whip the cream: In a separate cold bowl, whip 1 cup cold heavy cream to soft peaks. You’ll know it’s ready when the cream holds a peak but still feels light and fluffy, not stiff.
- Combine filling and cream: Gently fold the whipped cream into the cream cheese mixture using a spatula. This keeps the filling light and airy. Fold slowly to keep as much air as possible—don’t rush or you’ll lose that perfect texture.
- Assemble the bars: Spread the cheesecake filling evenly over the chilled crust. Smooth the top with an offset spatula or back of a spoon.
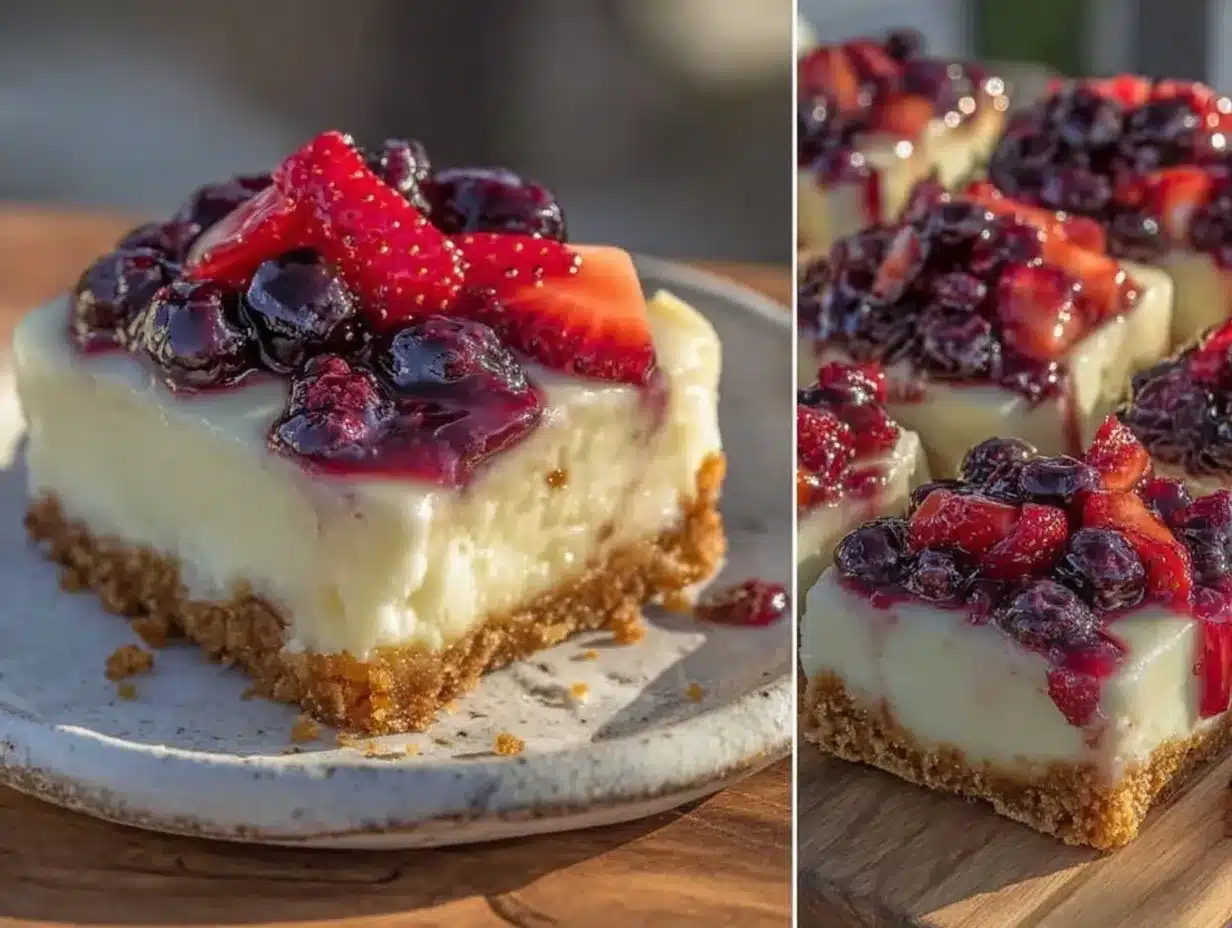
- Create the berry flag: Arrange sliced strawberries in the top left corner as the red stripes. Fill the rest of the top area with blueberries for the blue section. Add additional rows of strawberries to mimic the flag’s stripes. Don’t worry about perfection; this rustic look adds charm and taste.
- Chill: Refrigerate the cheesecake bars for at least 3 hours, preferably overnight, so they set firmly.
- Serve: When ready, use a sharp knife dipped in hot water to slice clean bars. Serve chilled for the best texture.
If your cream cheese filling feels too soft, a quick 10-minute chill before assembling can help it firm up. Also, when slicing, wiping your knife clean between cuts keeps those neat layers intact. I learned this the hard way after one messy attempt!
Cooking Tips & Techniques
Making no-bake cheesecake bars sounds simple, but a few details make all the difference. Here’s what I’ve learned:
- Softened cream cheese is essential: If it’s too cold, lumps will ruin the smooth filling. Let it sit on the counter for 30-45 minutes before mixing.
- Don’t overwhip the cream: Overwhipping turns it grainy and eventually into butter. Stop at soft peaks where it holds shape but still feels light.
- Folding technique matters: Gently fold whipped cream into the cream cheese mixture rather than stirring vigorously. This keeps the filling fluffy and airy.
- Press the crust firmly: This avoids a crumbly base that falls apart when sliced. Using the bottom of a glass or measuring cup works great.
- Chill time is key: Don’t rush the setting process. A few hours in the fridge help the bars hold their shape and flavors meld nicely.
- Cleaning your knife between slices: Dip it in hot water and wipe clean for neat, pretty bars without berry smudges.
I once tried using frozen berries straight from the freezer without thawing—big mistake. It released water and made the crust soggy. Always use fresh or fully thawed and drained fruit for the best texture. Also, this recipe pairs beautifully with other easy summer dishes like the creamy Tuscan chicken pasta I love making on busy nights.
Variations & Adaptations
Want to mix things up? Here are some simple ways to adapt this Easy No-Bake Berry Flag Cheesecake Bars recipe to suit your taste or dietary needs:
- Flavor twists: Swap vanilla extract for almond or lemon extract to brighten the cheesecake layer. Adding a teaspoon of lemon zest to the filling works wonders, too.
- Seasonal berry swaps: Use fresh raspberries, blackberries, or even peach slices if berries aren’t plentiful. In winter, frozen berries thawed and drained can work, though fresh is best.
- Crust alternatives: Try crushed shortbread cookies or gluten-free graham crackers for different textures or dietary needs. Almond flour crust with a touch of honey works well for a nutty twist.
- Dairy-free version: Use vegan cream cheese and coconut cream whipped to soft peaks. The flavor is slightly different but still creamy and delicious.
- Mini cheesecake bars: Make this in a muffin tin lined with parchment for individual servings—great for parties or picnics.
One time, I made a version with a drizzle of homemade blueberry compote on top instead of fresh berries, inspired by the no-bake strawberry cheesecake jars. It was a hit for a more indulgent take. Feel free to get creative!
Serving & Storage Suggestions
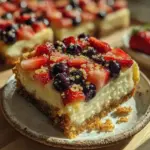
These cheesecake bars are best served chilled—straight from the fridge so the filling holds firm but is still creamy. Present them on a simple white platter to really make the berry colors pop, and maybe add a few fresh mint leaves for a touch of green contrast.
They make a perfect dessert after a summer cookout or as a sweet snack during fireworks watching. I often pair them with sparkling lemonade or iced tea for a refreshing combo.
To store, cover the bars tightly with plastic wrap or keep them in an airtight container in the refrigerator. They’ll stay fresh for up to 4 days, though mine never last that long. For longer storage, these bars freeze well—wrap individual portions in plastic and foil to prevent freezer burn. Thaw overnight in the fridge before serving.
The flavors actually deepen a bit after chilling overnight, so if you can wait, that’s even better. Just be gentle when slicing after storing to keep the layers looking neat.
Nutritional Information & Benefits
One serving of these Easy No-Bake Berry Flag Cheesecake Bars (based on 12 servings) roughly contains:
| Calories | 210 |
|---|---|
| Fat | 15g |
| Carbohydrates | 18g |
| Protein | 3g |
| Sugar | 12g |
The cream cheese provides a good dose of calcium and protein, while the berries bring antioxidants, fiber, and vitamins. Plus, the fresh fruit adds natural sweetness and bright flavor without extra sugar. This dessert fits well into a balanced diet when enjoyed in moderation, and the no-bake method keeps unnecessary additives out.
For those with gluten sensitivities, swapping the crust for gluten-free options makes this treat accessible, and the dairy-free substitutions mentioned earlier work well for lactose intolerance. Just watch the labels for hidden sugars or additives when choosing alternatives.
Conclusion
Easy No-Bake Berry Flag Cheesecake Bars are a simple way to bring color, flavor, and festive spirit to your patriotic celebrations without the hassle of baking. They’re creamy, light, and bursting with summer berries—perfect for sharing with family and friends.
What I love most is how this recipe invites you to make it your own, whether that means swapping berries, adjusting sweetness, or presenting it in mini servings. It’s a dependable crowd-pleaser that adds a touch of homemade charm to any holiday gathering.
If you try it out, I’d love to hear how you customize your bars or what other celebrations you’ve brought them to. Sharing recipes and stories makes the kitchen feel even cozier, don’t you think?
Here’s to easy, delicious desserts that let you enjoy the moment—cheers to sweet summer memories!
FAQs
Can I make these berry flag cheesecake bars ahead of time?
Absolutely! They actually taste better after chilling overnight. Just cover them tightly and keep refrigerated until ready to serve.
What if I don’t have graham crackers for the crust?
You can substitute with crushed digestive biscuits, shortbread cookies, or gluten-free graham crackers depending on your preference.
Can I use frozen berries instead of fresh?
Fresh berries are best for texture, but if using frozen, thaw and drain them thoroughly to avoid excess moisture making the crust soggy.
How do I store leftover cheesecake bars?
Store leftovers in an airtight container in the fridge for up to 4 days. For longer storage, freeze individual portions wrapped tightly.
Is this recipe suitable for a dairy-free diet?
With substitutions like vegan cream cheese and coconut cream, you can make a delicious dairy-free version that still has great texture and flavor.
Pin This Recipe!
Easy No-Bake Berry Flag Cheesecake Bars Recipe for 4th of July Celebrations
A quick and festive no-bake cheesecake bar featuring a graham cracker crust, creamy cheesecake filling, and a patriotic berry flag topping. Perfect for summer celebrations and last-minute desserts.
- Prep Time: 15 minutes
- Cook Time: 0 minutes
- Total Time: 3 hours 15 minutes
- Yield: 12 servings 1x
- Category: Dessert
- Cuisine: American
Ingredients
- 1 ½ cups graham cracker crumbs (about 10–12 whole crackers)
- 6 tablespoons unsalted butter, melted
- 2 tablespoons granulated sugar
- 16 ounces (450g) cream cheese, softened
- ½ cup powdered sugar
- 1 teaspoon vanilla extract
- 1 cup heavy whipping cream, cold
- 1 cup fresh strawberries, sliced
- 1 cup fresh blueberries
- Optional: ½ cup raspberries or blackberries
Instructions
- Make the crust: In a medium bowl, combine graham cracker crumbs, melted butter, and sugar. Mix until crumbs are evenly coated and hold together when pressed. Press firmly into the bottom of an 8×8-inch pan to create an even layer. Chill in the fridge for about 10 minutes.
- Prepare the cheesecake filling: Beat softened cream cheese with powdered sugar and vanilla extract until smooth and creamy, about 2-3 minutes on medium speed. Scrape down the sides to avoid lumps.
- Whip the cream: In a separate cold bowl, whip the cold heavy cream to soft peaks.
- Combine filling and cream: Gently fold the whipped cream into the cream cheese mixture using a spatula to keep the filling light and airy.
- Assemble the bars: Spread the cheesecake filling evenly over the chilled crust and smooth the top.
- Create the berry flag: Arrange sliced strawberries in the top left corner as red stripes, fill the rest of the top area with blueberries for the blue section, and add additional rows of strawberries to mimic the flag’s stripes.
- Chill: Refrigerate the cheesecake bars for at least 3 hours, preferably overnight, to set firmly.
- Serve: Use a sharp knife dipped in hot water to slice clean bars. Serve chilled.
Notes
Use softened cream cheese for a smooth filling. Do not overwhip the cream to avoid graininess. Press the crust firmly to avoid crumbling. Chill bars for at least 3 hours or overnight for best results. Clean knife between slices by dipping in hot water for neat cuts. Fresh or fully thawed and drained berries are recommended to avoid soggy crust.
Nutrition
- Serving Size: 1 bar (1/12th of rec
- Calories: 210
- Sugar: 12
- Fat: 15
- Carbohydrates: 18
- Protein: 3
Keywords: no-bake cheesecake, berry flag, 4th of July dessert, patriotic dessert, easy cheesecake bars, summer dessert