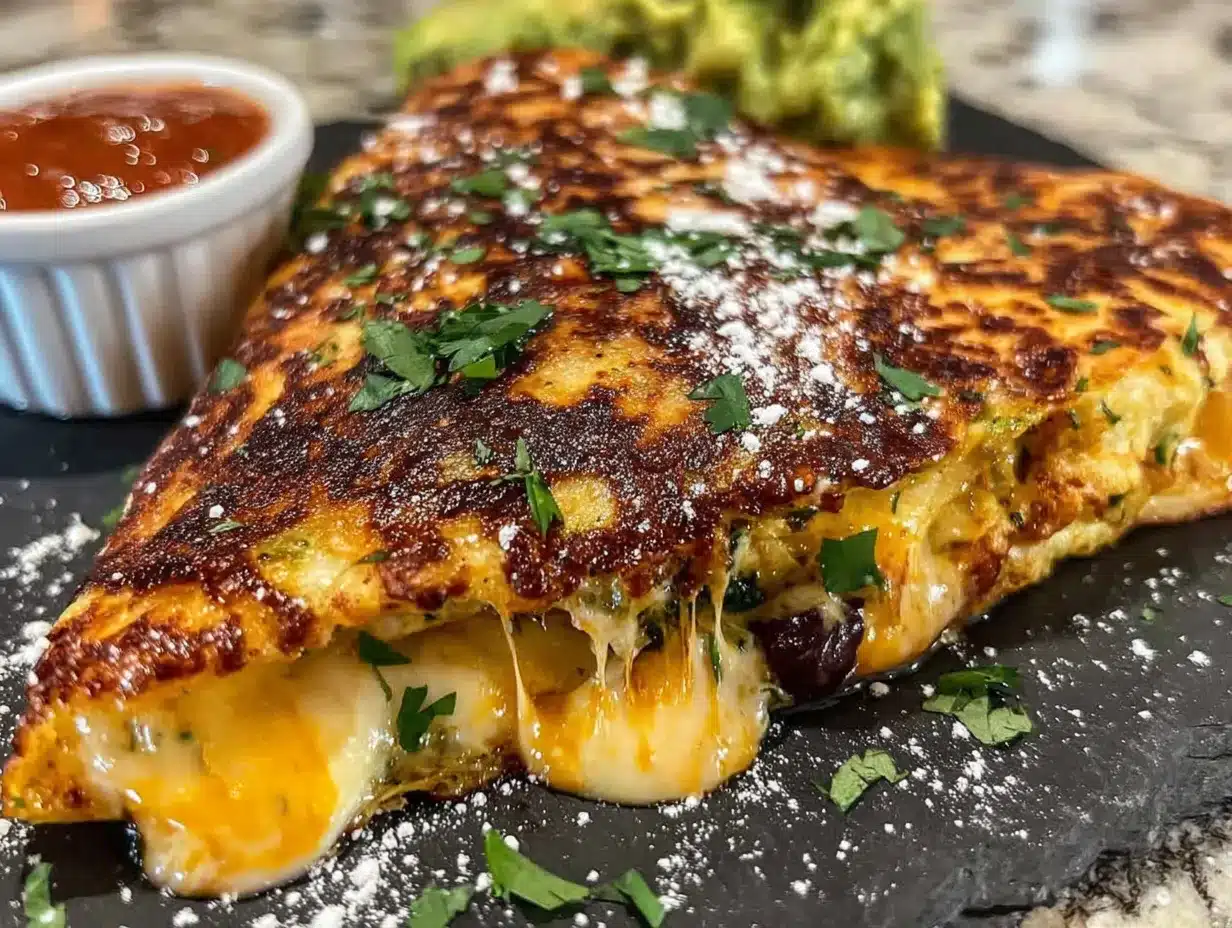
Third time this week and I finally figured out the cheese-to-tortilla ratio. The first two attempts were sad, greasy disasters—one where the filling exploded out the side like a cheesy volcano, and another where the tortilla burned before the cheese even thought about melting. But this one, the one I just pulled out of the sad little microwave in my dorm’s communal kitchen, was perfect. Golden brown spots, perfectly melted cheddar, and that satisfying crunch when I bit into it. I actually let out a little noise, and my roommate looked at me like I’d lost it. Maybe I have, but when you’re living on a meal plan that runs out by the third week of the month, a perfect quesadilla feels like a major win.
These Easy 15-Minute Dorm Room Quesadillas aren’t fancy. They’re not going to win any cooking competitions. But they are the kind of recipe that gets you through finals week, late-night study sessions, and those days when you just need something warm and comforting without a trip to the dining hall. I’ve been tweaking this method for months now, ever since I realized the microwave could do more than just heat up ramen. It’s about technique, timing, and knowing exactly how to layer your ingredients so everything comes together in one perfect, crispy package.
What makes these different is the method. Most people just throw tortillas and cheese in a pan and hope for the best. But I’ve learned that a quick pre-toast in a dry skillet, a specific folding technique, and the right cheese blend make all the difference. No fancy equipment, no complicated steps—just a few tricks I picked up from watching cooking videos at 2 AM when I couldn’t sleep. These quesadillas have become my go-to comfort food, and I’m pretty sure they’ll become yours too.
Why You’ll Love This Recipe
Let’s be real—dorm cooking is hard. You’ve got limited space, even less equipment, and probably a budget that’s tighter than your jeans after Thanksgiving. That’s exactly why these Easy 15-Minute Dorm Room Quesadillas exist. They’re designed for real life, not some picture-perfect kitchen with a six-burner stove.
- Quick & Easy: From start to finish, you’re looking at about 15 minutes. That’s less time than it takes to decide what to order on DoorDash. Perfect for those nights when you’re hungry now, not in an hour.
- Simple Ingredients: You probably already have most of this stuff in your mini-fridge or pantry. Tortillas, cheese, maybe some leftover chicken or beans—no fancy grocery trips required.
- Perfect for Dorm Life: No oven, no problem. You can make these in a microwave, a small skillet, or even a panini press if you’re feeling fancy. They’re designed for the limitations of a shared kitchen.
- Crowd-Pleaser: I’ve made these for my floor mates during study sessions, and they disappeared in minutes. Everyone loves a good quesadilla, and these are simple enough that anyone can make them.
- Endlessly Customizable: Got leftover garlic butter shrimp pasta from last night? Throw it in. Have some grilled honey sriracha chicken skewers from a weekend cookout? Chop it up and add it. These quesadillas are a blank canvas.
What really sets this recipe apart is the technique. I’ve tested this about a dozen times to figure out the perfect cheese-to-tortilla ratio, the ideal cooking time, and the best way to get that crispy exterior without burning the inside. It’s not just another quesadilla recipe—it’s the one I’d make for my little sister if she was heading off to college tomorrow. It’s that reliable.
What Ingredients You Will Need
This recipe uses simple, everyday ingredients that you can find at any grocery store—or probably already have sitting in your dorm room. The beauty of these Easy 15-Minute Dorm Room Quesadillas is that they’re flexible, so feel free to swap things based on what you’ve got.
For the Base Quesadilla
- Flour tortillas (8-inch), 2 per quesadilla – Look for ones that are soft and pliable, not too thick. I prefer Mission or Guerrero brand for the best texture. Corn tortillas work too, but they’re smaller and can be trickier to fold.
- Shredded cheddar cheese, 1/2 cup (about 60g) – Sharp cheddar gives the best flavor, but mild works fine too. Pre-shredded is fine, but freshly shredded melts better. (Trust me on this one.)
- Shredded mozzarella cheese, 1/4 cup (about 30g) – This adds that stretchy, gooey texture that makes quesadillas so satisfying. You can skip it if you only have cheddar, but the mix is better.
- Butter or cooking spray, 1 tablespoon – For getting that golden-brown crust. I use salted butter for extra flavor, but cooking spray works in a pinch. If you’re using a microwave, you won’t need this.
Optional Fillings (Pick 1-2)
- Cooked chicken, 1/2 cup shredded or diced – Leftover rotisserie chicken is perfect. You can also use canned chicken (drained well) if that’s all you’ve got.
- Canned black beans, 1/4 cup, drained and rinsed – Adds protein and fiber without needing refrigeration. Great for vegetarian versions.
- Sauteed bell peppers and onions, 1/4 cup – If you have a skillet, you can quickly sauté these. Otherwise, use jarred roasted peppers for convenience.
- Jalapeños, 1-2 tablespoons pickled or fresh – For heat lovers. Pickled ones are milder and more consistent.
- Salsa or pico de gallo, 2 tablespoons – Adds moisture and flavor. Just be careful not to add too much or your quesadilla gets soggy.
- Sour cream or Greek yogurt, 2 tablespoons – For dipping or spreading inside. Greek yogurt is a healthier swap that still tastes great.
- Fresh cilantro, 2 tablespoons chopped – Adds a fresh pop of flavor at the end. I always add this if I have it.
For Serving
- Salsa, for dipping – Store-bought or homemade, whatever you prefer.
- Guacamole or avocado slices – If you’re feeling fancy. I’ve been known to mash an avocado with salt and lime for a quick guac.
- Hot sauce – Because everything is better with a little heat. I’m partial to Cholula or Tapatío.
I’ve made these quesadillas with just cheese and tortillas before, and honestly, they’re still great. But the fillings take them from “I’m surviving” to “I’m thriving.” My personal favorite combo is black beans, pickled jalapeños, and a generous sprinkle of cilantro. It’s cheap, filling, and tastes way more expensive than it is.
Equipment Needed
One of the best things about these Easy 15-Minute Dorm Room Quesadillas is that you don’t need much. Here’s what you’ll want to have on hand:
- Non-stick skillet (8-10 inch) – This is ideal for getting that crispy exterior. If your dorm doesn’t allow open flames, a small electric skillet works too. I found mine at a thrift store for $5.
- Spatula – For flipping. A thin metal spatula works best, but a silicone one is fine too. Just be gentle so you don’t tear the tortilla.
- Cutting board and knife – For slicing the quesadilla into wedges. A pizza cutter works even better if you have one.
- Microwave-safe plate – If you’re going the microwave route. Make sure it’s not too thin or it might crack.
- Paper towels – For blotting excess moisture from fillings and for cleaning up. Trust me, you’ll need them.
- Small bowl – For mixing your cheese blend or holding salsa for dipping.
If you don’t have a skillet, don’t worry. I’ve made these in the microwave, in a toaster oven, and even on a panini press. The microwave version is softer and less crispy, but it still hits the spot. My first attempt was in a sad little microwave that took forever, but I learned that a quick 30-second burst on high, then flipping, gives you the best texture. No special equipment required, just a little patience and creativity.
Preparation Method
Alright, let’s get cooking. These Easy 15-Minute Dorm Room Quesadillas come together fast, so have everything ready before you start. Here’s how I do it:
- Prep your fillings (5 minutes)
If you’re using any cooked proteins, make sure they’re at room temperature. Shred or dice chicken, drain and rinse black beans, and chop any vegetables. Pat everything dry with a paper towel—wet fillings are the enemy of crispy quesadillas. I learned this the hard way when my first attempt turned into a soggy mess. - Mix your cheese blend (1 minute)
In a small bowl, combine the shredded cheddar and mozzarella. Mix them together so they’re evenly distributed. This blend gives you both flavor and that stretchy texture. If you only have one type of cheese, use about 3/4 cup total. Pre-shredded cheese works, but it has anti-caking agents that can make it less melty. Freshly shredded is always better. - Assemble the quesadilla (2 minutes)
Lay one tortilla flat on your work surface. Sprinkle about 1/4 cup of the cheese blend evenly over the entire tortilla, leaving a 1/2-inch border around the edge. Add your fillings on one half of the tortilla—don’t overstuff or it won’t close properly. Sprinkle another 1/4 cup of cheese on top of the fillings. Place the second tortilla on top and press down gently. - Cook in a skillet (6-8 minutes)
Heat your non-stick skillet over medium heat. Add 1/2 tablespoon of butter and let it melt. Carefully place the assembled quesadilla in the skillet. Cook for 3-4 minutes until the bottom is golden brown and crispy. Use your spatula to peek underneath—you’re looking for deep golden spots. Flip carefully using the spatula, add the remaining butter to the pan, and cook for another 3-4 minutes. The cheese should be fully melted and oozing out the sides just a little. - Microwave alternative (2-3 minutes)
If you don’t have a skillet, place the assembled quesadilla on a microwave-safe plate. Microwave on high for 30 seconds, then flip and microwave for another 30 seconds. Check if the cheese is melted—if not, go in 15-second increments. The texture will be softer, but it still tastes great. For a slightly crispier result, finish it in a toaster oven for 2 minutes. - Rest and slice (2 minutes)
Once cooked, transfer the quesadilla to a cutting board and let it rest for 1-2 minutes. This helps the cheese set slightly so it doesn’t all ooze out when you cut it. Use a sharp knife or pizza cutter to slice into 4-6 wedges. I like to cut it like a pizza for maximum dipping surface area. - Serve immediately
Serve hot with your favorite dipping sauces. Salsa, sour cream, guacamole, or just a drizzle of hot sauce—all are welcome here. The quesadilla is best eaten within 5 minutes of cooking, so don’t wait around.
A quick note: if you’re making multiple quesadillas, keep the cooked ones warm in a 200°F oven (if you have access to one) or wrap them in foil. Otherwise, just eat them as you go—that’s what I do during late-night study sessions.
Cooking Tips & Techniques
After making these Easy 15-Minute Dorm Room Quesadillas more times than I care to admit, I’ve picked up a few tricks that make a real difference. Here’s what I’ve learned:
- Don’t overstuff. I know it’s tempting to pack in as much as possible, but less is more. Too many fillings make the quesadilla impossible to flip, and everything falls out. Stick to about 1/2 cup total fillings per quesadilla.
- Pat everything dry. Wet ingredients are the enemy. If you’re using salsa, beans, or any cooked vegetables, make sure they’re as dry as possible. I usually spread them on a paper towel for a minute before adding them to the tortilla.
- Pre-toast your tortillas. If you have a dry skillet, you can toast each tortilla for 30 seconds per side before assembling. This adds an extra layer of crunch that makes a huge difference. I started doing this after my third soggy attempt.
- Use medium heat, not high. I know you’re hungry and want it done fast, but high heat burns the tortilla before the cheese melts. Medium heat gives you that perfect golden crust without the burnt edges. Patience, my friend.
- Let it rest. That 1-2 minute rest after cooking isn’t optional. It lets the cheese set up so you get clean slices instead of a cheesy explosion. I learned this one the hard way.
- Experiment with cheese blends. My go-to is cheddar and mozzarella, but Monterey Jack, pepper jack, or even a little cream cheese mixed in can take things to another level. I once added a spoonful of cream cheese and it was life-changing.
One mistake I made early on was using too much butter. I thought more butter would mean more crispiness, but it just made the tortilla greasy and heavy. A thin layer is all you need—just enough to coat the pan. Also, don’t walk away while it’s cooking. These things go from perfect to burnt in about 30 seconds. Trust me, I’ve sacrificed many a quesadilla to the burnt offering gods.
Variations & Adaptations
One of the best things about these Easy 15-Minute Dorm Room Quesadillas is how flexible they are. Here are some of my favorite variations:
- Breakfast Quesadilla: Scramble an egg (microwave works!), add some cooked bacon or sausage crumbles, and use pepper jack cheese. Serve with a side of salsa for a breakfast that feels way more indulgent than it is.
- Veggie Lover’s Quesadilla: Sauté bell peppers, onions, and mushrooms until soft. Add black beans and corn for extra texture. Use a mix of cheddar and Monterey Jack. This is my go-to when I’m trying to eat more vegetables.
- Spicy Buffalo Chicken Quesadilla: Mix shredded cooked chicken with buffalo sauce (Frank’s RedHot is my favorite). Add blue cheese crumbles or ranch dressing. The spicy-savory combo is addictive.
- BBQ Chicken Quesadilla: Toss shredded chicken in your favorite BBQ sauce. Add caramelized onions if you have them, and use smoked gouda or cheddar. The smoky sweetness is incredible.
- Mediterranean Quesadilla: Use feta cheese, chopped kalamata olives, sun-dried tomatoes, and fresh spinach. A drizzle of tzatziki on top takes it over the edge.
- Dessert Quesadilla: Spread Nutella on one tortilla, add sliced bananas and strawberries, and sprinkle with cinnamon sugar. Cook in butter until golden. This is dangerous—I’ve eaten an entire one by myself.
For dietary adaptations, you can use gluten-free tortillas (corn or cassava flour work well), vegan cheese (Daiya or Violife melt decently), or low-carb tortillas if you’re watching your carbs. I’ve tried all of these, and while they’re not exactly the same, they’re still delicious in their own right. The key is to adjust cooking times slightly—gluten-free tortillas tend to brown faster, so keep an eye on them.
Serving & Storage Suggestions
These Easy 15-Minute Dorm Room Quesadillas are best served hot, right off the skillet. But here’s how to make the most of them:
- Serving temperature: Hot, with the cheese still stretchy. Let it rest for 1-2 minutes before cutting so the cheese doesn’t all slide out.
- Presentation: Cut into 4-6 wedges and arrange on a plate. Serve with small bowls of salsa, sour cream, and guacamole for dipping. A sprinkle of fresh cilantro or green onions on top adds a nice pop of color.
- Complementary dishes: These go great with a simple side salad, watermelon feta mint salad, or a bowl of creamy queso blanco dip for extra indulgence. If you’re making a full meal, pair with honey sriracha chicken skewers for a protein-packed dinner.
- Storage: If you have leftovers (unlikely, but possible), wrap them tightly in foil or plastic wrap and store in the fridge for up to 3 days. The texture will soften, but they’re still tasty.
- Reheating: The best way to reheat is in a dry skillet over medium heat for 2-3 minutes per side. This restores some of the crispiness. The microwave works in a pinch (30-45 seconds), but the tortilla will be soft. I’ve also had success with a toaster oven at 350°F for 5 minutes.
- Freezing: You can freeze assembled, uncooked quesadillas. Wrap each one individually in plastic wrap, then place in a freezer bag. They’ll keep for up to 3 months. Cook from frozen—just add 2-3 minutes to the cooking time.
One thing I’ve noticed is that these quesadillas actually taste better the next day, after the flavors have had time to meld. The cheese sets up a bit, and the fillings become more cohesive. I’ve been known to make a batch on Sunday and eat them for lunch all week. Just reheat in a skillet and they’re good as new.
Nutritional Information & Benefits
These Easy 15-Minute Dorm Room Quesadillas can be part of a balanced diet, especially when you load them up with veggies and lean protein. Here’s a rough estimate for one quesadilla (with cheese only, no additional fillings):
- Calories: Approximately 350-400
- Protein: 15-20g
- Carbohydrates: 30-35g
- Fat: 18-22g
- Fiber: 2-3g
- Calcium: 25% of daily value
Adding black beans increases the fiber and protein content significantly. Chicken adds lean protein without too many extra calories. If you’re watching your sodium, use low-sodium cheese and skip the added salt. The cheese already has plenty of saltiness.
From a health perspective, these quesadillas are a good source of calcium from the cheese, and if you add vegetables, you’ll get vitamins and antioxidants. I like to think of them as a blank canvas—you can make them as healthy or indulgent as you want. For a lighter version, use whole wheat tortillas, reduced-fat cheese, and load up on vegetables. For a treat, go all out with extra cheese and butter. Balance, right?
One thing I appreciate about this recipe is that it’s easy to control portions. One quesadilla is usually enough for a meal, especially with a side of vegetables or salad. And because you’re making it yourself, you know exactly what’s going into it—no mystery ingredients or preservatives.
FAQs
Can I make these quesadillas in a microwave only?
Absolutely! While you won’t get the same crispy texture as a skillet, the microwave method works great for dorm rooms without cooking facilities. Just assemble the quesadilla on a microwave-safe plate, microwave on high for 30 seconds, flip, and microwave for another 30 seconds. Check if the cheese is melted and go in 15-second increments if needed. The texture will be softer, but it’s still delicious and satisfying.
How do I keep the tortilla from getting soggy?
Sogginess comes from moisture. Make sure all your fillings are as dry as possible before adding them. Pat beans, salsa, and cooked vegetables with a paper towel. Don’t overdo the wet ingredients like salsa or sour cream inside the quesadilla—save them for dipping instead. Also, cooking on medium heat (not high) allows the tortilla to crisp up properly without burning.
What’s the best cheese for quesadillas?
My favorite combo is sharp cheddar and mozzarella. Cheddar gives you flavor, mozzarella gives you that stretchy, gooey texture. Monterey Jack and pepper jack are also excellent choices. Avoid pre-shredded cheese if possible—it has anti-caking agents that prevent it from melting as smoothly. Freshly shredded cheese melts better and gives you that perfect, creamy texture.
Can I make these ahead of time for meal prep?
Yes! You can assemble the quesadillas (without cooking) and store them in the fridge for up to 3 days. Wrap each one individually in plastic wrap or parchment paper. When you’re ready to eat, just cook them in a skillet for 3-4 minutes per side. You can also freeze assembled quesadillas for up to 3 months. Cook from frozen, adding a few extra minutes to the cooking time.
What if I don’t have a skillet or microwave?
No problem! You can use a toaster oven, panini press, or even a George Foreman grill. For a toaster oven, cook at 375°F for 8-10 minutes, flipping halfway through. For a panini press, cook for 4-5 minutes until golden and melty. You can also use a flat-bottomed pot if that’s all you have—just be careful with the heat and flip gently. The key is to get even heat and enough time for the cheese to melt.
Conclusion
These Easy 15-Minute Dorm Room Quesadillas have become my go-to for late-night cravings, quick lunches, and everything in between. They’re proof that you don’t need a fancy kitchen or expensive ingredients to make something genuinely delicious. Just a few simple components, a little patience, and the willingness to experiment.
What I love most about this recipe is how forgiving it is. You can mess up the cheese ratio, overstuff it, burn the first side—and it’ll still be pretty good. But when you get it right? When the tortilla is perfectly golden, the cheese is stretchy and melty, and all those flavors come together? That’s something special. It’s comfort food at its simplest and most honest.
I’d love to hear how your quesadillas turn out. Did you try a wild variation? Discover a new cheese combo? Burn one so badly you had to open a window? Share your stories in the comments below. And if you’re looking for more easy, budget-friendly meals, check out our 5-ingredient overnight oat cups or turkey pinwheel wraps for more dorm-friendly ideas. Happy cooking, and remember—even a burnt quesadilla is a learning experience.
Pin This Recipe!
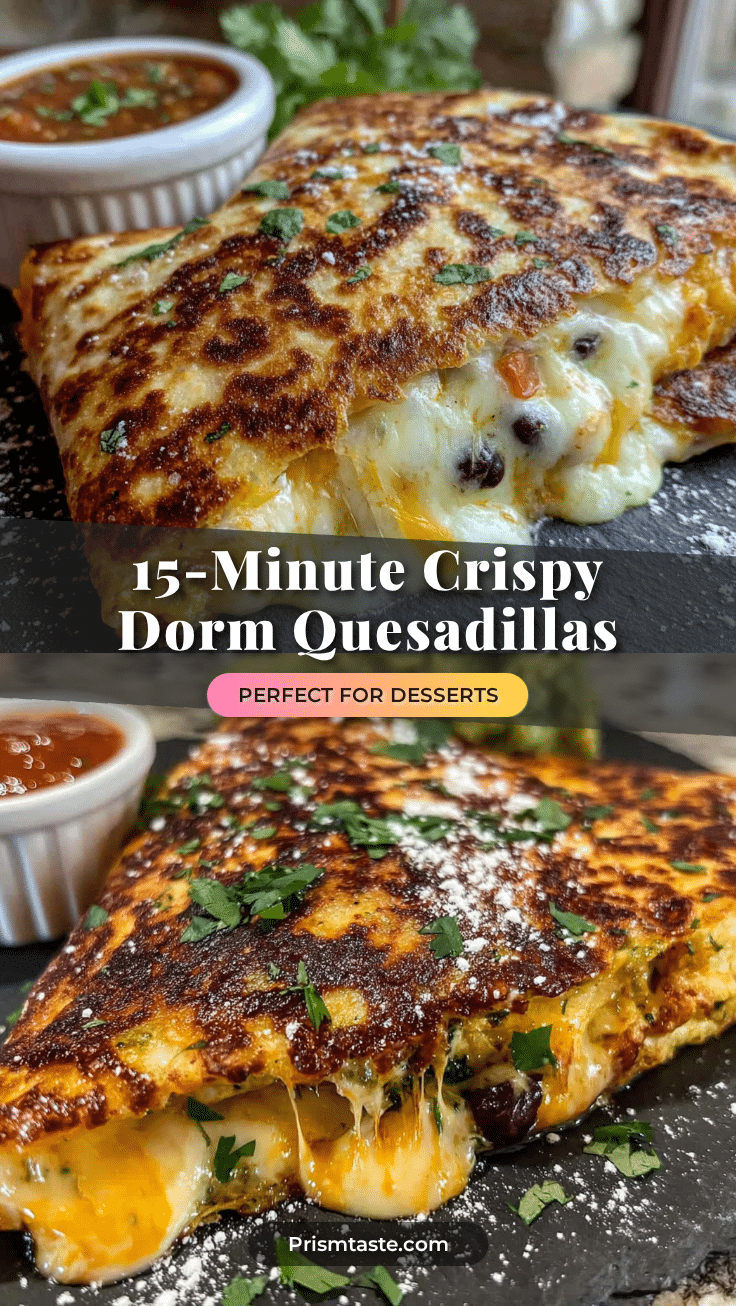
Easy 15-Minute Dorm Room Quesadillas

Quick, crispy, and endlessly customizable quesadillas perfect for dorm life. Made with simple ingredients and minimal equipment, these come together in just 15 minutes for a satisfying meal or snack.
- Prep Time: 5 minutes
- Cook Time: 8 minutes
- Total Time: 15 minutes
- Yield: 1 quesadilla (serves 1) 1x
- Category: Main Course
- Cuisine: Mexican-American
Ingredients
- 2 (8-inch) flour tortillas
- 1/2 cup (60g) shredded cheddar cheese
- 1/4 cup (30g) shredded mozzarella cheese
- 1 tablespoon salted butter or cooking spray
- Optional fillings (pick 1-2): 1/2 cup cooked chicken (shredded or diced), 1/4 cup canned black beans (drained and rinsed), 1/4 cup sautéed bell peppers and onions, 1-2 tablespoons pickled or fresh jal…
- For serving: salsa, guacamole or avocado slices, hot sauce
Instructions
- Prep your fillings (5 minutes): If using cooked proteins, bring to room temperature. Shred or dice chicken, drain and rinse black beans, chop vegetables. Pat everything dry with a paper towel.
- Mix your cheese blend (1 minute): In a small bowl, combine shredded cheddar and mozzarella. Mix evenly.
- Assemble the quesadilla (2 minutes): Lay one tortilla flat. Sprinkle about 1/4 cup of cheese blend evenly over the tortilla, leaving a 1/2-inch border. Add fillings on one half. Sprinkle another 1/4 cup cheese on top. Place second tortilla on top and press gently.
- Cook in a skillet (6-8 minutes): Heat a non-stick skillet over medium heat. Add 1/2 tablespoon butter and let melt. Place quesadilla in skillet. Cook 3-4 minutes until bottom is golden brown and crispy. Flip carefully, add remaining butter, and cook another 3-4 minutes until cheese is melted.
- Microwave alternative (2-3 minutes): Place assembled quesadilla on a microwave-safe plate. Microwave on high for 30 seconds, flip, and microwave another 30 seconds. Repeat in 15-second increments until cheese melts. For crispier texture, finish in a toaster oven for 2 minutes.
- Rest and slice (2 minutes): Transfer to a cutting board and let rest 1-2 minutes. Slice into 4-6 wedges using a sharp knife or pizza cutter.
- Serve immediately with salsa, sour cream, guacamole, or hot sauce.
Notes
Don’t overstuff; pat fillings dry to avoid sogginess; use medium heat; let rest before slicing. For best results, pre-toast tortillas in a dry skillet for 30 seconds per side before assembling.
Nutrition
- Serving Size: 1 quesadilla
- Calories: 375
- Sugar: 2
- Sodium: 650
- Fat: 20
- Saturated Fat: 12
- Carbohydrates: 33
- Fiber: 2
- Protein: 18
Keywords: quesadilla, dorm room, easy, quick, 15-minute, cheese, tortilla, microwave, skillet, budget-friendly


