I remember that question like it was yesterday, shouted from the backseat during a chaotic school morning. Honestly, sometimes those five words can send you into full-on panic mode, especially when you want to pack something nutritious but fuss-free. That’s exactly when these Easy 5-Ingredient Overnight Oat Lunchbox Cups for Kids became my little lifesaver.
It wasn’t a fancy culinary brainstorm or a Pinterest-inspired masterpiece that birthed these oats cups—it was pure necessity. I needed a grab-and-go, healthy snack that my kiddo would actually want to eat without a single complaint. Plus, it had to be something I could prepare the night before so mornings wouldn’t turn into a mad dash of scrambling ingredients.
These overnight oat lunchbox cups hit that sweet spot: simple ingredients, minimal effort, and enough deliciousness to make lunch feel like a treat rather than a chore. Each bite has this inviting creaminess with a touch of natural sweetness—no sugar overload here, just honest, wholesome flavor that you can trust your kids to enjoy.
What’s funny is how this recipe stuck around in our routine. It wasn’t just a one-time hack; it became our go-to snack and even a breakfast staple on rushed mornings. Now, packing lunchboxes feels less like a hassle and more like a small moment of care. It’s kind of amazing how something so straightforward can make such a difference—especially when you’re juggling a million little things.
So yeah, these Easy 5-Ingredient Overnight Oat Lunchbox Cups for Kids aren’t just oats in a cup. They’re a quiet little victory in the daily chaos, a way to sneak in some nutrition without drama, and a promise that lunch can be something to look forward to. And honestly, that’s why I keep making them.
Why You’ll Love This Recipe
Let me tell you why these Easy 5-Ingredient Overnight Oat Lunchbox Cups for Kids have earned a permanent spot in our kitchen lineup:
- Quick & Easy: Just five ingredients, no cooking required, and ready the night before. Perfect for those busy school mornings or last-minute snack needs.
- Simple Ingredients: You probably already have rolled oats, milk, and a couple of pantry staples on hand—no fancy trips to specialty stores.
- Perfect for Lunchboxes & Snacks: These cups hold up well in lunch containers and are just the right size for little hands and appetites.
- Crowd-Pleaser: My picky eater actually asks for seconds, which honestly surprised me! They get rave reviews from kids and adults alike.
- Unbelievably Delicious: The creamy texture combined with a touch of vanilla and cinnamon gives these oats a comforting warmth that’s hard to beat.
What sets this recipe apart is how simple it is without feeling boring. The secret is blending the oats with creamy yogurt (or a plant-based alternative) to get that luscious, pudding-like texture. Plus, prepping them in muffin tins means portion control is stress-free and lunchboxes stay neat.
This recipe isn’t just another overnight oats variation—it’s a little slice of calm in the morning rush, a way to pack nutrition and love into a portable snack. Honestly, every time I make these, I think about how easy it is to make nourishing choices when things are hectic. And that’s a win in my book.
What Ingredients You Will Need
This recipe uses simple, wholesome ingredients to deliver bold flavor and satisfying texture without the fuss. Most are pantry staples, and you can swap a few to suit dietary needs or preferences.
- Rolled oats: 2 cups (about 180g) — I prefer old-fashioned rolled oats for the best texture. Quick oats get too mushy, and steel-cut oats won’t soften enough overnight.
- Milk of choice: 1 ½ cups (360ml) — dairy or plant-based (almond, oat, or soy milk work well here).
- Greek yogurt: 1 cup (245g), plain or vanilla — adds creaminess and protein. Use dairy-free coconut yogurt to keep it vegan.
- Honey or maple syrup: 2 tablespoons — just enough natural sweetness to please little palates without overdoing it.
- Vanilla extract: 1 teaspoon — this tiny splash makes a big difference in flavor depth.
Optional add-ins you might already have:
- Ground cinnamon or nutmeg (a pinch for warmth)
- Fresh or frozen berries (swap into the oats or add as a topping)
- Chopped nuts or seeds for texture (if no allergies)
Pro tip: I trust brands like Bob’s Red Mill rolled oats for consistent quality, and when it comes to yogurt, I lean toward FAGE for creaminess but love So Delicious coconut yogurt for dairy-free options. These choices make a subtle but noticeable difference in the final texture.
Equipment Needed
For these overnight oat lunchbox cups, you’ll need:
- Muffin tin: Standard 12-cup size works best to portion the oats into neat individual servings.
- Spoon or small spatula: For mixing and evenly distributing the oat mixture.
- Measuring cups and spoons: To get the ingredient amounts just right.
- Mixing bowl: Medium size to combine oats, milk, yogurt, and flavorings.
- Plastic wrap or airtight container: To cover the muffin tin while the oats soak overnight in the fridge.
If you don’t have a muffin tin handy, small silicone cupcake molds are a great alternative and easier to clean. I’ve tried both, and silicone definitely makes popping out the cups a breeze without sticking or crumbling.
For budget-friendly kitchens, a simple glass or ceramic bowl with small ramekins can work too—just be sure to adjust portion sizes accordingly. Oh, and a good, sharp knife for optional toppings (like sliced fruit or nuts) will come in handy.
Preparation Method

- Combine the oats and milk: In your mixing bowl, stir together 2 cups (180g) of rolled oats and 1 ½ cups (360ml) of your chosen milk until well mixed. This is your base—make sure the oats are evenly coated.
- Add the yogurt: Spoon in 1 cup (245g) of Greek yogurt and fold it gently into the oat mixture. The yogurt adds creaminess and helps the oats thicken overnight.
- Sweeten and flavor: Stir in 2 tablespoons of honey or maple syrup and 1 teaspoon of vanilla extract. For a warm touch, sprinkle in a pinch of cinnamon or nutmeg if you like. Mix until everything is just combined—don’t overmix or the oats may get too mushy.
- Portion into muffin tin: Evenly divide the oat mixture into a greased or silicone-lined 12-cup muffin tin. Fill each cup about ¾ full—this keeps the texture just right and prevents overflow.
- Cover and refrigerate: Cover the muffin tin tightly with plastic wrap or an airtight lid. Pop it into the fridge overnight, or for at least 6 hours. During this time, the oats soak up the liquid and develop that perfect, custard-like consistency.
- Serve or pack: The next morning, these oat cups can be eaten cold straight from the fridge or topped with fresh fruit, nuts, or a dollop of nut butter. They’re perfect for packing into lunchboxes or grabbing as a quick snack.
Tip: If your mixture looks too thick before refrigerating, add a splash more milk. If it’s too runny after soaking, a quick stir will bring it back together. Texture is key, and a little tweak here and there can make all the difference.
Cooking Tips & Techniques
Making these overnight oat lunchbox cups is mostly about simple assembly, but a few tricks can make your results even better.
- Use rolled oats, not instant: Rolled oats soak up liquid nicely overnight and hold their shape better. Instant oats get too mushy, and steel-cut oats won’t soften enough.
- Don’t overmix: When combining ingredients, gentle folding keeps the texture intact. Overmixing can lead to a gummy or dense outcome, which isn’t as kid-friendly.
- Adjust sweetness cautiously: Kids’ tastes vary, so start with a modest 2 tablespoons of honey or maple syrup. You can always add a drizzle on top later if needed.
- Line muffin tins for easy removal: Silicone liners are a game changer here, but a light spray of oil or butter works too. This helps keep the oat cups intact and makes cleanup easier.
- Multitask overnight: Prep these oat cups alongside other make-ahead meals like easy refrigerator dill pickles or lemon blueberry zucchini muffins to save time and keep your weeknight dinners running smoothly.
I once skipped covering the muffin tin properly and woke up to a fridge full of dry oats—lesson learned the hard way! So, don’t skip that wrap or airtight seal. It seals in moisture and flavor, ensuring those oats stay creamy and delicious.
Variations & Adaptations
These Easy 5-Ingredient Overnight Oat Lunchbox Cups for Kids are a blank canvas for creativity. Here are some ways you can mix things up:
- Fruit-Forward: Stir in mashed banana or swirl in pureed berries before portioning for a natural fruity sweetness. In warmer months, fresh diced peaches or apples work wonderfully.
- Nut-Free: Skip nuts and seeds if allergies are a concern. Instead, consider adding a spoonful of sunflower seed butter or a sprinkle of toasted coconut flakes for texture.
- Chocolate Lover’s: Mix in a tablespoon of cocoa powder and mini chocolate chips for a kid-friendly treat that still packs in the goodness.
- Protein Boost: Add a scoop of your favorite protein powder or swap regular yogurt for a high-protein Greek variety to keep little tummies fuller longer.
- Dairy-Free: Simply use coconut or almond yogurt and plant-based milk to make this recipe vegan and dairy-free.
Personally, I tried this recipe with a mix of fresh blueberries and a handful of chopped walnuts once, which made for a delightful crunch that my kid couldn’t stop talking about. It’s fun to experiment and discover which combos work best for your family.
Serving & Storage Suggestions
These oat lunchbox cups are best served chilled, straight from the fridge. They keep their creamy texture and are easy for kids to eat on the go.
For an extra touch, top with a few fresh berries, a drizzle of honey, or a small spoonful of nut butter right before serving. It adds a bit of flair and extra flavor without much effort.
Storage is a breeze—keep the oat cups covered in the muffin tin or transfer them to an airtight container. They last up to 4 days in the refrigerator, making them perfect for meal prep.
If you want to keep them longer, these cups freeze well wrapped individually in plastic wrap and stored in a freezer bag. Thaw overnight in the fridge before serving.
Reheating is optional; some kids prefer them cold, but a quick 20-second zap in the microwave softens them nicely if preferred warm. Just watch out not to overheat or the texture can suffer.
Interestingly, the flavors deepen a bit the longer they sit, so leftovers can taste even better the next day. It’s like a little flavor bonus for busy weeks.
Nutritional Information & Benefits
Each serving of these Easy 5-Ingredient Overnight Oat Lunchbox Cups for Kids offers a well-rounded mix of nutrients:
- High in fiber from rolled oats, supporting digestion and keeping hunger at bay.
- Protein-packed thanks to Greek yogurt, which also adds probiotics for gut health.
- Natural sweetness from honey or maple syrup, avoiding refined sugars.
- Calcium and vitamin D from milk, aiding bone development in growing kids.
The recipe is naturally gluten-free if you use certified gluten-free oats, making it suitable for many dietary needs. You can also easily adapt it for dairy-free or vegan diets by swapping the yogurt and milk.
From my nutritionist friend’s recommendation, snacks like these are great for sustained energy during school hours, avoiding the sugar crash of processed treats. It’s a small swap that makes a big difference in how kids feel throughout the day.
Conclusion
These Easy 5-Ingredient Overnight Oat Lunchbox Cups for Kids are the kind of recipe that makes you wonder why you didn’t make them sooner. They’re simple, wholesome, and kid-approved—no small feat, honestly.
Whether you stick to the classic version or throw in your favorite mix-ins, these oat cups offer a quick, no-fuss way to keep your little ones nourished and happy. I love how they take the stress out of lunch packing and snack prepping, letting me focus on the other million things on my to-do list.
Give them a try and see how a tiny change in routine can brighten busy days. And hey, if you find a fun twist or your kids come up with a favorite combo, I’d love to hear about it!
FAQs About Easy 5-Ingredient Overnight Oat Lunchbox Cups for Kids
Can I prepare these oat cups without a muffin tin?
Yes! You can use small ramekins, silicone cupcake molds, or even a small baking dish. Just adjust the portion sizes accordingly and keep in mind the soaking time may vary slightly.
How long do these overnight oat cups last in the fridge?
They stay fresh up to 4 days when properly covered and refrigerated, making them great for weekly meal prep.
Can I make these oat cups ahead and freeze them?
Absolutely. Wrap each oat cup individually in plastic wrap and store in an airtight freezer bag. Thaw overnight in the fridge before eating.
Is it possible to make this recipe vegan?
Yes. Use plant-based milk and dairy-free yogurt alternatives like coconut or almond yogurt, and swap honey for maple syrup or agave nectar.
What can I add to make these oat cups more filling?
Adding chia seeds, nut butters, or a scoop of protein powder can boost the satiety factor without compromising the easy prep.
Pin This Recipe!
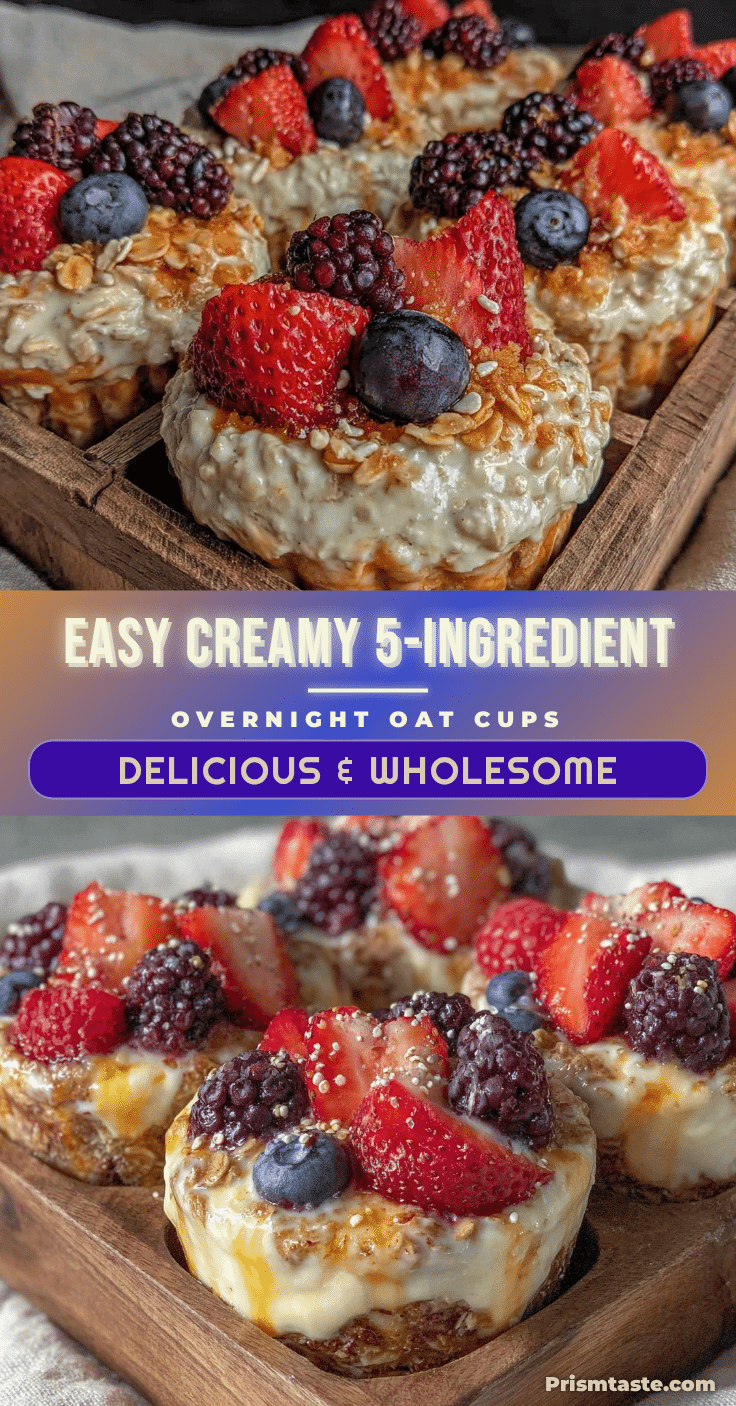
Easy 5-Ingredient Overnight Oat Lunchbox Cups for Kids

A simple, nutritious, and kid-approved overnight oat recipe made with just five ingredients. Perfect for quick breakfasts or healthy snacks that can be prepared the night before.
- Prep Time: 10 minutes
- Cook Time: 0 minutes
- Total Time: 6 hours 10 minutes
- Yield: 12 servings 1x
- Category: Snack
- Cuisine: American
Ingredients
- 2 cups rolled oats (about 180g)
- 1 ½ cups milk of choice (360ml) – dairy or plant-based (almond, oat, soy)
- 1 cup Greek yogurt (245g), plain or vanilla – or dairy-free coconut yogurt for vegan option
- 2 tablespoons honey or maple syrup
- 1 teaspoon vanilla extract
- Optional: pinch of ground cinnamon or nutmeg
- Optional: fresh or frozen berries
- Optional: chopped nuts or seeds
Instructions
- Combine 2 cups rolled oats and 1 ½ cups milk in a mixing bowl until well mixed.
- Add 1 cup Greek yogurt and fold gently into the oat mixture.
- Stir in 2 tablespoons honey or maple syrup and 1 teaspoon vanilla extract. Add a pinch of cinnamon or nutmeg if desired. Mix until just combined.
- Evenly divide the mixture into a greased or silicone-lined 12-cup muffin tin, filling each cup about ¾ full.
- Cover the muffin tin tightly with plastic wrap or an airtight lid and refrigerate overnight or for at least 6 hours.
- Serve cold straight from the fridge or topped with fresh fruit, nuts, or nut butter. Perfect for packing into lunchboxes or as a quick snack.
Notes
Use rolled oats for best texture; avoid instant or steel-cut oats. Do not overmix to prevent mushy texture. Silicone liners or greasing muffin tins help with easy removal. Adjust milk quantity if mixture is too thick or runny before refrigerating. Can be stored up to 4 days in fridge or frozen individually.
Nutrition
- Serving Size: 1 oat cup (approx. 1
- Calories: 150
- Sugar: 7
- Sodium: 50
- Fat: 2.5
- Saturated Fat: 1
- Carbohydrates: 27
- Fiber: 4
- Protein: 6
Keywords: overnight oats, kids snack, lunchbox ideas, healthy snack, easy recipe, no-cook, make-ahead, gluten-free, dairy-free option, vegan option


