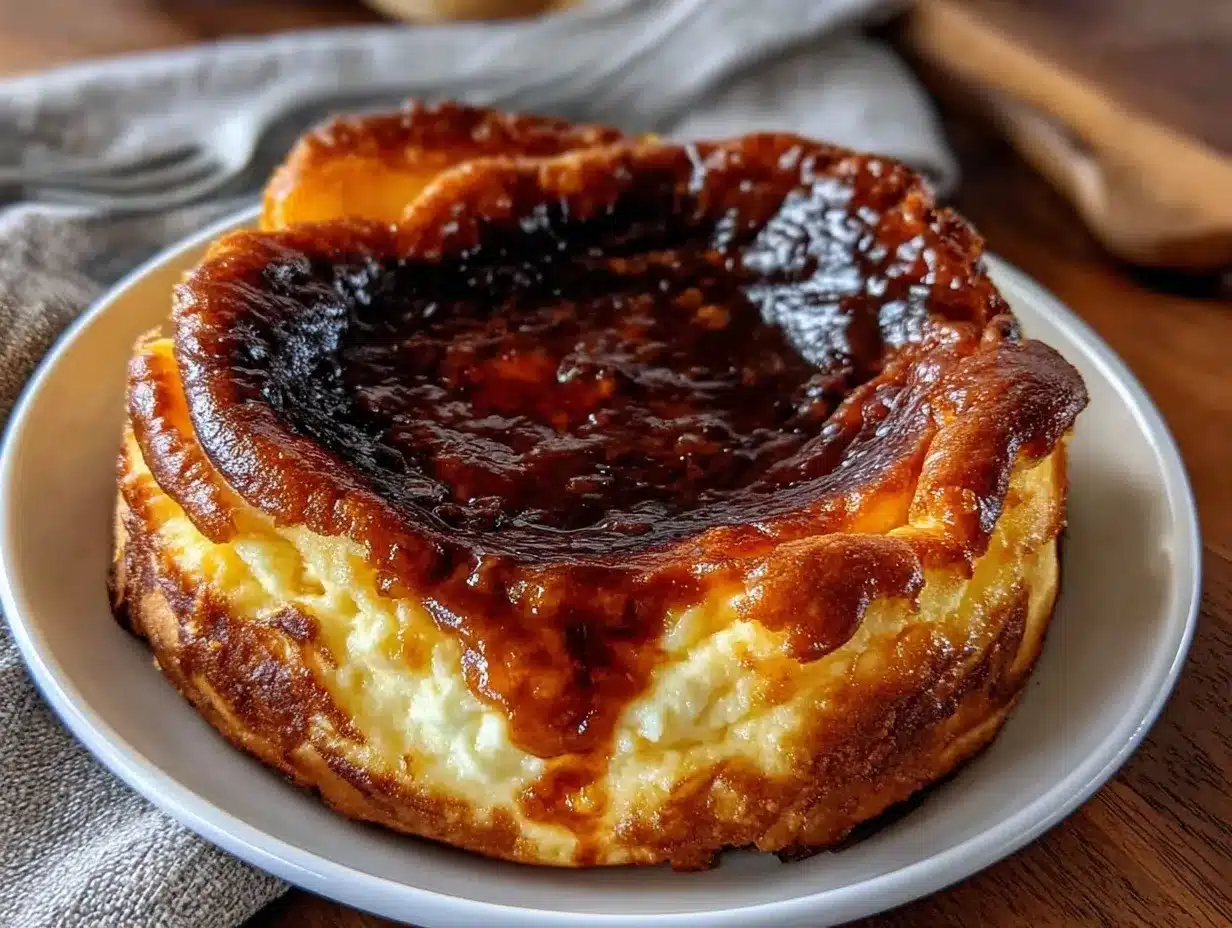
“This burnt Basque cheesecake smells like trouble,” my roommate joked the first time I pulled it from the oven. Honestly, I wasn’t so sure either. The dark, caramelized top looked more like a baking disaster than a dessert masterpiece. But after one tentative bite, the skepticism melted away faster than I expected. The rich, creamy center with that slightly smoky, caramelized crust was something I hadn’t quite tasted before. I kept thinking, “How did something that looks so burnt manage to taste so irresistible?”
Late one evening after a chaotic day of endless meetings and missed calls, I just wanted something simple, comforting, and a little bit fancy. I’d stumbled on a recipe for this “burnt” Basque cheesecake that promised minimal ingredients and no fussy water baths or crusts. And, well, it was a gamble—cheesecake that’s supposed to look burnt? I was curious enough to try it.
Turns out, this cheesecake is the kind of recipe that sneaks up on you. Not just because of the caramelized top that looks like it belongs in a rustic bakery rather than my home kitchen, but because it delivers the perfect balance of creamy richness and a smoky edge. It became a quiet late-night obsession—I found myself making it multiple times in a week, each time tweaking the caramelization just a touch. That slightly burnt top? It’s not a mistake, it’s the star.
There’s something honest about a dessert that doesn’t try too hard but still manages to win hearts. I’m sharing this irresistible burnt Basque cheesecake with caramelized top because it’s proof that sometimes, the best things come from happy accidents and a little kitchen curiosity. And if you’re like me, sometimes a simple dessert that feels like a secret indulgence is exactly what the day calls for.
Why You’ll Love This Recipe
Having played around with this recipe many times, I can tell you it’s not just another cheesecake. It’s got personality and an edge that traditional cheesecakes just don’t have. Here’s why it’s become a favorite in my kitchen:
- Quick & Easy: You can whip this up in about 50 minutes, including baking, making it perfect for last-minute sweet cravings or a relaxed weekend treat.
- Simple Ingredients: No fancy or hard-to-find ingredients—just cream cheese, eggs, sugar, heavy cream, and a bit of flour. You probably have these pantry staples already!
- Perfect for Gatherings: Whether it’s an intimate dinner or a small celebration, the burnt Basque cheesecake impresses with its unique look and deep flavor.
- Crowd-Pleaser: I’ve never had anyone turn this down. Even cheesecake skeptics find themselves asking for seconds.
- Unbelievably Delicious: The contrast between the caramelized top and the silky, custard-like inside makes every bite a delight.
What sets this recipe apart, honestly, is the technique that embraces that dark, almost burnt top. Instead of a perfectly smooth surface, you get a crackled, deeply caramelized crust that adds complexity. I like to think of it as a little rebellious twist on classic cheesecake—less fuss, more flavor. And trust me, the texture inside is so creamy that it almost melts on your tongue.
Plus, this cheesecake feels like a little quiet celebration—no need for fancy decorations or complicated steps. Just honesty in baking and pure satisfaction in eating. If you ever want to surprise your guests or treat yourself without stress, this is your go-to.
What Ingredients You Will Need
This burnt Basque cheesecake uses straightforward, wholesome ingredients that work together to create that perfect balance of creamy and caramelized flavors. Most of these are pantry staples, which means you can pull this off anytime without a special trip to the store.
- Cream Cheese (24 oz / 675 g), softened – The star of the cheesecake, providing richness and creaminess. I prefer brands like Philadelphia for consistent texture.
- Granulated Sugar (1 cup / 200 g) – Sweetens the batter without overpowering the tang of the cheese.
- Large Eggs (4), room temperature – Helps set the cheesecake while keeping it tender.
- Heavy Cream (1 1/4 cups / 300 ml) – Adds silkiness and a luscious mouthfeel. If you want a slightly lighter version, half-and-half works but the texture won’t be quite as rich.
- All-Purpose Flour (2 tablespoons / 15 g) – Just enough to give structure without weighing down the cheesecake.
- Vanilla Extract (1 teaspoon) – A subtle flavor booster that rounds out the richness.
- Salt (1/4 teaspoon) – Balances the sweetness and enhances depth.
Optional but recommended:
- Butter (for greasing the pan) – Using unsalted butter to coat the pan ensures the cheesecake doesn’t stick and adds a hint of flavor.
If you’re curious about substitutions, you can swap the all-purpose flour for a gluten-free blend if needed, or try coconut cream instead of heavy cream for a dairy-free experiment, though the texture will differ. For a slight twist, some people add a splash of lemon zest to brighten the flavor—but honestly, I like this recipe best when it keeps things simple.
For those who want to pair this with other recipes, you might enjoy serving it after a rich meal like the slow cooker beef ragu with homemade pasta, where the cheesecake’s creamy decadence is the perfect finish.
Equipment Needed
- 9-inch (23 cm) springform pan: This is ideal for easy release without damaging the cheesecake sides. If you don’t have one, a regular cake pan lined with parchment paper can work but be extra careful removing the cake.
- Mixing bowls: At least two—one for beating cream cheese and sugar, another for mixing eggs and cream.
- Electric mixer or stand mixer: Helpful for smooth batter, but you can whisk by hand if you don’t mind a workout.
- Rubber spatula: For scraping the bowl and folding ingredients gently.
- Oven thermometer: Optional but useful to maintain the perfect high heat that creates that signature caramelized top without burning the inside.
- Parchment paper: Essential for lining the pan so the cheesecake doesn’t stick and to help achieve that rustic, crinkled edge.
From personal experience, using a high-quality springform pan makes the biggest difference in presentation. I’ve tried baking this cheesecake in different pans, and the removable sides save you from cracking the delicate cake. Also, parchment paper with a bit of extra height helps contain the batter while it rises and browns unevenly, which is exactly what you want.
You don’t need expensive or fancy tools for this recipe—honestly, it’s more about technique and patience than gadgetry. I often bake it on a busy night after making something like the slow cooker salsa verde chicken burrito bowls, so having simple, reliable equipment is a lifesaver.
Preparation Method
- Preheat your oven to 400°F (205°C). Line your 9-inch springform pan with parchment paper, ensuring the paper extends about 2-3 inches above the rim for the cheesecake to rise and create those signature rustic edges. Butter the paper lightly to prevent sticking. (5 minutes)
- Beat the cream cheese and sugar: In a large bowl, use an electric mixer on medium speed to beat 24 oz (675 g) of softened cream cheese with 1 cup (200 g) granulated sugar until completely smooth and creamy, about 3-4 minutes. Scrape down the sides occasionally to avoid lumps. (4 minutes)
- Add eggs one at a time: Crack 4 large eggs (room temperature) into the bowl, beating well after each addition. This helps incorporate air and ensures a smooth texture. Be careful not to overmix once all eggs are combined. (3 minutes)
- Mix in remaining ingredients: Pour in 1 1/4 cups (300 ml) heavy cream, 2 tablespoons (15 g) all-purpose flour, 1 teaspoon vanilla extract, and 1/4 teaspoon salt. Gently fold these in with a spatula until just combined. The batter will be fairly loose—this is normal. (3 minutes)
- Pour batter into the prepared pan: Tap the pan gently on the counter to release any large air bubbles. (2 minutes)
- Bake at 400°F (205°C) for 50-60 minutes: The cheesecake should puff up and the top will turn a deep golden brown with some spots nearly blackened—don’t worry, that’s the signature look. The center will still look slightly jiggly but will set as it cools. (50-60 minutes)
- Cool completely at room temperature: Let the cheesecake cool in the pan for at least 2 hours before removing the springform sides. This resting time helps it set perfectly. (2 hours)
- Chill in the fridge for best texture: For a creamier slice, refrigerate the cheesecake for at least 4 hours or overnight. (4+ hours)
Quick tip: If you find the top browns too fast in your oven, tent loosely with foil after 40 minutes to avoid burning beyond the desired caramelization. The goal is that bittersweet, smoky flavor without an acrid taste. When slicing, use a sharp knife dipped in hot water and wiped dry for clean edges.
Cooking Tips & Techniques
Mastering the burnt Basque cheesecake is less about precision and more about embracing the rustic charm—and here are some tips from the many times I’ve baked it:
- Let the cream cheese soften fully: Cold cream cheese can result in lumps. I usually leave it out for an hour or zap it in 10-second bursts in the microwave if I’m in a hurry.
- Don’t overmix after adding eggs: Over-beating can cause cracks or a rubbery texture. Mix until just combined for that silky custard feel.
- Use heavy cream for richness: It’s what gives the cheesecake that luscious mouthfeel. I’ve tried half-and-half, but it’s just not the same.
- High oven temperature is key: The 400°F (205°C) bake creates the signature deeply caramelized top. Lower temps won’t give you that burnt crust, which is half the fun.
- Don’t panic if the cheesecake jiggles: The center should still wobble slightly when you pull it out. It firms up as it cools—this guarantees a creamy texture inside.
- Patience is your friend: Cooling and chilling times are important. Rushing this part can lead to a crumbly or unstable cheesecake.
I once tried blasting the cake under the broiler to get a darker top, but it ended up bitter. Slow, steady caramelization wins every time. Also, wrapping the pan’s base with foil and adding a water bath isn’t necessary here, which makes this recipe wonderfully straightforward compared to traditional cheesecakes.
Variations & Adaptations
This recipe is pretty forgiving, so feel free to make it your own. Here are a few ways I’ve experimented:
- Chocolate Burnt Basque Cheesecake: Add 3 tablespoons of cocoa powder to the batter for a deep chocolate twist. The caramelized top contrasts beautifully with the chocolate richness.
- Berry Swirl: Drop spoonfuls of raspberry or blueberry jam into the batter before baking and swirl with a skewer. This adds a fresh fruity note that cuts through the richness.
- Gluten-Free Option: Swap the all-purpose flour with almond flour or a gluten-free blend. Texture varies slightly but still delicious.
- Vegan Adaptation: Use dairy-free cream cheese and coconut cream, plus flax eggs (1 tablespoon flaxseed meal + 3 tablespoons water per egg). Expect a denser but still satisfying result.
- Personal Favorite: Sometimes I sprinkle a pinch of flaky sea salt over the top right after baking. That salty crunch with the caramelized top is unexpectedly addictive.
If you want to serve a complete meal alongside your cheesecake, the rich, cozy flavors pair wonderfully after a comforting dish like the creamy lemon ricotta stuffed shells with spinach.
Serving & Storage Suggestions
The burnt Basque cheesecake is best served chilled or at room temperature, depending on how creamy you like it. I usually slice it after it’s been in the fridge for a few hours so the texture is smooth but still soft.
Presentation-wise, the rustic, slightly cracked top is beautiful on its own, no need for frosting or extra decorations. A dollop of whipped cream or a handful of fresh berries on the side adds a nice contrast.
For storage, keep the cheesecake covered tightly in the refrigerator. It lasts up to 5 days, though I’ve never had leftovers past two days—it disappears that fast! You can freeze slices individually wrapped in plastic and foil for up to a month. Thaw overnight in the fridge for best results.
When reheating, avoid the microwave if you want to keep the texture intact. Instead, let slices come to room temperature naturally or warm gently in a low oven (about 300°F / 150°C) for 5-7 minutes.
Over time, the flavors mellow and the caramelized top softens slightly, which some people prefer. I like it fresh for that crisp burnt edge but have a soft spot for leftovers too.
Nutritional Information & Benefits
This cheesecake is rich and indulgent but uses simple, whole ingredients without unnecessary additives. Here’s an approximate breakdown per serving (assuming 12 slices):
| Calories | 320 |
|---|---|
| Fat | 26 g |
| Carbohydrates | 15 g |
| Protein | 6 g |
| Sugar | 13 g |
Cream cheese and heavy cream provide a good source of calcium and vitamin A, while eggs add protein and essential nutrients. The recipe is gluten-containing due to the flour but can be easily adapted for gluten-free diets.
If you’re watching carbs, reducing sugar slightly or serving smaller slices works well. I usually think of this cheesecake as a special treat—it feels indulgent but not over-the-top.
Conclusion
This burnt Basque cheesecake with its caramelized top is one of those recipes that feels both simple and special. It’s not about perfection but about embracing rustic charm and deep, rich flavors that surprise you. Whether you’re baking it for a quiet night in or to impress friends, it’s a dessert that invites you to slow down and savor every bite.
I love how this cheesecake turns a seemingly “burnt” surface into something irresistible, a reminder that sometimes the best results come from trusting the process and a little experimentation. Make it your own, try one of the variations, or stick to the classic—either way, you’re in for a treat that’s both comforting and unforgettable.
If you try this recipe, I’d love to hear how you tweaked it or what you served it with—maybe after a hearty meal of tender crockpot French dip sandwiches? Share your experience below, and happy baking!
Frequently Asked Questions
What makes Basque cheesecake different from traditional cheesecake?
Basque cheesecake is baked at a high temperature without a crust, creating a deeply caramelized, almost burnt top with a creamy, custard-like center. It’s less dense and doesn’t require a water bath.
Can I use a different pan if I don’t have a springform pan?
Yes, you can use a regular cake pan lined with parchment paper, but be careful when removing the cheesecake as it’s delicate. A springform pan is highly recommended for easy release.
Why does the cheesecake have a burnt top?
The burnt top is intentional and results from baking at a high temperature. It provides a smoky, caramelized flavor that contrasts beautifully with the creamy inside.
How do I store leftover cheesecake?
Store leftovers in an airtight container in the refrigerator for up to 5 days. You can also freeze slices wrapped well for up to a month.
Can I make this cheesecake vegan or dairy-free?
Yes, by using dairy-free cream cheese, coconut cream, and flax eggs as substitutes, you can make a vegan version. The texture will be denser but still tasty.
Pin This Recipe!
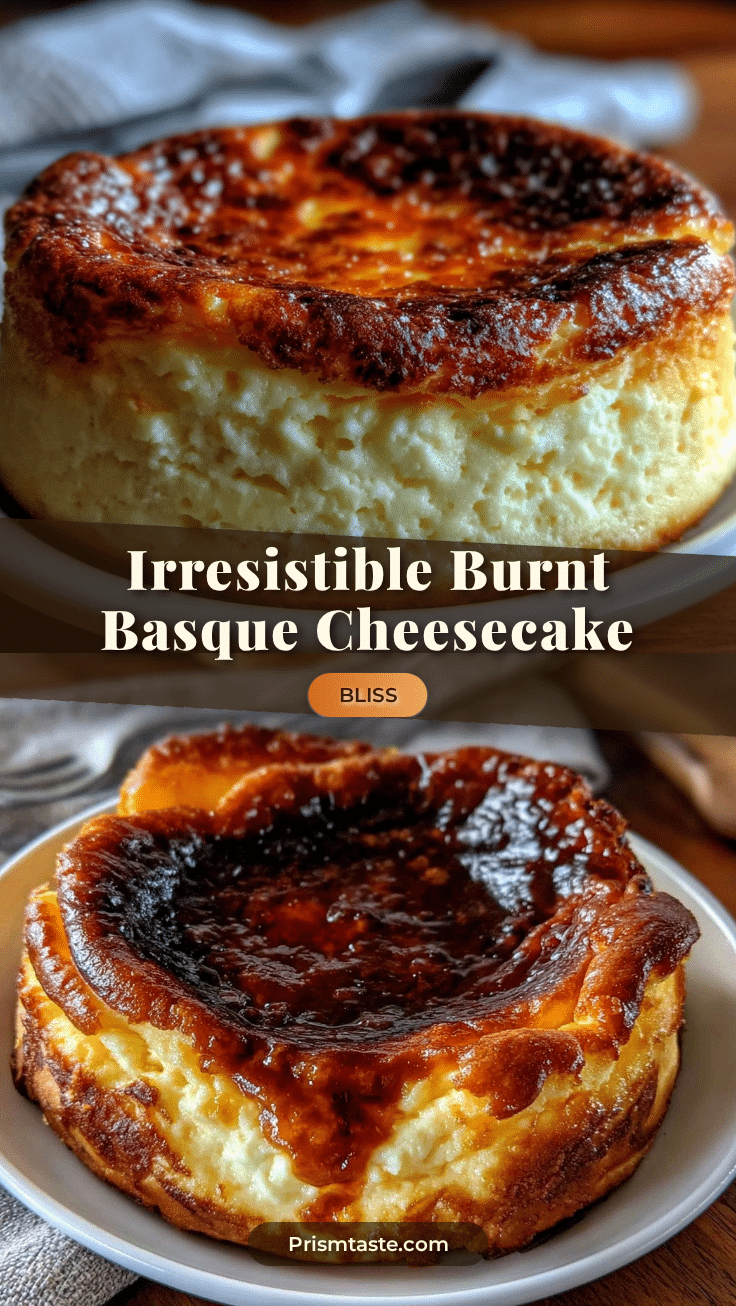
Burnt Basque Cheesecake

A rustic cheesecake with a deeply caramelized, almost burnt top and a creamy, custard-like center. This easy recipe uses simple ingredients and no crust, delivering a rich and smoky flavor.
- Prep Time: 15 minutes
- Cook Time: 50-60 minutes
- Total Time: 3 hours 15 minutes
- Yield: 12 servings 1x
- Category: Dessert
- Cuisine: Spanish
Ingredients
- 24 oz (675 g) cream cheese, softened
- 1 cup (200 g) granulated sugar
- 4 large eggs, room temperature
- 1 1/4 cups (300 ml) heavy cream
- 2 tablespoons (15 g) all-purpose flour
- 1 teaspoon vanilla extract
- 1/4 teaspoon salt
- Unsalted butter (for greasing the pan, optional)
Instructions
- Preheat your oven to 400°F (205°C). Line a 9-inch springform pan with parchment paper, extending 2-3 inches above the rim. Lightly butter the parchment paper to prevent sticking.
- In a large bowl, beat the softened cream cheese and granulated sugar with an electric mixer on medium speed until smooth and creamy, about 3-4 minutes. Scrape down the sides occasionally.
- Add eggs one at a time, beating well after each addition. Avoid overmixing once all eggs are combined.
- Gently fold in heavy cream, all-purpose flour, vanilla extract, and salt until just combined. The batter will be fairly loose.
- Pour the batter into the prepared pan and tap gently on the counter to release large air bubbles.
- Bake at 400°F (205°C) for 50-60 minutes until the top is deeply caramelized with some nearly blackened spots. The center should still jiggle slightly.
- Cool the cheesecake completely at room temperature for at least 2 hours before removing the springform sides.
- Refrigerate for at least 4 hours or overnight for best texture before serving.
Notes
If the top browns too fast, tent loosely with foil after 40 minutes to avoid burning beyond the desired caramelization. Use a sharp knife dipped in hot water and wiped dry for clean slices. Let cream cheese soften fully before mixing. Avoid overmixing after adding eggs to prevent cracks or rubbery texture. Cooling and chilling times are important for the perfect texture.
Nutrition
- Serving Size: 1 slice (1/12th of c
- Calories: 320
- Sugar: 13
- Fat: 26
- Carbohydrates: 15
- Protein: 6
Keywords: burnt Basque cheesecake, caramelized cheesecake, easy cheesecake, no crust cheesecake, creamy cheesecake, rustic cheesecake