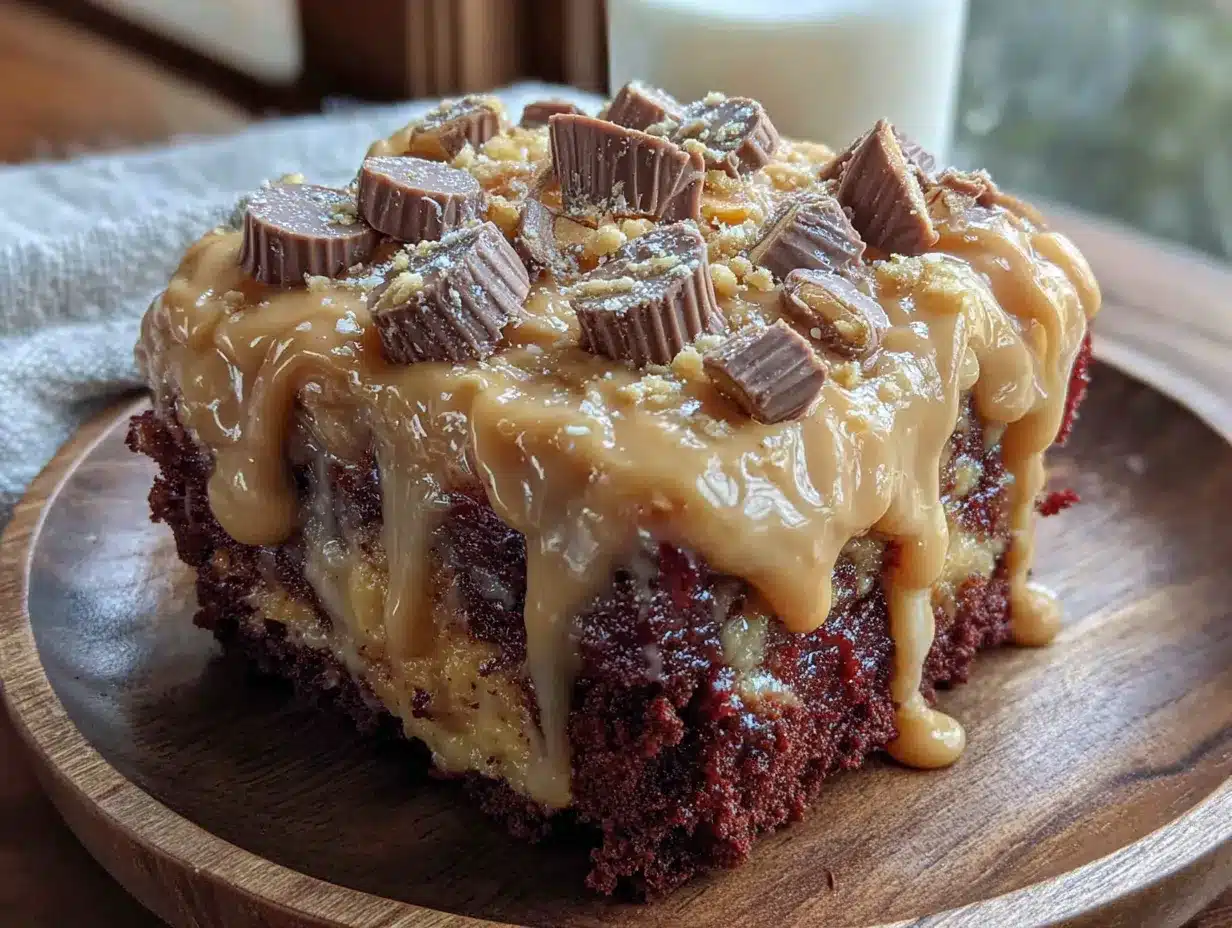
Late Sunday evening, the kitchen is finally quiet, and the only thing I want is a slice of something that tastes like a reward for making it through the week. The house smells faintly of chocolate and something nutty, warm, and familiar. I pull the pan from the fridge, the glossy chocolate top has set perfectly, and I cut into it slowly—the fork sinks through layers of cake, peanut butter filling, and rich ganache without a fight. This is my version of a dessert that doesn’t need a special occasion to feel special.
I didn’t grow up making poke cakes. Honestly, I was skeptical of them for years. The whole concept—poking holes in a perfectly good cake and pouring sweetened condensed milk or pudding over it—felt like a shortcut that couldn’t possibly be worth the hype. Then I tried one at a potluck, and I had to eat my words. That first bite was ridiculously moist, almost like a pudding cake but with structure. I went home and started experimenting, and somewhere around my third attempt, I landed on this combination. Chocolate cake, creamy peanut butter filling, and a chocolate ganache that makes everything feel a little indulgent. It’s not fancy, but it’s honest.
The thing about this cake is that it delivers exactly what it promises. No pretending to be healthy, no complicated techniques, just pure, unapologetic peanut butter and chocolate satisfaction. It’s the kind of dessert you make when you want to impress people without actually working that hard. And honestly, after a long week, isn’t that exactly what we all need?
Why You’ll Love This Recipe
Let me tell you why this cake has earned a permanent spot in my dessert rotation. I’ve tested this recipe at least half a dozen times—adjusting the filling consistency, tweaking the ganache ratio, even trying different brands of peanut butter to see which one gives the best flavor. So when I say this is the best version, I mean it.
- Incredibly Moist – The poke method ensures every single bite is infused with creamy peanut butter goodness. No dry cake here, ever.
- Simple Ingredients – You likely have most of these in your pantry right now. No special trips to a gourmet store needed.
- Perfect for Parties – This cake feeds a crowd, travels well, and gets rave reviews every single time. I’ve brought it to everything from backyard barbecues to holiday dinners.
- Crowd-Pleaser – Kids love it, adults love it, and even people who claim they’re “not dessert people” go back for seconds.
- Make-Ahead Friendly – Actually, it tastes better the next day. The flavors have time to meld together, and the texture becomes even more luxurious.
What makes this recipe different from all the other poke cakes out there? It’s the balance. The peanut butter filling isn’t too thick or too runny—it seeps into the holes just right, creating pockets of flavor without making the cake soggy. And the ganache? It’s not just a drizzle; it’s a proper layer that sets into a fudge-like topping. This isn’t just another version of a poke cake—it’s the one I keep coming back to, and I think you will too.
What Ingredients You Will Need
This recipe uses simple, wholesome ingredients to deliver bold flavor and satisfying texture without the fuss. Most of these are pantry staples, which makes this cake perfect for spontaneous baking sessions.
For the Cake Base
- 1 box (15.25 oz) chocolate cake mix – I prefer Duncan Hines or Betty Crocker for consistent results. You can use your favorite brand, but avoid the “extra moist” varieties as they can be too soft for poking.
- Eggs, oil, and water – Follow the box instructions for these. I use large eggs and vegetable oil for a neutral flavor.
- 1 teaspoon vanilla extract – (optional but recommended) Adds depth to the chocolate flavor.
For the Peanut Butter Filling
- 1 can (14 oz) sweetened condensed milk – This is non-negotiable. It creates the perfect pourable consistency that soaks into the cake.
- 1/2 cup creamy peanut butter – I recommend Skippy or Jif for the best texture. Natural peanut butter that separates can make the filling grainy.
- 1/4 cup whole milk – Helps thin the filling just enough to pour easily. You can use 2% or oat milk in a pinch.
For the Chocolate Ganache Topping
- 1 cup semi-sweet chocolate chips – Ghirardelli or Guittard are my go-to brands. They melt smoothly and have a rich flavor that complements the peanut butter.
- 1/2 cup heavy cream – Creates a silky, pourable ganache that sets beautifully. You can substitute full-fat coconut cream for a dairy-free version.
- 1 tablespoon unsalted butter – Adds shine and a slightly softer texture to the ganache.
Optional Toppings
- 1/2 cup chopped Reese’s peanut butter cups – For extra crunch and visual appeal.
- Flaky sea salt – A sprinkle on top balances the sweetness perfectly.
- Whipped cream – For serving, if you want to go all out.
Equipment Needed
You don’t need a fancy kitchen to pull off this cake. Here’s what you’ll need:
- 9×13-inch baking pan – Glass or metal both work, but glass gives a slightly more even bake. I’ve used both and prefer glass for this recipe.
- Mixing bowls – One large for the cake batter and one medium for the filling and ganache.
- Wooden spoon or spatula handle – For poking holes. The round end works perfectly. I’ve also used the back of a chopstick in a pinch.
- Saucepan – For heating the cream for the ganache. A small one works fine.
- Whisk – Helps smooth out the ganache and filling.
- Measuring cups and spoons – Accuracy matters, especially for the filling.
- Cooling rack – Essential for letting the cake cool completely before adding the filling.
If you don’t have a 9×13 pan, you can use two 8-inch round pans, but adjust the baking time. The poke method works just as well, and you get a gorgeous layer cake instead.
Preparation Method
Alright, let’s get to the good part. Follow these steps, and you’ll have a cake that looks like you spent hours on it—when really, it’s mostly hands-off.
- Preheat your oven to 350°F (175°C). Grease your 9×13-inch baking pan with butter or non-stick spray. I like to line the bottom with parchment paper for easy removal, but it’s not required.
- Prepare the cake batter according to the box instructions. Add the teaspoon of vanilla extract if you’re using it. Pour the batter into the prepared pan and spread it evenly. Bake for 25-30 minutes, or until a toothpick inserted in the center comes out clean. The edges should pull away slightly from the pan.
- Let the cake cool for 10 minutes in the pan on a cooling rack. This is important—if it’s too hot, the filling will soak in too much and make the cake mushy. If it’s too cool, the filling won’t absorb properly. Ten minutes is the sweet spot.
- While the cake cools, make the peanut butter filling. In a medium bowl, whisk together the sweetened condensed milk, creamy peanut butter, and whole milk until smooth. It should be pourable but not watery. If it seems too thick, add another tablespoon of milk.
- Poke holes all over the cake using the handle of a wooden spoon or a chopstick. Space the holes about 1 inch apart. Don’t be shy—poke all the way to the bottom of the cake. I usually do about 20-25 holes. You want enough for the filling to distribute evenly, but not so many that the cake falls apart.
- Pour the peanut butter filling evenly over the entire cake. Use a spatula to help it flow into the holes. You’ll see it pooling on top—that’s fine. Let the cake sit for 10-15 minutes so the filling can absorb completely.
- Make the chocolate ganache. Place the chocolate chips in a heatproof bowl. Heat the heavy cream in a small saucepan over medium heat until it just begins to simmer—don’t let it boil. Pour the hot cream over the chocolate chips and let it sit for 2 minutes. Add the butter, then whisk gently until smooth and glossy. If the ganache is too thick, add a splash more cream.
- Pour the ganache over the cake and spread it evenly with a spatula. It will set as it cools, creating a beautiful fudge-like layer. Sprinkle the chopped Reese’s peanut butter cups and a pinch of flaky sea salt on top while the ganache is still wet so they stick.
- Refrigerate the cake for at least 2 hours before serving. This allows the filling to fully set and the flavors to meld. Overnight is even better—I promise you won’t regret the wait.
Cooking Tips & Techniques
I’ve made this cake more times than I care to count, and I’ve learned a few things along the way. Here are my best tips to ensure success every time.
Don’t over-poke the cake. I made this mistake on my first attempt. I poked holes every half inch, thinking more holes meant more flavor. Instead, the cake basically fell apart when I tried to cut it. Space your holes about an inch apart, and you’ll get perfect pockets of peanut butter filling without compromising the structure.
Use room temperature ingredients for the filling. Cold peanut butter doesn’t mix well with sweetened condensed milk, and you’ll end up with a lumpy filling. Let your peanut butter sit out for 15-20 minutes before you start, or microwave it for 10 seconds to soften it.
Let the ganache cool slightly before pouring if you want a thicker layer. I like a pourable ganache that settles into a thin, even layer, but if you prefer a thicker, more fudge-like topping, let it sit for 5-10 minutes after whisking before pouring.
Timing is everything with this cake. I usually bake the cake in the morning, let it cool, add the filling and ganache, and then refrigerate it until dinner. That gives it a solid 6-8 hours to set. If you’re in a hurry, 2 hours is the minimum, but the texture won’t be as perfect.
Use a sharp knife to cut clean slices. Run the knife under hot water, wipe it dry, and then cut. Wipe the blade between cuts for the cleanest slices. This is especially important because the ganache can stick to the knife and pull away from the cake.
Variations & Adaptations
One of the best things about this recipe is how adaptable it is. Here are a few ways to make it your own.
Gluten-Free Version: Use a gluten-free chocolate cake mix. I’ve tried King Arthur Flour and Pillsbury, and both work well. Just make sure to check the baking time, as gluten-free cakes can bake faster or slower depending on the brand.
Peanut Butter Lover’s Dream: Add 1/2 cup of creamy peanut butter to the cake batter before baking. It makes the cake itself peanut-buttery, and then the filling adds even more. It’s almost too much—but in the best way possible.
Chocolate Overload: Use milk chocolate chips instead of semi-sweet for the ganache if you prefer a sweeter, creamier topping. You can also add a layer of chocolate pudding between the cake and the ganache for extra richness.
Dairy-Free Adaptation: Use a dairy-free cake mix, coconut cream instead of heavy cream, and a dairy-free butter substitute. I’ve made this for a friend with dairy allergies, and it turned out beautifully. The coconut cream adds a subtle flavor that actually complements the chocolate.
Seasonal Twist: In the fall, I sometimes add a teaspoon of cinnamon to the peanut butter filling. It gives the cake a warm, cozy flavor that pairs surprisingly well with the chocolate. In summer, top with fresh berries for a pop of color and acidity.
Serving & Storage Suggestions
This cake is best served cold or at room temperature. I personally love it straight from the fridge—the ganache is firm, the cake is dense and moist, and every bite is perfectly chilled. If you prefer a softer texture, let it sit at room temperature for 15-20 minutes before serving.
What to serve with it: A scoop of vanilla ice cream is the classic pairing, but I also love it with a dollop of whipped cream or a drizzle of caramel sauce. For a fun twist, serve it alongside a creamy no-churn strawberry cheesecake ice cream for a dessert spread that feels like a party.
Storage: Cover the pan tightly with plastic wrap or aluminum foil and store in the refrigerator for up to 5 days. The cake actually gets better after a day or two as the flavors continue to meld. I’ve even enjoyed it on day four, and it was still incredibly moist.
Freezing: You can freeze this cake for up to 3 months. Wrap the entire pan (or individual slices) in plastic wrap, then a layer of foil. Thaw in the refrigerator overnight before serving. The ganache may lose a bit of its shine, but the flavor will still be amazing.
Reheating: If you want a warm slice, microwave individual pieces for 15-20 seconds. The ganache will soften, and the peanut butter filling will become slightly gooey. It’s a completely different experience from the cold version, and honestly, both are worth trying.
Nutritional Information & Benefits
Let’s be real—this is not a health food, and I’m not going to pretend it is. But it’s made with real ingredients, and there are a few redeeming qualities worth mentioning.
- Estimated per serving (based on 12 servings): 420 calories, 22g fat, 52g carbohydrates, 8g protein, 35g sugar.
- Peanut butter provides a good amount of protein and healthy fats, which helps make this dessert more satisfying than a plain chocolate cake. You’ll feel full after one slice, not tempted to eat three.
- Dark chocolate in the ganache contains antioxidants, and using semi-sweet chips means less sugar than milk chocolate.
- Potential allergens: This recipe contains dairy, peanuts, gluten, and soy (from the chocolate chips). For a nut-free version, substitute sunflower seed butter for the peanut butter.
I believe in balance. This cake is meant to be enjoyed in moderation, as a treat for special occasions or when you just need something indulgent. Pair it with a creamy vanilla sweet cream cold brew for a dessert-and-drink combo that feels like a cafe treat at home.
Conclusion
This Ultimate Reese’s Peanut Butter Poke Cake is everything I want in a dessert—rich, indulgent, and surprisingly easy to make. It’s the kind of cake that disappears at parties, gets requested for birthdays, and makes you look like a baking pro even when you took plenty of shortcuts. The combination of moist chocolate cake, creamy peanut butter filling, and silky ganache is just unbeatable.
I hope you give this recipe a try and make it your own. Maybe you’ll add extra peanut butter cups on top, or swap the chocolate cake for vanilla, or serve it with a scoop of ice cream. Whatever you do, I promise it will be delicious. And if you make it, I’d love to hear how it turned out. Leave a comment below, tag me in your photos, or share your own twist on this recipe. Happy baking, friends!
Frequently Asked Questions
Can I use homemade chocolate cake instead of a box mix?
Absolutely. If you have a favorite homemade chocolate cake recipe, use it. Just make sure it’s sturdy enough to hold up to poking and soaking. A lighter, fluffier cake might fall apart. I’ve used a doctored-up box mix for years because it’s reliable, but a from-scratch cake works beautifully too.
Why did my ganache turn out grainy?
Grainy ganache usually happens when the cream is too hot or when moisture gets into the chocolate. Heat your cream until it just simmers—small bubbles around the edge, not a rolling boil. If your ganache seizes, you can sometimes fix it by whisking in a tablespoon of warm water or cream, one teaspoon at a time.
Can I make this cake ahead of time for a party?
Yes, and I actually recommend it. This cake tastes better after 24 hours in the fridge. The flavors meld together, and the texture becomes even more luscious. Make it the day before, keep it covered in the fridge, and pull it out about 20 minutes before serving.
How do I get clean slices without the ganache sticking to the knife?
Run your knife under hot water, wipe it dry, and cut. Wipe the blade clean between each slice. This technique works for any cake with a sticky topping. For extra-clean slices, chill the cake for at least 4 hours before cutting.
Can I use crunchy peanut butter instead of creamy?
You can, but the texture will be different. The crunchy bits won’t soak into the cake as well, and you might end up with chunks of peanut pieces in the filling. If you love crunchy peanut butter, go for it—just know the filling won’t be as smooth. I’ve tried it both ways, and I always come back to creamy for this recipe.
Pin This Recipe!
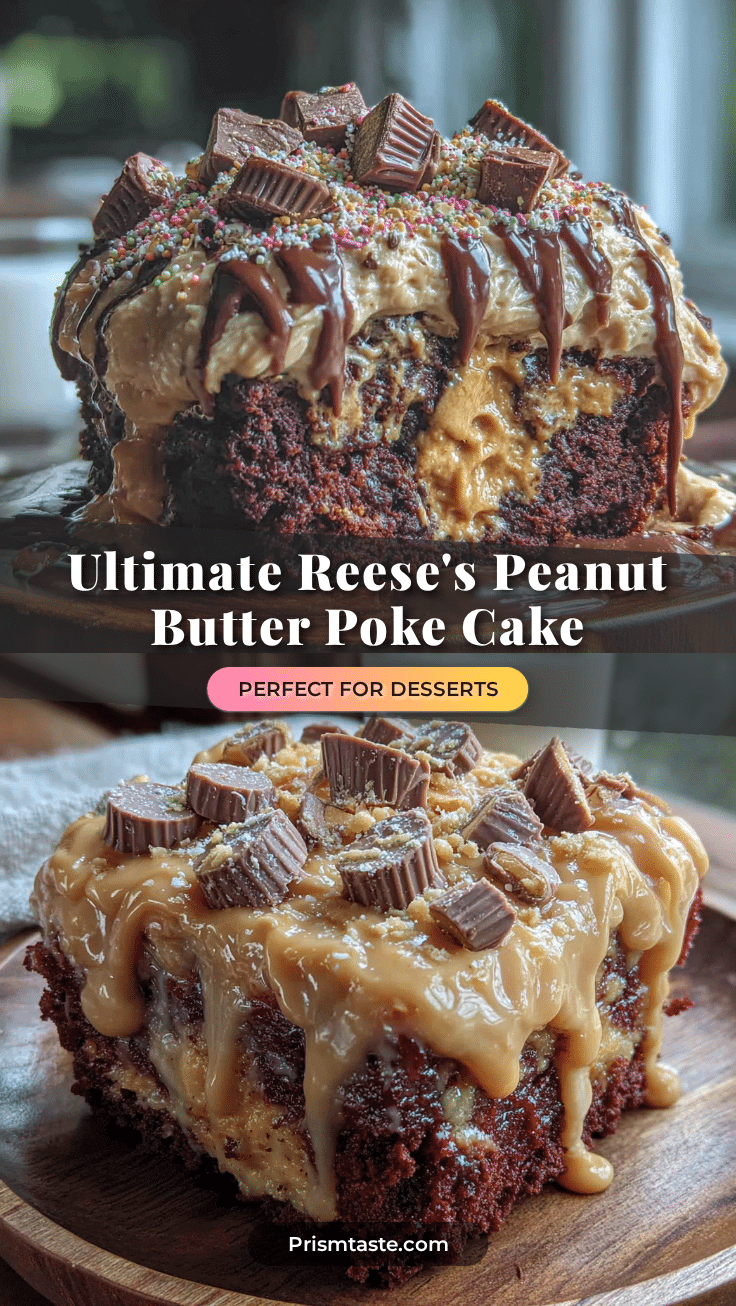
Ultimate Reese’s Peanut Butter Poke Cake – Easy Homemade Dessert

This Ultimate Reese’s Peanut Butter Poke Cake is a rich, indulgent dessert featuring moist chocolate cake infused with creamy peanut butter filling and topped with silky chocolate ganache. It’s surprisingly easy to make and perfect for parties, potlucks, or any occasion that calls for a crowd-pleasing treat.
- Prep Time: 15 minutes
- Cook Time: 30 minutes
- Total Time: 45 minutes (plus 2 hours chilling)
- Yield: 12 servings 1x
- Category: Dessert
- Cuisine: American
Ingredients
- 1 box (15.25 oz) chocolate cake mix
- Eggs, oil, and water (as per box instructions)
- 1 teaspoon vanilla extract (optional)
- 1 can (14 oz) sweetened condensed milk
- 1/2 cup creamy peanut butter
- 1/4 cup whole milk
- 1 cup semi-sweet chocolate chips
- 1/2 cup heavy cream
- 1 tablespoon unsalted butter
- 1/2 cup chopped Reese’s peanut butter cups (optional)
- Flaky sea salt (optional)
- Whipped cream (optional, for serving)
Instructions
- Preheat your oven to 350°F (175°C). Grease a 9×13-inch baking pan with butter or non-stick spray.
- Prepare the cake batter according to the box instructions, adding the vanilla extract if using. Pour into the prepared pan and spread evenly. Bake for 25-30 minutes, or until a toothpick inserted in the center comes out clean.
- Let the cake cool in the pan on a cooling rack for 10 minutes.
- While the cake cools, make the peanut butter filling: In a medium bowl, whisk together the sweetened condensed milk, creamy peanut butter, and whole milk until smooth and pourable.
- Poke holes all over the cake using the handle of a wooden spoon or a chopstick, spacing them about 1 inch apart and poking all the way to the bottom.
- Pour the peanut butter filling evenly over the cake, using a spatula to help it flow into the holes. Let sit for 10-15 minutes to absorb.
- Make the chocolate ganache: Place chocolate chips in a heatproof bowl. Heat heavy cream in a small saucepan over medium heat until it just simmers. Pour hot cream over chocolate chips, let sit for 2 minutes, then add butter and whisk until smooth and glossy.
- Pour the ganache over the cake and spread evenly with a spatula. Sprinkle chopped Reese’s peanut butter cups and flaky sea salt on top while ganache is still wet.
- Refrigerate the cake for at least 2 hours (overnight is best) before serving.
Notes
For best results, refrigerate overnight to allow flavors to meld. Use room temperature peanut butter for a smooth filling. To get clean slices, run a knife under hot water and wipe dry between cuts.
Nutrition
- Serving Size: 1 slice (1/12 of cak
- Calories: 420
- Sugar: 35
- Sodium: 380
- Fat: 22
- Saturated Fat: 10
- Carbohydrates: 52
- Fiber: 2
- Protein: 8
Keywords: Reese's peanut butter poke cake, chocolate peanut butter cake, easy poke cake, homemade dessert, chocolate ganache cake


