My niece took one bite, looked at the cookie in her hand, and said, “Auntie, this ghost tastes like a cloud.” That’s when I knew we had a new Halloween tradition. The meringue was barely set — still slightly chewy in the center — and the little chocolate chip eyes were staring up at her like they knew they were about to be eaten. I had been nervous about making them for her school Halloween party. Meringue can be finicky, and I didn’t want to show up with a tray of flat, weepy blobs. But these little ghosts held their shape perfectly, and the kids went absolutely wild for them. Honestly, I think the adults were even more excited. There’s something about a cookie that looks like a cartoon ghost that makes everyone smile.
I first tried making ghost meringues years ago, and the results were… questionable. They spread out into sad little puddles. The chocolate chips sank to the bottom. They looked more like sad, deflated balloons than friendly ghosts. But I kept tweaking. I learned that the temperature of your eggs matters way more than you’d think. I figured out that folding in the chocolate chips at the right moment keeps them suspended. And I discovered that a low, slow bake is the secret to getting that crisp exterior with a soft, marshmallow-like center. These spooky ghost meringue cookies with easy chocolate chip eyes are the result of all that trial and error. They’re the kind of recipe that feels like a magic trick — simple ingredients, a little patience, and suddenly you have a plate of the cutest Halloween treats you’ve ever seen.
So if you’re looking for a fun, surprisingly easy Halloween baking project that doesn’t require any fancy decorating skills, you’ve found it. These ghosts are forgiving, adaptable, and they always steal the show. I promise, the hardest part is waiting for them to cool.
Why You’ll Love This Recipe
These aren’t just another Halloween cookie. They’re light, airy, and practically melt in your mouth. And the best part? They look like you spent hours piping intricate designs, when really, you just made a few dollops and stuck on some chocolate chips. Let me break down why these spooky ghost meringue cookies with easy chocolate chip eyes will become your go-to Halloween treat.
- Quick & Easy: The active prep time is about 15 minutes. The rest is just baking and cooling, which the oven does for you. Perfect for a last-minute Halloween party or a fun afternoon project with kids.
- Simple Ingredients: You probably have everything in your pantry right now. Egg whites, sugar, a pinch of cream of tartar, vanilla, and chocolate chips. No special extracts, no food coloring, no complicated decorations.
- Perfect for Halloween: These are the star of any Halloween dessert table. They’re spooky but not scary, cute but not childish. Adults love them, kids adore them, and they look amazing on a platter next to some spooky graveyard dirt cup pudding cups.
- Crowd-Pleaser: Meringues are naturally gluten-free and low in fat, so they work for a lot of different diets. Plus, who can resist a cookie that looks like a little ghost?
- Unbelievably Delicious: That crunchy outer shell gives way to a soft, chewy, marshmallow-like center. The tiny chocolate chip eyes add just a hint of rich chocolate in every bite. It’s a texture and flavor combo that’s pure comfort.
What makes this recipe different from all the other ghost meringue recipes out there? It’s the technique. I’ve tested this dozens of times to make sure the meringue doesn’t weep, the ghosts don’t spread, and the chocolate chips stay where you put them. I experimented with different baking temperatures and cooling methods until I found the perfect sweet spot. This isn’t just another version of a ghost cookie — it’s the best version. The one that works every single time, even if you’ve never made meringue before.
These cookies are the kind that make you close your eyes after the first bite. They’re light, sweet, and just a little bit magical. Perfect for impressing a crowd without any stress, or for turning a simple Halloween baking session into a cherished memory.
What Ingredients You Will Need
This recipe relies on a handful of basic ingredients, but each one plays a crucial role. Using the right ones at the right temperature makes all the difference between perfect little ghosts and flat, sticky messes. Here’s everything you’ll need.
- 3 large egg whites, at room temperature (this is key — cold eggs won’t whip up as well. Separate them while they’re cold, then let the whites sit on the counter for 30 minutes)
- 3/4 cup (150g) granulated sugar (not powdered sugar! Granulated sugar dissolves into the meringue for that perfect structure. I use regular white sugar)
- 1/4 teaspoon cream of tartar (this stabilizes the meringue and helps it hold its shape. If you don’t have it, you can use 1/2 teaspoon of lemon juice or white vinegar instead)
- 1/2 teaspoon vanilla extract (pure vanilla extract gives the best flavor, but imitation vanilla works fine too. You could also use almond extract for a different twist)
- 1/3 cup (60g) mini chocolate chips (mini chips work best because they’re small enough to stay suspended in the meringue without sinking. Regular chips are too heavy and will slide right down the ghost’s face. I recommend Ghirardelli or Enjoy Life for a dairy-free option)
Ingredient Selection Tips: For the best results, use fresh eggs. Older egg whites are thinner and don’t whip up as well. If you’re unsure about the age of your eggs, separate them and let the whites sit for a few extra minutes at room temperature. The cream of tartar is your insurance policy — don’t skip it, especially if you live in a humid climate. Humidity is the enemy of meringue, and the cream of tartar helps counteract that.
Substitution Guidance: If you need a vegan option, you can try aquafaba (the liquid from a can of chickpeas) instead of egg whites. Use 3 tablespoons of aquafaba per egg white. It whips up just like egg whites, but you’ll need to add a little extra cream of tartar and bake them slightly longer. For a different flavor, swap the vanilla for peppermint extract to make ghost meringues that taste like candy canes. Just be careful — peppermint is strong, so start with 1/4 teaspoon.
Equipment Needed
You don’t need any fancy equipment for these spooky ghost meringue cookies with easy chocolate chip eyes. A stand mixer makes things easier, but a hand mixer works perfectly fine. Here’s what you’ll need.
- Electric mixer (stand mixer with a whisk attachment or a hand mixer with beaters. You could whip by hand with a balloon whisk, but your arm will be very, very tired)
- Large glass or metal mixing bowl (make sure it’s completely clean and dry. Any grease or moisture will prevent the egg whites from whipping up)
- Baking sheet (a standard half-sheet pan works great. Line it with parchment paper — don’t use wax paper or foil)
- Parchment paper (essential for preventing sticking. You can also use a silicone baking mat)
- Rubber spatula (for folding in the chocolate chips gently)
- Piping bag (a disposable piping bag with a large round tip, or you can simply snip the corner off a zip-top bag. I’ve done both, and honestly, the zip-top bag method is less intimidating for beginners)
- Cooling rack (for letting the meringues cool completely after baking. They need to cool in the oven, but a rack helps once they’re out)
Budget-Friendly Options: If you don’t have a piping bag, a sturdy zip-top freezer bag works perfectly. Just fill it with the meringue, snip off a small corner (about 1/2 inch), and pipe away. No need to buy a fancy piping tip — the ghosts look adorable with a simple round opening. And if you don’t have a cooling rack, you can let the meringues cool on the parchment paper on the counter. Just make sure they’re completely cool before you try to peel them off.
Preparation Method
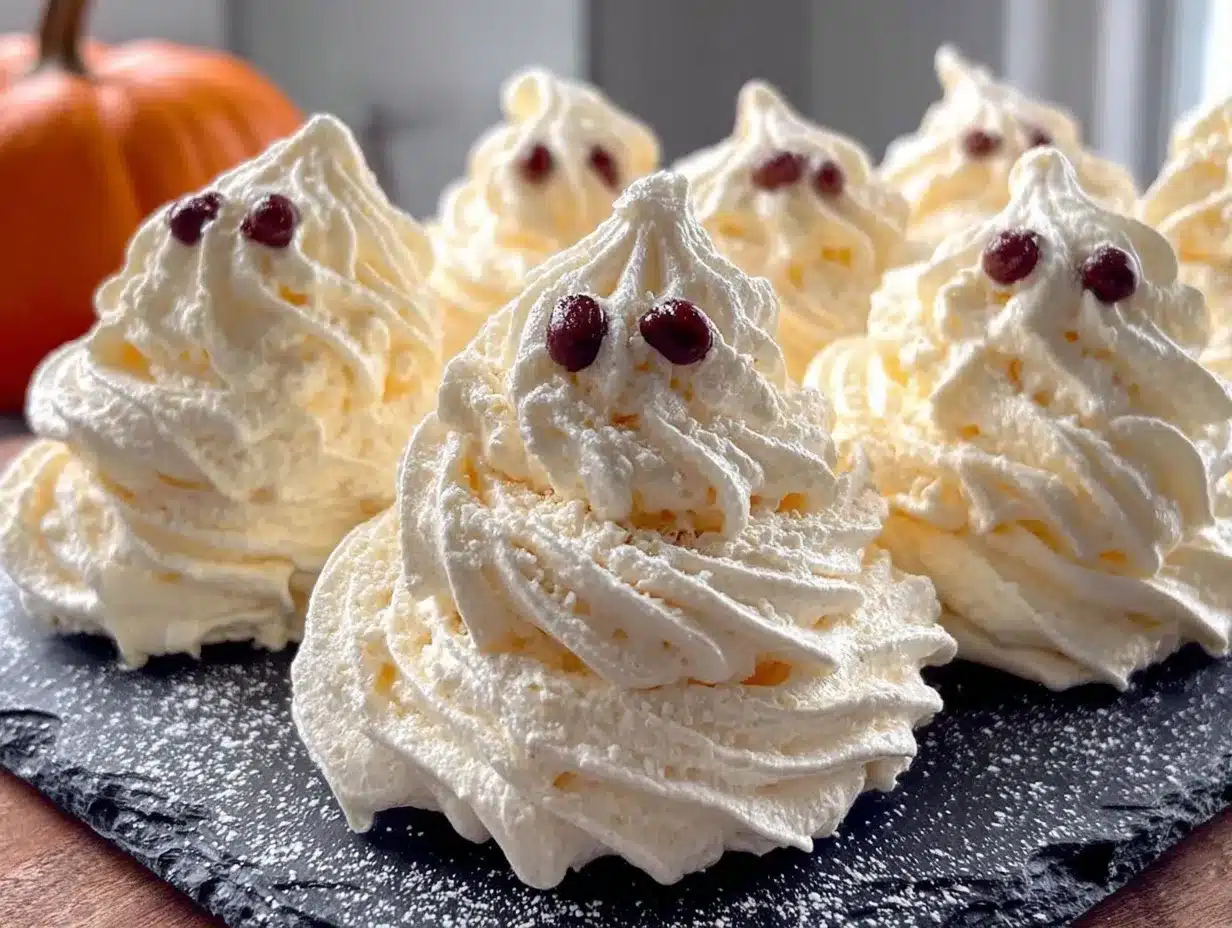
Making meringue can feel a little intimidating if you’ve never done it before, but I promise it’s straightforward. The key is patience and paying attention to a few critical details. Follow these steps, and you’ll have perfect little ghosts every time.
- Preheat your oven to 200°F (95°C). Yes, that’s low. This is a low-and-slow bake. Line a large baking sheet with parchment paper and set it aside. Make sure your oven rack is in the center position.
- Prepare your egg whites. Separate the eggs while they’re cold — it’s much easier. Put the whites in your clean, dry mixing bowl and let them sit at room temperature for 30 minutes. This is non-negotiable. Room temperature egg whites whip up to a much greater volume and create a more stable meringue. While you wait, you can measure out your sugar and chocolate chips.
- Start whipping. Add the cream of tartar to the egg whites. Begin whipping on medium speed. After about 30 seconds, the mixture will become frothy and bubbly, like a bubble bath. This is normal. Gradually increase the speed to medium-high.
- Add the sugar slowly. With the mixer running on medium-high, start adding the granulated sugar one tablespoon at a time. I know it’s tempting to dump it all in at once, but don’t. Adding it slowly allows each grain of sugar to dissolve completely. If you add it too fast, your meringue will be gritty and might collapse. This step takes about 3-4 minutes.
- Whip to stiff peaks. Once all the sugar is added, increase the speed to high and whip for another 5-7 minutes. You’re looking for stiff, glossy peaks. How do you know when it’s ready? Lift the whisk attachment — the meringue should stand straight up without drooping. Also, rub a tiny bit between your fingers. If it feels smooth and not gritty, the sugar is fully dissolved. If it feels grainy, keep whipping for another minute or two.
- Add the vanilla. With the mixer on low, add the vanilla extract. Mix just until combined — about 5 seconds. Don’t overmix at this stage or you’ll deflate all that beautiful volume.
- Fold in the chocolate chips. Remove the bowl from the mixer. Sprinkle about two-thirds of the mini chocolate chips over the meringue. Using a rubber spatula, gently fold them in. Fold from the bottom up, rotating the bowl as you go. Stop as soon as the chips are evenly distributed. Overfolding will deflate the meringue.
- Pipe the ghosts. Transfer the meringue to your piping bag or zip-top bag. If using a zip-top bag, snip off a corner about 1/2 inch wide. Hold the bag straight up and down over the baking sheet. Squeeze out a mound of meringue about 2 inches wide and 2 inches tall. As you finish squeezing, lift the bag straight up to create a little peak on top — that’s the ghost’s head. Space the ghosts about 1 inch apart; they don’t spread much, but they need a little breathing room. You should get about 20-24 ghosts.
- Add the eyes. This is the fun part. Take the remaining mini chocolate chips and gently press two into each ghost to make eyes. Press them in just enough so they stick — don’t push them all the way through. A good trick is to place them slightly off-center for a more “ghostly” look. You can also add a tiny third chip for a mouth if you want, but I like the simplicity of just eyes.
- Bake low and slow. Place the baking sheet in the preheated oven. Bake for 60-70 minutes. The meringues should be firm to the touch and easily peel off the parchment paper. They will be very pale — that’s perfect. They should not be brown at all. If they start to brown, your oven is too hot.
- Cool in the oven. This is the secret step that makes all the difference. After baking, turn off the oven but leave the meringues inside. Prop the oven door open slightly with a wooden spoon. Let them cool completely in the oven for at least 1 hour, or overnight if you have the time. This slow cooling prevents cracking and ensures that perfect marshmallow-like center.
- Remove and enjoy. Once completely cool, gently peel the ghosts off the parchment paper. They should release easily. If they stick, they need to bake a little longer next time.
Troubleshooting Tip: If your meringue looks weepy or starts to separate after you add the chocolate chips, your meringue wasn’t whipped enough. Next time, whip it a little longer until it’s truly stiff and glossy. Also, make sure your bowl and whisk are completely grease-free. A tiny bit of egg yolk or oil can ruin the whole batch.
Cooking Tips & Techniques
I’ve made my fair share of meringue mistakes over the years. One time, I tried making these on a rainy day, and they came out sticky and flat. Another time, I forgot the cream of tartar and ended up with a sad, deflated tray of puddles. Here’s everything I’ve learned so you can skip the failures.
Humidity is the enemy. Meringue is basically sugar and egg whites, and sugar loves to absorb moisture from the air. If it’s a humid or rainy day, your meringues might turn out sticky or chewy instead of crisp. Try to make these on a dry day. If you live in a humid climate, bake them a little longer — up to 80 minutes — and let them cool in the oven with the door propped open for an extra hour.
Don’t overbake. The goal is a crisp exterior with a soft, marshmallow center. If you bake them too long, they’ll be hard all the way through and lose that wonderful texture. They should feel firm but not rock-hard when you touch them. If they start to crack or brown, they’re overdone.
Room temperature eggs are not optional. I know I’ve said this already, but it’s worth repeating. Cold egg whites don’t whip up as well, and they won’t hold as much air. Your meringue will be denser and less stable. Set your eggs out 30 minutes before you start. If you forget, you can place the whole eggs (unseparated) in a bowl of warm water for 5 minutes.
Use a clean, dry bowl. Any trace of grease or moisture will prevent the egg whites from whipping. Wash your bowl and whisk with hot, soapy water, then dry them thoroughly. Some bakers even wipe the bowl with a bit of lemon juice or vinegar to remove any lingering grease. It sounds fussy, but it works.
Multitasking strategy: While your egg whites are coming to room temperature, measure out all your ingredients and line your baking sheet. That way, once you start whipping, you won’t have to stop and search for the chocolate chips. Meringue waits for no one.
Variations & Adaptations
These spooky ghost meringue cookies with easy chocolate chip eyes are surprisingly versatile. Once you’ve mastered the basic technique, you can play around with different flavors and looks. Here are a few of my favorite variations.
- Peppermint Ghosts: Swap the vanilla extract for 1/4 teaspoon of peppermint extract. The meringues will taste like a light, airy peppermint patty. Crush up a candy cane and sprinkle the crumbs on top of the ghosts before baking for a festive touch. These are amazing for Christmas too!
- Pumpkin Spice Ghosts: Add 1/2 teaspoon of pumpkin pie spice and 1/4 teaspoon of cinnamon to the sugar before you start whipping. The spices will incorporate beautifully into the meringue. Use dark chocolate chips for the eyes — the contrast is gorgeous, and the flavors pair perfectly.
- Vegan Aquafaba Ghosts: Replace the 3 egg whites with 9 tablespoons of aquafaba (the liquid from a can of chickpeas). Add an extra 1/4 teaspoon of cream of tartar. Whip the aquafaba on high speed for about 8-10 minutes until stiff peaks form. The texture is slightly different — a bit chewier — but they’re just as delicious. Bake them for an extra 10-15 minutes.
- Mini Ghosts: Pipe smaller ghosts — about 1 inch wide and 1 inch tall — and bake for only 40-45 minutes. These are perfect for party favors or for adding to a Halloween snack board. You’ll get about 40-50 mini ghosts from one batch.
Personal Variation: My favorite twist is to add a tiny pinch of cinnamon and a drop of orange extract to the meringue. It gives the ghosts a subtle, warm flavor that’s perfect for fall. I also like to use a mix of mini chocolate chips and mini white chocolate chips for the eyes — it makes the ghosts look even more whimsical.
Serving & Storage Suggestions
These little ghosts are best served at room temperature, straight from the cooling rack. They’re a showstopper on any Halloween dessert table, and they pair beautifully with other spooky treats. I love serving them alongside a batch of perfect mummy cake pops for a truly epic Halloween spread.
Serving Ideas: Arrange the ghosts on a platter with some black licorice “spiderwebs” or sprinkle edible glitter over them for a magical effect. They’re also wonderful crumbled over a bowl of vanilla ice cream or floating in a cup of hot chocolate (they’ll bob around like little marshmallows). For a Halloween party, stick them into a bowl of spooky graveyard dirt cup pudding cups — they look like ghosts rising from the grave!
Storage Instructions: Store the meringues in an airtight container at room temperature. Do not refrigerate them — the moisture in the fridge will make them sticky and soft. They’ll stay crisp for up to 5 days. If they do get a little soft, you can pop them back into a 200°F (95°C) oven for 10 minutes to re-crisp them.
Freezer Instructions: Meringues freeze surprisingly well. Place them in a single layer in a freezer-safe container, with parchment paper between layers. They’ll keep for up to 3 months. Thaw them at room temperature for about 15 minutes before serving. Don’t thaw them in the fridge — again, moisture is the enemy.
How Flavors Develop: These meringues are best eaten within the first 2-3 days. The chocolate chip eyes stay nice and firm, and the meringue retains its perfect crunch. After that, the chocolate might start to bloom (develop a white powdery look), but they’re still perfectly safe to eat.
Nutritional Information & Benefits
While these spooky ghost meringue cookies with easy chocolate chip eyes are definitely a treat, they’re lighter than most cookies. Each ghost has about 35-40 calories, 0 grams of fat (before the chocolate chips), and 8 grams of sugar. The mini chocolate chips add a tiny bit of fat and antioxidants from the cocoa.
Health Benefits of Key Ingredients: Egg whites are pure protein — about 4 grams per large egg white. They’re low in calories and contain no fat or cholesterol. The cream of tartar adds a small amount of potassium. And dark chocolate chips (if you use them) are rich in antioxidants. This is a treat that’s a little kinder to your waistline than a typical butter-and-flour cookie.
Dietary Considerations: This recipe is naturally gluten-free, low-fat, and dairy-free if you use dairy-free chocolate chips. It’s also nut-free (as long as your chocolate chips are processed in a nut-free facility). The only allergen concern is eggs. For a vegan option, use the aquafaba variation mentioned above.
Personal Wellness Perspective: I love that these cookies let me indulge in something sweet without feeling heavy or sluggish afterward. They’re light, airy, and satisfying in a way that a dense, buttery cookie isn’t. They’re perfect for when you want a little something sweet after dinner but don’t want to undo all your healthy eating efforts.
Conclusion
These spooky ghost meringue cookies with easy chocolate chip eyes are the perfect Halloween treat. They’re fun to make, adorable to look at, and absolutely delicious to eat. The combination of a crisp, airy meringue with tiny bursts of chocolate in every bite is simply irresistible. And honestly, they’re so easy that you’ll find yourself making them for every Halloween party, school event, or cozy movie night.
I encourage you to make these your own. Experiment with different extracts, try different chip colors, or pipe them into different shapes. The basic technique is so forgiving that you can really play around. And if you come up with a variation you love, I’d love to hear about it! Leave a comment below and tell me how your ghosts turned out. Did you add a pinch of cinnamon? Use white chocolate chips? Make them for a Halloween party? I read every comment, and your ideas might just inspire my next batch.
So go ahead — preheat that oven, whip up some meringue, and create a plate full of adorable little ghosts. They’re a little spooky, a little sweet, and a whole lot of fun. Happy Halloween, and happy baking!
Frequently Asked Questions
Can I make these ghost meringues ahead of time?
Absolutely! They’re actually perfect for making ahead. Bake and cool them completely, then store them in an airtight container at room temperature for up to 5 days. They’ll stay crisp and delicious. You can even freeze them for up to 3 months.
Why did my meringue turn out sticky?
Sticky meringue is usually a sign of humidity or underbaking. If it’s a humid day, bake the meringues a little longer — up to 80 minutes — and let them cool in the oven with the door propped open for an extra hour. Also, make sure you’re using a clean, dry bowl and that your egg whites are at room temperature.
Can I use a hand mixer instead of a stand mixer?
Yes, absolutely! A hand mixer works just as well. It might take a little longer to whip the meringue to stiff peaks — about 8-10 minutes instead of 5-7. Just be patient and keep whipping until the meringue is glossy and holds stiff peaks. Your arm might get a little tired, but it’s worth it.
My chocolate chips sank to the bottom. What went wrong?
This happens when the meringue isn’t thick enough to support the chips, or when the chips are too large. Make sure you whip the meringue to stiff, glossy peaks before folding in the chips. Also, use mini chocolate chips instead of regular-sized ones — they’re lighter and stay suspended much better. Fold them in gently and stop as soon as they’re distributed.
Can I make these without a piping bag?
Definitely! A zip-top freezer bag works perfectly. Just fill it with the meringue, snip off a small corner (about 1/2 inch wide), and pipe away. You can even use two spoons to dollop the meringue onto the baking sheet — they won’t look as perfectly ghost-shaped, but they’ll still be delicious and adorable.
Pin This Recipe!
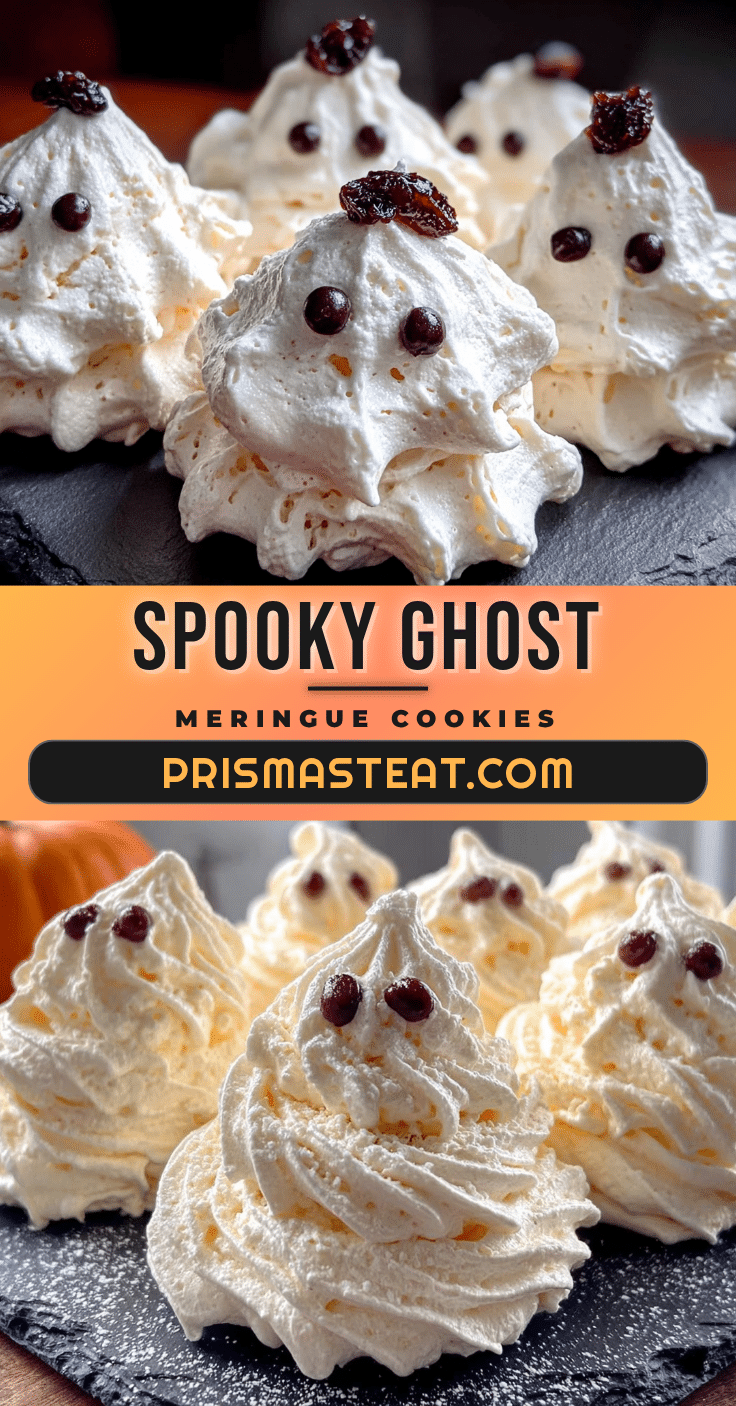
Spooky Ghost Meringue Cookies with Easy Chocolate Chip Eyes
These light and airy meringue cookies are shaped like adorable ghosts with chocolate chip eyes. They have a crisp exterior and a soft, marshmallow-like center, making them a perfect Halloween treat that’s surprisingly easy to make.
- Prep Time: 15 minutes
- Cook Time: 60-70 minutes
- Total Time: 1 hour 45 minutes (plus cooling time)
- Yield: 20-24 cookies 1x
- Category: Dessert
- Cuisine: American
Ingredients
- 3 large egg whites, at room temperature
- 3/4 cup (150g) granulated sugar
- 1/4 teaspoon cream of tartar
- 1/2 teaspoon vanilla extract
- 1/3 cup (60g) mini chocolate chips
Instructions
- Preheat your oven to 200°F (95°C). Line a large baking sheet with parchment paper and set aside.
- Separate the eggs while cold, then let the egg whites sit at room temperature for 30 minutes.
- Add the cream of tartar to the egg whites. Begin whipping on medium speed until frothy, then gradually increase to medium-high.
- With the mixer running on medium-high, add the granulated sugar one tablespoon at a time, taking about 3-4 minutes.
- Increase speed to high and whip for another 5-7 minutes until stiff, glossy peaks form. The meringue should feel smooth between your fingers.
- Add the vanilla extract on low speed and mix just until combined, about 5 seconds.
- Remove the bowl from the mixer. Sprinkle about two-thirds of the mini chocolate chips over the meringue and gently fold them in with a rubber spatula until evenly distributed.
- Transfer the meringue to a piping bag or zip-top bag with a corner snipped off. Pipe mounds about 2 inches wide and 2 inches tall onto the prepared baking sheet, lifting straight up to create a peak. Space ghosts about 1 inch apart.
- Press the remaining mini chocolate chips into each ghost to make eyes, placing them slightly off-center for a ghostly look.
- Bake for 60-70 minutes until firm to the touch and easily peelable from the parchment. They should remain pale.
- Turn off the oven and prop the door open slightly with a wooden spoon. Let the meringues cool completely in the oven for at least 1 hour or overnight.
- Gently peel the ghosts off the parchment paper and serve at room temperature.
Notes
Humidity is the enemy of meringue; make these on a dry day. Ensure all equipment is clean and dry. Room temperature egg whites are essential for volume. For a vegan option, use aquafaba (3 tablespoons per egg white) with extra cream of tartar.
Nutrition
- Serving Size: 1 cookie
- Calories: 3540
- Sugar: 8
- Sodium: 10
- Carbohydrates: 8
- Protein: 1
Keywords: Halloween cookies, ghost meringues, meringue cookies, easy Halloween treats, gluten-free cookies, low-fat cookies


