Introduction
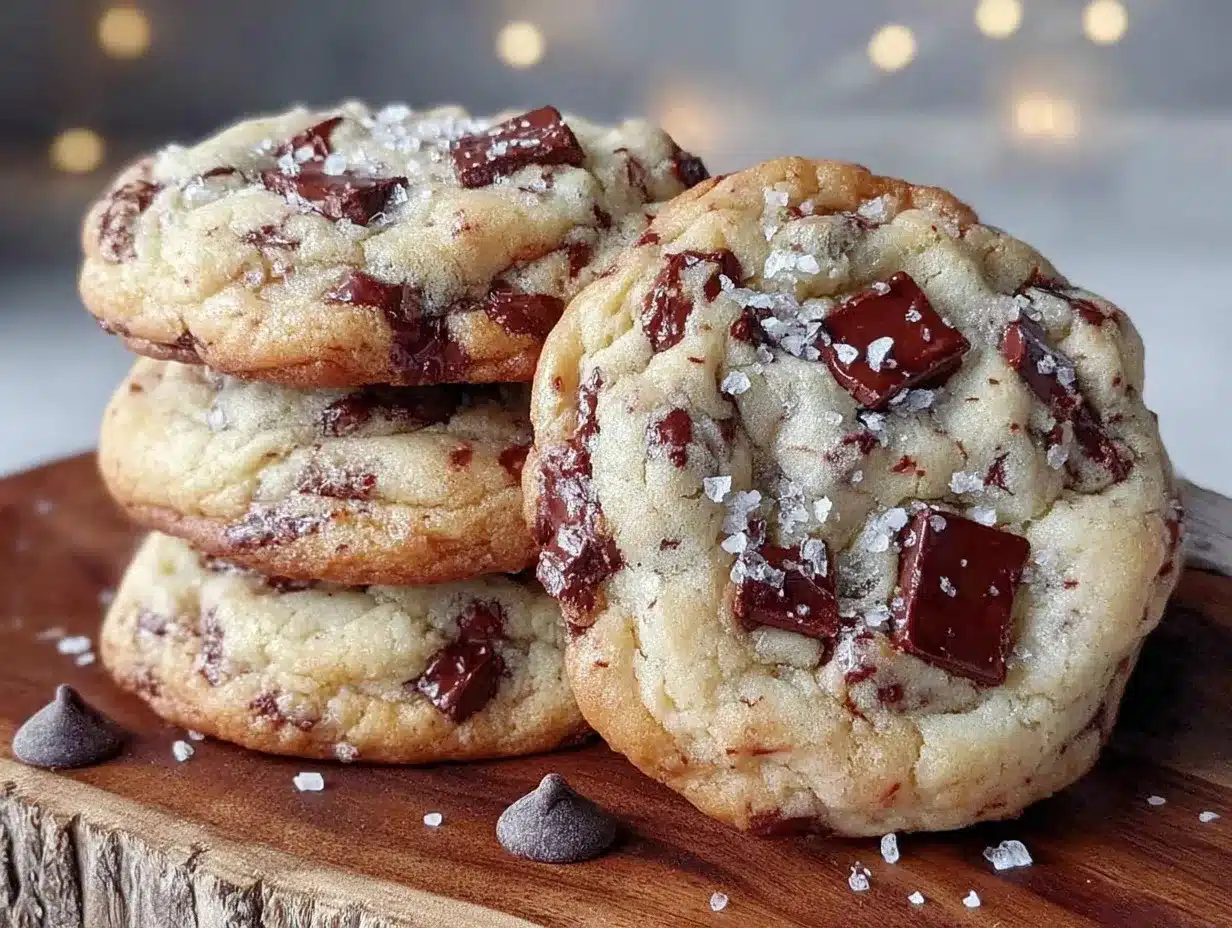
“Are you sure these are homemade?” my friend asked, eyes wide as she bit into one of these thick, chewy chocolate chip cookies. Honestly, I wasn’t expecting much when I first threw this batch together on a random Wednesday night after a long day of juggling work and life. I just wanted something quick, comforting, and — frankly — a little indulgent. The recipe wasn’t fancy, no special ingredients or complicated steps, just the basics. But the result? A cookie that was dense, soft in the middle, with edges that had just enough crunch. It was a happy accident that quickly became a favorite.
I kept making these cookies over and over that week, tweaking here and there, and every time someone stopped by, they asked for more. There’s something about the way the chocolate melts just so, paired with that perfect thickness and chewiness, that makes these cookies stand out. The smell alone fills the kitchen with this warm, inviting vibe — like the house is wrapping you in a cozy blanket. It’s the kind of recipe that sticks with you, the one you reach for when you want a little treat that feels both nostalgic and new.
It’s funny how the simplest recipes can surprise you the most. After a few batches, I realized this wasn’t just a quick fix—it was my go-to. And the best part? You don’t need a fancy pantry or hours at the oven. Just some straightforward ingredients, a bit of patience, and you’re set. So, if you’ve ever searched for the perfect thick and chewy chocolate chip cookies, the kind that make you close your eyes after the first bite, you’re in the right place.
Why You’ll Love This Recipe
From my many experiments in the kitchen, this recipe for thick and chewy chocolate chip cookies has proven itself time and again. It’s not just a cookie; it’s an experience that blends ease with that comforting, homemade charm I crave. Here’s why you’ll want to keep this recipe in your arsenal:
- Quick & Easy: Comes together in about 15 minutes of prep and bakes in 12–15 minutes—ideal for restless evenings or unexpected guests.
- Simple Ingredients: No need to hunt for exotic items; most are pantry staples like brown sugar, butter, and chocolate chips.
- Perfect for Any Occasion: Whether it’s an after-school snack, a cozy dessert, or you’re prepping for a get-together, these cookies fit right in.
- Crowd-Pleaser: Kids adore them, adults can’t get enough, and they often lead to “Can I have the recipe?” requests.
- Unbelievably Delicious: The balance of chewy centers with slightly crispy edges and pockets of melted chocolate is honestly hard to beat.
What sets this apart? It’s the attention to texture — using a higher ratio of brown sugar for moisture and a chill time that’s just right to get that thickness without the cookie spreading too thin. Plus, I fold in just the right amount of chocolate chips (go for a mix of semi-sweet and dark chocolate for depth). This recipe isn’t just another cookie; it’s the one that’s earned a permanent spot on my baking list.
What Ingredients You Will Need
This recipe uses simple, wholesome ingredients that come together to create that perfect thick and chewy texture with bursts of chocolatey goodness. Most ingredients are common in any kitchen, and substitutions are easy if needed.
- Unsalted Butter, softened (about 1 cup or 226g) — I prefer Land O’Lakes for its creamy texture
- Light Brown Sugar, packed (3/4 cup or 150g) — adds moisture and chewiness
- Granulated Sugar (1/4 cup or 50g) — balances sweetness and helps with crisp edges
- Large Eggs, room temperature (2) — helps bind the dough and add richness
- Pure Vanilla Extract (2 tsp) — the subtle flavor boost that makes a difference
- All-Purpose Flour (2 1/4 cups or 280g) — the base for that sturdy yet soft cookie
- Baking Soda (1 tsp) — for a little lift and spread control
- Salt (1/2 tsp) — balances the sweetness and enhances flavor
- Chocolate Chips (1 1/2 cups or about 270g) — semi-sweet or a blend of semi-sweet and dark for complexity; Ghirardelli chips work great
Substitution Tips: For gluten-free options, swap all-purpose flour with a 1:1 gluten-free blend. Use dairy-free butter and coconut sugar if you want a vegan-friendly cookie. I’ve tried swapping Greek yogurt for some butter in another recipe, but here, butter’s richness really rules.
Equipment Needed
- Mixing Bowls: At least two — one for wet ingredients, one for dry
- Electric Mixer or Stand Mixer: Helpful but not required; a sturdy whisk and wooden spoon work fine too
- Measuring Cups and Spoons: Accurate measurements matter here
- Baking Sheets: Two standard-size sheets; use parchment paper or silicone mats for easy cleanup
- Cooling Rack: Allows cookies to cool evenly and keep their texture
- Spoon or Cookie Scoop: I like a medium-sized cookie scoop (about 1.5 tbsp) for uniform cookies that bake evenly
Personally, I’ve found that silicone baking mats give the best results for even baking and no sticking. If you don’t have one, parchment paper is a budget-friendly alternative. For mixing, an electric hand mixer saves time but stirring by hand gives you more control over the dough’s texture — sometimes I like to feel it, you know?
Preparation Method
- Preheat your oven to 350°F (175°C) and line two baking sheets with parchment paper or silicone mats.
- Cream the butter and sugars: In a large bowl, beat the softened unsalted butter with the light brown and granulated sugars until light and fluffy—about 3-4 minutes. This step is key for that tender texture.
- Add eggs and vanilla: Beat in the eggs one at a time, mixing well after each addition. Stir in the vanilla extract. The mixture should look creamy and smooth.
- Whisk dry ingredients: In a separate bowl, combine the all-purpose flour, baking soda, and salt. Whisk together to distribute the leavening evenly.
- Combine wet and dry: Gradually add the dry ingredients to the wet mixture, beating on low speed or folding gently with a spatula. Avoid overmixing to prevent tough cookies.
- Fold in chocolate chips: Use a spatula to evenly fold in the chocolate chips, making sure each scoop has a generous amount.
- Chill the dough: Cover the dough and refrigerate for at least 30 minutes (or up to 24 hours). This helps the dough firm up and prevents spreading during baking.
- Scoop cookies: Using a cookie scoop or spoon, drop mounds of dough about 2 inches apart on the baking sheets. For thicker cookies, mound the dough slightly higher rather than flattening it.
- Bake: Place the baking sheets in the oven and bake for 12-15 minutes. Look for golden edges and slightly soft centers — the cookies will continue to set as they cool.
- Cool: Let the cookies rest on the baking sheet for 5 minutes before transferring to a cooling rack. This prevents breakage and helps with texture.
One thing I learned the hard way: don’t skip chilling the dough. I once baked straight after mixing, and the cookies spread out flat like pancakes. Chilling makes all the difference for that thick, chewy bite. Also, keep an eye on the first batch—the exact oven times can vary, so adjust as needed.
Cooking Tips & Techniques
Getting the perfect thick and chewy chocolate chip cookies isn’t just about following a recipe; it’s about these little tricks I’ve picked up over countless batches:
- Butter Temperature: Softened, not melted. Melted butter leads to thinner cookies. You want it soft enough to cream but still hold some shape.
- Brown Sugar Ratio: Using mostly brown sugar keeps the cookies moist and chewy thanks to the molasses content. Too much white sugar and you get crispier edges but less chew.
- Don’t Overmix: Once flour goes in, mix just until combined. Overworking gluten makes cookies tough.
- Chilling Time Matters: At least 30 minutes is best, but overnight chills improve flavor and texture.
- Bake One Sheet at a Time: For even heat distribution and better control over browning.
- Look Before You Pull: Cookies should look set around the edges but still soft in the middle — they’ll firm up as they cool.
One time, I tried adding extra baking soda to make them puffier, but they tasted a bit soapy — lesson learned! I’ve also found that a mix of semi-sweet and dark chocolate chips adds a nice depth of flavor, rather than just straight semi-sweet. Multitasking tip: while the dough chills, prep your next snack or clean up to save time.
Variations & Adaptations
This recipe is pretty forgiving and versatile. Here are some ways I’ve played with it:
- Nutty Upgrade: Toss in 1/2 cup chopped walnuts or pecans for crunch. Toasted nuts add a lovely aroma and texture contrast.
- Oatmeal Twist: Swap 1/2 cup of flour for rolled oats to add chew and a bit of heartiness.
- Vegan Version: Use plant-based butter and substitute eggs with flax eggs (1 tbsp ground flaxseed + 3 tbsp water per egg, chilled). Coconut sugar works well here too.
- Salted Caramel Surprise: Add chunks of soft caramel candies and sprinkle flaky sea salt on top right before baking for a sweet-salty combo.
- Seasonal Flavors: In fall, try adding a teaspoon of cinnamon or pumpkin pie spice. I once made a batch with a hint of espresso powder — subtle but adds a mocha note.
If you like experimenting, these tweaks can keep the recipe fresh and exciting without losing that signature chew and thickness. Sometimes I’ll even fold in a handful of mini chocolate chips along with the regular-sized ones for a fun texture play.
Serving & Storage Suggestions
These cookies are best served warm or at room temperature. That first bite, when the chocolate is still melty, is pure joy. I like to let them cool on a rack for about 10 minutes before digging in, but honestly, fresh out of the oven is hard to resist.
Pair them with a cold glass of milk, a cup of coffee, or even a scoop of vanilla ice cream for a simple dessert to impress. If you enjoy festive treats, these cookies would fit right in alongside a batch of mini American flag fruit pizzas for a fun party spread.
For storage, keep cooled cookies in an airtight container at room temperature for up to 5 days. They soften slightly over time but stay chewy. You can freeze baked cookies for up to 3 months; just thaw at room temperature. The dough freezes well too, so scoop and freeze before baking to have fresh cookies anytime.
Reheat gently in a microwave for 10-15 seconds or in a warm oven to bring back that freshly baked feel. I’ve noticed the flavors mellow and deepen after a day, making them even more enjoyable.
Nutritional Information & Benefits
While these chocolate chip cookies are definitely a treat, using quality ingredients makes a difference. Each cookie (based on 24 servings) roughly contains:
| Calories | 180-200 |
|---|---|
| Fat | 9-11g |
| Carbohydrates | 24-26g |
| Protein | 2-3g |
| Sugar | 15-17g |
Brown sugar provides some minerals like calcium and potassium, and real butter adds fat-soluble vitamins. For those watching gluten, swapping in a gluten-free flour blend keeps these cookies accessible. They do contain eggs, dairy, and wheat, so be mindful of allergies.
From a wellness perspective, I think a well-made cookie like this is about balance — a satisfying indulgence that can brighten your day without fuss or guilt. It’s all about quality over quantity, and these cookies fit right into that mindset.
Conclusion
Perfect thick and chewy chocolate chip cookies aren’t just a recipe; they’re a little comfort in every bite. Whether you’re making them for a quick pick-me-up or to impress friends, this recipe delivers consistent, delicious results that feel both classic and special. The balance of texture, flavor, and simplicity makes it a staple that’s hard to resist.
Feel free to customize with your favorite mix-ins or spices to make it your own. Personally, I love how they pair with a good cup of coffee or a relaxed afternoon. And hey, if you ever want to try a fruity dessert to follow, you might enjoy the easy patriotic poke cake with Jello and Cool Whip — it’s a crowd-pleaser for summer gatherings.
Give these cookies a try, and let them become your go-to when you need a sweet, satisfying bite. I’d love to hear how you make them your own, so don’t hesitate to share your tweaks and thoughts below. Baking’s better when it’s shared.
FAQs
How do I make my chocolate chip cookies thicker and chewier?
Use more brown sugar than white sugar, chill the dough before baking, and avoid overmixing. These steps help keep the cookies moist, thick, and chewy.
Can I freeze the cookie dough or baked cookies?
Yes! Dough can be scooped and frozen for up to 3 months. Baked cookies freeze well too — just thaw at room temperature or warm gently before serving.
What’s the best type of chocolate to use in these cookies?
Semi-sweet chocolate chips are classic, but mixing in some dark chocolate chips adds depth. I recommend brands like Ghirardelli for quality and melt.
How long should I chill the dough for best results?
At least 30 minutes is ideal, but chilling overnight gives the best flavor and texture. If short on time, even 15 minutes helps reduce spreading.
Can I make these cookies gluten-free or vegan?
Yes. Swap all-purpose flour with a gluten-free blend for gluten-free cookies. For vegan, use plant-based butter and flax eggs (1 tbsp ground flaxseed + 3 tbsp water per egg).
Pin This Recipe!
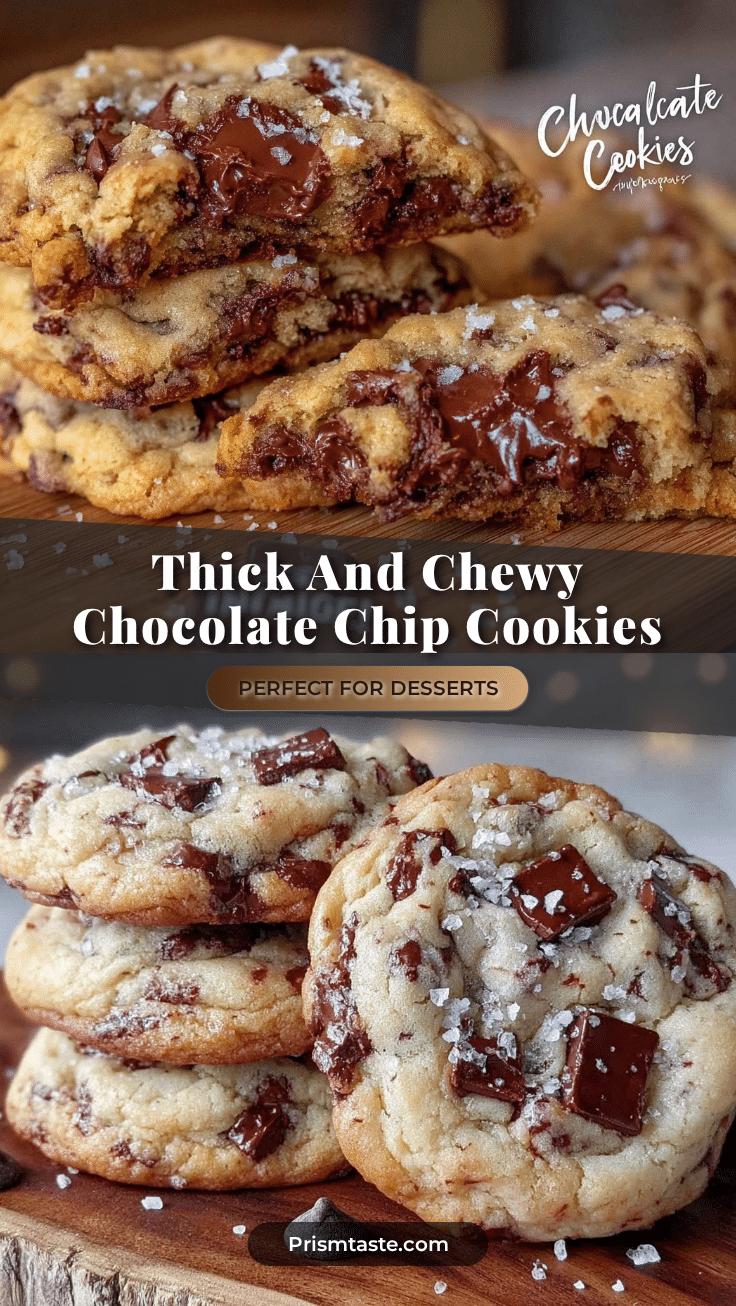
Perfect Thick and Chewy Chocolate Chip Cookies

A quick and easy homemade recipe for thick, chewy chocolate chip cookies with a soft center and slightly crispy edges, perfect for any occasion.
- Prep Time: 15 minutes
- Cook Time: 12-15 minutes
- Total Time: 45 minutes
- Yield: 24 servings 1x
- Category: Dessert
- Cuisine: American
Ingredients
- 1 cup (226g) unsalted butter, softened
- 3/4 cup (150g) light brown sugar, packed
- 1/4 cup (50g) granulated sugar
- 2 large eggs, room temperature
- 2 tsp pure vanilla extract
- 2 1/4 cups (280g) all-purpose flour
- 1 tsp baking soda
- 1/2 tsp salt
- 1 1/2 cups (about 270g) chocolate chips (semi-sweet or a mix of semi-sweet and dark)
Instructions
- Preheat your oven to 350°F (175°C) and line two baking sheets with parchment paper or silicone mats.
- In a large bowl, beat the softened unsalted butter with the light brown and granulated sugars until light and fluffy, about 3-4 minutes.
- Beat in the eggs one at a time, mixing well after each addition. Stir in the vanilla extract until creamy and smooth.
- In a separate bowl, whisk together the all-purpose flour, baking soda, and salt.
- Gradually add the dry ingredients to the wet mixture, beating on low speed or folding gently with a spatula. Avoid overmixing.
- Fold in the chocolate chips evenly with a spatula.
- Cover the dough and refrigerate for at least 30 minutes (or up to 24 hours) to firm up and prevent spreading.
- Using a cookie scoop or spoon, drop mounds of dough about 2 inches apart on the baking sheets, mounding slightly for thicker cookies.
- Bake for 12-15 minutes until edges are golden and centers are slightly soft. Cookies will firm up as they cool.
- Let the cookies rest on the baking sheet for 5 minutes before transferring to a cooling rack.
Notes
Use softened, not melted butter for best texture. Chill dough at least 30 minutes to prevent spreading and achieve thickness. Avoid overmixing once flour is added. Bake one sheet at a time for even heat distribution. Cookies look set at edges but soft in center when done; they firm up while cooling.
Nutrition
- Serving Size: 1 cookie
- Calories: 190
- Sugar: 16
- Fat: 10
- Carbohydrates: 25
- Protein: 2.5
Keywords: chocolate chip cookies, thick cookies, chewy cookies, homemade cookies, easy cookie recipe, chocolate chips, dessert