I burned three batches of small-batch chocolate chip cookies before I finally figured out what I was doing wrong. Not just slightly overdone, mind you — I’m talking about the kind of burnt where the smoke alarm becomes part of the baking process. The first batch, I thought I could just scale down my full-size recipe and call it a day. Nope. The second batch, I overcompensated and underbaked them so badly they collapsed into greasy puddles. By the third attempt, I was genuinely annoyed at a cookie. That’s when I sat down and actually thought about what makes a small batch work differently than a big one. Turns out, a lot changes when you’re only making six cookies instead of three dozen.
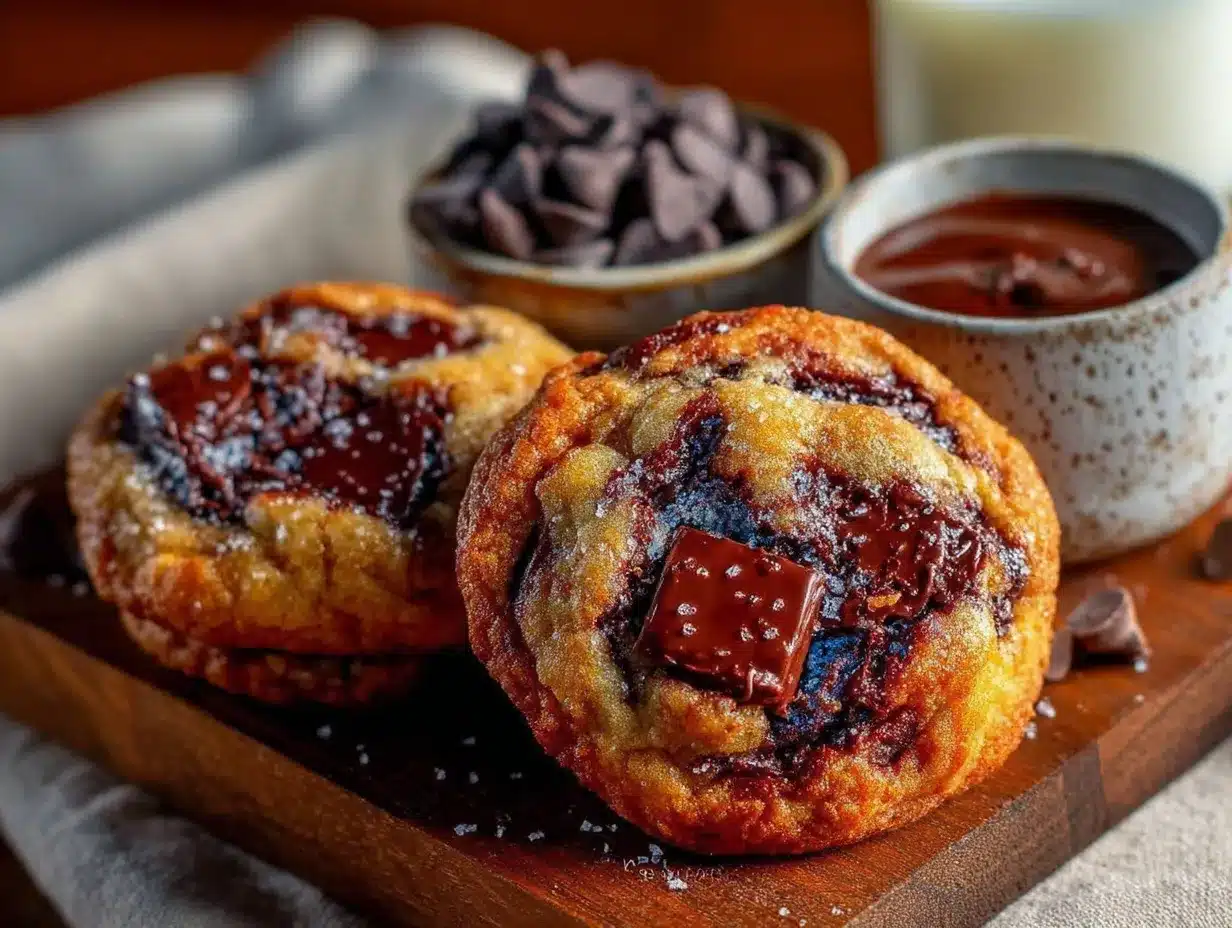
The ratio of butter to flour shifts. The way heat hits a smaller mass of dough changes. Even the pan material matters more when there’s less dough to insulate itself. I started over from scratch — testing different butter temperatures, playing with chill times, weighing ingredients instead of eyeballing them. Somewhere around attempt number seven, I bit into a cookie that made me stop mid-chew. It had that perfect edge — crispy and golden, with a center so soft it barely held together. The chocolate had melted into little pools instead of staying in solid chunks. And there were exactly six of them on the tray. Enough for two people to have three each, which feels like the perfect number, honestly. Not so many that you feel guilty, but enough that you get that third one and think, yeah, that was the right call.
These cookies aren’t trying to be anything fancy. They’re just really, really good chocolate chip cookies scaled down to human proportions. No leftover dough taking up space in your fridge. No temptation to eat raw dough at 11 PM (okay, maybe a little). Just warm, fresh cookies whenever you want them, without committing to a week’s worth of baking.
Why You’ll Love This Recipe
I’ve tested this recipe more times than I care to admit, and every single person who’s tried them has asked for the recipe. That’s not bragging — that’s just the result of being stubborn enough to keep failing until something works.
- No leftover dough — This makes exactly six cookies. No half-used bags of chocolate chips sitting around, no weird dough scraps you don’t know what to do with.
- Ready in 20 minutes — From the moment you decide you want cookies to the moment you’re eating one, we’re talking about 20 minutes. Maybe 25 if you’re slow at measuring.
- Real ingredients — Butter, sugar, flour, eggs, chocolate. Nothing weird, nothing you’ll use once and forget about.
- Perfect texture — Crispy edges, soft centers, melty chocolate. That’s the whole goal, and this recipe nails it every single time.
- No special equipment — One bowl, a whisk, a spatula. That’s it. No stand mixer required.
What makes these different from every other small-batch cookie recipe out there is the butter situation. Most recipes tell you to use melted butter for convenience, but melted butter changes the texture completely. These cookies use softened butter — just leave it out for 15 minutes while you get everything else ready. It makes a real difference in how the cookies spread and how the edges crisp up.
There’s something nice about making exactly enough for two people. It feels intentional, you know? Like you’re not just baking out of habit or because you have ingredients to use up. You’re making these cookies for a reason — a quiet evening, a movie night, a Tuesday that needed a little something.
What Ingredients You Will Need
This recipe uses simple, everyday ingredients that you probably already have in your kitchen. Nothing fancy, nothing hard to find — just good, basic baking staples that work together to make something better than the sum of their parts.
- 4 tablespoons unsalted butter, softened to room temperature — Not melted, not cold. Softened. Leave it on the counter for about 15-20 minutes before you start. I use Kerrygold when I have it, but any good unsalted butter works fine.
- 3 tablespoons granulated sugar — This gives the cookies their crispy edges. Don’t substitute brown sugar for all of it; you need the granulated for structure.
- 2 tablespoons packed light brown sugar — Adds moisture and that slight chewiness in the center. Dark brown sugar works too, but it’ll make the cookies a little darker and more molasses-y.
- 1 large egg yolk — Just the yolk. Save the white for breakfast or toss it. The yolk adds richness without making the dough too wet.
- 1/2 teaspoon vanilla extract — Real vanilla, please. The imitation stuff has its place, but this is a small batch — every ingredient matters more.
- 1/2 cup plus 2 tablespoons all-purpose flour — Spoon and level it. Scooping straight from the bag packs the flour and gives you too much, which makes dry cookies.
- 1/4 teaspoon baking soda — Fresh baking soda matters here. If yours has been sitting open for six months, it might not work as well.
- 1/4 teaspoon salt — I use fine sea salt. If you’re using kosher salt, use a little more. If you’re using table salt, use a little less.
- 1/3 cup semi-sweet chocolate chips — Or chopped chocolate from a bar. I actually prefer chopped chocolate because it melts into pools instead of staying in chip shapes. Ghirardelli or Guittard are my go-tos.
- Flaky sea salt for finishing — Optional but honestly, it makes these cookies next-level. A tiny sprinkle right when they come out of the oven changes everything.
The egg yolk thing might seem weird if you’re used to using whole eggs, but trust me on this. A whole egg would make the dough too wet for a batch this small, and you’d end up with flat, spread-out cookies. The yolk alone gives you all the richness without the extra liquid.
If you want to swap the butter for something dairy-free, use a good quality vegan butter stick — not the spreadable kind in a tub. Country Crock Plant Butter works well. Coconut oil changes the flavor and texture too much for my taste.
Equipment Needed
You don’t need much for these cookies. That’s kind of the point.
- Medium mixing bowl — Any bowl works. I use a ceramic one because it doesn’t react with anything, but glass or stainless steel is fine.
- Whisk — For creaming the butter and sugar together. A fork works in a pinch, but a whisk does a better job.
- Rubber spatula — For folding in the flour and chocolate chips. A wooden spoon works too, but a spatula gets every last bit of dough.
- Small baking sheet — A quarter sheet pan is perfect. If you only have a full-size sheet pan, that’s fine — just make sure it’s not dark-colored, which can burn the bottoms.
- Parchment paper — Non-negotiable. It prevents sticking and helps the cookies spread evenly. Silpat mats work too, but I find parchment gives better browning on the bottom.
- Cookie scoop or tablespoon — For portioning the dough evenly. A 1.5 tablespoon scoop is perfect. If you don’t have one, just use a regular spoon and try to make them roughly the same size.
- Cooling rack — Lets air circulate under the cookies so they don’t get soggy bottoms. If you don’t have one, transfer the cookies to a plate after a few minutes.
I’ve made these cookies in a toaster oven before, and they turned out great. Just keep an eye on them because toaster ovens run hotter and faster than regular ovens. Start checking at 8 minutes instead of 10.
Preparation Method
Preheat your oven to 350°F (175°C). Line your baking sheet with parchment paper. Get everything measured and ready before you start — these cookies come together fast, and you don’t want to be hunting for the vanilla while your butter and sugar are halfway creamed.
- Cream the butter and sugars together. In your medium bowl, combine the softened butter, granulated sugar, and brown sugar. Whisk vigorously for about 2 minutes until the mixture looks light, fluffy, and slightly pale. You’re looking for a texture that’s almost like a thick paste — no visible butter chunks. If you’re using a hand mixer, 1 minute on medium speed works. If you’re doing it by hand, get ready for a mini arm workout. The mixture should smell sweet and buttery at this point.
- Add the egg yolk and vanilla. Drop in the egg yolk and pour in the vanilla extract. Whisk until everything is fully combined and smooth. The mixture might look a little separated at first — keep going until it comes back together into a uniform, glossy paste. This usually takes about 30 seconds. Scrape down the sides of the bowl with your spatula to make sure nothing is hiding.
- Mix the dry ingredients separately. In a small bowl, whisk together the flour, baking soda, and salt. This step matters more than you think — if you dump the baking soda directly into the wet mixture, you’ll end up with bitter spots in your cookies. Whisking it into the flour first distributes everything evenly.
- Fold in the dry ingredients. Add the flour mixture to the wet ingredients. Use your rubber spatula to fold everything together gently. Start from the bottom of the bowl, scraping up and over. Stop as soon as you no longer see streaks of flour. Overmixing at this stage develops gluten, which makes tough cookies instead of tender ones. The dough should be soft and slightly sticky but hold together when pressed.
- Fold in the chocolate chips. Add the chocolate chips and fold them in with a few gentle strokes. Make sure they’re distributed evenly throughout the dough. If you’re using chopped chocolate, some of the smaller pieces will melt into the dough and create those beautiful chocolate swirls. If you’re using chips, they’ll stay more intact — both are delicious, just different.
- Chill the dough (optional but recommended). Here’s the thing — you can bake these right away and they’ll be good. But if you chill the dough for 15-20 minutes in the fridge, the cookies will be thicker and chewier. The butter solidifies slightly, which means the cookies spread less in the oven. I usually chill them while the oven preheats, so it doesn’t add any extra time.
- Portion the dough. Scoop the dough into 6 equal portions, about 1.5 tablespoons each. Place them on the prepared baking sheet, spacing them about 2 inches apart. They’ll spread, so give them room. If you want bakery-style cookies, roll each portion into a ball and then pull it apart slightly in the middle — this creates those craggy edges that get extra crispy.
- Bake for 10-12 minutes. Bake at 350°F (175°C) for 10 minutes for soft centers, 12 minutes for crispier cookies. The edges should be golden brown and the centers should look slightly underdone — puffy and pale. They’ll continue cooking on the hot baking sheet after you pull them out. If you wait until the centers look fully baked, they’ll be overdone by the time they cool.
- Add flaky salt immediately. As soon as the cookies come out of the oven, sprinkle a tiny pinch of flaky sea salt on each one. This is optional, but it’s the difference between a good cookie and a “wow, what did you put in these?” cookie. The salt cuts the sweetness and makes the chocolate taste richer.
- Cool on the baking sheet for 5 minutes. Let the cookies sit on the hot baking sheet for exactly 5 minutes. This is when they finish setting up. After 5 minutes, transfer them to a cooling rack. If you try to move them too early, they’ll fall apart. If you leave them too long, the bottoms might get too dark from the residual heat.
- Serve warm. These cookies are at their absolute best within 15 minutes of coming out of the oven. The chocolate is still melty, the edges are crisp, and the center is soft. Pour yourself a glass of milk and enjoy the moment.
Cooking Tips & Techniques
I learned most of these the hard way — by making mistakes and eating the evidence. Here’s what I wish someone had told me before I started.
Temperature matters more than you think. Cold butter won’t cream properly with the sugar. Melted butter makes flat, greasy cookies. Room temperature butter — where it gives slightly when you press it but still holds its shape — is the sweet spot. If you forgot to take it out ahead of time, cut it into small cubes and let it sit for 10 minutes. It’ll soften faster that way.
Weigh your flour if you can. I know, I know — weighing ingredients feels fussy. But flour is incredibly inconsistent when measured by volume. One cup can weigh anywhere from 120 to 150 grams depending on how you scoop it. For this recipe, 75 grams of flour is the target. If you don’t have a scale, spoon the flour into your measuring cup and level it off with a knife. Don’t scoop directly from the bag.
Don’t overbake. This is the most common mistake I see. People wait until the cookies look “done” in the oven, but by then they’re already overbaked. Pull them when the edges are golden and the centers are still pale and puffy. They’ll look underdone. That’s correct. The carryover cooking will finish them perfectly.
Use a light-colored baking sheet. Dark sheets absorb more heat and can burn the bottoms of your cookies before the tops are done. If you only have dark sheets, reduce the oven temperature by 25°F and check the cookies a minute earlier.
Let the cookies rest. Those 5 minutes on the hot baking sheet are crucial. The cookies are still cooking, the structure is setting, and the chocolate is cooling down from molten to melty. If you rush this step, you’ll end up with a crumbly mess. Patience pays off here.
I once forgot to add the sugar to a batch. Just completely spaced on it. The cookies were these sad, flat, bland discs that tasted like flour and butter. My dog wouldn’t even eat them. So yeah — double-check your ingredients before you start mixing.
Variations & Adaptations
This recipe is forgiving enough to play around with. Here are some variations I’ve tried and loved.
Double Chocolate Chip Cookies. Replace 1 tablespoon of the flour with unsweetened cocoa powder. Use dark chocolate chips instead of semi-sweet. The cookies come out rich and fudgy, almost like brownies in cookie form. My friend called them “dangerous” and I took that as a compliment.
Brown Butter Version. Brown 4 tablespoons of butter in a small pan over medium heat until it turns amber and smells nutty — about 3-4 minutes. Let it cool completely before using. Brown butter adds a deep, toasty flavor that makes these cookies taste way more complicated than they are. Just note that the dough will be softer, so chill it for at least 30 minutes before baking.
Gluten-Free Option. Swap the all-purpose flour for a good gluten-free baking blend that contains xanthan gum. I’ve had the best luck with King Arthur Measure for Measure. The texture is slightly more delicate, so handle the dough gently and chill it a bit longer.
Add-In Ideas. Toss in 2 tablespoons of chopped toasted walnuts or pecans along with the chocolate chips. Or swap half the chocolate chips for white chocolate and add a handful of dried cranberries. For a salty-sweet twist, crush up some pretzels and fold them in — the salt and crunch are incredible against the soft cookie.
Vegan Adaptation. Use vegan butter sticks and replace the egg yolk with 1 tablespoon of aquafaba (the liquid from a can of chickpeas) mixed with 1/2 teaspoon of cornstarch. The texture won’t be exactly the same, but it’s surprisingly close. Chill the dough for at least 30 minutes for best results.
My personal favorite variation is the brown butter version with chopped dark chocolate and a sprinkle of smoked sea salt. It sounds fancy, but it’s really just the same recipe with one extra step. The brown butter adds this almost caramel-like depth that makes the cookies taste like they came from a bakery.
Serving & Storage Suggestions
These cookies are best served warm, ideally within 15 minutes of coming out of the oven. That’s when the edges are perfectly crisp and the center is still soft and gooey. Pair them with a cold glass of milk, a hot cup of coffee, or — my personal favorite — a scoop of vanilla ice cream sandwiched between two cookies.
If you’re serving these for a dessert situation, arrange them on a small plate with a dusting of powdered sugar and a few fresh berries on the side. It looks prettier than just throwing them on a plate, and the tartness of the berries cuts through the sweetness nicely.
Storage: These cookies are really best eaten the same day. But if you have leftovers (unlikely, but possible), store them in an airtight container at room temperature for up to 2 days. They’ll lose some of their crispness, but they’ll still be good. To bring back some of that fresh-baked texture, pop them in a 300°F oven for 3-4 minutes.
Freezing: You can freeze the unbaked dough balls on a parchment-lined baking sheet until solid, then transfer them to a freezer bag. Bake directly from frozen, adding 2-3 minutes to the baking time. This way, you can have fresh cookies whenever the craving hits without making a whole batch. I keep a stash in my freezer for emergencies — and by emergencies, I mean Tuesday nights.
The flavors actually develop a bit overnight if you store the baked cookies in an airtight container. The moisture redistributes, and the cookies become slightly chewier. They won’t be as crispy as fresh, but they’ll have a different kind of appeal — almost like a soft-baked bakery cookie.
Nutritional Information & Benefits
Let’s be real — these are cookies. They’re a treat, not a health food. But knowing what’s in them helps you enjoy them mindfully.
Per cookie (based on 6 cookies per batch):
- Calories: approximately 220
- Total Fat: 12g
- Saturated Fat: 7g
- Cholesterol: 55mg
- Sodium: 180mg
- Total Carbohydrates: 27g
- Sugars: 16g
- Protein: 3g
These numbers are estimates and will vary based on the specific brands and ingredients you use. If you use dark chocolate chips with higher cocoa content, you’ll get more antioxidants and less sugar. If you use milk chocolate, you’ll get more sugar and a creamier flavor. It’s all about what you prefer.
The butter provides vitamin A and healthy fats, while the egg yolk adds choline and protein. The chocolate contains flavonoids, which are antioxidants that support heart health. Is that a reason to eat six cookies? No. But it’s nice to know you’re getting something besides sugar.
If you’re watching your sugar intake, you can reduce the granulated sugar to 2 tablespoons without significantly affecting the texture. The cookies won’t be as sweet, but they’ll still be good. You can also use sugar-free chocolate chips, though I find they don’t melt as nicely.
These cookies are not gluten-free, dairy-free, or vegan in their standard form, but I’ve included adaptations above for each of those dietary needs.
Conclusion
These small-batch chocolate chip cookies are exactly what they say they are — six perfect cookies for two people. No more, no less. No leftover dough, no huge batch that takes over your kitchen, no pressure to share with people you don’t really want to share with. Just warm, melty, homemade cookies that taste like you spent way more effort than you actually did.
I love this recipe because it’s honest. It doesn’t pretend to be something it’s not. It’s not a health food. It’s not a complicated pastry project. It’s just a really good chocolate chip cookie, scaled down to fit a quiet evening or a small craving. And honestly? That’s enough.
Try these cookies once, and I think you’ll find yourself coming back to them. They’re the kind of recipe you memorize without trying — simple enough to make on a whim, good enough to make you wonder why you ever bothered with full batches.
If you make these, let me know how they turn out. Leave a comment below, tag me in your photos, tell me if you added the flaky salt or went without. I want to hear about your cookie adventures. And if you’re looking for other small-batch treats, check out my small-batch fig jam or these caramelized grilled peach crisps — they’re both designed for two people, just like these cookies. Happy baking, friend!
Frequently Asked Questions
Can I double this recipe?
Absolutely. Just double every ingredient and bake in two batches or on two separate baking sheets. The baking time stays the same — just make sure your oven can handle the extra trays without losing heat.
Why did my cookies turn out flat?
Flat cookies usually mean the butter was too warm or the dough wasn’t chilled. Make sure your butter is softened but not melted, and pop the dough in the fridge for 15-20 minutes if your kitchen is warm. Also check that your baking soda is fresh — old baking soda loses its power.
Can I use margarine instead of butter?
I don’t recommend it. Margarine has a higher water content than butter, which changes the texture and spread of the cookies. If you need a dairy-free option, use a good vegan butter stick instead.
How do I get bakery-style cookies with craggy edges?
After portioning the dough into balls, pull each ball apart gently in the middle — like you’re trying to break it in half but stopping halfway. This creates uneven edges that get extra crispy and golden in the oven. It’s a small trick that makes a big visual difference.
Can I make these cookies without an oven?
Yes! You can bake them in a toaster oven at 350°F for 8-10 minutes. Just keep an eye on them because toaster ovens run hot. You can also try an air fryer at 325°F for 6-8 minutes, though the texture will be slightly different — crispier on the outside and softer in the middle.
Pin This Recipe!
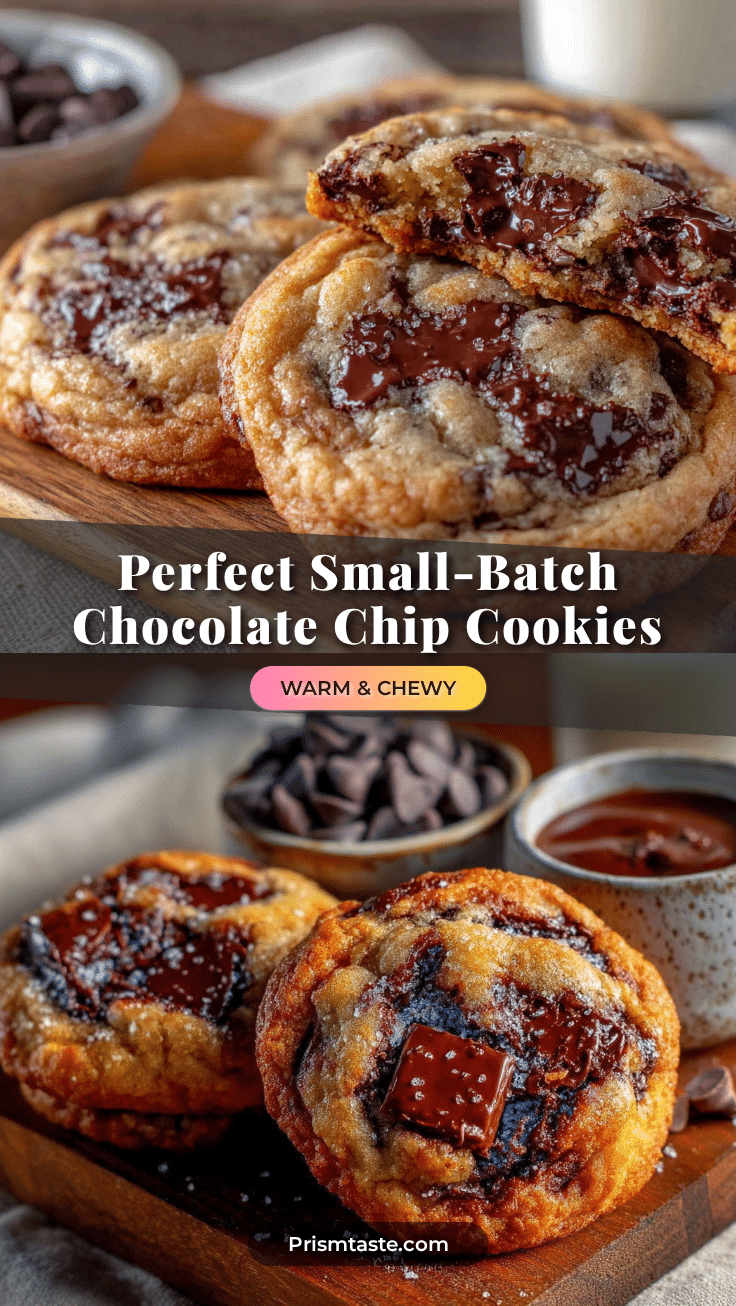
Perfect Small-Batch Chocolate Chip Cookies for Two
These small-batch chocolate chip cookies make exactly six cookies for two people. With crispy edges, soft centers, and melty chocolate, they’re ready in 20 minutes using simple ingredients and no special equipment.
- Prep Time: 10 minutes
- Cook Time: 10-12 minutes
- Total Time: 20-22 minutes
- Yield: 6 cookies (3 per person) 1x
- Category: Dessert
- Cuisine: American
Ingredients
- 4 tablespoons unsalted butter, softened to room temperature
- 3 tablespoons granulated sugar
- 2 tablespoons packed light brown sugar
- 1 large egg yolk
- 1/2 teaspoon vanilla extract
- 1/2 cup plus 2 tablespoons all-purpose flour (75 grams)
- 1/4 teaspoon baking soda
- 1/4 teaspoon fine sea salt
- 1/3 cup semi-sweet chocolate chips or chopped chocolate
- Flaky sea salt for finishing (optional)
Instructions
- Preheat oven to 350°F (175°C). Line a baking sheet with parchment paper.
- In a medium bowl, whisk together softened butter, granulated sugar, and brown sugar for about 2 minutes until light, fluffy, and slightly pale.
- Add egg yolk and vanilla extract; whisk until fully combined and smooth, about 30 seconds. Scrape down sides of bowl.
- In a small bowl, whisk together flour, baking soda, and salt.
- Add dry ingredients to wet ingredients; fold gently with a rubber spatula until no streaks of flour remain. Do not overmix.
- Fold in chocolate chips until evenly distributed.
- Chill dough for 15-20 minutes (optional but recommended for thicker cookies).
- Scoop dough into 6 equal portions (about 1.5 tablespoons each) and place on prepared baking sheet, spacing 2 inches apart. For craggy edges, roll into balls and gently pull apart in the middle.
- Bake for 10-12 minutes, until edges are golden brown and centers are still pale and puffy.
- Immediately sprinkle with flaky sea salt if desired.
- Cool on baking sheet for 5 minutes, then transfer to a cooling rack.
- Serve warm, ideally within 15 minutes of baking.
Notes
For best results, use room temperature butter (not melted). Weigh flour for accuracy (75g). Do not overbake; cookies continue cooking on hot sheet. Use a light-colored baking sheet to prevent burning. For thicker cookies, chill dough 15-20 minutes. For vegan option, use vegan butter sticks and replace egg yolk with 1 tablespoon aquafaba mixed with 1/2 teaspoon cornstarch.
Nutrition
- Serving Size: 1 cookie
- Calories: 220
- Sugar: 16
- Sodium: 180
- Fat: 12
- Saturated Fat: 7
- Carbohydrates: 27
- Fiber: 1
- Protein: 3
Keywords: small-batch chocolate chip cookies, cookies for two, easy cookie recipe, 6 cookies, chocolate chip cookies


