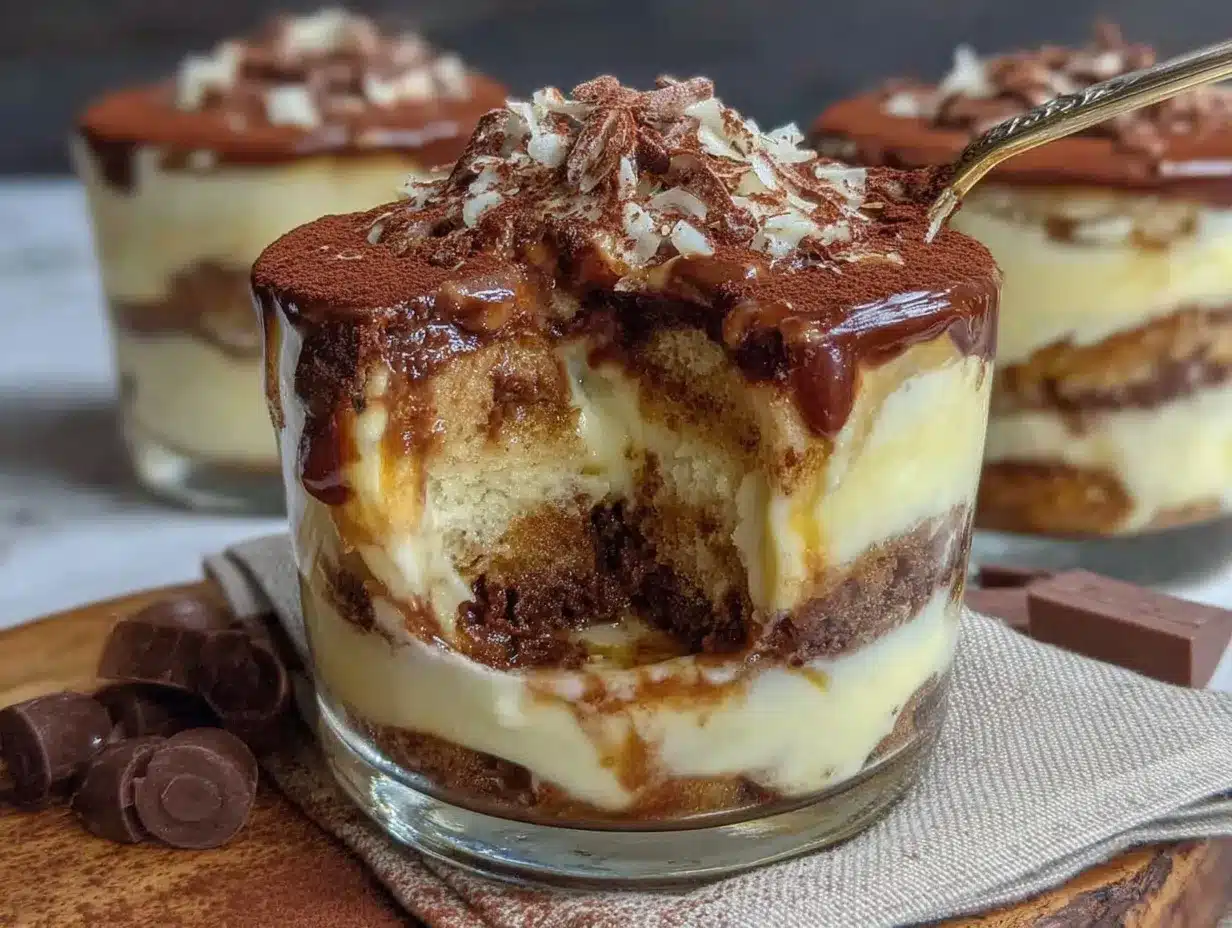
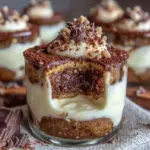
“You serious? Tiramisu in a cup?” my friend joked over the phone, laughter bubbling through the line. I had just whipped together these Perfect Classic Tiramisu Cups with Espresso-Soaked Ladyfingers on a whim, mostly because I was out of the usual baking pans and too tired for the fuss of layering in a big dish. Honestly, I wasn’t convinced this would work at first. But as I spooned that creamy mascarpone and espresso-infused ladyfinger combo into each glass, something clicked. It wasn’t just easier—it was downright charming.
Late that evening, while the kitchen smelled richly of coffee and cocoa, I found myself savoring one of those cups in the quiet glow of the counter light. There’s something about this version of tiramisu that feels intimate, like a secret indulgence you serve yourself after a messy day. It’s the perfect blend of bold espresso, velvety cream, and just enough sweetness, all tucked neatly into these petite cups. No slicing, no fuss—just pure, classic tiramisu goodness in a handheld dessert.
After making this recipe a handful of times (okay, maybe more), it’s become my go-to for when I want a no-fail dessert that impresses without stress. The espresso-soaked ladyfingers give it the perfect hit of coffee flavor, while the mascarpone mixture is luxuriously smooth but light enough to keep you coming back for more. It’s a quiet little revelation that’s stuck with me because it feels honest and comforting—like a small moment of calm in a hectic week.
Why You’ll Love This Recipe
Crafting these Perfect Classic Tiramisu Cups with Espresso-Soaked Ladyfingers has been a rewarding experiment, and I’m happy to share why this recipe stands out from the crowd:
- Quick & Easy: Ready in under 30 minutes, these cups are perfect for last-minute dessert cravings or casual get-togethers.
- Simple Ingredients: No fancy or hard-to-find items here—just pantry staples like espresso, ladyfingers, mascarpone, and a few others.
- Perfect for Any Occasion: Whether it’s a cozy dinner for two, a holiday treat, or a sweet finish to brunch, these cups fit the bill.
- Crowd-Pleaser: Every time I’ve brought these over, friends and family sneak seconds—kids and adults alike adore them.
- Unbelievably Delicious: The espresso-soaked ladyfingers bring that classic tiramisu bitterness, balanced beautifully by the creamy, lightly sweet mascarpone filling.
This isn’t just another tiramisu recipe. The way I soak the ladyfingers in espresso (a little splash of coffee liqueur if you like) ensures every bite carries that authentic Italian vibe but in a convenient, individual portion. Plus, layering in cups means no slicing disasters—just pure, mess-free indulgence. Honestly, it’s the kind of dessert that makes you close your eyes and savor each spoonful, no rush needed.
If you’ve enjoyed desserts like my creamy lemon ricotta stuffed shells for a cozy meal or the easy slow cooker salsa verde chicken burrito bowls for a quick dinner fix, this tiramisu cup recipe will slot right into your repertoire as that effortlessly impressive sweet finish.
What Ingredients You Will Need
This tiramisu recipe uses simple, wholesome ingredients to deliver bold flavor and satisfying texture without the fuss. Most of these are pantry staples or easy to find at any grocery store, and there’s room for simple swaps if needed.
- For the espresso-soaked ladyfingers:
- Ladyfinger cookies (about 24 pieces) – I prefer Savoiardi brand for their light, airy texture
- Strong brewed espresso (1 cup / 240 ml), cooled – espresso powder with hot water works in a pinch
- Optional: 2 tablespoons coffee liqueur (like Kahlúa) for added depth
- For the mascarpone filling:
- Mascarpone cheese (8 oz / 225 g), room temperature — look for fresh, creamy mascarpone for best texture
- Heavy cream (1 cup / 240 ml), cold — whipping cream or heavy whipping cream both work
- Granulated sugar (1/3 cup / 65 g) — adjust slightly to taste
- Vanilla extract (1 teaspoon) — pure vanilla adds a subtle warmth
- Egg yolks (3 large, room temperature) — optional but traditional for richness; pasteurized if preferred
- For garnish:
- Unsweetened cocoa powder, sifted — for dusting
- Dark chocolate shavings or curls (optional) — adds a touch of elegance
Ingredient tips: If you want a lighter version, swap heavy cream with coconut cream or a dairy-free alternative, but mascarpone is irreplaceable for that authentic flavor. For gluten-free, try ladyfingers made with gluten-free flour or a crisp sponge cake cut into strips. Freshly brewed espresso always beats instant for depth and aroma. I usually make my espresso with a stovetop moka pot—it gives that rich, bold flavor you want for soaking.
Equipment Needed
- Mixing bowls (medium and large) – glass or stainless steel preferred for whipping cream
- Electric hand mixer or stand mixer – essential for whipping cream and mascarpone filling to the right texture
- Measuring cups and spoons – for accuracy with sugar, vanilla, and liquids
- Espresso maker, moka pot, or strong coffee brewer – needed to make the espresso for soaking ladyfingers
- Small fine-mesh sieve – handy for dusting cocoa powder evenly on top
- Serving glasses or dessert cups (about 6-8, 6-ounce / 180 ml capacity each) – clear glasses work well to show off the layers
- Spatula and small spoon – for folding mascarpone and layering the cups neatly
If you don’t have a stand mixer, a good hand mixer works just fine. When dusting cocoa, a small sieve or even a clean tea strainer does the trick. The key is clean layers and smooth cream, so take your time folding the mascarpone mixture gently. I’ve tried this in mason jars and wine glasses—both look charming and make perfect portions for guests.
Preparation Method
- Brew the espresso: Prepare 1 cup (240 ml) of strong espresso using your preferred method. Allow it to cool completely, then stir in the coffee liqueur if using. Set aside. (About 10 minutes)
- Whip the cream: In a chilled large mixing bowl, pour the cold heavy cream and begin whipping on medium speed. When it starts to thicken, gradually add the granulated sugar. Continue whipping until soft peaks form. (3-5 minutes)
- Prepare mascarpone mixture: In a separate bowl, gently whisk the mascarpone cheese until smooth. If using egg yolks, whisk them lightly in a small bowl until pale and slightly thickened, then fold them carefully into the mascarpone.
- Combine cream and mascarpone: Fold the whipped cream into the mascarpone mixture in batches, using a spatula and gentle folding motions. The goal is a light, airy texture without deflating the cream. Add vanilla extract and fold once more. (3-4 minutes)
- Soak the ladyfingers: Quickly dip each ladyfinger into the cooled espresso mixture for about 1-2 seconds per side. Don’t soak too long or they’ll become mushy. Lay them flat on a plate to drain excess liquid.
- Assemble the cups: Place a layer of espresso-soaked ladyfingers at the bottom of each cup (about 2-3 pieces, broken to fit). Spoon or pipe a generous layer of mascarpone filling over the ladyfingers (about 1/3 cup / 80 ml). Repeat with a second layer of soaked ladyfingers and mascarpone. Finish with a final spread of mascarpone on top.
- Chill and garnish: Cover cups with plastic wrap and refrigerate for at least 4 hours, preferably overnight, to let flavors meld and cream set. Before serving, dust with sifted cocoa powder and sprinkle dark chocolate shavings if desired.
Note: If you’re short on time, chilling for 2 hours still yields a tasty dessert, but the texture improves with longer resting. When dipping ladyfingers, speed is key—you want a moist but intact base. The mascarpone mixture should be silky and fluffy; if it feels heavy, you might have overmixed the cream.
Cooking Tips & Techniques
Making tiramisu cups might seem simple, but a few tricks can really make the difference:
- Choose quality mascarpone: Some brands can be grainy or overly dense. I’ve found that fresh, high-fat mascarpone creates a smoother and richer filling.
- Whip cream just right: Stop whipping at soft peaks to keep the filling light. Overwhipping leads to grainy texture or butter-like lumps.
- Espresso soaking timing: Dip ladyfingers quickly—about 1 second per side. Too long and they turn into mush, ruining the layered effect.
- Use room temperature mascarpone: It blends more easily with cream and egg yolks, preventing lumps.
- Folding technique: Use a gentle folding motion rather than stirring to keep air in the cream mixture.
- Chill adequately: Don’t skimp on the refrigeration time. I’ve learned the hard way that tiramisu tastes best after a good rest, allowing flavors to meld and textures to set properly.
- Layering in cups: Smaller portions chill faster and look inviting. Try clear glasses to show off the beautiful layers.
Once, I rushed the soaking step and ended up with a soggy mess. Lesson learned: speed is your friend, and it helps to pour espresso into a shallow dish for easy dipping. For an extra touch, sprinkle a pinch of cinnamon in the cocoa dusting for a subtle twist. And if you’re into a boozy kick, a splash of coffee liqueur or dark rum never hurts.
Variations & Adaptations
There’s room to make these tiramisu cups your own, whether for dietary needs or flavor preferences:
- Non-alcoholic version: Simply omit coffee liqueur and replace with extra espresso or a hint of vanilla extract.
- Gluten-free twist: Use gluten-free ladyfingers or substitute with thin almond flour cookies for a nutty flavor.
- Chocolate lovers’ edition: Mix cocoa powder into the mascarpone filling and layer with chocolate-dipped ladyfingers for a mocha effect.
- Fruit infusion: Add a layer of fresh raspberries or strawberries between mascarpone layers for brightness and color.
- Dairy-free option: Swap mascarpone with a blend of coconut cream and vegan cream cheese, and use coconut-based whipping cream.
I once added a thin layer of homemade salted caramel between the ladyfingers and mascarpone—unexpected but wildly popular at a dinner party. For a lighter feel, try folding in some whipped Greek yogurt with the mascarpone for a tangy edge. These cups can also be assembled in mini mason jars for gift-giving or party favors.
Serving & Storage Suggestions
Serve these tiramisu cups chilled for the best texture and flavor. I like to bring them out straight from the fridge, letting guests dust their own cocoa powder for a bit of interactive fun. Presentation-wise, clear glasses highlight the beautiful layered contrast of espresso-soaked ladyfingers and creamy mascarpone.
Pair your tiramisu cups with a robust espresso or a glass of dessert wine for a lovely finish. They also make a perfect sweet ending after a meal like tender crockpot French dip sandwiches or alongside a simple fruit salad to balance richness.
Store leftovers covered in the refrigerator for up to 3 days. The flavors deepen over time, making the dessert even more luscious. Avoid freezing, as the creamy texture can become grainy once thawed. Reheat is not recommended; tiramisu is best enjoyed cold.
Before serving, give a gentle stir or fresh cocoa dusting if it’s been sitting a while. The delicate espresso aroma will always be the star here, inviting another bite.
Nutritional Information & Benefits
Each serving of these tiramisu cups has approximately 350-400 calories, depending on portion size and optional ingredients. The mascarpone and heavy cream contribute to a rich, satisfying dessert, while espresso adds a natural caffeine boost and antioxidants.
While this is definitely a treat, the protein from egg yolks and cheese offers some satiety, making it a balanced indulgence. For gluten-free or dairy-free options, swapping ingredients allows accommodation of dietary restrictions without losing much of the flavor.
Espresso itself is known to aid digestion and enhance alertness. Plus, this dessert’s portion-controlled presentation helps with mindful eating—no giant slices to overdo it.
Conclusion
These Perfect Classic Tiramisu Cups with Espresso-Soaked Ladyfingers have become one of my favorite easy desserts that still bring that traditional Italian charm. They’re simple to make, use straightforward ingredients, and deliver a creamy, coffee-kissed delight every time. The best part is how adaptable they are—you can tweak layers, flavors, and sizes to fit your mood or occasion.
I love offering these at casual dinners or when I want something a little special without fuss. It’s satisfying to see people’s faces light up with that first spoonful—trust me, they’ll be asking for the recipe again. If you try this out, I’d love to hear what variations you come up with or how you serve them. Sharing those moments makes the kitchen feel even cozier.
So go ahead, treat yourself to a little cup of indulgence—you deserve it.
FAQs About Perfect Classic Tiramisu Cups
Can I make tiramisu cups ahead of time?
Yes! In fact, chilling the tiramisu cups for at least 4 hours or overnight helps the flavors meld and the texture set perfectly.
What can I use if I don’t have mascarpone cheese?
You can substitute mascarpone with a mix of cream cheese and heavy cream, but the flavor will be slightly different. For a lighter option, blend ricotta with cream, but it won’t be as rich.
How long should I soak the ladyfingers in espresso?
Dip each ladyfinger quickly for about 1-2 seconds per side. Too long and they get soggy, which affects the texture of the dessert.
Is it safe to use raw egg yolks in tiramisu?
Using pasteurized eggs is the safest option if you’re concerned. Alternatively, you can skip eggs or use a cooked zabaglione mixture to avoid raw eggs.
Can I make this dessert dairy-free?
Yes, by using dairy-free cream cheese or mascarpone alternatives and coconut or almond-based whipping cream, you can create a delicious dairy-free tiramisu cup.
Pin This Recipe!
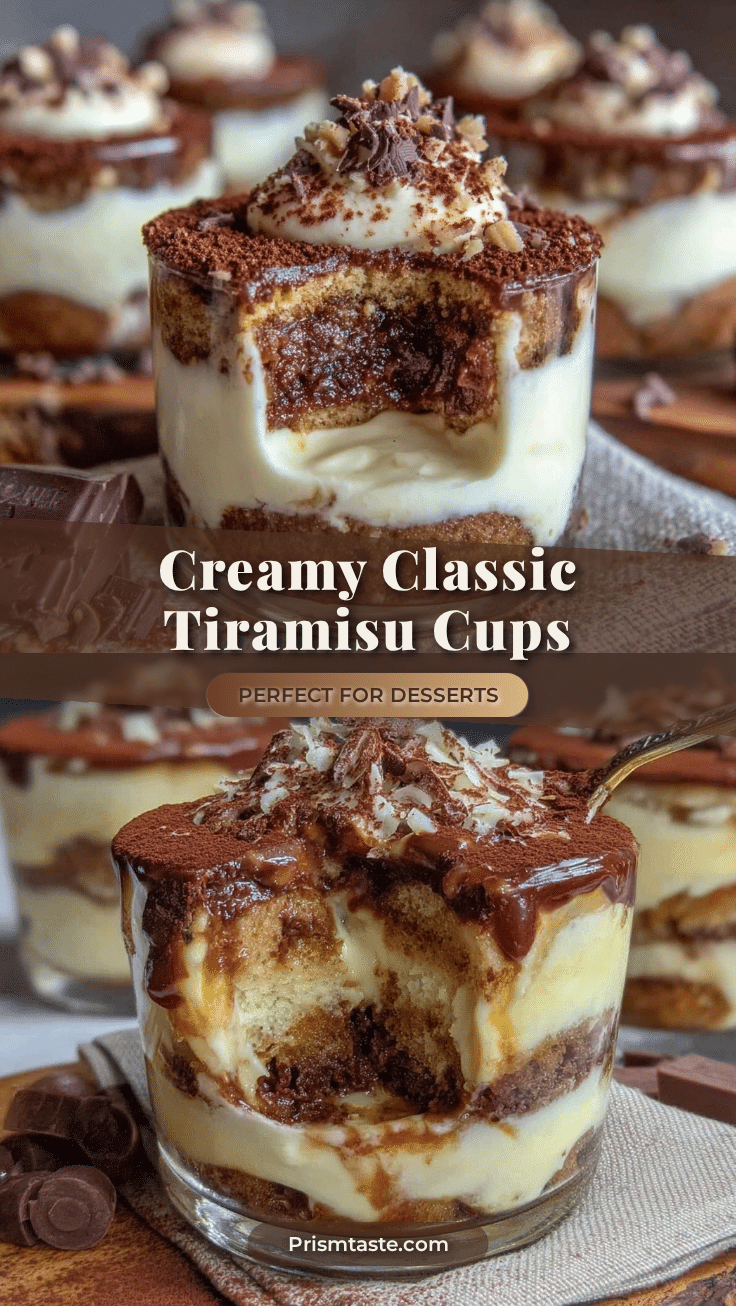
Perfect Classic Tiramisu Cups Recipe Easy Espresso-Soaked Ladyfingers
A quick and easy individual tiramisu dessert featuring espresso-soaked ladyfingers layered with a creamy mascarpone filling, perfect for any occasion.
- Prep Time: 15 minutes
- Cook Time: 10 minutes
- Total Time: 4 hours 25 minutes
- Yield: 6-8 servings 1x
- Category: Dessert
- Cuisine: Italian
Ingredients
- 24 ladyfinger cookies (Savoiardi preferred)
- 1 cup (240 ml) strong brewed espresso, cooled (espresso powder with hot water works as substitute)
- Optional: 2 tablespoons coffee liqueur (like Kahlúa)
- 8 oz (225 g) mascarpone cheese, room temperature
- 1 cup (240 ml) heavy cream, cold (whipping cream or heavy whipping cream)
- 1/3 cup (65 g) granulated sugar
- 1 teaspoon vanilla extract
- 3 large egg yolks, room temperature (optional, pasteurized preferred)
- Unsweetened cocoa powder, sifted (for dusting)
- Optional: dark chocolate shavings or curls (for garnish)
Instructions
- Brew 1 cup (240 ml) of strong espresso using your preferred method. Allow it to cool completely, then stir in coffee liqueur if using. Set aside.
- In a chilled large mixing bowl, pour the cold heavy cream and begin whipping on medium speed. When it starts to thicken, gradually add the granulated sugar. Continue whipping until soft peaks form.
- In a separate bowl, gently whisk the mascarpone cheese until smooth. If using egg yolks, whisk them lightly in a small bowl until pale and slightly thickened, then fold them carefully into the mascarpone.
- Fold the whipped cream into the mascarpone mixture in batches using a spatula and gentle folding motions. Add vanilla extract and fold once more until light and airy.
- Quickly dip each ladyfinger into the cooled espresso mixture for about 1-2 seconds per side. Lay them flat on a plate to drain excess liquid.
- Place a layer of espresso-soaked ladyfingers at the bottom of each cup (about 2-3 pieces, broken to fit). Spoon or pipe a generous layer of mascarpone filling over the ladyfingers (about 1/3 cup / 80 ml). Repeat with a second layer of soaked ladyfingers and mascarpone. Finish with a final spread of mascarpone on top.
- Cover cups with plastic wrap and refrigerate for at least 4 hours, preferably overnight, to let flavors meld and cream set.
- Before serving, dust with sifted cocoa powder and sprinkle dark chocolate shavings if desired.
Notes
Use fresh, high-fat mascarpone for best texture. Whip cream to soft peaks only to avoid grainy texture. Dip ladyfingers quickly (1-2 seconds per side) to prevent sogginess. Chill at least 4 hours or overnight for best flavor and texture. For gluten-free, use gluten-free ladyfingers or almond flour cookies. For dairy-free, substitute mascarpone and cream with coconut cream and vegan cream cheese. Coffee liqueur is optional and can be omitted for non-alcoholic version.
Nutrition
- Serving Size: About 1 cup (6-ounce
- Calories: 375
- Sugar: 18
- Sodium: 90
- Fat: 28
- Saturated Fat: 17
- Carbohydrates: 22
- Fiber: 1
- Protein: 6
Keywords: tiramisu, tiramisu cups, espresso-soaked ladyfingers, mascarpone dessert, easy tiramisu, classic tiramisu, individual tiramisu, no-bake dessert