I want something that feels like a splurge but doesn’t require turning on the oven. That’s where I land, mentally, every time I’ve got a serious sweet tooth and a container of strawberries threatening to go soft. The craving isn’t for plain fruit, and it’s not for a whole cheesecake either. It’s for that perfect middle ground—something handheld, bite-sized, and dangerously easy to eat four of before you realize what happened. These Perfect Chocolate Covered Strawberry Cheesecake Bites are exactly that. No baking, no complicated steps, just a little patience while they chill. Honestly, they solve a lot of problems in one tiny, delicious package.
The first time I made these, I was testing a batch for a small get-together and accidentally ate half the tray before anyone arrived. The combination of the creamy, tangy cheesecake filling with a fresh strawberry center, all wrapped in a crisp shell of dark chocolate? It hits every single note. It’s rich but not heavy, sweet but balanced by that slight bitterness from the chocolate. And the texture contrast—soft, creamy, and then that snap when you bite through the coating—is pure magic. I’ve been tweaking the ratio ever since, and this version is the one I keep coming back to. It’s the one that disappears fastest, and that’s always a good sign.
Why You’ll Love These Cheesecake Bites
- No Bake, No Stress: You don’t need an oven or any fancy equipment. Just a mixer, a freezer, and a little bit of patience. Perfect for hot days when you want dessert without heating up the kitchen.
- Simple Ingredients: Cream cheese, heavy cream, strawberries, and chocolate chips. That’s basically it. No weird stabilizers or hard-to-find extracts.
- Perfect for Entertaining: These look incredibly fancy on a platter. People assume you spent hours in the kitchen. Let them wonder. They’re actually super simple to throw together.
- Crowd-Pleaser: I’ve brought these to potlucks, birthday parties, and casual dinners. They get devoured every single time. Kids and adults go nuts for them.
- Unbelievably Delicious: The combination of tangy cheesecake, juicy strawberry, and rich chocolate is a classic for a reason. It just works.
What makes this recipe different from all the other versions out there? It’s the texture of the filling. I use a specific ratio of cream cheese to heavy cream that creates a filling that’s light and mousse-like, not dense or gluey. It holds its shape perfectly when frozen but softens to a luscious, creamy consistency once it hits room temperature for a few minutes. Plus, I add a tiny pinch of salt to the chocolate coating. It sounds small, but it makes the whole thing sing. It’s not just another dessert—it’s the best version of this idea, tested and perfected through many, many batches (and a few failures).
This recipe is the kind you make when you want to impress someone without breaking a sweat. Or when you want to treat yourself on a Tuesday night. No judgment here. Just really good, bite-sized cheesecake bliss.
What Ingredients You Will Need
This recipe relies on a handful of quality ingredients to deliver that perfect balance of creamy, fruity, and chocolatey. Nothing complicated here, just a few key players that do all the heavy lifting.
- 8 ounces full-fat cream cheese, softened: Don’t even think about using low-fat here. The full-fat version gives you that rich, velvety texture that makes these bites feel decadent. Let it sit out for at least 30 minutes before you start so it blends smoothly without lumps.
- 1/2 cup powdered sugar: This dissolves easily into the cream cheese, creating a smooth sweetness without any graininess. You can adjust slightly if you prefer a less sweet filling, but I find this amount is just right.
- 1 teaspoon vanilla extract: Pure vanilla, not imitation. It adds warmth and depth to the cheesecake flavor. I always reach for Nielsen-Massey or a good store-brand pure extract.
- 1/2 cup cold heavy cream: This gets whipped separately and folded into the cream cheese mixture. It’s what gives the filling its light, airy, mousse-like texture. Make sure it’s very cold for best results.
- 12-15 medium fresh strawberries, hulled and patted dry: The size matters here. You want berries that are big enough to wrap filling around but small enough to be a single, elegant bite. And please, pat them completely dry with paper towels. Any moisture will make the chocolate seize or slide right off.
- 1 1/2 cups dark or semi-sweet chocolate chips (about 9 ounces): I prefer dark chocolate (around 60% cacao) for its deep flavor that contrasts beautifully with the sweet filling. Ghirardelli or Guittard are my go-to brands for consistent melting.
- 1 tablespoon coconut oil or vegetable shortening: This is the secret to a smooth, glossy chocolate coating that snaps when you bite into it. It helps thin the chocolate just enough for easy dipping.
- Flaky sea salt (optional but highly recommended): A tiny sprinkle on top right after dipping takes these from delicious to unforgettable. It cuts the sweetness and makes the chocolate flavor pop.
For a fun variation, you can swap the dark chocolate for white chocolate or even ruby chocolate for a different flavor profile and color. Just keep the coconut oil ratio the same for proper melting.
Equipment Needed
You don’t need a pastry chef’s toolkit for these, but a few specific items make the process much smoother.
- Electric hand mixer or stand mixer: You could whisk the cream by hand, but your arm will hate you. A mixer makes quick work of both the cream cheese and the whipped cream.
- Large mixing bowls: One for the cream cheese mixture, one for whipping the cream, and one for melting the chocolate.
- Rubber spatula: Essential for folding the whipped cream into the cream cheese without deflating all that air you just whipped in.
- Baking sheet lined with parchment paper or a silicone mat: This is where the assembled bites will chill and set. The silicone mat is non-stick and reusable, which I love.
- Piping bag or a small zip-top bag: For neatly wrapping the cheesecake mixture around each strawberry. A zip-top bag with the corner snipped off works perfectly and is less intimidating than a piping bag.
- Small, deep bowl for melting chocolate: A bowl that’s narrow and deep is better than a wide, shallow one for dipping. It lets you submerge the bites more easily.
- Fork or dipping tool: A regular fork works, but a dedicated chocolate dipping tool or even a skewer can give you a cleaner finish.
- Toothpicks (optional): If you want to drizzle extra chocolate on top, toothpicks are great for creating thin, controlled lines.
I’ve used a cheap baking sheet and a fancy one—honestly, for this recipe, the cheap one works just fine as long as it’s flat. Don’t overthink the equipment. A bowl, a mixer, and a freezer are really all you need.
Preparation Method
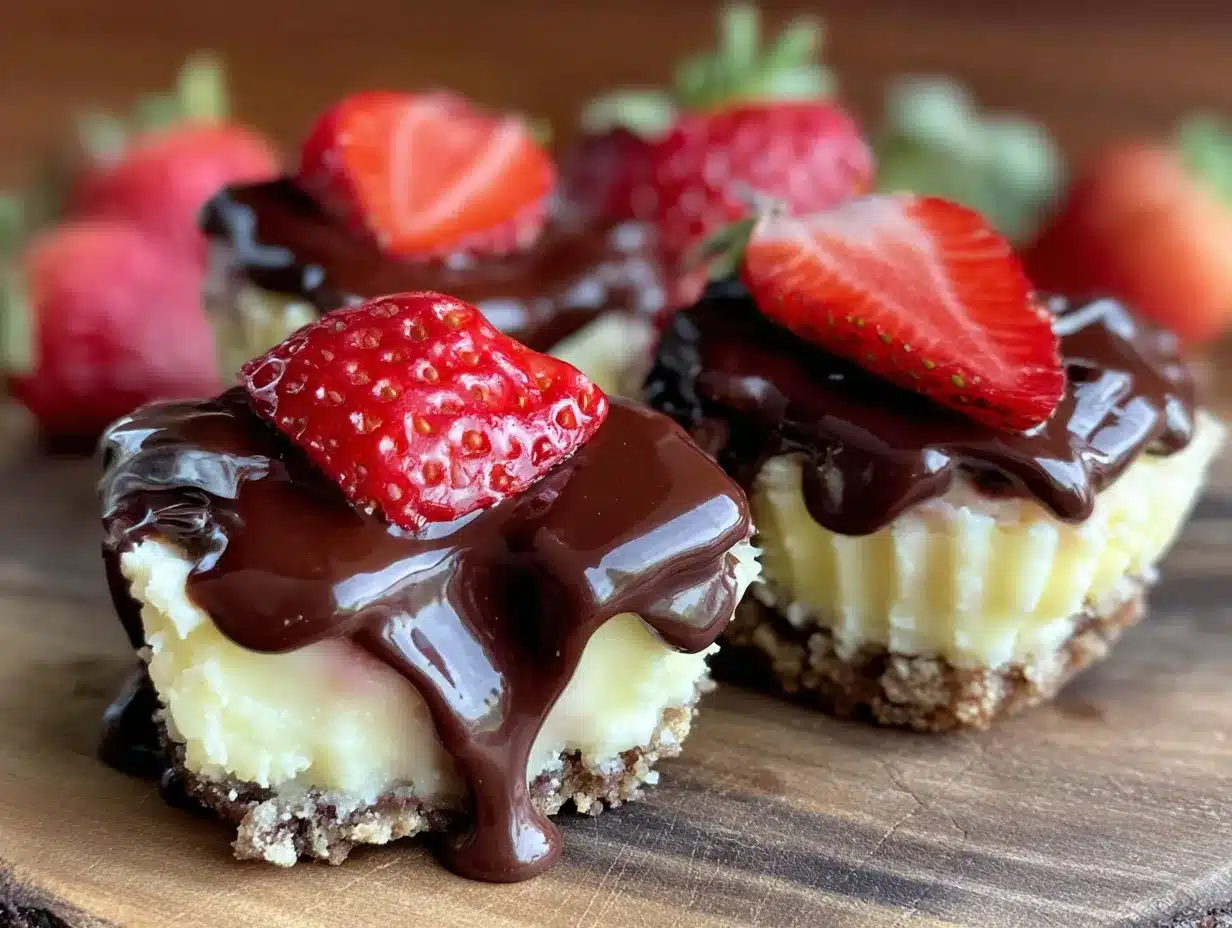
Let’s get to the fun part. This process is straightforward, but each step has a few little tricks that make the final result picture-perfect and delicious.
- Prepare the strawberries. Wash your strawberries and gently pat them completely dry with paper towels. This is non-negotiable. Any moisture left on the surface will create steam when you dip them in warm chocolate, causing the coating to bubble or slide off. Use a small paring knife to cut the hull out of each strawberry, creating a small, clean cavity. You want a little pocket for the cheesecake filling to nestle into. Set them aside on a paper towel-lined plate.
- Make the cheesecake filling. In a large mixing bowl, beat the softened cream cheese with an electric mixer on medium speed until it’s completely smooth and fluffy, about 2 minutes. Scrape down the sides of the bowl with a rubber spatula. Add the powdered sugar and vanilla extract, then beat again until well combined and creamy. Set this bowl aside.
- Whip the cream. In a separate, clean mixing bowl (chill the bowl and beaters in the freezer for 10 minutes if you want extra fluff), pour in the cold heavy cream. Beat on medium-high speed until stiff peaks form. You’ll know it’s ready when you lift the beaters and the cream holds a peak that doesn’t droop. Be careful not to over-whip, or you’ll end up with butter. It should look like soft, luscious clouds.
- Fold it all together. Take about one-third of the whipped cream and stir it into the cream cheese mixture to lighten it up. This is called “sacrificing” the first portion—it makes the rest of the folding easier. Then, gently fold the remaining whipped cream into the cream cheese mixture using a rubber spatula. Use a slow, sweeping motion, cutting through the center and folding the mixture over itself. Stop as soon as you don’t see any white streaks. Over-mixing will deflate the filling and make it dense.
- Fill the strawberries. Transfer the cheesecake filling to a piping bag or a sturdy zip-top bag. If using a zip-top bag, snip off about 1/2 inch from one corner. Hold a strawberry in your hand and pipe a generous amount of filling into the cavity you created earlier. Let it pile up slightly on top, creating a little dome. Place the filled strawberry, dome-side up, on your prepared baking sheet. Repeat with all the strawberries. Place the baking sheet in the freezer for at least 1 hour, or until the filling is completely firm to the touch. This step is crucial—if the filling isn’t frozen solid, it will squish out when you dip it in warm chocolate.
- Melt the chocolate. About 10 minutes before you’re ready to dip, place the chocolate chips and coconut oil in a small, deep microwave-safe bowl. Microwave in 30-second intervals, stirring thoroughly after each interval, until the chocolate is completely smooth and glossy. It should be warm to the touch but not hot. Overheating will seize the chocolate, turning it into a grainy mess. If it looks thick, add another teaspoon of coconut oil.
- Dip the frozen bites. Remove the baking sheet from the freezer. Working with one bite at a time, hold it by the strawberry tip (the top) and dip it completely into the melted chocolate, covering the cheesecake dome and most of the strawberry. Let any excess chocolate drip back into the bowl for a few seconds. Place the dipped bite back on the parchment-lined baking sheet. If you want to add a sprinkle of flaky sea salt, do it immediately while the chocolate is still wet. Repeat with all the bites.
- Set and serve. Return the baking sheet to the refrigerator for at least 30 minutes to allow the chocolate to fully set. The bites are best served cold, straight from the fridge, or after sitting at room temperature for about 5 minutes to soften slightly.
A note on timing: The total active time is about 30 minutes of hands-on work, plus at least 1.5 hours of chilling. Plan ahead, and you’ll be rewarded with a perfect little dessert.
Cooking Tips & Techniques
I’ve made these bites more times than I can count, and I’ve definitely learned a few things the hard way. Here are my best tips for nailing it every time.
Dry strawberries are happy strawberries. I cannot stress this enough. If your strawberries are even slightly damp, the chocolate will struggle to adhere. After washing, lay them out on a clean kitchen towel and let them air dry for 15 minutes before you even start the filling. Pat them dry again right before you begin. It feels obsessive, but it works.
Don’t skip the freezing step. I tried to rush this once and dipped a strawberry that wasn’t fully frozen. The cheesecake filling immediately started melting into the warm chocolate, creating a muddy, messy disaster. Freeze them for at least an hour, or even overnight if you’re prepping ahead. The filling needs to be rock solid to survive the dip.
Use a deep bowl for melting chocolate. A shallow bowl means you have to tilt the strawberry at an awkward angle to get the chocolate to cover the dome. A small, deep ramekin or a tall coffee mug works wonders. You can submerge the bite almost completely with one smooth motion.
Work in small batches. Only take 3-4 bites out of the freezer at a time. The rest stay frozen while you work. If you take them all out, they’ll start to sweat and soften, making the chocolate coat unevenly. Keep them cold until the moment they hit the chocolate.
If your chocolate seizes. It happens to the best of us. If your melted chocolate suddenly turns thick and grainy, you’ve likely introduced a drop of water or overheated it. Don’t panic. You can sometimes rescue it by stirring in a teaspoon of warm coconut oil or heavy cream. If that doesn’t work, start fresh with a new batch of chocolate. It’s cheaper than ruining a whole tray of strawberries.
For a cleaner finish, use a fork. After dipping, lift the bite out of the chocolate with a fork, letting the excess drip through the tines. Then, gently slide the bite off the fork onto the parchment paper using a toothpick. This gives you a much cleaner, more professional look than just dropping it off the fork.
Variations & Adaptations
This recipe is incredibly versatile. Once you’ve mastered the basic technique, you can play around with flavors and textures to make it your own.
- White Chocolate Raspberry: Swap the dark chocolate for high-quality white chocolate. Use raspberries instead of strawberries. The sweet, creamy white chocolate pairs beautifully with the tartness of raspberries. Add a drop of pink food coloring to the cheesecake filling for a pretty blush effect.
- Milk Chocolate with Peanut Butter Drizzle: Use milk chocolate for the coating. After the bites are set, melt 2 tablespoons of creamy peanut butter with 1 teaspoon of coconut oil and drizzle it over the top. The salty-sweet combination is addictive. This is a great option for kids or anyone who loves a classic peanut butter and chocolate pairing.
- Vegan Option: Use a high-quality vegan cream cheese (like Miyoko’s or Violife) and a vegan heavy cream alternative (like coconut cream from a can, chilled and whipped). Most dark chocolate is naturally dairy-free, but check the label. The texture will be slightly different but still deliciously creamy.
- Keto-Friendly: Use a sugar-free powdered sweetener (like Swerve or monk fruit) in the filling. Choose a sugar-free dark chocolate for the coating. The strawberries themselves add a small amount of natural sugar, but this version is significantly lower in carbs and still incredibly satisfying.
- Spiced Chocolate: Add 1/4 teaspoon of cinnamon and a pinch of cayenne pepper to the melted chocolate before dipping. The warmth of the spices complements the sweet strawberries and creamy filling beautifully. It’s an unexpected twist that feels sophisticated.
I once made a batch with a dash of almond extract in the cheesecake filling and a coating of dark chocolate with crushed freeze-dried strawberries mixed in. It was a happy accident that turned into a new favorite. Don’t be afraid to experiment.
Serving & Storage Suggestions
These bites are best served cold, straight from the refrigerator. The chocolate shell should be firm and snappy, and the cheesecake filling should be creamy but not melting. If you’re serving them at a party, take them out of the fridge about 5 minutes before you set them out. This allows the filling to soften just slightly, making the texture even more luxurious.
Presentation ideas: Arrange them on a beautiful white platter or a slate board. Sprinkle a few extra flaky sea salt crystals around the base for visual interest. You can also drizzle a little extra melted chocolate over the top in a zigzag pattern using a fork or a piping bag. A few fresh mint leaves add a pop of green color that looks gorgeous against the dark chocolate and red strawberries.
What to serve with them: These bites are rich enough to stand alone, but they pair beautifully with a cup of strong black coffee or an espresso. For a dessert board, serve them alongside a creamy no-churn strawberry cheesecake ice cream for a double strawberry cheesecake experience. A glass of cold milk is always a welcome companion for kids (and adults who are kids at heart).
Storage: Store any leftover bites in an airtight container in the refrigerator. They will keep well for up to 3 days. The strawberries will soften slightly over time, but the overall flavor remains fantastic. Do not leave them at room temperature for more than an hour, as the cream cheese filling can become unstable.
Freezing: You can freeze the undipped, filled strawberries for up to 2 weeks. Just place them on a baking sheet in a single layer until frozen solid, then transfer them to a freezer-safe bag or container. When you’re ready to dip, let them thaw in the refrigerator for about 10 minutes before dipping in melted chocolate. This is a great make-ahead strategy for holiday entertaining.
Reheating: There’s no need to reheat these. They are meant to be enjoyed cold. If you want a slightly different texture, you can let them sit at room temperature for 10-15 minutes, but the chocolate will start to soften and lose its snap.
Nutritional Information & Benefits
Let’s be real—these are a treat, not a health food. But they do offer a few redeeming qualities beyond pure deliciousness.
Estimated nutritional values per bite (based on 15 bites):
- Calories: ~180-220
- Fat: 14g
- Carbohydrates: 16g
- Protein: 3g
- Sugar: 11g
Health highlights: Strawberries are packed with vitamin C and antioxidants. Dark chocolate (with at least 70% cacao) is a good source of flavonoids, which are linked to heart health. Cream cheese provides a small amount of calcium and protein. So while these aren’t a salad, they’re not entirely without nutritional merit either.
Dietary considerations: This recipe is naturally gluten-free. For a lower-sugar option, use sugar-free chocolate and powdered sweetener. For a dairy-free version, see the vegan variation above. Always check your labels if you have specific allergies, especially with chocolate and cream cheese.
I believe in balance. A few of these bites after a healthy dinner is a wonderful way to enjoy something decadent without guilt. They’re a celebration of simple, quality ingredients, not a compromise.
Conclusion
These Perfect Chocolate Covered Strawberry Cheesecake Bites are the kind of dessert that makes you look like a rockstar with minimal effort. They’re elegant, delicious, and endlessly customizable. Whether you’re making them for a romantic date night, a family gathering, or just because it’s Wednesday and you deserve a treat, they never disappoint.
I love that I can whip up a batch without turning on the oven, even in the middle of summer. I love that they look like they came from a fancy bakery. And most of all, I love that first bite—the snap of the chocolate, the creamy filling, the burst of fresh strawberry. It’s pure joy in a single, perfect bite.
Now it’s your turn. Give these a try and make them your own. Swap the chocolate, change the fruit, add a sprinkle of something special. I’d love to hear how they turn out for you. Drop a comment below and let me know your favorite variation, or tag me in your photos if you share them online. Happy dipping!
Frequently Asked Questions
Can I use frozen strawberries for this recipe?
I wouldn’t recommend it. Frozen strawberries release a lot of water as they thaw, which will make the cheesecake filling watery and cause the chocolate to seize. Fresh, firm strawberries are essential for the best texture and appearance.
How far in advance can I make these?
You can make the fully assembled and dipped bites up to 3 days in advance. Store them in an airtight container in the refrigerator. You can also freeze the undipped, filled strawberries for up to 2 weeks and dip them fresh when you’re ready to serve.
My chocolate is too thick for dipping. What should I do?
Add a little more coconut oil or vegetable shortening, about 1/2 teaspoon at a time, and stir until the chocolate thins out. Be careful not to add too much, or the chocolate won’t set properly. You want it to be fluid enough to coat the bite but not watery.
Can I use a different type of chocolate?
Absolutely. Dark, semi-sweet, milk, or white chocolate all work beautifully. Just keep in mind that white chocolate is sweeter and can be more temperamental to melt, so use a good quality brand and melt it gently. Ruby chocolate is also a fun, colorful option.
Why did my chocolate crack after setting?
This usually happens if the filling was too cold when you dipped it, or if the chocolate was too hot. The rapid temperature change can cause the chocolate to contract and crack. Make sure your filling is frozen solid but not rock-hard, and let your melted chocolate cool slightly before dipping if it feels very warm to the touch.
Pin This Recipe!
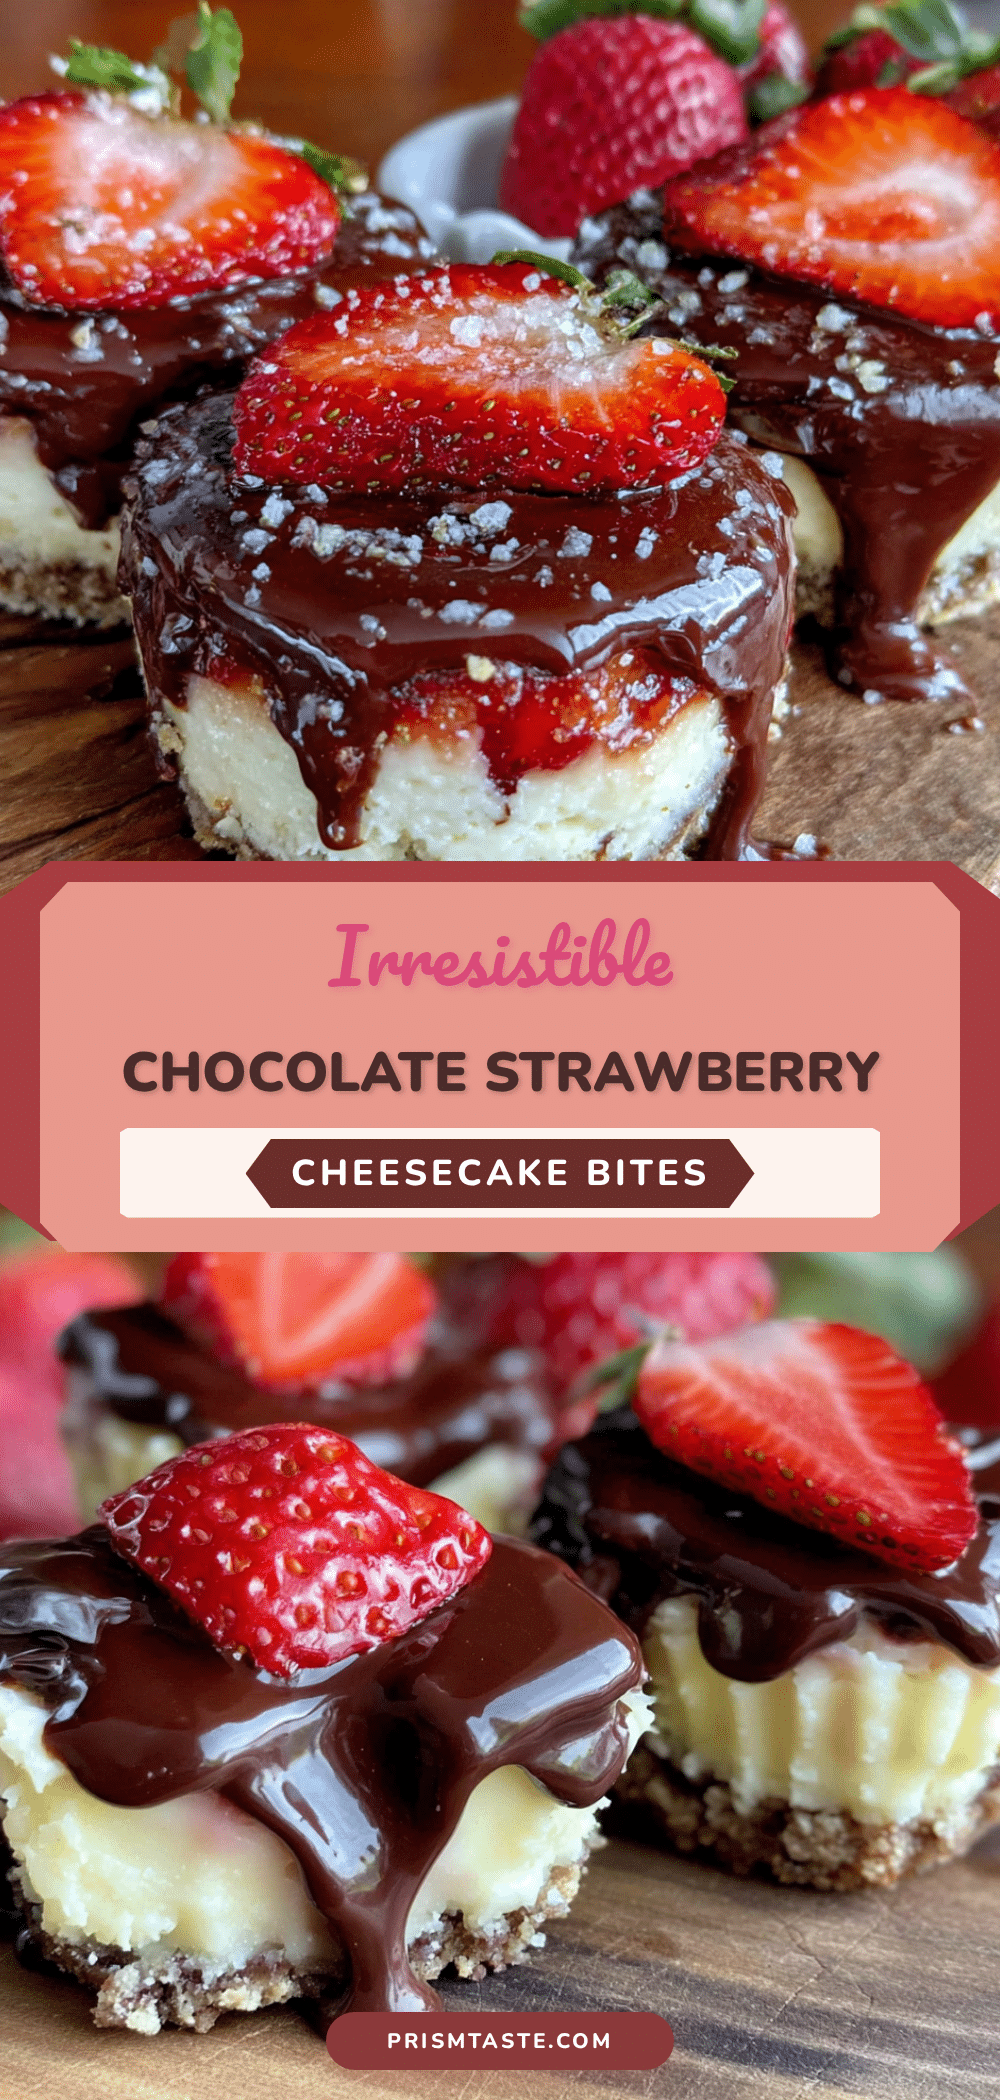
Perfect Chocolate Covered Strawberry Cheesecake Bites
No-bake, bite-sized cheesecake bites with a fresh strawberry center, creamy cheesecake filling, and a crisp dark chocolate shell. Perfect for entertaining or a quick sweet treat.
- Prep Time: 30 minutes
- Cook Time: 0 minutes
- Total Time: 2 hours (includes 1.5 hours chilling)
- Yield: 12-15 servings 1x
- Category: Dessert
- Cuisine: American
Ingredients
- 8 ounces full-fat cream cheese, softened
- 1/2 cup powdered sugar
- 1 teaspoon vanilla extract
- 1/2 cup cold heavy cream
- 12–15 medium fresh strawberries, hulled and patted dry
- 1 1/2 cups dark or semi-sweet chocolate chips (about 9 ounces)
- 1 tablespoon coconut oil or vegetable shortening
- Flaky sea salt (optional but highly recommended)
Instructions
- Prepare the strawberries: Wash and pat dry completely. Cut out the hull to create a small cavity. Set aside on a paper towel-lined plate.
- Make the cheesecake filling: Beat softened cream cheese with an electric mixer until smooth and fluffy, about 2 minutes. Add powdered sugar and vanilla extract; beat until combined.
- Whip the cream: In a separate chilled bowl, beat cold heavy cream until stiff peaks form.
- Fold together: Stir one-third of the whipped cream into the cream cheese mixture to lighten. Gently fold in the remaining whipped cream until no white streaks remain.
- Fill the strawberries: Transfer filling to a piping bag or zip-top bag with a snipped corner. Pipe filling into each strawberry cavity, creating a small dome. Place on a parchment-lined baking sheet. Freeze for at least 1 hour until firm.
- Melt the chocolate: In a small deep bowl, microwave chocolate chips and coconut oil in 30-second intervals, stirring until smooth and glossy.
- Dip the frozen bites: Working in small batches, dip each frozen bite into melted chocolate, covering the dome and most of the strawberry. Let excess drip off. Place back on baking sheet. Sprinkle with flaky sea salt if desired.
- Set and serve: Refrigerate for at least 30 minutes until chocolate is set. Serve cold or after 5 minutes at room temperature.
Notes
Ensure strawberries are completely dry to prevent chocolate from seizing. Freeze filled strawberries for at least 1 hour before dipping. Work in small batches to keep bites cold. For a cleaner finish, use a fork to lift bites out of chocolate.
Nutrition
- Serving Size: 1 bite
- Calories: 200
- Sugar: 11
- Sodium: 80
- Fat: 14
- Saturated Fat: 8
- Carbohydrates: 16
- Fiber: 2
- Protein: 3
Keywords: chocolate covered strawberries, cheesecake bites, no bake dessert, strawberry cheesecake, bite sized dessert, easy dessert, party dessert


