My eight-year-old nephew asked why I couldn’t just wrap the hot dogs in crescent roll dough and bake them. I started to explain why that wouldn’t work — something about the dough needing to be rolled thin enough, about the filling-to-wrapper ratio, about proper technique. Then I stopped. Because honestly? I had no good reason. I’d just never tried it that way before. So I handed him a can of crescent rolls and told him to show me what he meant.
That Tuesday night, standing in my messy kitchen with flour on my jeans, I watched him create the most ridiculously simple version of mummy hot dogs I’d ever seen. No rolling pins. No complicated wrapping patterns. Just strips of dough wrapped around hot dogs like bandages — exactly what a kid would think a mummy looks like. And you know what? They came out perfect. Crispy, buttery, and ready in twenty minutes flat. I’ve been making them this way ever since, and I’m not even a little embarrassed to admit it.
These quick mummy hot dogs have become my go-to for those nights when I need dinner on the table before my kids start eating their own arms. They’re fun enough for Halloween parties but practical enough for a regular Tuesday — which, let’s be honest, is when we really need them. If you’ve ever stood in the grocery store aisle wondering if you have the energy for one more complicated recipe, this one’s for you.
Why You’ll Love This Recipe
Let me tell you why these mummy hot dogs have earned a permanent spot in my weeknight rotation. I’ve tested this recipe at least a dozen times — sometimes with my nephew, sometimes solo, and once in a slightly panicked rush when I forgot it was my turn to bring snacks to soccer practice. Every single time, they’ve delivered.
- Quick & Easy: From fridge to table in 20 minutes flat. No marinating, no complicated prep, no standing over the stove. Just wrap, bake, and eat.
- Simple Ingredients: You need exactly four things: hot dogs, crescent roll dough, cheese slices, and mustard for the eyes. Chances are you already have most of these in your kitchen.
- Perfect for Weeknights: This is the dinner you make when you’re tired, hungry, and don’t want to think. Kids can even help wrap the dough — it’s that simple.
- Crowd-Pleaser: I’ve served these at birthday parties, Halloween gatherings, and plain old Tuesday dinners. Kids devour them, and adults sneak them when nobody’s looking.
- Unbelievably Delicious: The combination of salty hot dog, buttery flaky dough, and melty cheese is pure comfort food magic. You’ll make extra on purpose.
What makes this version different from all the others? It’s the technique. By using crescent roll dough straight from the can — no rolling, no cutting, no fuss — you save about ten minutes and a whole lot of frustration. Plus, the dough bakes up perfectly golden and flaky every single time. I’ve tested it with homemade dough, puff pastry, and biscuit dough, and nothing beats the convenience and texture of crescent rolls for this particular recipe.
This is the kind of recipe that makes you close your eyes after the first bite. It’s comfort food at its simplest — faster, easier, but with all the soul-soothing satisfaction of something that took hours. Perfect for impressing your kids without breaking a sweat, or turning a chaotic weeknight into something that feels just a little bit special.
What Ingredients You Will Need
This recipe uses simple, pantry-friendly ingredients to deliver big flavor and fun presentation without the fuss. Here’s what you’ll need and why each one matters:
- Hot dogs (8 standard-sized): Use your favorite brand — beef, pork, turkey, or plant-based all work great. I prefer all-beef hot dogs for their snap and flavor, but honestly, any kind works. For a fun twist, try jumbo hot dogs and adjust the baking time by a minute or two.
- Crescent roll dough (2 cans, 8 ounces each): This is the secret weapon. Pillsbury is my go-to for consistent results, but store brands work fine too. The dough separates into pre-scored triangles, making it incredibly easy to cut into strips. Keep it cold until you’re ready to use it — warm dough gets sticky and hard to handle.
- Cheese slices (8 slices, cheddar or mozzarella): Thin slices of cheese wrap around the hot dogs before the dough goes on. Cheddar adds sharpness, mozzarella gives that perfect stretchy pull. Use dairy-free cheese if needed — just make sure it’s the sliceable kind, not shredded.
- Mustard or ketchup (for eyes): Just a tiny dot for each mummy’s eyes. Yellow mustard gives the best contrast, but ketchup works in a pinch. You could also use sriracha for spicy mummies or even small dots of cream cheese for milder flavor.
- Cooking spray or parchment paper: To keep the mummies from sticking to the baking sheet. I prefer parchment paper for easy cleanup — just toss it when you’re done.
Optional additions that make these even better: Everything bagel seasoning sprinkled on top before baking adds amazing texture and flavor. A light brush of melted butter mixed with garlic powder takes them to another level. And if you want extra-crispy dough, give each mummy a quick spritz of cooking spray before they go in the oven.
For substitutions, here’s what I’ve learned through trial and error: Puff pastry works but needs a longer bake time. Biscuit dough is too thick and doesn’t wrap as neatly. Gluten-free crescent roll dough exists and works well — just handle it gently because it’s more delicate. And if you’re out of cheese, these are still delicious without it, though you’ll miss that melty surprise in the middle.
Equipment Needed
You don’t need much for this recipe, which is honestly my favorite thing about it. Here’s what you’ll need:
- Baking sheet (half-sheet pan or similar): A standard 13×18-inch baking sheet works perfectly. Line it with parchment paper for the easiest cleanup of your life. I’ve used the same battered sheet pan for years, and it works like a charm.
- Parchment paper or silicone baking mat: Prevents sticking and makes cleanup a breeze. Silicone mats are reusable and eco-friendly, but parchment is cheaper and easier to find.
- Sharp knife or pizza cutter: For cutting the crescent roll dough into strips. A pizza cutter makes quick work of this, but any sharp knife works. Dull knives will squish the dough instead of cutting it cleanly.
- Small bowl (for the egg wash, optional): If you want that gorgeous golden-brown finish, you’ll need a small bowl to whisk an egg or milk for brushing.
- Pastry brush (optional): For applying egg wash or melted butter. A silicone brush is easiest to clean, but a regular one works fine.
- Cooling rack: Not essential, but it helps the mummies stay crispy instead of getting soggy on the bottom.
Budget-friendly tip: You don’t need fancy equipment here. I’ve made these with a dollar-store baking sheet and a butter knife, and they turned out perfectly. Save your money for extra cheese.
Preparation Method
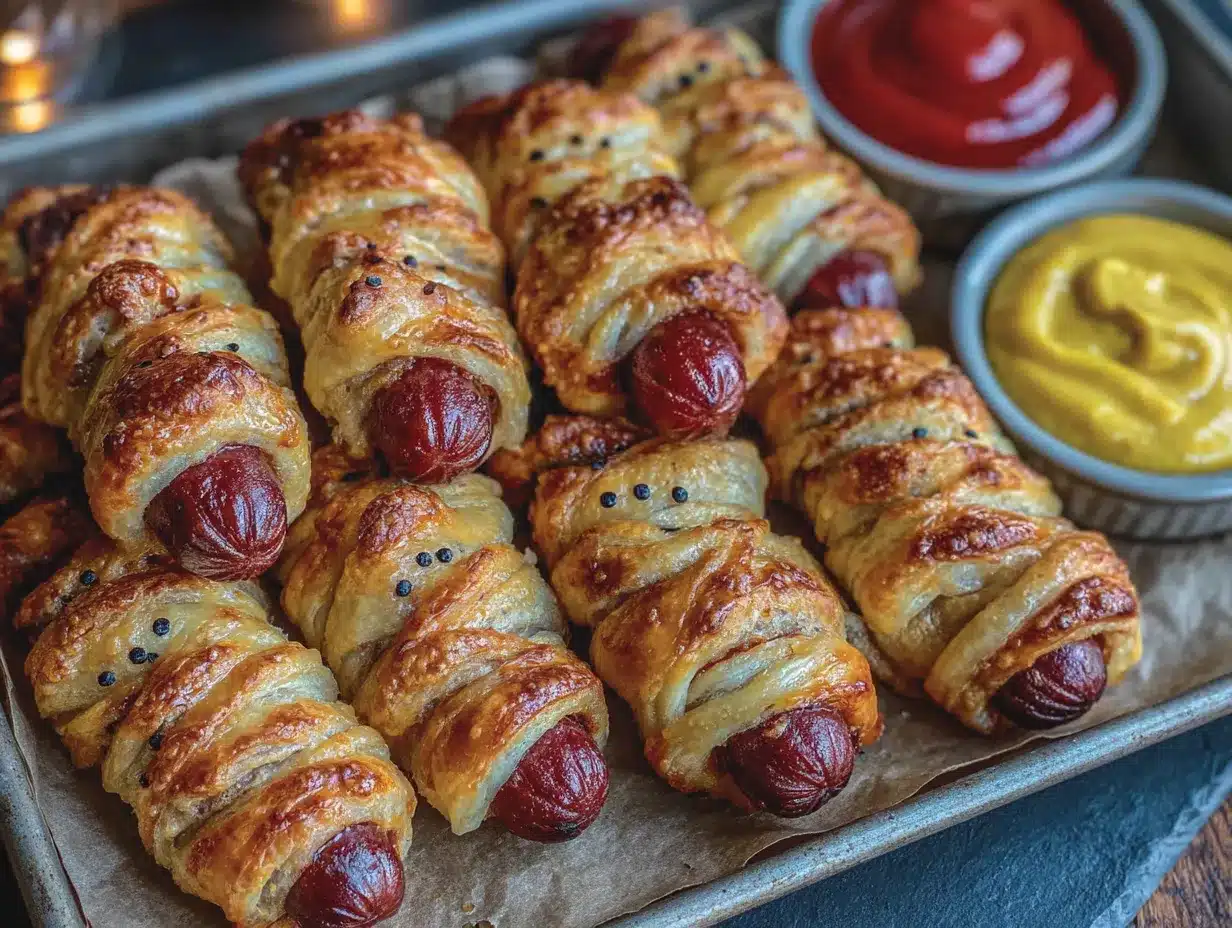
Let me walk you through this step by step. Trust me, it’s easier than it looks.
- Preheat your oven to 375°F (190°C). Line a baking sheet with parchment paper. Getting the oven hot first means you won’t be waiting around later with wrapped mummies sitting on the counter.
- Prepare your hot dogs. Pat each hot dog dry with a paper towel. This helps the cheese and dough stick better. If you’re using extra-long hot dogs, cut them in half crosswise to make them more mummy-sized.
- Wrap each hot dog with a slice of cheese. Place a cheese slice on a flat surface, put the hot dog on one edge, and roll it up. The cheese should wrap around the hot dog completely. Don’t worry if it tears a little — the dough will hold everything together.
- Open the crescent roll dough. Unroll each can of dough and separate it into triangles along the perforated lines. You should have 8 triangles total from 2 cans. Keep the dough cold while you work — warm dough is sticky and harder to handle.
- Cut each triangle into strips. Using a sharp knife or pizza cutter, slice each triangle lengthwise into 3-4 thin strips. The strips should be about 1/2 inch wide. Don’t worry about making them perfect — uneven strips give the mummies a more authentic wrapped look.
- Wrap the hot dogs. Take the dough strips and wrap them around each cheese-covered hot dog, starting at one end and working your way to the other. Leave a small gap at the top for the mummy’s face — about 1/2 inch of exposed hot dog. Overlap the strips slightly as you go so they look like bandages. Press the ends gently to seal.
- Place the mummies on the baking sheet. Arrange them about 2 inches apart so they have room to expand as they bake. Don’t crowd the pan — you want hot air to circulate around each mummy for even browning.
- Optional: Brush with egg wash or melted butter. If you want that golden, glossy finish, whisk one egg with a tablespoon of water and brush it over the dough. Or simply brush with melted butter for extra richness. This step is optional but makes them look bakery-perfect.
- Bake for 12-15 minutes. The mummies are done when the dough is golden brown and puffed, and you can see the cheese bubbling in places. Start checking at 12 minutes — ovens vary, and you don’t want burnt mummies.
- Add the eyes. Let the mummies cool on the baking sheet for 2-3 minutes (they’re dangerously hot inside). Then use a toothpick to dab tiny dots of mustard or ketchup onto the exposed hot dog for eyes. Get creative — different expressions make them even more fun.
- Serve immediately. These are best hot and fresh, when the cheese is still melty and the dough is perfectly crisp. Watch out for the hot cheese — it’s like a little surprise pocket of molten goodness.
A note from experience: If the dough tears while you’re wrapping, don’t panic. Just press it back together — it’ll seal up during baking. And if you end up with extra dough strips, bake them alongside the mummies for a crispy snack.
Cooking Tips & Techniques
After making these more times than I care to count, I’ve picked up a few tricks that make a real difference. Let me share the ones that saved me from some spectacular failures.
Keep the dough cold. This is the number one rule. Warm crescent roll dough turns into a sticky, unworkable mess. Keep it in the fridge until the moment you’re ready to use it. If your kitchen is hot, work in batches — take out one can at a time while the other stays chilled.
Don’t over-wrap. I learned this the hard way. Too many layers of dough means the inside won’t cook through, and you’ll end up with raw dough in the middle. Three to four strips per mummy is perfect — enough to look wrapped, but thin enough to bake completely.
Leave the face gap. That exposed bit of hot dog at the top isn’t just for eyes — it also lets steam escape during baking. I forgot this once and ended up with mummies that burst open in the oven. Not cute.
Space them out. I know it’s tempting to cram as many as possible onto one pan, but crowding leads to soggy bottoms. Give them room to breathe, and they’ll reward you with crispy, golden dough all around.
Watch the cheese. Some cheese slices melt more aggressively than others. If you see cheese pooling on the baking sheet, your mummies are probably overstuffed. Next time, use a little less cheese or wrap it tighter.
Make ahead tip. You can assemble these up to 4 hours ahead and keep them in the fridge, covered with plastic wrap. Add an extra minute or two to the baking time if they’re going in cold. I’ve even frozen them before baking — just add 5 minutes to the cook time straight from frozen.
One mistake I still make sometimes: using too much pressure when cutting the dough. You want a clean cut, not a squish. Use a sharp knife or pizza cutter and let the tool do the work.
Variations & Adaptations
One of the best things about this recipe is how easy it is to change up. Here are some variations I’ve tried and loved:
Spicy Mummy Dogs: Spread a thin layer of sriracha or chipotle mayo on the hot dog before adding the cheese. Or use pepper jack cheese instead of cheddar for a kick that builds as you eat. My brother-in-law requests these every time he visits.
Breakfast Mummies: Swap the hot dogs for breakfast sausages and use a slice of American cheese. Serve with maple syrup for dipping. These are dangerous — I’ve eaten four in one sitting without shame.
Veggie Mummies: Use plant-based hot dogs and dairy-free cheese. The cooking time stays the same. I’ve tested this with several brands, and they all work well — just make sure the vegan hot dogs are fully cooked before wrapping.
Pizza Mummies: Spread a thin layer of pizza sauce on the hot dog before adding the cheese. Sprinkle Italian seasoning on the dough before baking. Serve with warm marinara for dipping. These disappear fastest at parties.
Gluten-Free Version: Use gluten-free crescent roll dough (it’s available in most grocery stores now). Handle it gently — gluten-free dough is more fragile and tears easily. Bake for the same amount of time.
Air Fryer Method: Cook at 350°F (175°C) for 8-10 minutes, flipping halfway through. The air fryer makes the dough extra crispy. You might need to work in batches depending on your air fryer size.
My personal favorite variation? Add a thin slice of jalapeño under the cheese for a spicy surprise in every bite. My nephew calls them “angry mummies,” and honestly, the name stuck.
Serving & Storage Suggestions
These mummy hot dogs are best served hot, right out of the oven, when the cheese is still stretchy and the dough is perfectly crisp. But here’s how to handle them if you’re planning ahead or have leftovers.
Serving: Arrange the mummies on a platter with the eyes facing up so everyone can see their funny expressions. Serve with dipping sauces — ketchup, mustard, ranch dressing, or warm marinara all work beautifully. For a complete meal, add a simple side salad or some carrot sticks with ranch. I’ve also served them alongside a bowl of tomato soup for dipping, and it was a huge hit.
Storage: Leftover mummies keep in the refrigerator for up to 3 days in an airtight container. The dough will soften slightly, but they’re still delicious. Don’t leave them at room temperature for more than 2 hours — the hot dog and cheese need to stay refrigerated.
Reheating: The oven is your best bet for restoring crispiness. Bake at 350°F (175°C) for 5-7 minutes. The microwave works in a pinch (30 seconds on high), but the dough will be soft, not crispy. I’ve also reheated them in the air fryer at 300°F (150°C) for 3 minutes — perfect results every time.
Freezing: You can freeze baked mummies for up to 2 months. Let them cool completely, then wrap individually in plastic wrap and place in a freezer bag. Reheat from frozen at 350°F (175°C) for 10-12 minutes. I keep a stash in my freezer for emergency dinners.
One thing I’ve noticed: the flavors actually meld together a bit after a day in the fridge. The cheese gets more integrated with the hot dog, and the dough absorbs some of the savory goodness. They’re different from fresh, but still really good.
Nutritional Information & Benefits
Let’s be real — these are a treat, not a health food. But here’s what you’re looking at per mummy (based on standard ingredients):
| Nutrient | Amount per Mummy |
|---|---|
| Calories | 280-320 |
| Protein | 12-15g |
| Carbohydrates | 18-22g |
| Fat | 18-22g |
| Saturated Fat | 8-10g |
| Sodium | 700-900mg |
| Calcium | 150-200mg |
The hot dogs provide a decent amount of protein, and the cheese adds calcium. If you use turkey or chicken hot dogs, you’ll cut the fat and calories by about 30%. Plant-based versions are typically lower in saturated fat but higher in sodium.
For a slightly healthier version, use low-fat cheese and turkey hot dogs. You can also swap the crescent roll dough for whole wheat pizza dough cut into strips — it bakes up denser but adds fiber. And serving these with a big vegetable side helps balance out the meal.
One thing I love about this recipe? Portion control is built in. One mummy is satisfying, two is a full meal, and three means you’re having a really good day. No guessing, no measuring — just eat until you’re happy.
Conclusion
These quick mummy hot dogs have saved my sanity on more weeknights than I can count. They’re proof that dinner doesn’t have to be complicated to be memorable — sometimes the simplest ideas are the ones that stick. My nephew taught me that, and I’m grateful every time I make them.
I hope you’ll give these a try, whether it’s for Halloween, a busy Tuesday, or just because you want something fun and delicious. Customize them however you like — add different cheeses, try new dipping sauces, or let your kids design their own mummy faces. That’s the beauty of this recipe: it’s impossible to mess up, and it always brings smiles.
If you make these, I’d love to hear how they turned out. Drop a comment below, share your mummy creations, or tag me in your photos. And if you have a variation I haven’t tried yet, please share it — I’m always looking for new ideas. Until next time, happy cooking, and may your mummies always be perfectly golden.
Frequently Asked Questions
Can I make these ahead of time for a party?
Absolutely! Assemble them up to 4 hours ahead and keep them covered in the fridge. Bake just before serving for the best texture. You can also bake them fully, then reheat at 350°F for 5 minutes.
What if I don’t have crescent roll dough?
Puff pastry works well — just roll it out slightly and cut into strips. Pizza dough is another option, though it’s denser and needs a few extra minutes of baking time. Biscuit dough is too thick, so I don’t recommend it.
Can I use turkey or chicken hot dogs?
Yes, they work perfectly. The cooking time stays the same. Turkey hot dogs are leaner and have a slightly different texture, but they’re still delicious. Just pat them dry before wrapping so the dough sticks.
How do I keep the dough from getting soggy?
Make sure your hot dogs are patted dry before wrapping. Don’t over-wrap with too many layers of dough. And bake on parchment paper, not directly on the pan — it helps the bottoms crisp up. If you’re reheating, use the oven or air fryer, not the microwave.
Can I freeze these after baking?
Yes! Let them cool completely, then wrap individually in plastic wrap and store in a freezer bag for up to 2 months. Reheat from frozen at 350°F for 10-12 minutes. They won’t be quite as crispy as fresh, but they’re still really good.
Pin This Recipe!
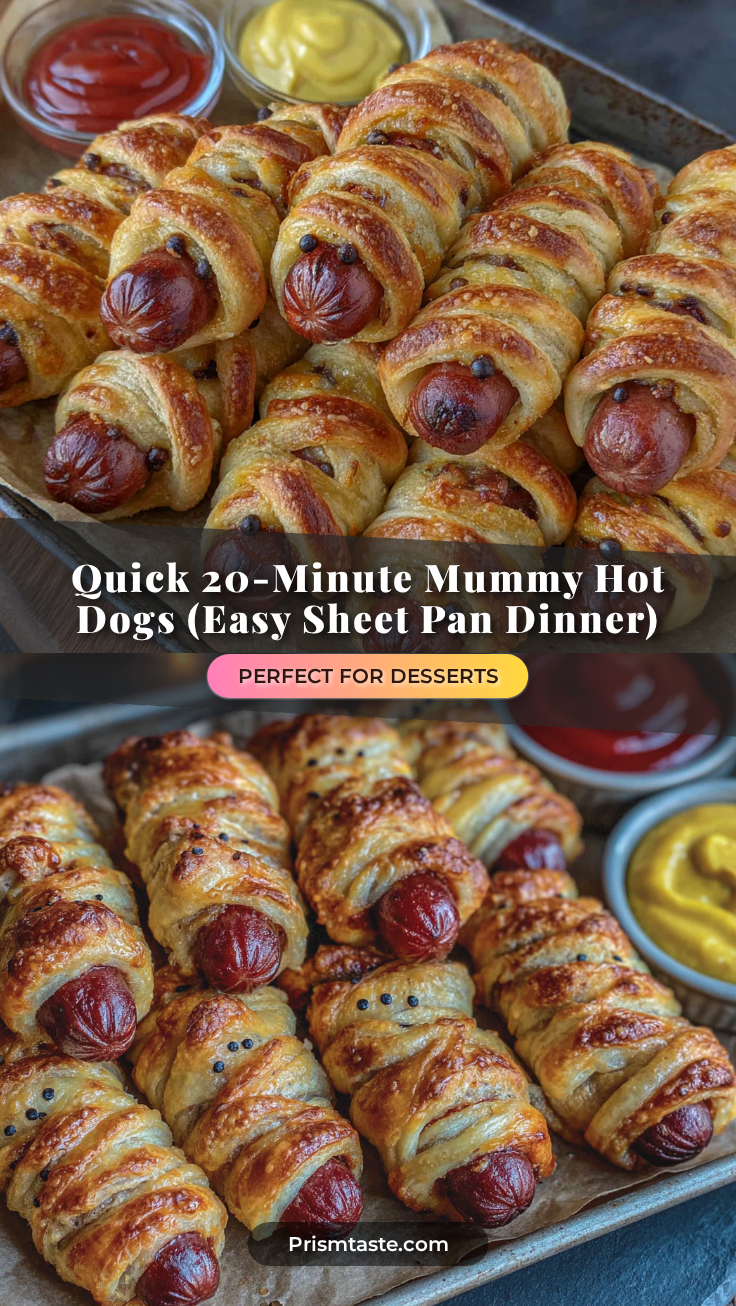
Perfect 20-Minute Mummy Hot Dogs (Easy Sheet Pan Dinner)
These quick mummy hot dogs are a fun and easy weeknight dinner made with just four ingredients: hot dogs, crescent roll dough, cheese, and mustard. Ready in 20 minutes, they’re perfect for Halloween parties or busy Tuesdays.
- Prep Time: 5 minutes
- Cook Time: 15 minutes
- Total Time: 20 minutes
- Yield: 8 servings 1x
- Category: Main Course
- Cuisine: American
Ingredients
- 8 standard-sized hot dogs (beef, pork, turkey, or plant-based)
- 2 cans (8 ounces each) crescent roll dough
- 8 slices cheddar or mozzarella cheese
- Mustard or ketchup (for eyes)
- Cooking spray or parchment paper
Instructions
- Preheat your oven to 375°F (190°C). Line a baking sheet with parchment paper.
- Pat each hot dog dry with a paper towel. If using extra-long hot dogs, cut them in half crosswise.
- Wrap each hot dog with a slice of cheese. Place a cheese slice on a flat surface, put the hot dog on one edge, and roll it up.
- Open the crescent roll dough. Unroll each can and separate into triangles along the perforated lines. You should have 8 triangles total from 2 cans.
- Using a sharp knife or pizza cutter, slice each triangle lengthwise into 3-4 thin strips, about 1/2 inch wide.
- Take the dough strips and wrap them around each cheese-covered hot dog, starting at one end and working to the other. Leave a small gap at the top for the mummy’s face (about 1/2 inch of exposed hot dog). Overlap the strips slightly and press the ends gently to seal.
- Place the mummies on the baking sheet about 2 inches apart.
- Optional: Brush with egg wash (1 egg whisked with 1 tablespoon water) or melted butter for a golden finish.
- Bake for 12-15 minutes, until the dough is golden brown and puffed.
- Let the mummies cool on the baking sheet for 2-3 minutes. Use a toothpick to dab tiny dots of mustard or ketchup onto the exposed hot dog for eyes.
- Serve immediately.
Notes
Keep the dough cold until ready to use. Don’t over-wrap with too many layers of dough. Leave a gap at the top for the face to let steam escape. Space mummies out on the baking sheet for even browning. Can be assembled up to 4 hours ahead and refrigerated. Can be frozen before or after baking.
Nutrition
- Serving Size: 1 mummy
- Calories: 300
- Sugar: 4
- Sodium: 800
- Fat: 20
- Saturated Fat: 9
- Carbohydrates: 20
- Protein: 13
Keywords: mummy hot dogs, Halloween dinner, easy weeknight dinner, crescent roll hot dogs, kid-friendly dinner, sheet pan dinner, quick dinner


