I did not trust pumpkin in banana bread. That sounds dramatic, I know. But honestly, the first time someone handed me a slice of “banana pumpkin bread” at a fall potluck, I took a polite bite and spent the next five minutes trying to figure out why it tasted like someone had watered down a perfectly good loaf of banana bread with canned pumpkin. It was dense in all the wrong ways. It was bland. It made me wonder why anyone would mess with a classic.
So when I started developing this Moist One-Bowl Banana Pumpkin Bread, I went in stubborn. I was not about to throw pumpkin into a banana bread recipe and call it a day. I wanted the pumpkin to actually do something. I wanted it to add moisture without making the crumb soggy. I wanted it to deepen the flavor, not dilute it. And I wanted the whole thing to come together in one bowl because, let’s face it, nobody wants to wash a mixer attachment just for a loaf of bread on a Tuesday afternoon.
It took a few tries. The first batch was too wet (lesson learned: drain your pumpkin puree just a little). The second batch was too dense (turns out, you cannot just swap banana for pumpkin one-to-one and walk away). But the third batch? That was the one. The texture was soft, almost velvety, with that perfect tender crumb that holds together when you slice it but practically melts on your tongue. The banana flavor was still front and center, but the pumpkin added this subtle, earthy warmth that made the whole thing taste like fall in a loaf pan.
This is the recipe I keep coming back to when the leaves start turning. It is the one I make for neighbors, for book club, for no reason at all except that the house smells good. And if you are skeptical about combining these two flavors, I get it. But trust me on this one.
Why You’ll Love This Recipe
Let me tell you why this particular loaf has earned a permanent spot in my fall baking rotation. It is not just another pumpkin bread recipe, and it is not just another banana bread recipe. It is the best of both worlds, and here is what makes it different.
- One Bowl, No Mixer. You do not need a stand mixer, a hand mixer, or any fancy equipment. Just one large bowl, a whisk, and a spatula. The less cleanup, the better. That is the whole philosophy here.
- Perfectly Moist Without Being Soggy. The trick is balancing the moisture from the bananas with the pumpkin puree. I tested this six times to get the ratio right. The result is a loaf that stays moist for days without turning into a wet mess.
- Simple Pantry Ingredients. You probably already have most of these on hand. Canned pumpkin puree, ripe bananas, flour, sugar, eggs, oil, and basic spices. No trips to a specialty grocery store required.
- Foolproof for Beginners. If you have never made quick bread before, this is a great place to start. The steps are straightforward, and I have included all the little cues that tell you when you are on the right track.
- It Gets Better Overnight. Honestly, this bread is even better the next day. The flavors meld together, the texture settles, and a slice with a pat of butter the next morning is pure comfort.
- Family-Approved and Kid-Tested. I brought a loaf to my sister’s house, and her kids ate half of it before I even got a slice. It is sweet enough to feel like a treat but not so sweet that you cannot justify it for breakfast.
This is the kind of recipe you will make over and over. It is forgiving, it is delicious, and it makes your whole kitchen smell like autumn. What more could you ask for?
What Ingredients You Will Need
This recipe uses simple, wholesome ingredients to deliver bold flavor and satisfying texture without the fuss. Most of these are pantry staples, which is exactly how I like my fall baking to go.
For the Bread
- 1 ½ cups all-purpose flour (195g) — Spoon and level for accuracy. Too much flour makes the bread dry.
- 1 teaspoon baking soda — This is our leavening agent. Make sure it is fresh (not expired) for the best rise.
- 1 teaspoon ground cinnamon — Adds warmth and pairs beautifully with both banana and pumpkin.
- ½ teaspoon ground nutmeg — Freshly grated if you have it, but pre-ground works perfectly.
- ½ teaspoon ground ginger — A little zing to balance the sweetness.
- ¼ teaspoon ground cloves — Optional, but I love the depth it adds.
- ½ teaspoon salt — Enhances all the flavors. Do not skip it.
- 1 cup mashed ripe bananas (about 2 large bananas) — The riper, the better. Spotty brown bananas are ideal.
- ½ cup pumpkin puree (120g) — Not pumpkin pie filling. Make sure you grab 100% pure pumpkin puree.
- ⅓ cup vegetable oil (80ml) — Or any neutral oil like canola or avocado oil. Keeps the bread tender.
- ½ cup granulated sugar (100g) — Adds sweetness and helps with browning.
- ¼ cup brown sugar, packed (50g) — I like light brown sugar here for a subtle molasses note.
- 2 large eggs — Room temperature is best, but if you forget, place them in a bowl of warm water for 5 minutes.
- 1 teaspoon vanilla extract — Pure vanilla, not imitation, if you can swing it.
For the Optional Topping
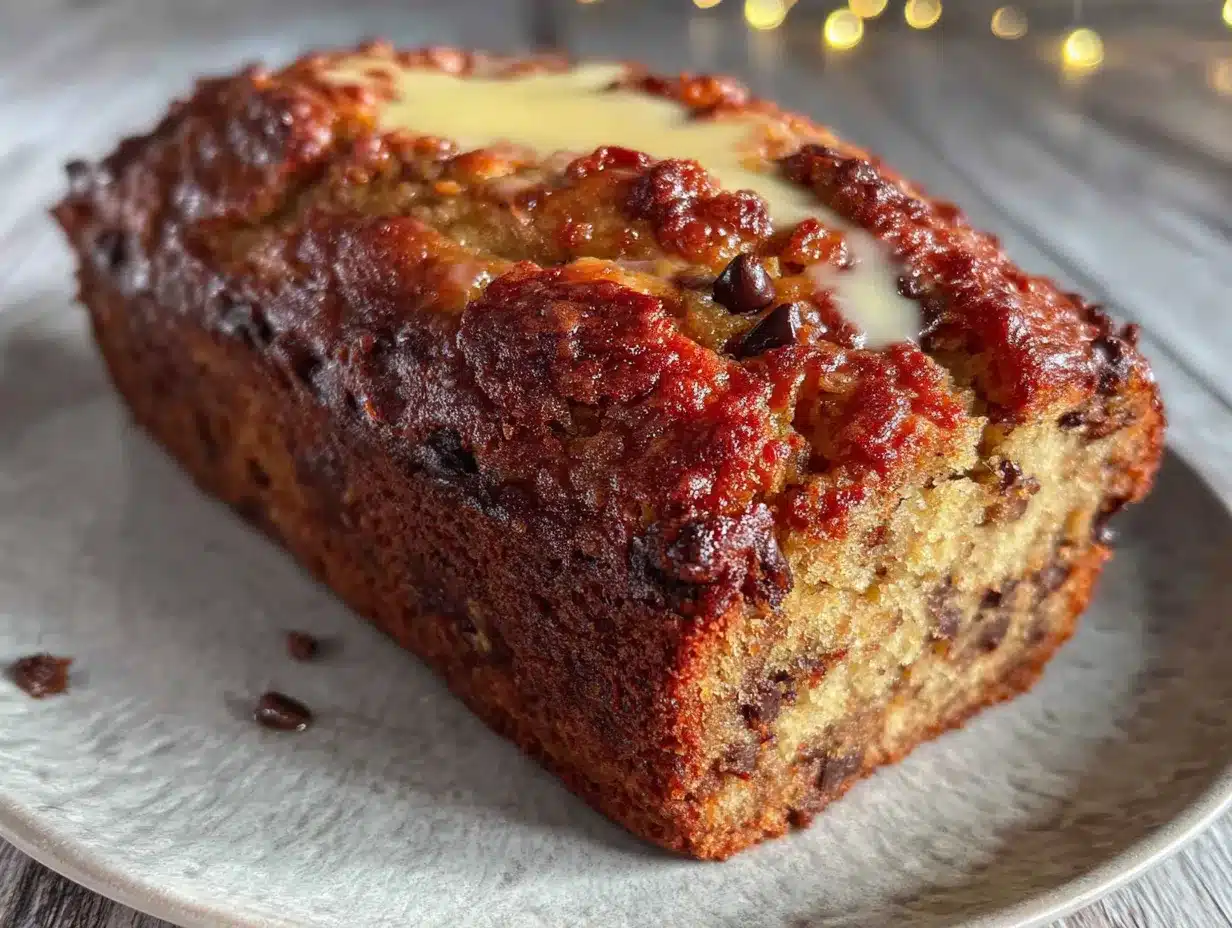
- 1 tablespoon turbinado sugar — Also called raw sugar. It adds a lovely crunchy top crust. Regular granulated sugar works too.
- ¼ cup chopped pecans or walnuts — Totally optional, but I love the texture they add.
I recommend using Libby’s canned pumpkin puree for consistent results. Their pumpkin is always smooth and not too watery. For the bananas, the darker and spottier, the better. If your bananas are not quite ripe enough, you can speed things up by placing them on a baking sheet in a 300°F oven for 15 minutes until the skins turn black. They will soften right up.
Equipment Needed
Here is what you will need to pull this together. Nothing fancy, I promise.
- One large mixing bowl — Big enough to whisk everything without splashing.
- A whisk and a rubber spatula — The whisk for the wet ingredients, the spatula for folding in the flour.
- A 9×5-inch loaf pan — Standard size. If you use an 8×4-inch pan, you will need to increase the baking time by about 10 minutes.
- Parchment paper — My secret for easy removal. Leave an overhang on the long sides for handles.
- Measuring cups and spoons — Or a kitchen scale if you prefer weighing ingredients (I do).
- Cooling rack — Essential for even cooling so the bottom does not get soggy.
- Toothpick or skewer — For testing doneness.
If you do not have a loaf pan, you can bake this in a 9×9-inch square pan for about 25-30 minutes. The bake time will be shorter, so keep an eye on it. I have also made these as muffins (see the variations section below), and they turn out great. A standard 12-cup muffin tin and paper liners are all you need for that version.
Preparation Method
Preheat your oven to 350°F (175°C). Line your 9×5-inch loaf pan with parchment paper, leaving an overhang on the two long sides. Lightly grease the exposed ends with a little butter or non-stick spray. Set the pan aside.
Step 1: Mash the bananas. In your large mixing bowl, add the ripe bananas. Mash them thoroughly with a fork until they are mostly smooth with just a few small lumps. You want about 1 cup of mashed banana. This is the base of our bread, so take your time here.
Step 2: Combine the wet ingredients. To the mashed bananas, add the pumpkin puree, vegetable oil, granulated sugar, brown sugar, eggs, and vanilla extract. Whisk everything together until it is smooth and well combined. The mixture will look a little thick and glossy. That is perfect. Do not over-whisk; just get it uniform.
Step 3: Mix the dry ingredients. Add the flour, baking soda, cinnamon, nutmeg, ginger, cloves, and salt directly on top of the wet mixture. Do not stir yet. Trust me on this. Use your whisk to gently stir the dry ingredients together on top of the wet mixture before folding everything together. This ensures the baking soda and spices are evenly distributed without over-mixing.
Step 4: Fold until just combined. Switch to your rubber spatula. Gently fold the dry ingredients into the wet ingredients. Use a sweeping motion, scraping the bottom of the bowl. Stop folding as soon as you no longer see streaks of flour. A few small lumps are fine. Over-mixing will make the bread tough and dense. You want a tender crumb, not a hockey puck.
Step 5: Pour and top. Pour the batter into your prepared loaf pan. Use the spatula to spread it evenly. If you are using the topping, sprinkle the turbinado sugar and chopped pecans (if using) evenly over the top. The sugar creates a lovely crackly crust.
Step 6: Bake. Place the pan in the preheated oven on the center rack. Bake for 50 to 60 minutes. At the 45-minute mark, check the bread. If the top is browning too quickly, tent it loosely with a piece of aluminum foil. The bread is done when a toothpick inserted into the center comes out clean or with just a few moist crumbs attached. If the toothpick has wet batter on it, give it another 5 minutes and check again.
Step 7: Cool. Let the bread cool in the pan on a wire rack for 15 minutes. Then, use the parchment paper handles to lift the bread out of the pan and transfer it to the wire rack to cool completely. Do not slice it while it is still warm, or it will crumble. I know it is tempting, but patience pays off here. Let it cool for at least 1 hour before slicing.
Step 8: Slice and enjoy. Use a serrated knife to slice the bread. A gentle sawing motion works best. Serve plain, with a pat of butter, or with a drizzle of honey. Store leftovers in an airtight container at room temperature for up to 4 days.
Cooking Tips & Techniques
I have made this recipe more times than I can count, and I have learned a few things along the way. Here are my best tips for getting it right every single time.
Do not over-mix the batter. This is the number one mistake people make with quick breads. Once you add the flour, mix only until it disappears. Over-mixing develops gluten, which makes the bread tough and dense. You want a tender, soft crumb. A few lumps are your friend.
Check your baking soda. Baking soda loses its potency over time. If your baking soda has been sitting in the back of your pantry for two years, it might not work as well. To test it, drop a teaspoon of baking soda into a small bowl of vinegar. If it fizzes vigorously, it is still good. If it barely bubbles, buy a new box.
Room temperature eggs matter. Cold eggs can seize up the batter and make it harder to mix evenly. If you forgot to take your eggs out of the fridge, place them in a bowl of warm (not hot) water for 5 minutes before using them. This simple step makes a real difference in the final texture.
Let the bread cool completely. I know the smell is intoxicating. I know you want a warm slice with butter. But slicing this bread while it is still warm will result in a crumbly, gummy mess. The bread continues to set as it cools. Give it at least an hour. Trust me, it is worth the wait.
Use a kitchen scale for consistent results. Measuring flour by volume can be inconsistent. If you have a kitchen scale, weigh your flour. 195 grams is the sweet spot. If you do not have a scale, spoon the flour into your measuring cup and level it off with a knife. Do not scoop directly from the bag; that packs the flour and gives you too much.
Variations & Adaptations
One of the best things about this recipe is how versatile it is. Here are some of my favorite ways to change it up, depending on what I have on hand or what I am in the mood for.
Chocolate Chip Banana Pumpkin Bread. Fold in ½ cup of semi-sweet or dark chocolate chips right before pouring the batter into the pan. The chocolate adds a rich, melty contrast to the spiced bread. I have made this version for my niece’s birthday, and it disappeared in minutes.
Gluten-Free Version. Substitute the all-purpose flour with a 1:1 gluten-free baking flour blend that contains xanthan gum. I have tested this with Bob’s Red Mill 1:1 Baking Flour, and it works beautifully. The texture is slightly more delicate, so let it cool completely before slicing.
Vegan Adaptation. Replace the eggs with two flax eggs (2 tablespoons ground flaxseed mixed with 6 tablespoons water, let sit for 5 minutes). Use a plant-based milk alternative if needed, though the recipe does not call for milk. The texture will be a bit denser, but still delicious and moist.
Pumpkin Banana Muffins. Divide the batter evenly among a 12-cup muffin tin lined with paper liners. Bake at 350°F for 18-22 minutes, or until a toothpick inserted into the center of a muffin comes out clean. This is my go-to for breakfast meal prep. They freeze beautifully, too.
Spice It Up. If you like a stronger spice profile, add ¼ teaspoon of cardamom or allspice along with the other spices. Cardamom pairs especially well with pumpkin and gives the bread a slightly floral, aromatic quality that feels fancy without any extra effort.
Serving & Storage Suggestions
This bread is wonderfully versatile when it comes to serving. Here is how I like to enjoy it, and how to keep it fresh for as long as possible.
Serving Temperature. This bread is excellent at room temperature, but I also love it lightly toasted. Pop a slice in the toaster or under the broiler for just a minute or two until the edges are slightly crisp. Then spread a generous pat of salted butter on top and watch it melt into the warm crumb. Heaven.
Pairings. A slice of this bread pairs beautifully with a hot cup of coffee, a chai latte, or a glass of cold milk. For a more indulgent treat, serve it warm with a drizzle of maple syrup and a dollop of whipped cream. It also makes a lovely addition to a fall brunch spread alongside a cozy crockpot fall harvest chicken stew for a sweet-savory combo.
Room Temperature Storage. Store the bread in an airtight container or wrap it tightly in plastic wrap at room temperature for up to 4 days. The flavor actually improves after the first day as the spices meld together.
Refrigeration. If you live in a warm or humid climate, you can refrigerate the bread. Wrap it tightly in plastic wrap and then in aluminum foil to prevent it from drying out. It will keep for up to a week in the fridge. Let it come to room temperature before serving, or toast it directly from the fridge.
Freezing. This bread freezes beautifully. Wrap the cooled loaf (or individual slices) tightly in plastic wrap, then in a layer of aluminum foil, and place it in a freezer-safe bag. It will keep for up to 3 months. To thaw, leave it on the counter for a few hours or pop a frozen slice directly into the toaster.
Flavor Development. Honestly, this bread is even better on day two. The spices have time to settle, and the moisture distributes more evenly throughout the loaf. If you can resist eating it all on day one, you will be rewarded with an even more delicious slice the next morning.
Nutritional Information & Benefits
Here is an estimated nutritional breakdown for one slice of this bread (based on 10 slices, without the optional pecan topping). Keep in mind that these values are approximate and can vary based on specific brands and ingredient substitutions.
| Nutrient | Per Slice |
|---|---|
| Calories | 245 |
| Total Fat | 9g |
| Saturated Fat | 1.5g |
| Cholesterol | 37mg |
| Sodium | 220mg |
| Total Carbohydrates | 38g |
| Dietary Fiber | 2g |
| Sugars | 20g |
| Protein | 4g |
| Vitamin A | 35% DV |
| Potassium | 180mg |
This bread offers a few nutritional perks worth noting. The pumpkin puree is packed with vitamin A, which supports eye health and immune function. Bananas contribute potassium, which is important for heart health and muscle function. The eggs add a nice boost of protein, and the oil provides healthy unsaturated fats.
If you are looking to reduce the sugar, you can cut the granulated sugar down to ⅓ cup without sacrificing too much texture. The bananas add natural sweetness, so the bread will still taste plenty sweet. For a lower-carb option, this recipe is not naturally low-carb due to the flour and bananas, but you can experiment with almond flour if that is a priority for you.
As always, this bread contains gluten, eggs, and tree nuts (if you add the pecan topping). It is not suitable for those with celiac disease or nut allergies unless you make the appropriate substitutions.
Conclusion
This Moist One-Bowl Banana Pumpkin Bread has become my go-to fall recipe for a reason. It is simple enough for a beginner baker, quick enough for a weekday morning, and delicious enough to impress anyone who tries it. The combination of ripe bananas and pumpkin puree creates a texture that is soft, tender, and perfectly moist without being heavy. The spices are warm and inviting, and the whole thing comes together in one bowl with minimal cleanup.
What I love most about this recipe is how adaptable it is. You can add chocolate chips, turn it into muffins, or keep it classic with a crunchy sugar top. It works for breakfast, snack time, or dessert. It is the kind of bread that makes you feel like you have your life together, even on a chaotic Tuesday.
I would love to hear how this recipe turns out for you. Did you add any variations? Did your family love it as much as mine does? Leave a comment below and let me know. And if you are looking for more fall baking inspiration, you might also enjoy this cozy pumpkin chai latte muffins with maple glaze or this one-bowl pumpkin coffee cake with easy pecan streusel for another one-bowl wonder.
Happy baking, friends. I hope this bread brings a little warmth and comfort to your kitchen this season.
Frequently Asked Questions
Can I use fresh pumpkin instead of canned pumpkin puree?
Yes, you can use fresh pumpkin puree. Just make sure you cook and puree a sugar pumpkin (not a carving pumpkin). After pureeing, let it drain in a fine-mesh sieve lined with cheesecloth for about 30 minutes to remove excess water. Fresh pumpkin tends to be more watery than canned, so draining is essential to avoid a soggy loaf.
Why did my banana pumpkin bread sink in the middle?
A sunken middle usually means the bread was underbaked or the oven temperature was too low. Make sure your oven is fully preheated to 350°F and that you are using an oven thermometer to verify the temperature. Also, do not open the oven door during the first 40 minutes of baking, as the rush of cold air can cause the bread to collapse.
Can I use frozen bananas for this recipe?
Absolutely. Frozen bananas work great. Thaw them completely at room temperature, then drain off any excess liquid before mashing. The bananas will be very soft and almost liquidy when thawed, which is actually perfect for this recipe. Just make sure to measure out 1 cup of mashed banana after draining.
How do I know when the bread is done baking?
The best way to test for doneness is the toothpick test. Insert a toothpick or a thin skewer into the center of the bread. If it comes out clean or with just a few moist crumbs attached, the bread is done. If it comes out with wet batter, give it another 5-7 minutes and check again. The top should also be golden brown and spring back gently when touched.
Can I make this bread dairy-free?
Yes, this recipe is naturally dairy-free as written. It uses oil instead of butter and does not call for any milk or cream. Just double-check that your chocolate chips (if using) are dairy-free, and you are good to go. The bread is incredibly moist and tender without any dairy at all.
Pin This Recipe!
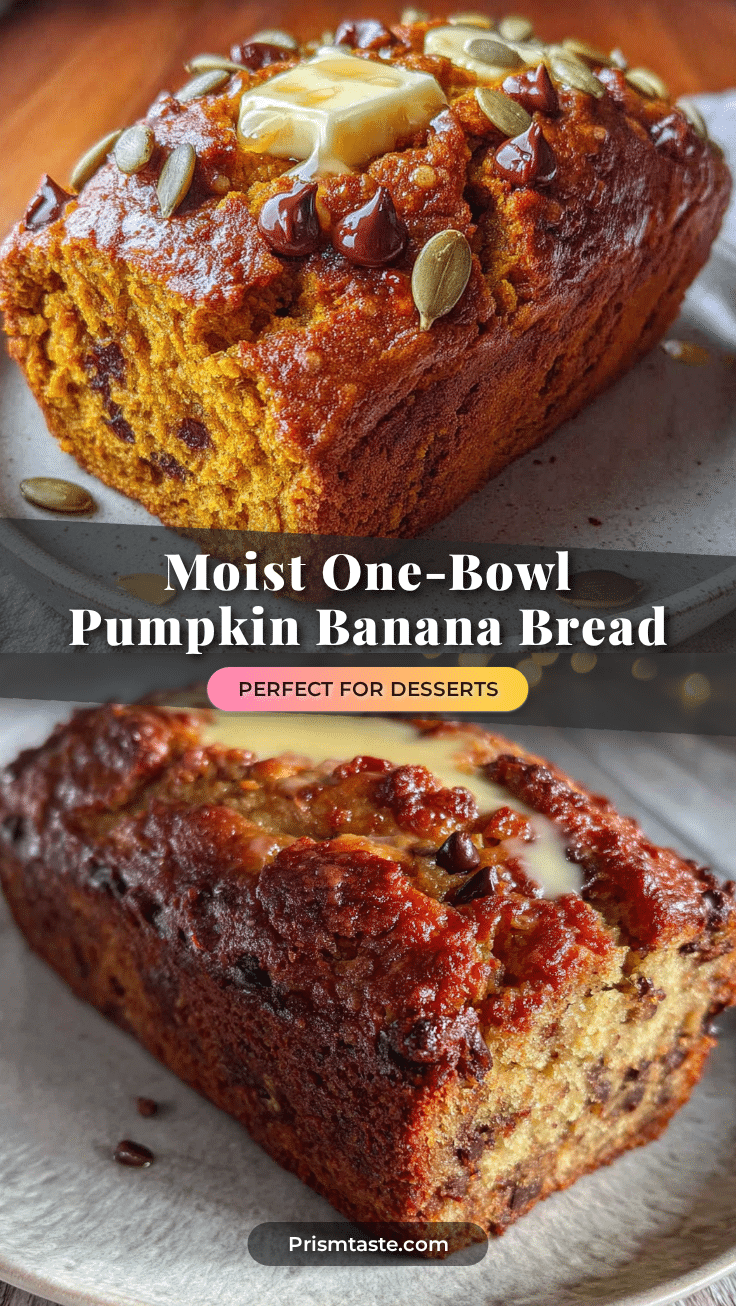
Moist One-Bowl Banana Pumpkin Bread
This moist and tender banana pumpkin bread combines ripe bananas and pumpkin puree for a perfectly spiced fall loaf. Made in one bowl with simple pantry ingredients, it’s an easy, foolproof recipe that’s even better the next day.
- Prep Time: 15 minutes
- Cook Time: 55 minutes
- Total Time: 1 hour 10 minutes
- Yield: 10 servings 1x
- Category: Dessert
- Cuisine: American
Ingredients
- 1 ½ cups all-purpose flour (195g)
- 1 teaspoon baking soda
- 1 teaspoon ground cinnamon
- ½ teaspoon ground nutmeg
- ½ teaspoon ground ginger
- ¼ teaspoon ground cloves
- ½ teaspoon salt
- 1 cup mashed ripe bananas (about 2 large bananas)
- ½ cup pumpkin puree (120g)
- ⅓ cup vegetable oil (80ml)
- ½ cup granulated sugar (100g)
- ¼ cup brown sugar, packed (50g)
- 2 large eggs
- 1 teaspoon vanilla extract
- 1 tablespoon turbinado sugar (optional, for topping)
- ¼ cup chopped pecans or walnuts (optional, for topping)
Instructions
- Preheat oven to 350°F (175°C). Line a 9×5-inch loaf pan with parchment paper, leaving overhang on the long sides. Lightly grease exposed ends.
- In a large mixing bowl, mash ripe bananas with a fork until mostly smooth with a few small lumps (about 1 cup).
- Add pumpkin puree, vegetable oil, granulated sugar, brown sugar, eggs, and vanilla extract. Whisk until smooth and well combined.
- Add flour, baking soda, cinnamon, nutmeg, ginger, cloves, and salt on top of the wet mixture. Gently stir dry ingredients together on top before folding everything together with a rubber spatula.
- Fold until just combined—no streaks of flour remain. Do not over-mix; a few lumps are fine.
- Pour batter into prepared loaf pan and spread evenly. Sprinkle turbinado sugar and chopped nuts on top if using.
- Bake on center rack for 50–60 minutes. At 45 minutes, check browning; tent with foil if needed. Bread is done when a toothpick inserted in center comes out clean or with a few moist crumbs.
- Cool in pan on a wire rack for 15 minutes. Use parchment handles to lift bread out and transfer to rack to cool completely (at least 1 hour) before slicing.
- Slice with a serrated knife using a gentle sawing motion. Serve plain, with butter, or with honey.
Notes
Do not over-mix the batter to avoid a tough loaf. Check baking soda freshness by testing with vinegar. Use room temperature eggs for best texture. Let bread cool completely before slicing to prevent crumbling. For consistent results, weigh flour (195g). Bread improves overnight as flavors meld.
Nutrition
- Serving Size: 1 slice
- Calories: 245
- Sugar: 20
- Sodium: 220
- Fat: 9
- Saturated Fat: 1.5
- Carbohydrates: 38
- Fiber: 2
- Protein: 4
Keywords: banana pumpkin bread, one bowl banana bread, fall banana bread, pumpkin banana bread, easy banana bread recipe, moist banana bread


