The crackling of the cheese crust as you cut into it — that’s the whole point. Not the gooey pull, not the melty center, though those are nice too. No, what I was after was that audible crunch giving way to something soft and warm underneath. I had this vision weeks before the big game, standing in my kitchen staring at a block of cream cheese like it held the answer. And honestly, it kind of did.
I’ve never been one for fussy party food. You know the type — those little phyllo cups with three different drizzles that look pretty but leave you hungry. Game day food should be different. It should be the kind of thing you can eat while standing up, holding a drink, yelling at the TV. Something that doesn’t require a plate and a fork and a napkin and a prayer. This baked football cheese ball is that thing.
The idea came to me during a particularly intense fourth quarter. I was halfway through a bag of mediocre store-bought dip, thinking about how much better homemade would be. I wanted something that looked like it belonged at a party — shaped like a football, obviously — but tasted like actual effort went into it. Not complicated effort, just smart effort. The kind where you let the oven do most of the work.
So I started testing. First batch was too soft. Second batch was too dense. Third batch? That was the one where my husband walked in, grabbed a cracker, scooped up a chunk of warm, cheesy goodness, and said, “Don’t change a thing.” So I didn’t. This game day baked football cheese ball is the result of that third batch, and it’s been my go-to ever since. Trust me on this one.
Why You’ll Love This Recipe
I’ve made this for three different game days now, and it disappears every single time. Not in a polite, “oh, I’ll just have one more” way. In a “who ate the last of it while I was getting a beer” way. That’s the kind of recipe you want in your back pocket.
- Comes together fast: Twenty minutes of hands-on work, then the oven does the rest. You can prep it during halftime and still have it ready before the third quarter ends.
- Simple ingredients: Nothing fancy here. Cream cheese, cheddar, a few seasonings, and some pantry staples. You probably have most of it already.
- Perfect for parties: It’s shaped like a football. That alone makes it the star of the snack table. Kids love it, adults love it, even people who claim they’re “not really into cheese dips” go back for seconds.
- Always a crowd-pleaser: I’ve brought this to potlucks, backyard barbecues, and Super Bowl parties. It’s never come home with leftovers. Not once.
- Unbelievably delicious: The outside gets this beautiful golden crust while the inside stays creamy and warm. The texture contrast is honestly addictive.
What makes this different from every other cheese ball out there? The baking. Most cheese balls are served cold, which is fine, I guess. But baking it transforms the texture completely. The cheese melts into this luscious, dippable situation that’s way more satisfying than cold cream cheese ever could be. Plus, shaping it like a football is just fun. It’s the kind of thing that makes people smile before they even taste it.
This isn’t just good — it’s the kind of appetizer that makes you close your eyes after the first bite. It’s comfort food reimagined for game day, with the same soul-soothing satisfaction but way more portable. Perfect for impressing guests without stress, or turning a simple snack spread into something memorable.
What Ingredients You Will Need
This recipe uses straightforward ingredients to deliver big flavor and satisfying texture without any fuss. Most of these are things you probably already have in your kitchen, which is exactly how game day cooking should be.
- Cream cheese (16 oz), softened to room temperature: This is the base of our football. Use full-fat for the best texture — low-fat versions get a bit grainy when baked. I prefer Philadelphia brand for consistency.
- Sharp cheddar cheese (2 cups, shredded): Buy a block and shred it yourself. Pre-shredded cheese has anti-caking agents that prevent it from melting smoothly. Trust me on this one.
- Monterey Jack cheese (1 cup, shredded): Adds that perfect meltiness. You could use all cheddar, but the Jack gives it a creamier texture.
- Bacon (6 strips, cooked and crumbled): Because everything is better with bacon. Cook it until crispy, then chop it fine. You want little bits throughout, not big chunks.
- Green onions (4-5, thinly sliced): Adds freshness and color. The green parts are prettiest, but use the white parts too for more flavor.
- Garlic powder (1 teaspoon): Don’t use fresh garlic here — it can get bitter during baking. Garlic powder gives you that savory note without the risk.
- Onion powder (1 teaspoon): Pairs with the garlic powder for that classic savory base.
- Worcestershire sauce (1 tablespoon): Adds umami depth. This is my secret ingredient — don’t skip it.
- Salt (½ teaspoon): Just enough to enhance everything. Go easy since the cheeses and bacon are already salty.
- Black pepper (¼ teaspoon): Fresh ground is best.
- Pecans or almonds (½ cup, finely chopped): For the outside coating. Pecans are more traditional, but almonds work great too. Toast them first for extra flavor.
- For the laces (optional): Use chives or thin strips of red bell pepper to create the football laces on top. Makes it look legit.
For the bacon, I like using thick-cut applewood smoked. It’s got a sweetness that plays nicely with the sharp cheddar. If you’re feeding vegetarians, you can leave the bacon out entirely — the cheese ball is still delicious without it. Just add an extra ¼ teaspoon of smoked paprika to get some of that smoky flavor back.
One more thing about the cream cheese — let it sit out for at least an hour before you start. Cold cream cheese is impossible to mix smoothly, and you’ll end up with lumpy bits. Nobody wants a lumpy football.
Equipment Needed
You don’t need much for this, which is part of why I love it. Here’s what you’ll need:
- Large mixing bowl: For combining all the ingredients. Any bowl works, but a wide one makes mixing easier.
- Electric hand mixer or stand mixer: You can mix by hand if you’ve got strong arms, but the mixer makes it so much faster and smoother. I’ve done it both ways, and the mixer is worth pulling out.
- Rubber spatula: For scraping down the sides and shaping the ball.
- Plastic wrap: To wrap the cheese ball while it chills. This step is important for the shape to hold.
- Baking sheet lined with parchment paper: For baking. The parchment makes cleanup a breeze.
- Sharp knife and cutting board: For chopping the green onions and bacon.
- Small skillet: If you’re toasting the nuts, which I highly recommend.
If you don’t have a mixer, no worries. Just let your cream cheese get really soft — like, leave it out for two hours — and use a sturdy spoon. It’ll take a few minutes of elbow grease, but it works. I’ve done it that way when my mixer was buried in the back of a cabinet, and the result was just as good.
Preparation Method
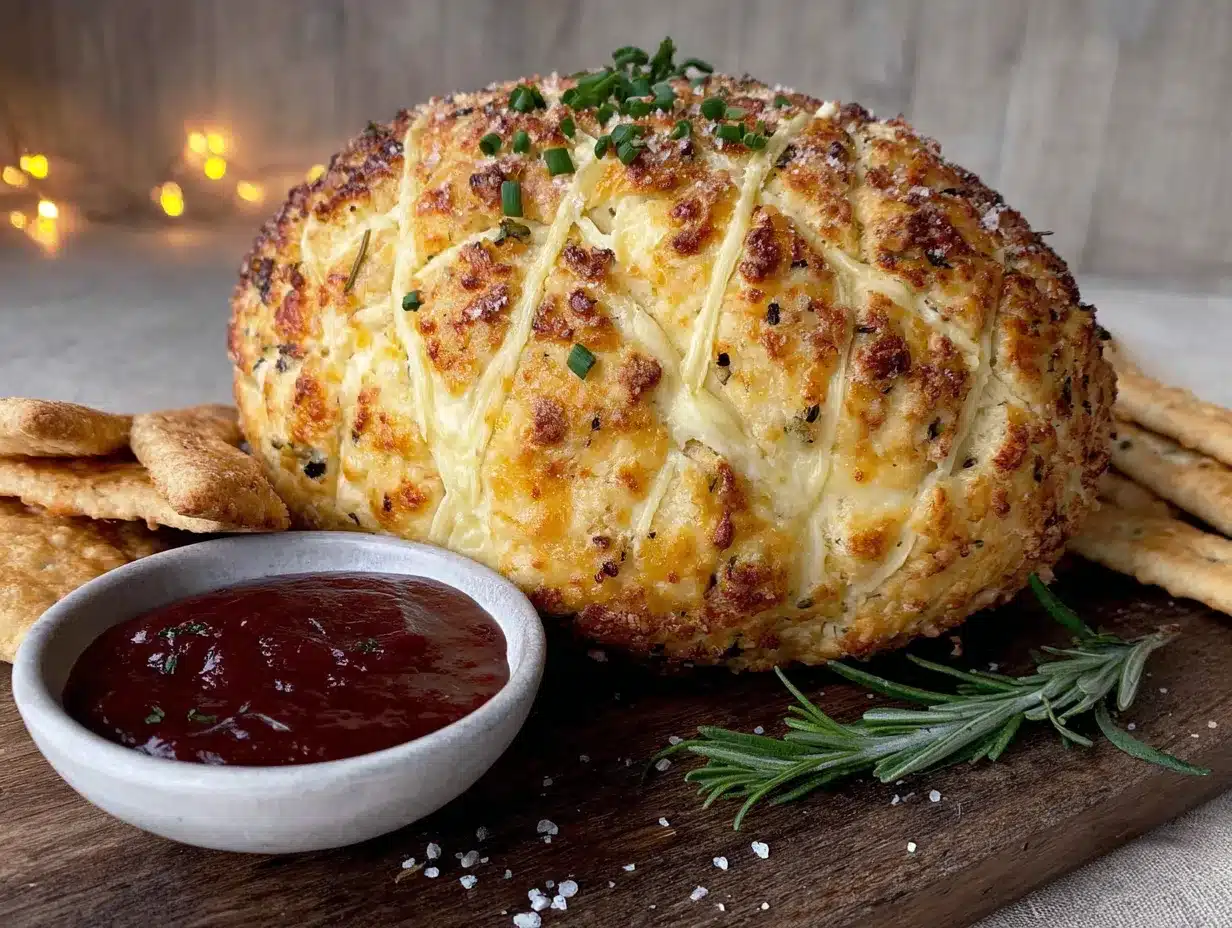
Let’s make this football happen. I’ll walk you through every step so there’s no confusion.
- Preheat your oven to 375°F (190°C). Line a baking sheet with parchment paper and set it aside. Getting the oven hot first means it’s ready when you are.
- Cook the bacon. In a skillet over medium heat, cook those 6 strips until crispy, about 6-8 minutes. Transfer to a paper towel-lined plate to drain. Once cool enough to handle, crumble or chop into small pieces. Set aside.
- Toast the nuts (optional but recommended). In that same skillet (drain most of the bacon fat, leaving just a thin coating), add your chopped pecans or almonds. Toast over medium heat for 2-3 minutes, stirring frequently, until fragrant. Watch them carefully — nuts burn fast. Transfer to a plate to cool.
- Soften the cream cheese. Make sure your cream cheese is at room temperature. If you forgot to take it out, here’s a trick: unwrap it, place it on a microwave-safe plate, and microwave for 10-15 seconds. Don’t overdo it or you’ll have melted cream cheese, which is a different problem entirely.
- Mix the base. In your large mixing bowl, combine the softened cream cheese, shredded cheddar, shredded Monterey Jack, crumbled bacon (save a tablespoon for garnish), sliced green onions (save some for garnish), garlic powder, onion powder, Worcestershire sauce, salt, and pepper. Beat with your hand mixer on medium speed until everything is well combined and smooth. Scrape down the sides with your spatula halfway through.
- Taste and adjust. This is important — dip a clean spoon in and taste it. Need more salt? More garlic? Adjust now before it goes in the oven. I usually add an extra dash of Worcestershire at this point because I love that savory depth.
- Shape the football. Transfer the cheese mixture onto a large piece of plastic wrap. Use your hands to shape it into a football shape — sort of an elongated oval with slightly pointed ends. Don’t stress about perfection; you’ll smooth it out. Wrap the plastic wrap tightly around the shaped cheese and refrigerate for at least 30 minutes. This chilling step is crucial — it helps the ball hold its shape during baking.
- Prep the coating. While the cheese ball chills, spread your toasted, chopped nuts on a plate. If you’re using chives or bell pepper for the laces, prep those now too.
- Coat the football. After 30 minutes, unwrap the chilled cheese ball. Gently press the nuts into the outside, covering all sides. Don’t press too hard or you’ll break the ball apart. Just a gentle, even coating. Place the coated football on your parchment-lined baking sheet.
- Bake. Pop that football into your preheated oven and bake for 20-25 minutes. You’re looking for the outside to be golden and slightly puffed, and the center to be warm and melty. If you want it extra golden, switch to broil for the last 2 minutes — but watch it closely so it doesn’t burn.
- Add the laces. Right when it comes out of the oven, use your chives or bell pepper strips to create the football laces on top. Work quickly while the cheese is still warm and pliable. Sprinkle your reserved bacon and green onions over the top for a finished look.
- Let it rest for 5 minutes. I know, I know, you want to dig in. But letting it rest allows the cheese to set up just enough that it won’t slide off your cracker. Five minutes. That’s all I’m asking.
Your kitchen is going to smell incredible at this point. The combination of melted cheese, bacon, and toasted nuts is honestly intoxicating. You’ll have people wandering in asking what’s for dinner before the timer even goes off.
Cooking Tips & Techniques
I’ve made this recipe enough times to know where things can go wrong. Here’s what I’ve learned the hard way so you don’t have to.
Don’t skip the chilling step. I tried it once when I was in a hurry, thinking “how different could it be?” Very different, apparently. The cheese ball spread out on the baking sheet into more of a cheese pancake than a football. Still tasted good, but it lost all the presentation points. That 30 minutes in the fridge makes the mixture firm enough to hold its shape during baking.
Watch your oven temperature. Every oven runs a little differently. My friend’s oven runs hot, and her first batch came out darker than she wanted. Check yours at the 18-minute mark if you know it runs hot. You’re looking for golden, not brown. The cheese should be bubbly around the edges but not burnt.
Room temperature ingredients matter. Cold cream cheese is the enemy of smooth mixing. I cannot stress this enough. If you try to mix cold cream cheese, you’ll get lumps that never quite go away, even with a mixer. Set everything out an hour before you start. Your future self will thank you.
Shred your own cheese. I know pre-shredded cheese is convenient, but it’s coated in cellulose and potato starch to prevent clumping. Those additives also prevent smooth melting. Your cheese ball will be grainy instead of creamy. A block of cheddar takes two minutes to shred, and the difference is night and day.
Multitask smartly. While the cheese ball is chilling in the fridge, that’s the perfect time to toast your nuts, prep your garnishes, and set up your serving platter with crackers and veggies. You’ll thank yourself when it comes out of the oven and you just have to place it on the board.
One more thing — if you’re making this for a party, you can prepare it completely up to step 7 (the chilling step) a day ahead. Just keep it wrapped in the fridge, then coat and bake it the day of. It’s a great way to reduce game day stress.
Variations & Adaptations
This recipe is flexible, and I’ve tried quite a few variations over the months. Here are some of my favorites:
Spicy Kick Version: Add 1-2 tablespoons of diced pickled jalapeños or a teaspoon of cayenne pepper to the cheese mixture. The heat cuts through the richness beautifully. I made this version for a group of spice lovers, and it was gone in ten minutes flat.
Herb and Garlic Version: Swap the bacon for 2 tablespoons of fresh chopped herbs — rosemary, thyme, and chives work wonderfully. Add an extra clove of roasted garlic (mashed into a paste) for depth. This version feels a bit more elegant, perfect for a brunch gathering or holiday party.
Everything Bagel Version: Instead of nuts, coat the outside with everything bagel seasoning. The sesame seeds, poppy seeds, garlic, and onion flakes create an incredible crust. This has become my husband’s favorite variation.
Vegetarian Version: Omit the bacon and add ½ cup of finely chopped sun-dried tomatoes or roasted red peppers. The umami from the tomatoes fills the gap the bacon leaves behind. Add a dash of liquid smoke if you want that smoky flavor back.
Nut-Free Version: If you’re serving people with nut allergies, skip the nut coating entirely. Instead, press crushed pork rinds or crushed pretzels into the outside. Both give you that satisfying crunch without the nuts.
I’ve also tried this with different cheese combinations. Smoked gouda instead of cheddar is incredible — it adds this deep, woodsy flavor that’s perfect for fall game days. Pepper jack instead of Monterey Jack gives you a spicy kick without having to add extra peppers. Feel free to experiment based on what you have on hand.
For a fun twist, try making mini footballs instead of one big one. Divide the mixture into 6-8 smaller portions, shape them into mini footballs, and reduce the baking time to 12-15 minutes. They’re perfect for individual servings or for parties where you want multiple options on the table.
Serving & Storage Suggestions
This baked football cheese ball is best served warm, right out of the oven. That’s when the texture is at its peak — crispy outside, melty inside. Set it on a nice platter surrounded by crackers, sliced baguette, and fresh veggie sticks. I like to add some pepperoncini and olives on the side for contrast.
For dipping, you don’t really need anything extra since the cheese ball itself is dippable. But if you want to get fancy, a small bowl of marinara or a drizzle of hot honey on the side adds another layer of flavor. My kids love it with ranch dressing, which I pretend to judge but secretly enjoy.
As for drinks, this pairs beautifully with a cold beer — an IPA or a light lager works great. If you’re doing cocktails, a bourbon-based drink or a margarita complements the savory richness. For non-alcoholic options, sparkling water with lemon or a crisp apple cider are perfect.
Storage: If you have leftovers (which, let’s be honest, is rare), let the cheese ball cool completely, then wrap it tightly in plastic wrap and refrigerate. It’ll keep for 3-4 days. The texture won’t be quite as melty when reheated, but it’s still delicious.
Reheating: To reheat, place it back on a baking sheet and warm it in a 350°F oven for 10-15 minutes, or until heated through. You can also microwave individual portions for 30-45 seconds, though the texture won’t be as nice. The oven method is better.
Freezing: You can freeze the unbaked, shaped cheese ball for up to a month. Wrap it tightly in plastic wrap, then foil. When you’re ready to bake, thaw it overnight in the fridge, then proceed with coating and baking as directed. The texture after freezing is slightly softer, but still very good.
One thing I’ve noticed — the flavors actually deepen after a day in the fridge. So if you’re making it ahead, the leftovers might taste even better than the first serving. Not that you’ll have leftovers, but just in case.
Nutritional Information & Benefits
Let’s be real — this is game day food, not health food. But here’s the breakdown if you’re curious:
Per serving (based on 8 servings):
- Calories: 380
- Fat: 32g
- Carbohydrates: 4g
- Protein: 18g
- Fiber: 1g
- Sugar: 2g
That said, there are some redeeming qualities here. The cheese provides a good amount of calcium and protein, which helps keep you full. The nuts add healthy fats and vitamin E. The bacon, well, the bacon adds joy, which I’m counting as a nutritional benefit.
If you’re watching your intake, this is definitely a “treat yourself” recipe. But it’s also made with real ingredients — no processed cheese products or mystery additives. You know exactly what’s going into it, which is more than you can say for most store-bought dips.
For those with dietary restrictions, this recipe is naturally gluten-free (just make sure your Worcestershire sauce is gluten-free, as some brands contain malt vinegar). It’s also low-carb and keto-friendly if you skip the crackers and use veggie sticks for dipping.
Personally, I think food like this is about balance. Enjoy it on game day, savor every bite, and don’t stress about the numbers. That’s my philosophy anyway.
Conclusion
This game day baked football cheese ball is the kind of recipe that becomes a tradition. It’s fun to make, fun to serve, and even more fun to eat. The combination of creamy, melted cheese with crispy bacon and crunchy nuts is honestly unbeatable, especially when it’s shaped like a football and served warm from the oven.
I love that this recipe lets me be creative — changing up the cheese, trying different coatings, making it spicy or mild depending on the crowd. It’s forgiving enough for beginners but impressive enough for experienced cooks. And the fact that it comes together in under an hour makes it perfect for those last-minute game day cravings.
If you make this, I’d love to hear about it. Did you try a different cheese combination? Did you add extra heat? Did your guests fight over the last bite? Drop a comment below and let me know how it turned out. And if you’re looking for more party-perfect recipes, you might enjoy my creamy game day slow cooker queso blanco and hatch chili dip or these easy no-bake peanut butter oat energy balls for a lighter option.
So go ahead — preheat that oven, soften that cream cheese, and get ready to be the hero of your next game day gathering. Your football-shaped, bacon-studded, cheese-filled masterpiece awaits. Game on!
Frequently Asked Questions
Can I make this ahead of time?
Yes! You can prepare the cheese mixture, shape it into a football, wrap it in plastic, and refrigerate for up to 24 hours before baking. Just add the nut coating right before you bake it for the best texture.
How do I get the football shape right?
Think of it like making a meatball, but oval. Start with a round ball, then gently press the sides to elongate it into an oval shape. Taper the ends slightly with your palms. It doesn’t have to be perfect — the laces will help sell the look.
Can I use different cheeses?
Absolutely. Smoked gouda, pepper jack, or even a bit of blue cheese work great. Just keep the total cheese amount the same and make sure at least half is a good melting cheese like cheddar or Monterey Jack.
What if I don’t have Worcestershire sauce?
You can substitute with soy sauce or coconut aminos, though the flavor will be slightly different. A splash of balsamic vinegar also works in a pinch. The Worcestershire adds umami depth, so whatever you use should have some savory quality.
How do I keep the cheese ball from spreading too much during baking?
That 30-minute chill in the fridge is key. It firms up the cream cheese enough that it holds its shape during the first few minutes of baking. If you’re worried, you can chill it for up to an hour. Don’t skip this step.
Pin This Recipe!

Game Day Baked Football Cheese Ball: Easy Party Appetizer

A warm, baked cheese ball shaped like a football, loaded with cream cheese, cheddar, bacon, and nuts. Perfect for game day parties, this easy appetizer comes together in under an hour and disappears every time.
- Prep Time: 20 minutes
- Cook Time: 25 minutes
- Total Time: 45 minutes
- Yield: 8 servings 1x
- Category: Appetizer
- Cuisine: American
Ingredients
- 16 oz cream cheese, softened to room temperature
- 2 cups sharp cheddar cheese, shredded
- 1 cup Monterey Jack cheese, shredded
- 6 strips bacon, cooked and crumbled
- 4–5 green onions, thinly sliced
- 1 teaspoon garlic powder
- 1 teaspoon onion powder
- 1 tablespoon Worcestershire sauce
- ½ teaspoon salt
- ¼ teaspoon black pepper
- ½ cup pecans or almonds, finely chopped
- Chives or thin strips of red bell pepper for laces (optional)
Instructions
- Preheat oven to 375°F (190°C). Line a baking sheet with parchment paper.
- Cook bacon in a skillet over medium heat until crispy, about 6-8 minutes. Drain on paper towels, then crumble.
- Toast chopped nuts in the same skillet over medium heat for 2-3 minutes until fragrant. Set aside to cool.
- In a large mixing bowl, combine softened cream cheese, shredded cheddar, shredded Monterey Jack, crumbled bacon (reserve 1 tablespoon for garnish), sliced green onions (reserve some for garnish), garlic powder, onion powder, Worcestershire sauce, salt, and pepper.
- Beat with an electric hand mixer on medium speed until well combined and smooth. Taste and adjust seasoning if needed.
- Transfer cheese mixture onto a large piece of plastic wrap. Shape into a football shape (elongated oval with slightly pointed ends). Wrap tightly and refrigerate for at least 30 minutes.
- Spread toasted nuts on a plate. After chilling, unwrap the cheese ball and gently press nuts into the outside to coat evenly.
- Place coated football on prepared baking sheet. Bake for 20-25 minutes until golden and slightly puffed. For extra golden color, broil for the last 2 minutes, watching closely.
- Remove from oven and immediately add football laces using chives or bell pepper strips. Sprinkle reserved bacon and green onions on top.
- Let rest for 5 minutes before serving. Serve warm with crackers, sliced baguette, and fresh veggie sticks.
Notes
Don’t skip the chilling step—it helps the cheese ball hold its shape during baking. Use room temperature cream cheese for smooth mixing. Shred your own cheese for best melting. For a make-ahead option, prepare up to step 7 (chilling) a day ahead, then coat and bake the day of. For mini footballs, divide mixture into 6-8 portions and bake for 12-15 minutes.
Nutrition
- Serving Size: 1 serving
- Calories: 380
- Sugar: 2
- Fat: 32
- Carbohydrates: 4
- Fiber: 1
- Protein: 18
Keywords: baked cheese ball, football cheese ball, game day appetizer, party appetizer, cheese ball, bacon cheese ball, easy appetizer


