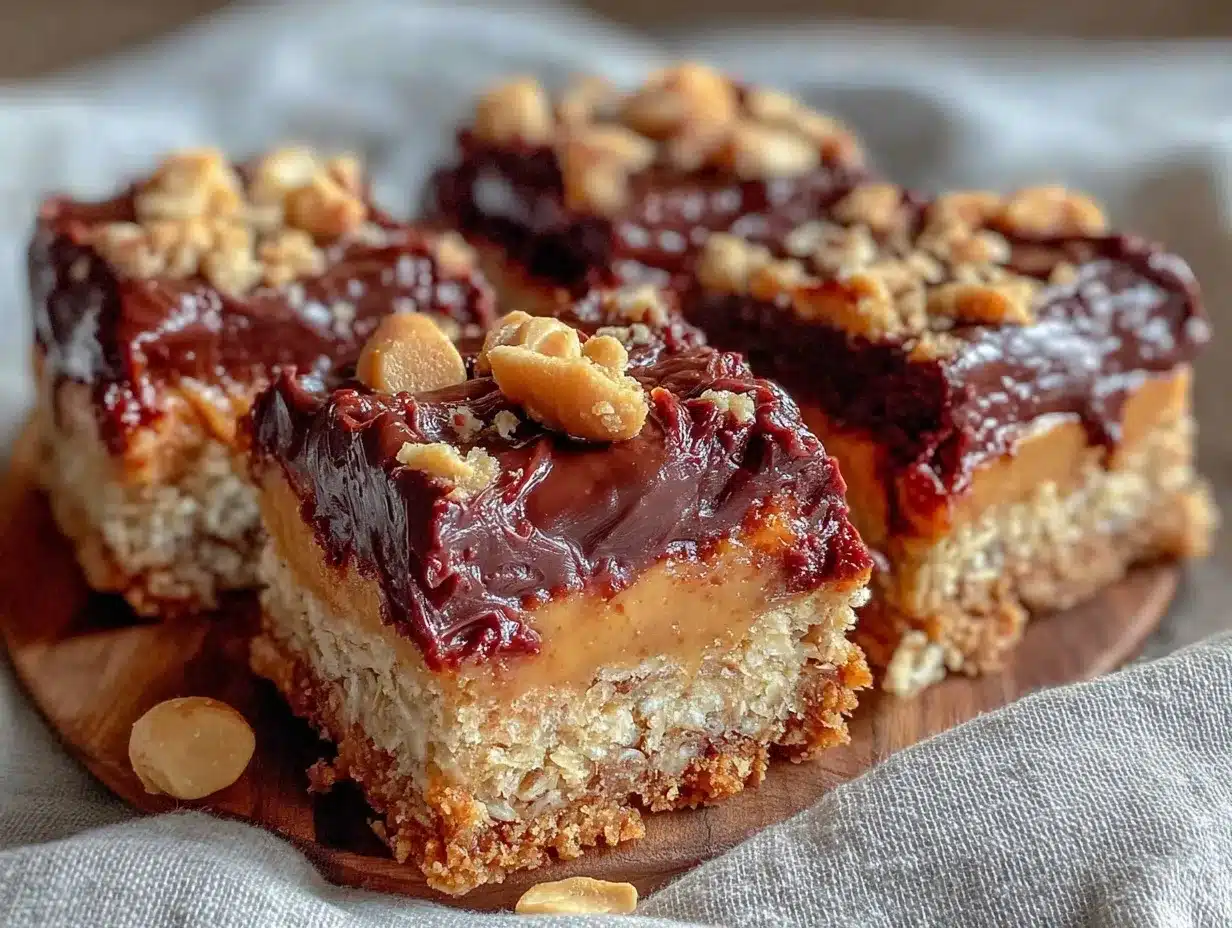
“You’ve got peanut butter and chocolate? That’s it?” my friend asked skeptically as I pulled these Easy No-Bake Peanut Butter Chocolate Oat Bars out of the fridge. Honestly, I felt the same way at first. One evening, after a long day juggling work and a growing pile of “to-dos,” I just wanted something quick, satisfying, and a little indulgent without the fuss of the oven. I rummaged through my pantry, glanced at the oats, peanut butter, and chocolate chips, and figured I’d throw something together—no recipe, no measuring cups, just eyeballing it.
What happened next surprised me: the bars set up perfectly in under an hour, and the combination of creamy peanut butter and rich chocolate with the comforting chew of oats was exactly what I needed. No baking, no mess, no waiting forever. Since then, these bars have become my go-to snack for busy afternoons, quick breakfasts, or even a last-minute treat when guests drop by. They’re the kind of snack that makes you pause for a moment and savor that perfect bite.
What’s stuck with me is how simple ingredients can create something that feels indulgent but is still wholesome. It’s not just about a sweet fix; these bars carry a little comfort and energy in every bite. And that quiet realization—that sometimes the easiest recipes are the best ones—keeps me coming back to this no-bake peanut butter chocolate oat bars recipe again and again.
Why You’ll Love This Recipe
From one snack lover to another, these Easy No-Bake Peanut Butter Chocolate Oat Bars have earned their place in my kitchen because they hit all the right marks. Here’s why they might just become your favorite too:
- Quick & Easy: You can whip these up in about 15 minutes, and they firm up in less than an hour—perfect for busy days or when you need a snack ASAP.
- Simple Ingredients: No need for fancy trips to specialty stores. Most of these items are pantry staples, making it a breeze to pull together.
- Perfect for On-the-Go: Whether you need a lunchbox addition, post-workout boost, or a quick afternoon pick-me-up, these bars travel well and stay fresh.
- Crowd-Pleaser: Kids love ’em, adults love ’em, and they’re great for sharing at casual get-togethers or potlucks.
- Unbelievably Delicious: The creamy peanut butter melds beautifully with the chocolate, with oats adding just the right chewiness. Honestly, it’s comfort food without the guilt.
What sets this recipe apart is the balance of texture and flavor—no soggy bottoms or chalky bites here. The secret? Using smooth peanut butter and melting the chocolate gently to get that silky coating on the oats. Plus, a tiny pinch of salt to bring out all those flavors.
It’s the kind of snack that makes you close your eyes for a second after the first bite and say, “Yep, this is exactly what I needed.” If you’re juggling a hectic schedule or just want an easy homemade treat without turning on the oven, you’ll find this recipe fits right into your rhythm—no fuss, just yum.
What Ingredients You Will Need
This recipe keeps things simple and wholesome, relying on ingredients that bring both flavor and texture without complicating your pantry. Here’s what you’ll need to make your own batch of Easy No-Bake Peanut Butter Chocolate Oat Bars:
- Old-fashioned rolled oats (2 cups / 180g) – Gives the bars their chewy, hearty texture. I prefer Bob’s Red Mill for consistent quality.
- Natural creamy peanut butter (1 cup / 250g) – The star ingredient. Look for one with just peanuts and maybe a pinch of salt. Avoid overly processed or sweetened types.
- Honey or maple syrup (1/2 cup / 120ml) – Adds natural sweetness and helps bind everything together. Maple syrup gives a subtle depth of flavor if you want to switch it up.
- Vanilla extract (1 teaspoon) – Just a splash to round out the flavors.
- Mini semi-sweet chocolate chips (3/4 cup / 130g) – Melts into little pockets of chocolatey goodness. I use Ghirardelli minis but any good-quality chocolate chips work.
- Chia seeds or ground flaxseed (2 tablespoons, optional) – For a little nutritional boost and extra binding power.
- Salt (1/4 teaspoon) – Enhances the peanut butter and chocolate combo. Don’t skip it, even if your peanut butter is salted.
Feel free to swap rolled oats with gluten-free oats if needed. If you’re after a nut-free version, sunflower seed butter works surprisingly well here. And for a vegan twist, substitute honey with pure maple syrup.
Equipment Needed
Since this is a no-bake recipe, you won’t need much in the way of gear. Here’s what I use:
- Mixing bowl: A medium to large one to combine everything comfortably.
- Measuring cups and spoons: For accurate ingredient amounts.
- Wooden spoon or silicone spatula: To mix the sticky peanut butter and honey mixture well.
- 8×8-inch baking pan or similar: Line it with parchment paper for easy bar removal.
- Microwave-safe bowl or double boiler: For melting chocolate chips gently. I personally prefer the double boiler method to avoid scorching.
If you don’t have a baking pan, a shallow glass or metal dish works just fine. For quick cleanup, silicone baking mats or liners are lifesavers. Nothing fancy needed, just a few basics that probably live in your kitchen already.
Preparation Method
- Toast the oats (optional but recommended): Place the 2 cups (180g) of rolled oats in a dry skillet over medium heat. Stir frequently for about 5 minutes until they smell nutty and turn a light golden color. This step brings out more flavor and adds a toasty depth to your bars. Let cool slightly.
- Mix the wet ingredients: In your mixing bowl, combine 1 cup (250g) of creamy peanut butter, 1/2 cup (120ml) of honey or maple syrup, and 1 teaspoon of vanilla extract. Stir vigorously until smooth and well blended. This usually takes about 2-3 minutes. If your peanut butter is firm, microwave for 20 seconds to soften.
- Add dry ingredients: Stir in the toasted oats, 2 tablespoons of chia seeds or ground flaxseed if using, and 1/4 teaspoon of salt. Mix well so every oat is coated with that luscious peanut butter mixture.
- Melt the chocolate chips: Gently melt 3/4 cup (130g) of mini semi-sweet chocolate chips using a double boiler or microwave in 20-second bursts, stirring between each. You want silky smooth chocolate, not burnt or grainy.
- Combine and layer: Reserve about 1/4 cup of melted chocolate to drizzle on top later. Mix the remaining melted chocolate into the oat and peanut butter mixture thoroughly. Use a spatula to press the mixture firmly into your lined 8×8-inch pan, smoothing the surface evenly.
- Top and chill: Drizzle the reserved chocolate over the top in a zigzag pattern for an extra chocolate hit and prettier presentation. Pop the pan into the refrigerator for at least 45 minutes, or until firm and easy to cut.
- Slice and serve: Once set, lift the parchment out and cut into 12 bars. Keep refrigerated for up to a week or stash them in the freezer for longer storage.
Pro tip: Pressing the mixture firmly into the pan helps the bars hold together better, so don’t be shy with your hands or spatula. If your bars crumble, a quick 10-second zap in the microwave softens them up nicely before eating.
Cooking Tips & Techniques
Making no-bake bars sounds simple, but a few tricks can make all the difference between crumbly bites and snack perfection.
- Don’t skip toasting the oats. It’s a subtle step, but it adds a warm, toasty flavor that blends beautifully with the peanut butter and chocolate.
- Use creamy peanut butter. Chunky varieties make the bars harder to bind evenly and can create dry spots.
- Warm your peanut butter and honey slightly. This makes mixing easier and ensures the oats are fully coated.
- Chill long enough. If you cut the bars too soon, they’ll fall apart. At least 45 minutes in the fridge is key for firm bars.
- When melting chocolate, go slow. Microwaving in short bursts with stirring prevents burning. A double boiler is safest if you have one.
- Press firmly in the pan. This compresses the mixture and helps the bars hold their shape better.
I learned the hard way that rushing chilling or skimping on the chocolate melting step can leave you with a crumbly mess instead of those perfect chewy bars. Also, adding a pinch of salt balances the sweetness and really makes the flavors pop, so don’t forget it!
Variations & Adaptations
One of the best things about this recipe is how flexible it is. Here are a few ways I’ve tweaked it to suit different tastes and dietary needs:
- Nut-Free Version: Swap peanut butter for sunflower seed butter and use dairy-free chocolate chips to make this safe for nut allergies.
- Add Crunch: Stir in 1/3 cup chopped roasted peanuts or toasted coconut flakes for texture contrast.
- Boost Protein: Add 1/4 cup protein powder (vanilla or chocolate works well) to the oat mixture for a post-workout snack.
- Seasonal Twist: Toss in 1/3 cup dried cranberries or chopped dried apricots for a fruity surprise.
- Dark Chocolate Swap: Use dark chocolate chips (70% cocoa or higher) for a less sweet, richer flavor.
Once, I tried adding a teaspoon of cinnamon and a pinch of cayenne pepper to the mix—it gave the bars a subtle warmth and a little kick that caught my guests off guard in a good way! Feel free to experiment with spices or mix-ins to make this recipe truly your own.
Serving & Storage Suggestions
These bars are best served chilled straight from the refrigerator for that perfect chewy, fudgy texture. If you’re packing them for lunch or a snack on the go, wrapping individual bars in parchment paper keeps things tidy.
They pair wonderfully with a cold glass of milk, a hot cup of coffee, or even a refreshing iced tea. For a quick breakfast, grab one alongside some fresh fruit or yogurt for a balanced start to your day.
Store bars in an airtight container in the fridge for up to 7 days. They also freeze beautifully—just pop them in a freezer-safe container or bag, and thaw at room temperature for 10-15 minutes before eating.
Over time, the flavors meld and intensify, so if you can resist, letting them rest overnight in the fridge actually improves the taste and texture. Just don’t wait too long, or you might find yourself eating the whole batch in one sitting (not that I’m speaking from experience).
Nutritional Information & Benefits
Each bar (assuming 12 bars per batch) roughly contains:
| Calories | approx. 180 |
|---|---|
| Protein | 5 grams |
| Fat | 10 grams (mostly healthy fats from peanut butter) |
| Carbohydrates | 18 grams (with fiber from oats and chia seeds) |
| Sugar | 8 grams (from natural sweeteners and chocolate) |
These bars offer a good balance of protein, fiber, and healthy fats, making them a nourishing snack that keeps hunger in check. The oats provide sustained energy, while peanut butter adds heart-healthy monounsaturated fats. Using natural sweeteners like honey or maple syrup cuts down on refined sugars.
If you’re gluten-sensitive, just be sure to use certified gluten-free oats. Also, watch for nut allergies if serving to a crowd. Overall, these bars strike a nice balance between indulgence and wholesome snacking.
Conclusion
Honestly, these Easy No-Bake Peanut Butter Chocolate Oat Bars have become my secret weapon for when life gets hectic but a craving hits hard. They come together without stress, satisfy that sweet tooth, and keep me fueled with simple, real ingredients. What I really love is how flexible they are—you can tweak them to fit your mood or pantry without losing that core deliciousness.
Go ahead and give them a try. Make them your own by playing with mix-ins or sweeteners. And if you end up loving these bars as much as I do, I’d love to hear how you customized them or what moments you enjoyed them in. Sharing those stories makes the kitchen feel a little smaller and friendlier, don’t you think?
Here’s to no-bake simplicity and snacks that always hit the spot.
Frequently Asked Questions
Can I use crunchy peanut butter instead of creamy?
You can, but creamy peanut butter helps bind the bars better and creates a smoother texture. If you use crunchy, expect a chunkier bite.
How long do these bars keep in the fridge?
Stored in an airtight container, they last up to 7 days refrigerated. For longer storage, freeze them for up to 2 months.
Can I make these bars vegan?
Yes! Use maple syrup instead of honey and dairy-free chocolate chips to keep it vegan.
What can I use instead of honey or maple syrup?
Agave nectar or brown rice syrup can work as alternatives, but they may slightly alter the taste and texture.
Is it necessary to melt the chocolate and mix it into the bars?
Melting the chocolate and mixing it in ensures an even chocolatey flavor and helps bind the ingredients. You can also just sprinkle chocolate chips on top if you prefer a chunkier texture.
If you’re interested in more easy, wholesome recipes that fit into busy schedules, you might enjoy the easy freezer-friendly loaded burritos recipe for busy weekdays or the budget-friendly loaded pasta bake under $8. Both are great options when you want hearty meals without a ton of fuss.
Pin This Recipe!
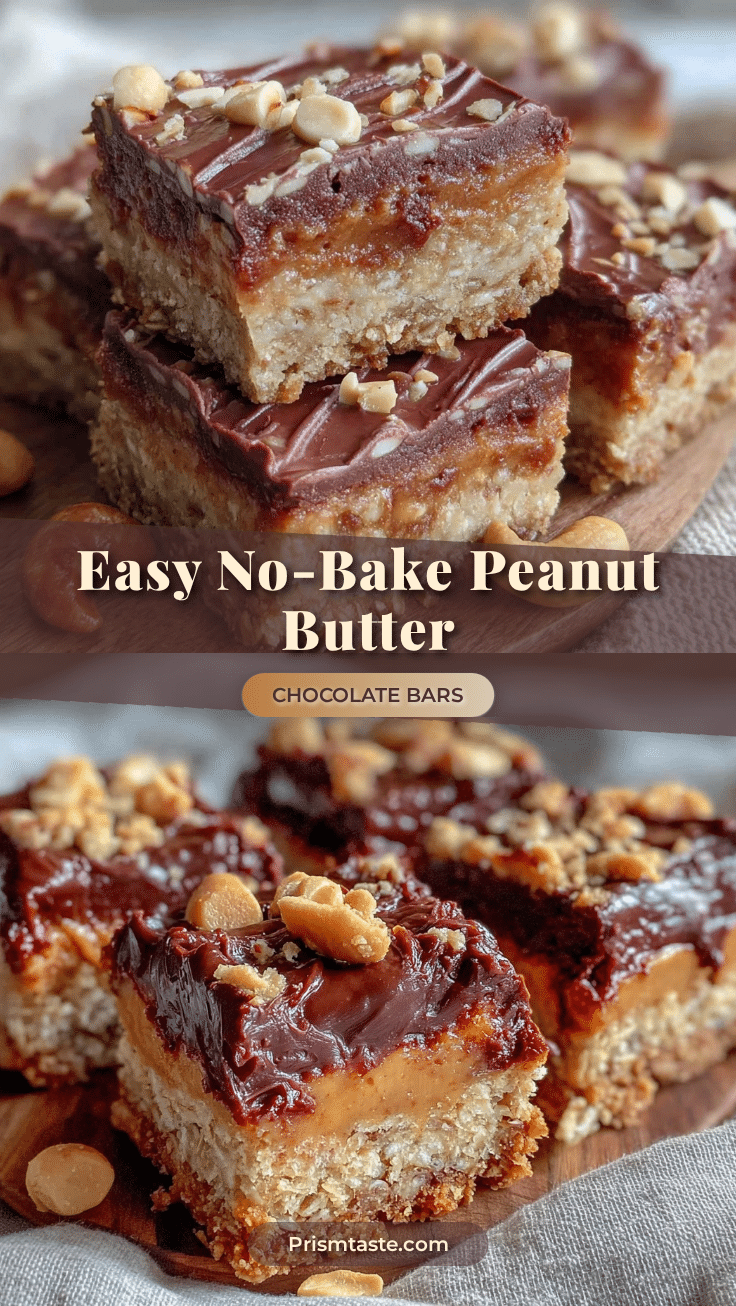
Easy No-Bake Peanut Butter Chocolate Oat Bars

These no-bake bars combine creamy peanut butter, rich chocolate, and chewy oats for a quick, satisfying, and wholesome snack perfect for busy days or on-the-go.
- Prep Time: 15 minutes
- Cook Time: 5 minutes (toasting oats, optional)
- Total Time: 1 hour
- Yield: 12 bars 1x
- Category: Snack
- Cuisine: American
Ingredients
- 2 cups old-fashioned rolled oats (180g)
- 1 cup natural creamy peanut butter (250g)
- 1/2 cup honey or maple syrup (120ml)
- 1 teaspoon vanilla extract
- 3/4 cup mini semi-sweet chocolate chips (130g)
- 2 tablespoons chia seeds or ground flaxseed (optional)
- 1/4 teaspoon salt
Instructions
- Toast the oats (optional but recommended): Place the 2 cups of rolled oats in a dry skillet over medium heat. Stir frequently for about 5 minutes until they smell nutty and turn a light golden color. Let cool slightly.
- Mix the wet ingredients: In a mixing bowl, combine 1 cup of creamy peanut butter, 1/2 cup of honey or maple syrup, and 1 teaspoon of vanilla extract. Stir vigorously until smooth and well blended. Microwave for 20 seconds if peanut butter is firm.
- Add dry ingredients: Stir in the toasted oats, 2 tablespoons of chia seeds or ground flaxseed if using, and 1/4 teaspoon of salt. Mix well to coat all oats.
- Melt the chocolate chips: Gently melt 3/4 cup of mini semi-sweet chocolate chips using a double boiler or microwave in 20-second bursts, stirring between each until smooth.
- Combine and layer: Reserve about 1/4 cup of melted chocolate to drizzle on top. Mix the remaining melted chocolate into the oat and peanut butter mixture thoroughly. Press the mixture firmly into a lined 8×8-inch pan, smoothing the surface evenly.
- Top and chill: Drizzle the reserved chocolate over the top in a zigzag pattern. Refrigerate for at least 45 minutes or until firm and easy to cut.
- Slice and serve: Lift the parchment out and cut into 12 bars. Keep refrigerated for up to a week or freeze for longer storage.
Notes
Press the mixture firmly into the pan to help bars hold together. Toasting oats adds flavor but is optional. Melt chocolate slowly to avoid burning. Chill bars at least 45 minutes before cutting. For vegan version, use maple syrup and dairy-free chocolate chips. Nut-free version can use sunflower seed butter.
Nutrition
- Serving Size: 1 bar
- Calories: 180
- Sugar: 8
- Fat: 10
- Carbohydrates: 18
- Protein: 5
Keywords: no-bake, peanut butter, chocolate, oat bars, healthy snacks, quick snack, easy recipe, no oven, vegan option