“You really should try these jars,” my friend texted me one hectic afternoon when I was juggling a mountain of emails and a toddler who somehow decided every toy was suddenly the most important thing ever. Honestly, the last thing on my mind was making dessert. But curiosity got the best of me, and I gave it a shot—no oven, no mess, just good old-fashioned simplicity. The result? These delightful Easy Mini No-Bake Strawberry Cheesecake Jars that turned out to be a total crowd-pleaser at our next family gathering.
What struck me first was their size—individual portions that felt fancy without fuss. The sweet aroma of fresh strawberries mingling with creamy cheesecake filling was subtle but inviting, and the crumbly crust gave just the right hint of crunch. It wasn’t the kind of dessert I expected to fall head over heels for, but here we are, weeks later, me making them again and again (sometimes twice in one week, no joke).
These little jars brought a calm moment to otherwise chaotic days. They’re simple, quick, and—honestly—comforting in the way that only a sweet treat can be. I appreciate that they feel special but don’t demand hours in the kitchen. It’s the kind of recipe that makes me think, “Why didn’t I try this sooner?” Whether you’re hosting an impromptu summer party or just craving a sweet bite after dinner, these no-bake cheesecakes quietly promise to be your new go-to. Let me share why they stuck with me.
Why You’ll Love This Recipe
Having tested this Easy Mini No-Bake Strawberry Cheesecake Jars recipe multiple times (sometimes on back-to-back weekends), I can say it’s a keeper. Here’s why this recipe earns a permanent spot in my dessert arsenal:
- Quick & Easy: Ready in about 20 minutes plus chilling time. Perfect when you want dessert without the wait or heat of baking.
- Simple Ingredients: No obscure pantry items needed; you probably have cream cheese, strawberries, and a few basics on hand.
- Perfect for Summer: The fresh strawberry topping is bright and refreshing—ideal for sunny days and outdoor gatherings.
- Crowd-Pleaser: Kids love the sweet creaminess; adults appreciate the light, not-too-sweet balance.
- Unbelievably Delicious: The silky cheesecake layered over buttery graham cracker crumbs makes every spoonful feel indulgent.
This recipe isn’t just another no-bake cheesecake. The trick lies in blending the cream cheese until perfectly smooth (no lumps allowed!) and folding in just the right amount of whipped cream for a fluffy texture. Plus, I add a splash of vanilla to bring it all together. It’s the kind of dessert that quietly impresses without showing off. Honestly, you close your eyes after the first bite and just savor that perfect sweet-tart strawberry balance.
If you want to serve something that feels homemade but doesn’t overwhelm your schedule—whether after a busy day or as a fun weekend project—these jars fit the bill beautifully. They’re like the perfect little treat you didn’t know you needed, a bit like the comfort you find in easy slow cooker meals that save the day but with a sweet twist.
What Ingredients You Will Need
This recipe uses simple, wholesome ingredients to deliver bold flavor and satisfying texture without the fuss. Most are pantry staples, and you can find fresh strawberries in any season or swap with frozen if needed.
- For the Crust:
- Graham cracker crumbs – about 1 1/2 cups (150g), finely crushed (I prefer Nabisco for consistent texture)
- Unsalted butter, melted – 6 tablespoons (85g) (adds richness and binds the crust)
- Granulated sugar – 2 tablespoons (25g), optional for extra sweetness
- For the Cheesecake Filling:
- Cream cheese – 8 ounces (225g), softened (use full-fat for best creaminess)
- Powdered sugar – 1/2 cup (60g), sifted to prevent lumps
- Vanilla extract – 1 teaspoon (adds warmth and depth)
- Heavy whipping cream – 1 cup (240ml), cold (whipped to soft peaks for lightness)
- For the Strawberry Topping:
- Fresh strawberries – 1 1/2 cups (about 225g), hulled and sliced
- Granulated sugar – 2 tablespoons (optional, for macerating the berries)
- Fresh lemon juice – 1 teaspoon (balances sweetness)
If fresh strawberries aren’t in season, frozen berries work fine—just thaw and drain well before using. For a gluten-free crust, swap graham crackers with almond flour or gluten-free cookie crumbs. And if you need a dairy-free version, use a plant-based cream cheese and coconut cream whipped instead of heavy cream.
Equipment Needed
- Mixing bowls – medium and large size for separate components
- Electric mixer or stand mixer – essential for whipping cream and smoothing cream cheese
- Measuring cups and spoons – for precise ingredient amounts
- Spoons or spatulas – for folding and layering
- Small jars or clear dessert cups – about 4 to 6 ounces (120-180ml) capacity, perfect for individual servings
- Food processor or zip-top bag and rolling pin – to crush graham crackers finely (I personally like a food processor for speed)
If you don’t have a mixer, you can whisk by hand, but it takes more elbow grease to achieve the fluffy texture. Mason jars work great here and double as charming serving vessels, plus they seal well if you want to store the cheesecake jars in the fridge or take them on-the-go.
Preparation Method
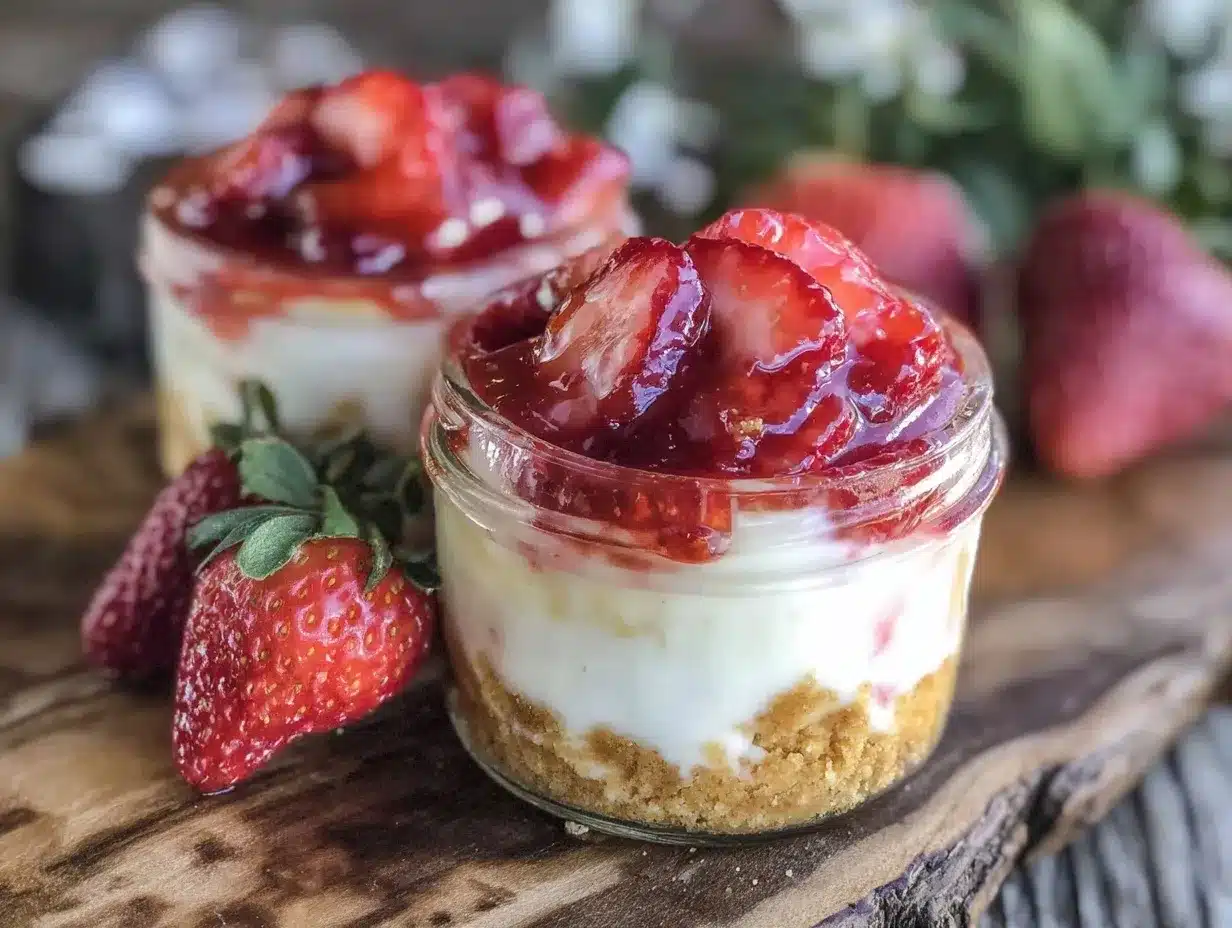
- Prepare the Crust: In a medium bowl, combine the graham cracker crumbs, melted butter, and sugar. Stir until the mixture looks like wet sand. Using a spoon, evenly press about 2 tablespoons (30g) of the crust mixture into the bottom of each jar. Set aside while you prepare the filling. (Tip: Press firmly for a compact crust that holds together.)
- Macerate the Strawberries: In a small bowl, toss the sliced strawberries with sugar and lemon juice. Let them sit for at least 10 minutes to release their juices and soften. This step creates that lovely juicy topping that feels fresh and vibrant.
- Make the Cheesecake Filling: Using an electric mixer, beat the softened cream cheese until smooth and creamy—about 2 minutes. Add powdered sugar and vanilla extract, mixing until fully combined.
- Whip the Cream: In a separate bowl, whip the cold heavy cream until soft peaks form. (Tip: Chill your bowl and beaters beforehand to speed this up.)
- Fold Cream into Cheesecake: Gently fold the whipped cream into the cream cheese mixture using a spatula. Do this carefully to keep the filling light and airy—no rushing here!
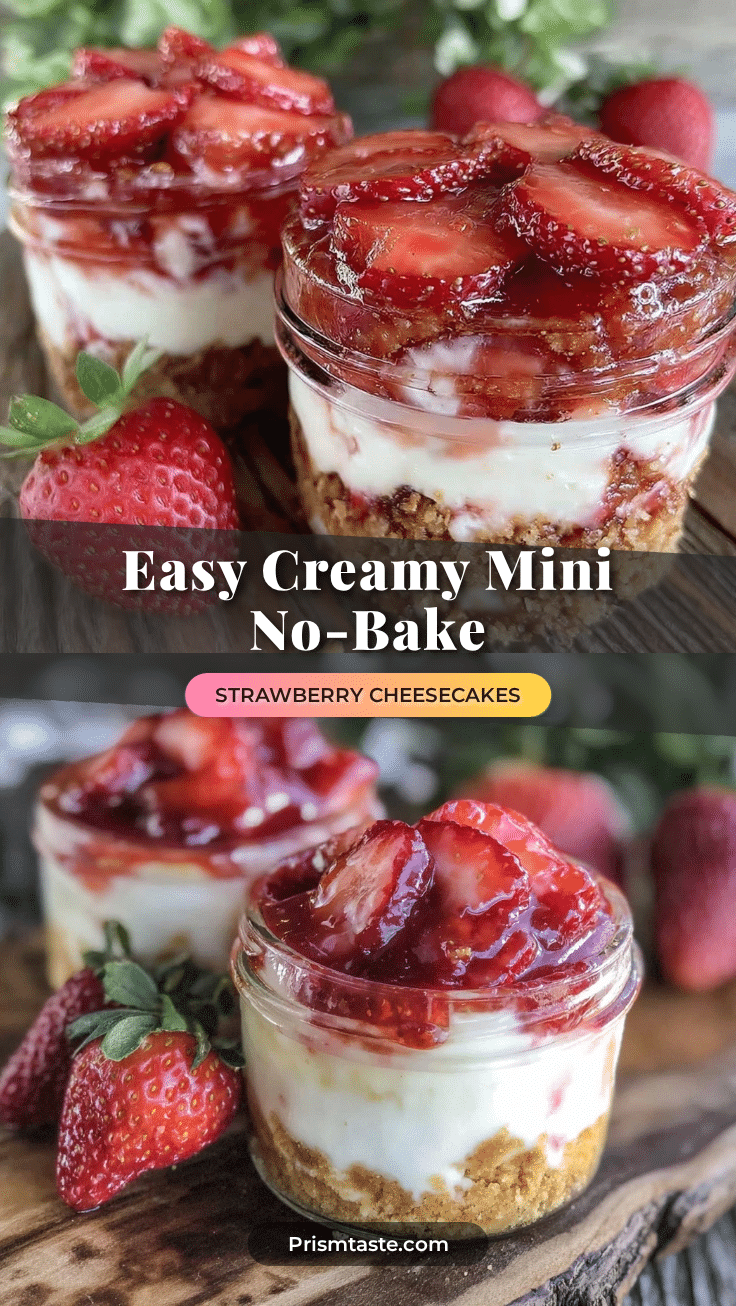
- Assemble the Jars: Spoon or pipe a generous layer of cheesecake filling over the crust in each jar. Top with a spoonful of the macerated strawberries, including some of that juice for extra flavor.
- Chill: Cover jars with lids or plastic wrap and refrigerate for at least 2 hours, preferably longer, to let the flavors meld and the cheesecake set beautifully.
These jars are best enjoyed chilled but can be kept up to 3 days in the fridge. If you’re in a rush, a quick chill in the freezer for 30 minutes helps firm them up faster.
Cooking Tips & Techniques
Here’s what I’ve learned after making these cheesecake jars a bunch of times—some things that make a big difference in the outcome:
- Softened Cream Cheese is Key: Don’t skip this step. If it’s too cold, lumps sneak in and the filling won’t be smooth. Leave it out for about 30 minutes or microwave in 10-second bursts if you’re in a hurry.
- Whip Cream Properly: Watch closely when whipping. Overwhipping turns the cream grainy and can separate it. Stop once you see soft peaks that hold shape but still look silky.
- Press the Crust Firmly: This avoids crumbly bottoms that fall apart when you dig in. I use the back of a spoon to compact it tightly in each jar.
- Macerate Strawberries: This step isn’t optional. It brings out natural sweetness and softens berries so they blend perfectly with the creamy filling.
- Chill Long Enough: If you skip chilling, the texture will be runny. Even 2 hours makes a big difference, but overnight is best if you have the time.
Also, multitasking helps—while the strawberries macerate, you can crush the graham crackers or whip the cream. It’s a neat little dance of prep that saves time. For a richer flavor, I sometimes add a tiny pinch of salt to the crust or a splash of lemon zest to the filling—both subtle but worth trying.
Variations & Adaptations
While the classic strawberry version is a winner, here are some fun twists and changes I’ve tested:
- Berry Mix: Swap strawberries with a mix of blueberries and raspberries for a colorful summer look.
- Chocolate Swirl: Add a spoonful of melted dark chocolate or cocoa powder to the cheesecake filling for a mocha cheesecake jar.
- Gluten-Free: Use almond flour or gluten-free cookie crumbs for the crust instead of graham crackers.
- Vegan-Friendly: Replace cream cheese with a vegan alternative and use coconut cream whipped instead of heavy cream.
- Citrus Burst: Add fresh lemon or orange zest to the filling for a zingy twist that brightens the flavor.
Once, I experimented with a lemon ricotta filling inspired by a savory dish, swapping ricotta into the cheesecake for a lighter texture. It was surprisingly good—worth a try if you want to mix things up.
Serving & Storage Suggestions
These mini cheesecake jars are best served chilled, straight from the fridge. They look beautiful with a little extra strawberry or a mint sprig on top for presentation. Perfect for summer picnics, casual dinner parties, or just a sweet afternoon treat.
Pair them nicely with a light beverage like iced tea or a sparkling lemonade for a refreshing combo. They also make a lovely finish after a homemade meal like honey garlic pulled chicken sandwiches, balancing savory with sweet.
Store the jars sealed in the refrigerator for up to 3 days. If you want to make them ahead of time, they hold up well, and the flavors even deepen. To reheat, just bring them to room temperature for 15 minutes—don’t microwave or the filling loses its texture.
Nutritional Information & Benefits
Each mini cheesecake jar typically contains around 250-300 calories depending on portion size and ingredients. The cream cheese provides protein and calcium, while strawberries add vitamin C and antioxidants.
This dessert is naturally gluten-free if you use gluten-free crumbs and can be made lower sugar by adjusting the sweeteners. It’s a lighter alternative to heavier baked cheesecakes due to the airy whipped cream.
For those mindful of allergens, note the dairy and gluten unless swaps are made. Personally, I appreciate how this recipe balances indulgence with relatively simple, wholesome ingredients—making it a treat I feel good sharing.
Conclusion
Easy Mini No-Bake Strawberry Cheesecake Jars are one of those recipes that sneak into your routine and stay there. They bring a sweet, creamy comfort without demanding hours or complicated steps. Whether you’re whipping up a quick dessert for unexpected guests or craving a little self-care in a jar, this recipe fits the bill.
Feel free to tweak the strawberries, crust, or filling to suit your taste—there’s room for creativity here, which is part of the fun. I keep coming back to these jars because they’re simple, satisfying, and honestly, a bit of joy in a busy week.
If you try them, I’d love to hear how you made them your own. Sharing little kitchen wins always makes the day better, don’t you think?
FAQs about Easy Mini No-Bake Strawberry Cheesecake Jars
How long should I chill the cheesecake jars before serving?
At least 2 hours in the fridge is best for the filling to set. Overnight chilling gives even better texture and flavor melding.
Can I use frozen strawberries for the topping?
Yes! Just thaw and drain them well to avoid watery jars. Macerate as usual with sugar and lemon juice.
What can I substitute for graham cracker crumbs in the crust?
Gluten-free cookie crumbs, crushed digestive biscuits, or almond flour work well. Just press firmly to hold the crust together.
Is it possible to make these jars ahead of time?
Definitely. They keep well for up to 3 days in the refrigerator sealed tightly, making them great for prepping before parties.
How do I prevent the cheesecake filling from being too sweet?
Adjust the powdered sugar to your liking. Start with less and add more if needed. The strawberries add natural sweetness, so sometimes less is more!
Pin This Recipe!
Easy Mini No-Bake Strawberry Cheesecake Jars
Delightful individual no-bake strawberry cheesecake jars that are quick, easy, and perfect for summer gatherings. Creamy cheesecake filling layered over a buttery graham cracker crust topped with fresh macerated strawberries.
- Prep Time: 15 minutes
- Cook Time: 0 minutes
- Total Time: 2 hours 15 minutes
- Yield: 6 servings 1x
- Category: Dessert
- Cuisine: American
Ingredients
- 1 1/2 cups graham cracker crumbs (about 150g), finely crushed
- 6 tablespoons unsalted butter, melted (about 85g)
- 2 tablespoons granulated sugar (optional)
- 8 ounces cream cheese, softened (use full-fat for best creaminess)
- 1/2 cup powdered sugar (about 60g), sifted
- 1 teaspoon vanilla extract
- 1 cup heavy whipping cream (240ml), cold
- 1 1/2 cups fresh strawberries (about 225g), hulled and sliced
- 2 tablespoons granulated sugar (optional, for macerating berries)
- 1 teaspoon fresh lemon juice
Instructions
- Prepare the crust: In a medium bowl, combine graham cracker crumbs, melted butter, and sugar. Stir until mixture resembles wet sand. Press about 2 tablespoons (30g) of crust mixture firmly into the bottom of each jar. Set aside.
- Macerate the strawberries: In a small bowl, toss sliced strawberries with sugar and lemon juice. Let sit at least 10 minutes to release juices and soften.
- Make the cheesecake filling: Beat softened cream cheese with an electric mixer until smooth, about 2 minutes. Add powdered sugar and vanilla extract; mix until combined.
- Whip the cream: In a separate bowl, whip cold heavy cream until soft peaks form.
- Fold whipped cream gently into the cream cheese mixture to keep filling light and airy.
- Assemble the jars: Spoon or pipe a generous layer of cheesecake filling over the crust in each jar. Top with a spoonful of macerated strawberries including some juice.
- Chill: Cover jars and refrigerate for at least 2 hours, preferably longer, to let flavors meld and cheesecake set.
Notes
Use softened cream cheese to avoid lumps. Whip cream to soft peaks to keep filling light. Press crust firmly to avoid crumbly bottoms. Macerate strawberries to enhance sweetness and texture. Chill at least 2 hours or overnight for best results. Can use frozen strawberries if thawed and drained. For gluten-free crust, substitute graham crackers with almond flour or gluten-free cookie crumbs. For dairy-free, use plant-based cream cheese and coconut cream.
Nutrition
- Serving Size: 1 mini cheesecake ja
- Calories: 275
- Sugar: 14
- Sodium: 150
- Fat: 20
- Saturated Fat: 12
- Carbohydrates: 18
- Fiber: 1
- Protein: 4
Keywords: no-bake cheesecake, strawberry cheesecake, mini cheesecake jars, summer dessert, easy dessert, individual servings, no oven dessert


