I was supposed to be making a classic pecan pie. It was two days before Thanksgiving, my sister-in-law was bringing her famous bourbon whipped cream, and I had this whole vision of a golden, gooey pie sitting on the counter. But then my three-year-old decided to “help” by dumping the entire bag of pecans onto the floor, and somewhere between the chaos and the dog trying to eat a nut, I realized I had exactly zero pie crusts in the freezer. Classic move, right?
I stood there staring at the mess, the butter melting on the stove, and a bottle of maple syrup that my neighbor had brought back from Vermont. I thought about the store-bought crusts, but honestly, I was too tired to go back out. So I grabbed a bag of flour, some oats I had in the pantry, and decided to just press something together in a pan. No rolling, no fuss. Just press, pour, and hope for the best. What came out of the oven was nothing like the plan — and honestly, so much better. These maple bourbon pecan pie bars are now the thing I’m asked to bring to every family gathering.
Maybe you’ve been there too — a kitchen disaster that somehow turns into your most requested recipe. That’s exactly what happened here. I mean, I was just trying to survive the pre-holiday madness, and I stumbled onto a dessert that tastes like you spent hours on it, but really takes about fifteen minutes of active work. And the best part? It’s actually budget-friendly. No expensive pie crusts, no fancy equipment, just simple ingredients that come together in a way that makes everyone think you’re a pastry chef. Let me tell you, that first bite of warm, maple-bourbon goodness straight out of the pan was a moment of pure kitchen vindication.
Why You’ll Love This Recipe
These maple bourbon pecan pie bars aren’t just another dessert recipe. They’re the kind of thing that makes you look like a hero without the stress. I’ve tested this version at least six times — first for my own family, then for a neighborhood potluck, and finally for a holiday bake sale where they sold out in under an hour. Here’s why they keep winning people over:
- Budget-Friendly Ingredients: No expensive pie crusts or specialty flours. You probably have most of what you need in your pantry right now. The pecans are the biggest expense, and I’ll show you how to stretch them.
- Kid-Approved (Seriously): I was worried the bourbon flavor would be too strong for my kids, but the alcohol cooks off completely, leaving just a warm, rich depth that even picky eaters love. My daughter, who usually picks around nuts, actually asked for seconds.
- Quick & Easy: The crust is a simple press-in situation — no rolling, no chilling, no drama. You can have these in the oven in about fifteen minutes flat.
- Perfect for Any Occasion: They work for Thanksgiving, Christmas, potlucks, or just a Tuesday night when you need something sweet. They’re fancy enough for guests but simple enough for a weeknight.
- Unbelievably Delicious: The combination of buttery oat crust, rich maple syrup, and a hint of bourbon is next-level comfort food. The texture is chewy, crunchy, and gooey all at once.
What makes these bars different from every other pecan pie bar recipe out there is the crust. Instead of a traditional pastry crust that can be finicky and expensive to make, I use a simple oat-and-flour press-in crust that adds a nutty, buttery flavor and a perfect crunch. It’s my best version — tested by a busy mom who doesn’t have time for complicated techniques.
This recipe isn’t just good — it’s the kind that makes you close your eyes after the first bite. It’s comfort food reimagined: faster, more affordable, but with the same soul-soothing satisfaction. Perfect for impressing guests without stress, or turning a simple family dinner into something memorable.
What Ingredients You Will Need
This recipe uses simple, wholesome ingredients to deliver big flavor without the fuss. Most of these are pantry staples, and I’ve included notes on substitutions so you can work with what you have.
For the Crust
- All-purpose flour, 1 ½ cups (190g) — I use Gold Medal, but any brand works. For a gluten-free option, use a 1:1 gluten-free baking flour.
- Rolled oats, 1 cup (90g) — Not quick oats! The rolled oats give the crust a better texture. If you only have quick oats, it’ll still work, but the crust will be a bit softer.
- Brown sugar, ½ cup (100g), packed — Light or dark both work. Dark brown sugar adds a deeper molasses flavor that I love with the maple.
- Unsalted butter, ½ cup (113g), melted — Salted butter works too, just reduce the added salt in the filling by a pinch.
- Salt, ¼ teaspoon — Just to balance the sweetness.
For the Filling
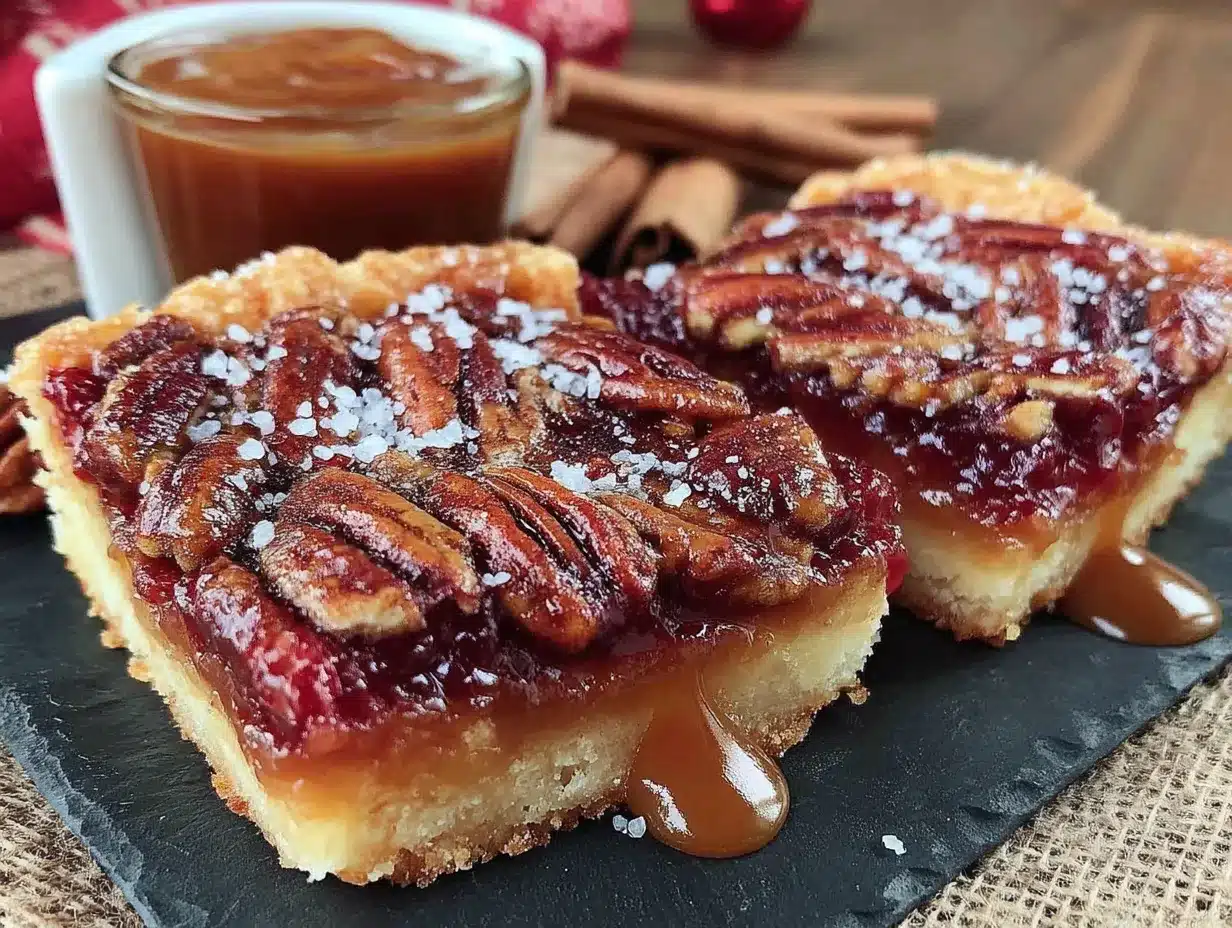
- Pecan halves, 2 cups (200g) — I buy them in bulk from the baking aisle, which is way cheaper than the pre-chopped bags. Roughly chop them — some big pieces, some small — for the best texture.
- Maple syrup, ¾ cup (180ml) — Pure maple syrup is best. The fake stuff has a different consistency and won’t set up the same way. I like Grade A Dark Amber for a richer flavor.
- Brown sugar, ½ cup (100g), packed — This helps thicken the filling and adds that classic pecan pie sweetness.
- Large eggs, 2, at room temperature — Cold eggs can make the filling seize up. If you forget to take them out, just place them in a bowl of warm water for 5 minutes.
- Unsalted butter, 3 tablespoons (42g), melted — Adds richness and helps the filling set.
- Bourbon, 2 tablespoons (30ml) — The alcohol cooks off, leaving just a warm, oaky depth. If you’re serving strict non-drinkers or kids under 2, you can substitute with 1 teaspoon of vanilla extract plus 1 tablespoon of apple juice.
- Vanilla extract, 1 teaspoon — Pure vanilla is worth it here. The flavor really shines through.
- Salt, ¼ teaspoon — Don’t skip this! It balances all that sweetness.
Equipment Needed
You don’t need a fancy kitchen to pull these off. Here’s what you’ll need:
- 9×13-inch baking pan — A metal pan works best for even browning. Glass or ceramic will work, but you might need to add 5 minutes to the baking time.
- Parchment paper — This is non-negotiable for easy removal. Leave an overhang on two sides so you can lift the bars out cleanly.
- Mixing bowls — One medium for the crust, one large for the filling.
- Measuring cups and spoons — For accuracy. I’ve learned the hard way that eyeballing maple syrup leads to sticky disasters.
- Whisk — For the filling. A fork works in a pinch, but a whisk makes it smoother.
- Sharp knife — For clean cuts. A serrated knife works beautifully.
That’s it. No stand mixer, no food processor, no fancy gadgets. I’ve made these in a tiny apartment kitchen with a broken oven thermometer, and they still came out perfect. The parchment paper is the one thing I really recommend — it saves you from the nightmare of trying to cut bars that are stuck to the pan.
Preparation Method
Let’s get these bars in the oven. I’ve broken everything down into simple steps with timings and sensory cues so you know exactly what to look for.
Step 1: Prep the Pan and Preheat
Preheat your oven to 350°F (175°C). Line your 9×13-inch pan with parchment paper, leaving about 2 inches of overhang on the long sides. This is your handle for lifting the bars out later. Don’t skip this — I’ve had to fish broken bars out of a pan before, and it’s not fun.
Step 2: Make the Crust
In a medium bowl, whisk together the flour, rolled oats, brown sugar, and salt. Pour in the melted butter and stir with a fork until the mixture looks like wet sand and holds together when you squeeze it. It should feel crumbly but cohesive — if it’s too dry, add another tablespoon of melted butter.
Press the mixture evenly into the bottom of your prepared pan. Use the bottom of a measuring cup or a flat glass to really pack it down. This is important — a loose crust will fall apart when you cut the bars. Bake for 12 minutes, until the edges are just starting to turn golden. The center will still look a bit pale, and that’s perfect. Set it aside to cool slightly while you make the filling.
Step 3: Prepare the Pecans
Spread the pecan halves on a baking sheet and toast them in the oven for 5-7 minutes, until they smell nutty and are slightly darker. Watch them carefully — pecans burn fast. I learned this the hard way when I got distracted by a phone call and ended up with charcoal. Let them cool for a few minutes, then roughly chop them. You want a mix of sizes: some small bits for texture, some bigger pieces for that classic pecan pie look.
Step 4: Make the Filling
In a large bowl, whisk together the maple syrup, brown sugar, eggs, melted butter, bourbon, vanilla extract, and salt. Whisk until everything is smooth and the sugar has mostly dissolved. It should look like a dark, glossy caramel. Don’t over-whisk — you don’t want to incorporate too much air, which can cause the filling to puff up and then collapse.
Fold in the chopped pecans with a spatula. Make sure every piece is coated in that beautiful maple mixture.
Step 5: Assemble and Bake
Pour the filling over the pre-baked crust. Use the spatula to spread it evenly — the pecans will try to clump together, so give them a gentle nudge to distribute them. Bake for 25-30 minutes, until the edges are set and the center is just slightly jiggly. It should look puffed and golden, and the kitchen should smell like heaven.
Here’s the test: Gently shake the pan. The center should wobble like Jell-O, not slosh like liquid. If it sloshes, give it 5 more minutes. If it’s completely firm, you’ve overbaked it — it’ll still taste good, but the texture will be less gooey.
Step 6: Cool and Cut
Let the bars cool completely in the pan on a wire rack. This takes about 2 hours, and I know it’s hard to wait, but it’s crucial. The filling needs time to set, or you’ll end up with a delicious but messy puddle. Once cool, use the parchment overhang to lift the whole slab onto a cutting board. Use a sharp knife to cut into 24 bars. For clean cuts, wipe the knife with a damp paper towel between slices.
Cooking Tips & Techniques
After making these bars more times than I can count, I’ve collected a few tricks that make a real difference. Let me save you from my mistakes.
Don’t overbake the crust. The first time I made these, I baked the crust until it was deeply golden, thinking it needed to be fully cooked. It came out too hard and crumbly. You only need 12 minutes — it’ll continue baking with the filling. Trust the process.
Room temperature eggs matter. I once used cold eggs straight from the fridge, and the filling came out slightly lumpy. The cold butter in the eggs seized up when it hit the warm maple syrup. If you forget to take them out early, place them in a bowl of warm water for 5 minutes. Problem solved.
Toast your pecans. This is a small step that makes a huge difference. Raw pecans are fine, but toasting them brings out their natural oils and adds a deeper, nuttier flavor. Just watch them like a hawk — they go from perfectly toasted to burnt in about 30 seconds.
Let them cool completely. I know, I know. The smell is intoxicating, and you want to cut into them immediately. But if you do, the filling will run everywhere, and you’ll end up with a sticky mess. Patience is the secret ingredient here. I usually make these the night before I need them, let them cool overnight, and cut them in the morning. They’re even better the next day.
Multitasking tip: While the crust is baking, toast your pecans and make the filling. That way, everything comes together in about 15 minutes of active work. I’ve timed it — from start to oven, it takes me 14 minutes flat.
Variations & Adaptations
One of the best things about this recipe is how flexible it is. Here are some ways to make it your own.
Bourbon-Free Version: If you’re serving kids or avoiding alcohol, just swap the bourbon for 1 teaspoon of vanilla extract plus 1 tablespoon of apple juice or water. You’ll lose a tiny bit of depth, but it’s still delicious. I’ve made this version for my daughter’s school bake sale, and no one noticed the difference.
Gluten-Free Adaptation: Use a 1:1 gluten-free baking flour blend in place of the all-purpose flour, and make sure your oats are certified gluten-free. The texture will be slightly more crumbly, but the flavor is spot on. I’ve tested this with Bob’s Red Mill 1:1 flour, and it works beautifully.
Chocolate-Pecan Bars: For a decadent twist, sprinkle ½ cup of dark chocolate chips over the crust before pouring the filling. The chocolate melts into the pecan mixture, creating little pockets of gooey goodness. My sister-in-law requests this version every Christmas.
Nut-Free Option: You can replace the pecans with roasted pumpkin seeds (pepitas) or sunflower seeds for a nut-free version. The texture is different, but the maple-bourbon flavor still shines. My neighbor’s son has a nut allergy, and this version is always a hit at their house.
Spiced Variation: Add 1 teaspoon of cinnamon and ½ teaspoon of nutmeg to the filling for a warm, autumnal twist. I made this last Thanksgiving, and it paired perfectly with the maple and bourbon.
Serving & Storage Suggestions
These bars are incredibly versatile when it comes to serving. Here’s how to get the most out of them.
Serving Temperature: I prefer them at room temperature, where the filling is perfectly gooey and the crust is firm but not hard. They’re also delicious warm — just pop one in the microwave for 10 seconds and serve with a scoop of vanilla ice cream. The contrast between warm, sticky filling and cold ice cream is unbeatable.
Presentation Ideas: For a holiday gathering, cut the bars into small squares and arrange them on a platter with a dusting of powdered sugar. Add a few whole pecans on top for a pretty finish. For a more casual affair, just stack them on a plate — they’re rustic and beautiful as is.
Complementary Pairings: These bars are perfect with a cup of strong coffee or a glass of cold milk. For a dessert spread, serve them alongside a flourless chocolate cake or a batch of oatmeal raisin cookies. The flavors complement each other beautifully.
Storage: Store the bars in an airtight container at room temperature for up to 5 days. Layer them with parchment paper between each row to prevent sticking. They actually get better on day two — the flavors meld together, and the texture becomes even more fudgy.
Freezing: These freeze beautifully. Wrap individual bars in plastic wrap, then place them in a freezer-safe bag or container. They’ll keep for up to 3 months. To thaw, just leave them at room temperature for about 30 minutes. I love having a stash in the freezer for unexpected guests or late-night cravings.
Reheating: For that just-baked experience, reheat a bar in a 300°F (150°C) oven for 5-7 minutes. The microwave works in a pinch, but it can make the crust a bit soggy. If using the microwave, go for just 10-15 seconds.
Nutritional Information & Benefits
While these bars are definitely a treat, they do offer some nutritional benefits worth noting. Here’s the breakdown for one bar (based on 24 servings):
| Nutrient | Amount per bar |
|---|---|
| Calories | 195 |
| Total Fat | 11g |
| Saturated Fat | 4g |
| Cholesterol | 28mg |
| Sodium | 85mg |
| Total Carbohydrates | 23g |
| Dietary Fiber | 1g |
| Sugars | 16g |
| Protein | 3g |
Health Highlights: Pecans are a great source of healthy fats, fiber, and antioxidants. They contain magnesium, which supports bone health, and vitamin E, which is good for your skin. Maple syrup provides manganese and zinc, though it’s still sugar, so moderation is key. The oats in the crust add a bit of soluble fiber, which helps with digestion.
Dietary Considerations: These bars are vegetarian and can be made gluten-free with the substitutions mentioned above. They contain dairy (butter), eggs, and nuts (pecans), so they’re not suitable for vegan, egg-free, or nut-free diets without modifications.
I believe in balance, so I don’t stress about indulging in a treat like this. One bar is perfectly satisfying, and the nutritional profile is actually better than a lot of store-bought desserts. Plus, you know exactly what’s in them — no preservatives or weird additives.
Conclusion
These maple bourbon pecan pie bars are proof that the best recipes often come from the most unexpected places. What started as a kitchen disaster — a broken pie crust, a toddler’s “help,” and a moment of pure frustration — turned into my most requested dessert. They’re budget-friendly, kid-approved, and ridiculously easy to make. Honestly, they taste like you spent hours in the kitchen, but the whole thing comes together in under an hour.
I hope you give these a try and make them your own. Maybe add a little extra bourbon, swap in chocolate chips, or serve them warm with ice cream. The beauty of this recipe is that it’s forgiving and flexible. Don’t be afraid to experiment — that’s how I stumbled onto it in the first place.
If you make these, I’d love to hear about it. Leave a comment below and let me know how they turned out, or share your own twist on the recipe. And if you’re looking for more easy, budget-friendly desserts, check out my easy apple crisp or my no-bake chocolate oat bars. Happy baking, friends!
Frequently Asked Questions
Can I make these bars ahead of time?
Absolutely! In fact, they taste even better the next day. You can make them up to 2 days in advance and store them in an airtight container at room temperature. They also freeze beautifully for up to 3 months.
Can I skip the bourbon?
Yes, you can. Substitute the bourbon with 1 teaspoon of vanilla extract plus 1 tablespoon of apple juice or water. The flavor will be slightly different, but still delicious. The alcohol cooks off completely during baking, so it’s safe for kids.
Why did my bars turn out too runny?
This usually happens if the bars weren’t baked long enough or if they were cut while still warm. Make sure the center is just slightly jiggly when you take them out of the oven — it should wobble like Jell-O, not slosh like liquid. Also, let them cool completely before cutting.
Can I use a different type of nut?
Yes! Walnuts work beautifully in place of pecans. You can also use a mix of pecans and walnuts. For a nut-free version, try roasted pumpkin seeds or sunflower seeds.
How do I get clean cuts on my bars?
Use a sharp knife and wipe it clean with a damp paper towel between each slice. For the cleanest cuts, chill the bars in the refrigerator for 30 minutes before cutting. This firms up the filling and prevents it from sticking to the knife.
Pin This Recipe!
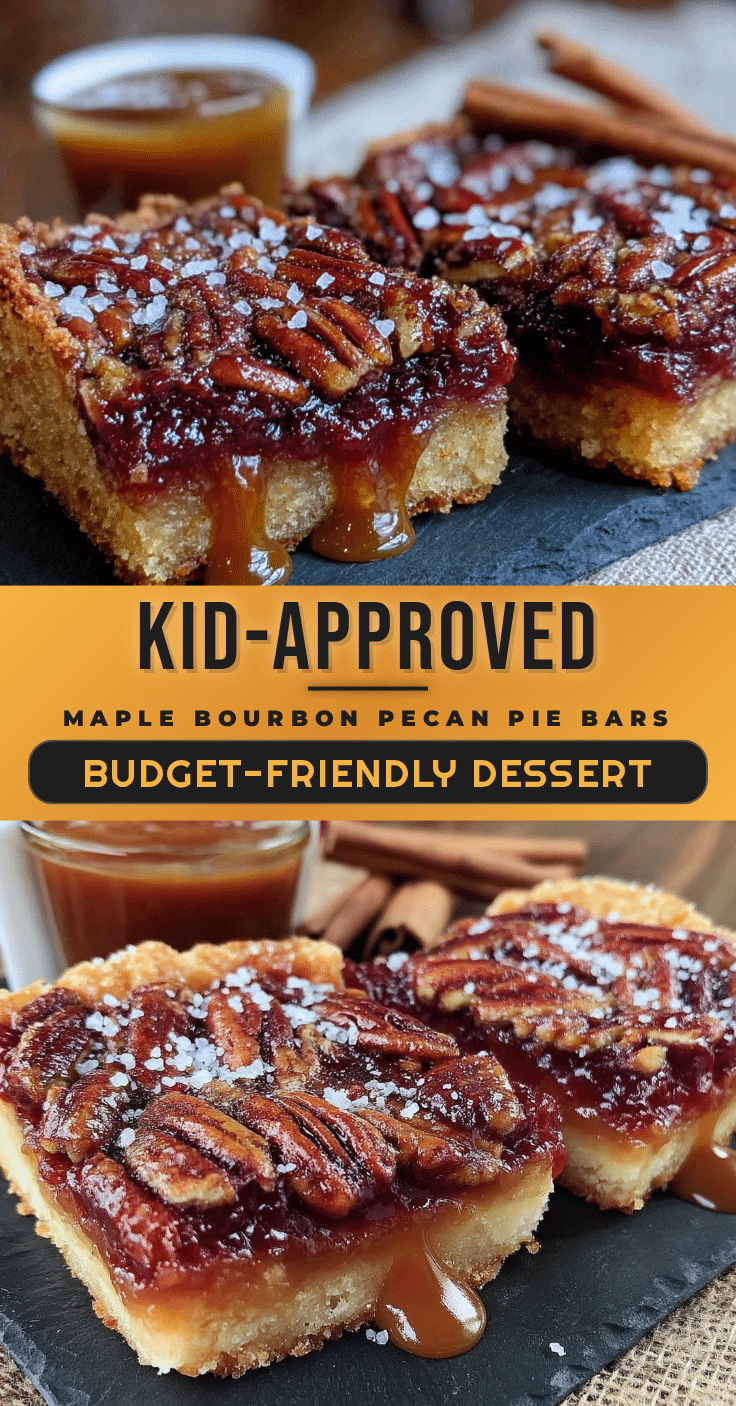
Easy Maple Bourbon Pecan Pie Bars: Best Kid-Approved Dessert
These maple bourbon pecan pie bars are a budget-friendly, kid-approved dessert that turns a kitchen disaster into a most-requested recipe. With a simple press-in oat crust and a rich, gooey filling, they’re quick, easy, and perfect for any occasion.
- Prep Time: 15 minutes
- Cook Time: 30 minutes
- Total Time: 45 minutes
- Yield: 24 bars
- Category: Dessert
- Cuisine: American
Ingredients
- All-purpose flour, 1 ½ cups (190g)
- Rolled oats, 1 cup (90g)
- Brown sugar, ½ cup (100g), packed (for crust)
- Unsalted butter, ½ cup (113g), melted (for crust)
- Salt, ¼ teaspoon (for crust)
- Pecan halves, 2 cups (200g)
- Maple syrup, ¾ cup (180ml)
- Brown sugar, ½ cup (100g), packed (for filling)
- Large eggs, 2, at room temperature
- Unsalted butter, 3 tablespoons (42g), melted (for filling)
- Bourbon, 2 tablespoons (30ml)
- Vanilla extract, 1 teaspoon
- Salt, ¼ teaspoon (for filling)
Instructions
- Preheat oven to 350°F (175°C). Line a 9×13-inch baking pan with parchment paper, leaving overhang on the long sides.
- Make the crust: In a medium bowl, whisk together flour, rolled oats, brown sugar, and salt. Pour in melted butter and stir with a fork until mixture resembles wet sand and holds together when squeezed. Press evenly into the prepared pan. Bake for 12 minutes until edges are just golden. Set aside to cool slightly.
- Toast pecans: Spread pecan halves on a baking sheet and toast for 5-7 minutes until fragrant and slightly darker. Let cool, then roughly chop into a mix of sizes.
- Make the filling: In a large bowl, whisk together maple syrup, brown sugar, eggs, melted butter, bourbon, vanilla extract, and salt until smooth and glossy. Fold in chopped pecans.
- Assemble: Pour filling over pre-baked crust, spreading evenly. Bake for 25-30 minutes until edges are set and center is slightly jiggly (like Jell-O).
- Cool completely in the pan on a wire rack (about 2 hours). Use parchment overhang to lift slab onto a cutting board. Cut into 24 bars with a sharp knife, wiping blade clean between cuts.
Notes
Don’t overbake the crust; it continues baking with the filling. Use room temperature eggs to avoid lumpy filling. Toast pecans for deeper flavor. Let bars cool completely before cutting to prevent runny filling. For clean cuts, chill bars for 30 minutes before slicing. Store in an airtight container at room temperature for up to 5 days or freeze for up to 3 months.
Nutrition
- Serving Size: 1 bar
- Calories: 195
- Sugar: 16
- Sodium: 85
- Fat: 11
- Saturated Fat: 4
- Carbohydrates: 23
- Fiber: 1
- Protein: 3
Keywords: maple bourbon pecan pie bars, easy pecan bars, kid-approved dessert, budget-friendly dessert, Thanksgiving dessert, Christmas dessert, pecan pie bars, maple pecan bars


