I was getting my car inspected—a Tuesday morning chore I’d been dreading for weeks—when the mechanic, a guy named Sal with grease under every fingernail, started talking about pumpkin seeds. Not about the oil change or the worn brake pads, but about how he roasts them every fall with garlic and Parmesan until they’re so crispy they practically shatter. I wasn’t expecting cooking advice from a man holding a wrench, but there I was, sitting on a plastic chair in the waiting area, listening to him describe exactly how to make the perfect batch of crispy garlic Parmesan pumpkin seeds. He told me his secret was a double-roast method he learned from his grandmother, who apparently refused to let a single pumpkin go to waste during her lifetime.
Honestly, I almost didn’t try it. I mean, I’d made roasted pumpkin seeds before—the kind that turn out chewy or burn on one side while staying raw in the middle. They were always fine, but never something I craved. Sal’s version sounded too good to be true. But later that week, with a pumpkin sitting on my counter from a trip to the orchard, I figured why not. I followed his instructions exactly, and let me tell you—the first batch disappeared in about twenty minutes. My husband looked at me like I’d hidden a bag of chips somewhere.
What makes these seeds different is the texture. They’re not just roasted; they’re cooked low and slow first to dry them out completely, then hit with high heat at the end to crisp them up. The garlic and Parmesan cling to every ridge and crevice, creating this savory, salty crust that’s absolutely addictive. Maybe you’ve been there—opening a bag of store-bought seeds and feeling let down by the bland, dusty coating. These are the opposite. They’re bold, crunchy, and taste like something you’d pay good money for at a farmers’ market.
I’ve made four batches since that conversation with Sal, tweaking the seasoning just a little each time. This version is the one I keep coming back to. It’s the kind of snack that makes you close your eyes after the first bite, wondering why you didn’t try this sooner. And honestly, it all started because my car needed new tires.
Why You’ll Love This Recipe
There are a lot of pumpkin seed recipes out there, but this one stands out for a few very good reasons. I’ve tested this method multiple times—burned a few batches, under-seasoned a few more—and what I’m sharing with you today is the version that works every single time. Here’s why you’ll want to make it all season long:
- Quick & Easy: From pumpkin to snack in about 45 minutes, with mostly hands-off oven time. Perfect for a lazy Sunday afternoon or a last-minute craving during a football game.
- Simple Ingredients: You need pumpkin seeds, garlic powder, Parmesan cheese, olive oil, and salt. That’s it. No fancy trips to specialty stores or obscure spice blends.
- Perfect for Fall Gatherings: These seeds are ideal for Halloween parties, Thanksgiving appetizer spreads, or just munching while you watch the leaves change. They travel well, too—bring them to a potluck and watch them disappear.
- Crowd-Pleaser: I’ve served these to kids, adults, and even picky in-laws who “don’t really like seeds.” Every single person has asked for the recipe. It’s the kind of snack that converts skeptics.
- Unbelievably Delicious: The texture is what gets people. They’re not chewy or tough—they snap cleanly when you bite into them, and the garlic-Parmesan coating is perfectly balanced. Not too salty, not too greasy.
What makes this recipe different from the rest is the double-roast technique. Most recipes just toss seeds in oil and bake them once, which often leaves the inside slightly soft. By drying the seeds out first at a lower temperature, then cranking up the heat to crisp them, you get that shatter-crunch that store-bought versions can’t touch. I learned this the hard way after a few sad, chewy batches. Trust me on this one—the extra step is worth it.
This isn’t just another snack recipe. It’s the kind that makes you feel good about eating something homemade, something you created from what would have been thrown away. It’s resourceful, delicious, and deeply satisfying. Perfect for impressing guests without stress, or turning a simple afternoon into something memorable.
What Ingredients You Will Need
This recipe uses simple, wholesome ingredients to deliver bold flavor and satisfying crunch. Most of these are pantry staples, especially if you do any fall baking or cooking. Here’s what you’ll need and why each one matters:
For the Seeds
- Fresh pumpkin seeds – 1 cup (about 120g), cleaned and patted dry. You can use seeds from any pumpkin variety, but larger pumpkins (like carving pumpkins) tend to produce bigger, meatier seeds. Sugar pumpkins work too, but the seeds are smaller and more delicate. I recommend rinsing them thoroughly in a colander to remove all the stringy pulp, then spreading them on a kitchen towel to dry for at least 30 minutes. Wet seeds won’t crisp up properly.
- Olive oil – 1 tablespoon (15ml). Use a good-quality extra virgin olive oil for the best flavor, but regular olive oil works fine too. The oil helps the seasoning stick and promotes browning. You can substitute melted butter or avocado oil if you prefer—I’ve tried both, and they work beautifully.
For the Seasoning
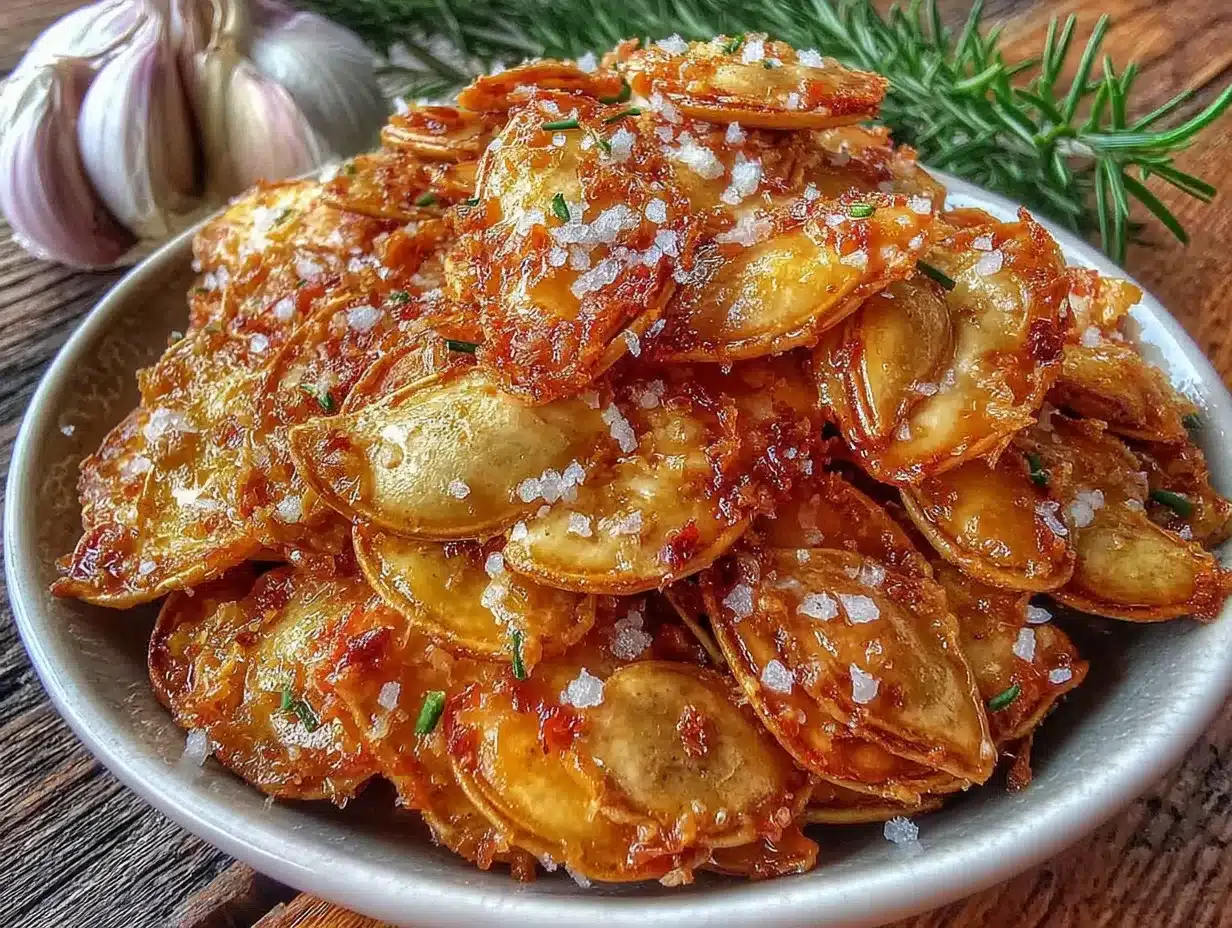
- Garlic powder – 1 teaspoon (3g). Not garlic salt—make sure you’re using pure garlic powder. I’ve made the mistake of using garlic salt before, and the seeds came out way too salty. If you only have garlic salt, reduce the added salt by half. I recommend the brand Simply Organic for its consistent, bold flavor.
- Finely grated Parmesan cheese – 3 tablespoons (15g). Use the real stuff from a block, not the green can. Freshly grated Parmesan melts better and clings to the seeds more evenly. Pre-shredded cheese often contains anti-caking agents that prevent it from sticking. I like using Parmigiano-Reggiano when I can find it—it’s nuttier and saltier than domestic Parmesan.
- Kosher salt – ½ teaspoon (2g). I use Diamond Crystal kosher salt. If you’re using table salt or fine sea salt, reduce the amount to ¼ teaspoon. You can always add more at the end, but you can’t take it away.
- Optional: Pinch of cayenne pepper – ⅛ teaspoon. This adds a tiny kick of heat that plays beautifully with the garlic and cheese. Totally optional, but I highly recommend it if you like a little warmth.
Ingredient Selection Tips
Look for pumpkins that feel heavy for their size—they tend to have more developed seeds. If you’re buying pre-packaged pumpkin seeds from the store, make sure they’re raw and unsalted. Roasted or salted seeds won’t absorb the seasoning the same way. I’ve tested this with both fresh and store-bought raw seeds, and fresh always yields better texture. For seasonal variations, try swapping the Parmesan for Pecorino Romano in the summer for a sharper, tangier flavor.
Substitution Guidance
For a dairy-free version, use nutritional yeast instead of Parmesan. Start with 2 tablespoons and adjust to taste—nutritional yeast has a cheesy, nutty flavor that works surprisingly well. For a gluten-free option, this recipe is naturally gluten-free as written. Just double-check your garlic powder and Parmesan labels to be safe. If you want to reduce the oil, you can use a cooking spray instead, but the seeds won’t get quite as crispy. I’ve tried it, and honestly, the oil is worth it for the texture.
Equipment Needed
You don’t need much to make these seeds, which is part of the appeal. Here’s what you’ll need:
- Baking sheet – A standard half-sheet pan (18×13 inches) works perfectly. If you’re making a double batch, use two pans and rotate them halfway through. Avoid using dark nonstick pans—they absorb more heat and can burn the seeds before they’re fully dried.
- Parchment paper or silicone baking mat – This prevents sticking and makes cleanup a breeze. I’ve baked these directly on the pan before, and they stuck like crazy. Parchment paper is your friend here.
- Mixing bowl – Any medium-sized bowl will do. I use a glass mixing bowl because it doesn’t retain odors, but metal or ceramic works fine too.
- Colander – For rinsing the seeds. A fine-mesh strainer is even better if you have one—it catches the smaller seeds and bits of pulp.
- Kitchen towel or paper towels – For drying the seeds after rinsing. A clean dish towel works great; just make sure it’s lint-free.
- Spatula or wooden spoon – For stirring the seeds halfway through roasting. I use a silicone spatula because it doesn’t scratch the pan.
If you don’t have parchment paper, you can lightly grease the baking sheet with cooking spray. Just keep an eye on the seeds during the last few minutes of baking—they’ll brown faster on a greased pan. I’ve also used a toaster oven for smaller batches, and it works fine—just reduce the temperature by 25°F and check the seeds a few minutes early. As for budget-friendly options, a basic baking sheet from the grocery store will do the job. You don’t need expensive equipment to get great results.
Preparation Method
Follow these steps carefully, and you’ll end up with the crispiest, most flavorful pumpkin seeds you’ve ever had. I’ve included time estimates and sensory cues so you know exactly what to look for at each stage.
- Preheat your oven to 300°F (150°C). This lower temperature is the key to drying the seeds without burning them. Line a baking sheet with parchment paper or a silicone mat.
- Clean the pumpkin seeds. Place the seeds in a colander and rinse them under cold running water. Use your fingers to gently rub away any stringy pulp. This takes about 2-3 minutes. Don’t worry if a few bits of pulp remain—they’ll crisp up in the oven and add flavor. Shake the colander to remove excess water, then spread the seeds on a clean kitchen towel. Pat them dry thoroughly. Wet seeds will steam instead of roast, and you’ll end up with chewy seeds. Let them air-dry for 10 minutes if you have time.
- Toss with oil and seasonings. In a medium mixing bowl, combine the dried pumpkin seeds, olive oil, garlic powder, and kosher salt. Stir until every seed is coated. The seeds should look glossy but not greasy. If they look wet, you’ve used too much oil—add a few more seeds to balance it out. Spread the seasoned seeds in a single layer on the prepared baking sheet. Don’t overcrowd them; they need space to dry evenly.
- First roast (the drying phase). Bake the seeds at 300°F for 20 minutes. After 10 minutes, give the pan a gentle shake or stir the seeds with a spatula to ensure even drying. At this stage, the seeds will look pale and feel dry to the touch but not yet crispy. The kitchen will start smelling toasty and savory—that’s the garlic warming up.
- Add the Parmesan. Remove the pan from the oven and sprinkle the grated Parmesan over the seeds. Stir gently to coat. The cheese will look clumpy at first, but it will melt and spread as it bakes. This is where the magic happens.
- Second roast (the crisping phase). Increase the oven temperature to 350°F (175°C). Return the pan to the oven and bake for another 10-15 minutes, stirring once halfway through. Watch closely during the last 3 minutes—the cheese can go from golden to burnt very quickly. The seeds are done when they’re deep golden brown and the cheese forms a crispy, lacy crust around them. You’ll hear a faint sizzling sound when you stir them, and they’ll feel firm and dry to the touch.
- Cool completely. Remove the pan from the oven and let the seeds cool on the pan for at least 10 minutes. They will continue to crisp as they cool. Don’t skip this step! If you try to eat them right away, they’ll seem softer than they actually are. Once cooled, the seeds should snap cleanly when you bite into them. If they still feel chewy, return them to the oven at 300°F for another 5 minutes.
- Break apart and serve. Once cool, use your hands to break the seeds apart. Some will stick together in small clusters—those are the best parts. Transfer to a serving bowl and enjoy immediately, or store for later.
Cooking Tips & Techniques
Over the years, I’ve made just about every mistake you can make with pumpkin seeds. I’ve burned them, undercooked them, overseasoned them, and once forgot to dry them entirely (that was a soggy disaster). Here’s what I’ve learned so you don’t have to repeat my mistakes.
Dry the seeds thoroughly. This is the single most important step. Any moisture left on the seeds will turn into steam in the oven, and steam prevents crisping. After rinsing, spread the seeds on a towel and let them sit for at least 10-15 minutes. If you’re in a hurry, you can pat them dry with paper towels, but be gentle—wet seeds are fragile and can break.
Don’t skip the low-temperature first roast. I know it’s tempting to just crank the oven to 400°F and hope for the best, but that’s how you end up with seeds that are burnt on the outside and soft on the inside. The 300°F stage dries the seeds from the inside out, ensuring they crisp evenly. Think of it like toasting nuts—low and slow is always better.
Use freshly grated Parmesan. I cannot stress this enough. The pre-shredded stuff in bags contains cellulose and anti-caking agents that prevent it from melting properly. It will burn before it sticks to the seeds. Grate a block of Parmesan on the fine side of a box grater—it takes two minutes and makes a huge difference. I learned this the hard way after a batch that looked like a cheese disaster.
Watch the oven like a hawk during the second roast. The difference between perfectly crispy and burnt is about 60 seconds. Set a timer for 8 minutes, then check every 2 minutes after that. The seeds should be golden brown, and the cheese should look bubbly and slightly darker at the edges. If you see any seeds turning black, pull the pan out immediately.
Let them cool completely before storing. I know it’s hard to wait, but trust me—seeds that go into a container while still warm will trap steam and lose their crunch. Spread them out on a plate or tray and let them sit at room temperature for at least 30 minutes. If you’re storing them, make sure they’re completely cool first.
Variations & Adaptations
One of the best things about this recipe is how easily you can change it up. I’ve experimented with dozens of flavor combinations, and here are some of my favorites:
Spicy Chipotle Lime
Replace the garlic powder with 1 teaspoon of chipotle powder and add the zest of one lime. Skip the Parmesan and use 1 tablespoon of nutritional yeast instead for a dairy-free, smoky version. The lime brightens the heat perfectly. I made this for a tailgate party last fall, and it was the first bowl to empty.
Everything Bagel Seasoning
Skip the Parmesan and garlic powder. Toss the seeds with 2 tablespoons of everything bagel seasoning (the kind with sesame seeds, poppy seeds, dried garlic, dried onion, and salt). Use the same double-roast method. These taste exactly like the top of an everything bagel—salty, savory, and incredibly addictive. My kids fight over these.
Sweet Cinnamon Sugar
For a dessert-style snack, skip the savory seasonings entirely. Toss the seeds with 1 tablespoon of melted butter, 2 tablespoons of brown sugar, and 1 teaspoon of cinnamon. Roast at 300°F for 20 minutes, then increase to 350°F for 8-10 minutes. Watch carefully—the sugar can burn quickly. These are amazing sprinkled over yogurt or oatmeal.
Dairy-Free Adaptation
Use 2 tablespoons of nutritional yeast in place of the Parmesan. Add an extra ¼ teaspoon of garlic powder to compensate for the missing savory depth. The nutritional yeast gives a cheesy, umami flavor that’s surprisingly close to the real thing. I’ve served this version to dairy-free friends, and they couldn’t tell the difference.
Air Fryer Method
If you want an even faster version, you can make these in an air fryer. Preheat the air fryer to 300°F. Toss the seeds with oil and seasonings (add the Parmesan at the end). Cook for 10 minutes, shaking the basket halfway through. Then increase the temperature to 350°F, add the Parmesan, and cook for another 3-5 minutes until golden. Keep an eye on them—air fryers run hot. I’ve found this method cuts the total time by about 15 minutes.
Serving & Storage Suggestions
These seeds are incredibly versatile, and I love finding new ways to use them. Here’s how I serve and store mine:
Serving Temperature: These are best served at room temperature, straight from the cooling tray. They’re perfectly crispy right after cooling, and they stay that way for a few hours. If you’re serving them at a party, make them the same day for the best texture.
Presentation Ideas: I like to pile them in a wooden bowl or a rustic ceramic dish. They look beautiful on a charcuterie board alongside dried fruits, nuts, and cheese. For a fall-themed party, I’ve served them in small paper cones lined with parchment—super cute and easy for guests to grab. You can also sprinkle them over soups or salads for an extra crunch. They’re amazing on top of a butternut squash soup.
Complementary Dishes: These seeds pair beautifully with a glass of dry cider or a crisp white wine like Sauvignon Blanc. They’re also great alongside a bowl of chili or a hearty stew. For a sweet-savory combo, serve them with sliced apples and a sharp cheddar cheese.
Storage Instructions: Store the seeds in an airtight container at room temperature for up to 2 weeks. Do not refrigerate them—the moisture in the fridge will soften them. If you live in a humid climate, add a silica gel packet (the kind you find in beef jerky bags) to the container to absorb excess moisture. For longer storage, you can freeze them in a sealed freezer bag for up to 3 months. Thaw at room temperature for 30 minutes before serving.
Reheating Tips: If the seeds lose their crunch after a few days (it happens), spread them on a baking sheet and reheat at 300°F for 5 minutes. Let them cool completely before eating. This restores the crispness almost perfectly. I’ve done this multiple times, and it works like a charm.
Flavor Development: Honestly, these seeds are best the day they’re made. The Parmesan stays crispiest, and the garlic flavor is most pronounced. After a day or two, the cheese softens slightly, but they’re still delicious. If you’re making them ahead for an event, I recommend making them no more than 2 days in advance.
Nutritional Information & Benefits
Pumpkin seeds are a nutritional powerhouse, and this recipe keeps them relatively healthy while adding incredible flavor. Here’s what you’re getting in a ¼-cup serving (about 30g):
| Nutrient | Amount |
|---|---|
| Calories | 180 |
| Total Fat | 14g |
| Saturated Fat | 3g |
| Cholesterol | 5mg |
| Sodium | 280mg |
| Carbohydrates | 5g |
| Fiber | 2g |
| Sugar | 1g |
| Protein | 8g |
| Calcium | 80mg |
| Iron | 2mg |
Health Benefits: Pumpkin seeds are packed with magnesium, zinc, and healthy fats. Magnesium supports muscle function and sleep quality—I’ve read that eating a handful before bed can help you relax. Zinc is great for immune health, which is especially important during cold and flu season. The protein and fiber content makes these seeds a satisfying snack that keeps you full between meals. Plus, the antioxidants in pumpkin seeds help fight inflammation.
Dietary Considerations: This recipe is naturally gluten-free and low-carb (only 5g net carbs per serving). It’s also vegetarian. For a vegan version, use nutritional yeast instead of Parmesan. The only potential allergen is dairy (from the cheese), but that’s easy to swap out. If you’re watching your sodium intake, reduce the salt to ¼ teaspoon and use unsalted butter or oil.
Personal Wellness Perspective: I love that this snack feels indulgent but is actually good for you. It’s the kind of thing I can munch on without guilt, knowing I’m getting real nutrients. Plus, making them from scratch means I control exactly what goes in—no preservatives, no weird additives, just real food.
Conclusion
If you’ve never made your own crispy garlic Parmesan pumpkin seeds, now is the time to start. This recipe takes something you might normally throw away and turns it into the best snack of the season. It’s simple, affordable, and incredibly rewarding—the kind of recipe that makes you feel like a kitchen wizard.
I love that this recipe is flexible enough to adapt to whatever you have on hand. Want it spicier? Add cayenne. Prefer a sweeter version? Try the cinnamon sugar variation. The double-roast method works for any flavor combination, so don’t be afraid to experiment. That’s the fun part of cooking—making a recipe your own.
I’d love to hear how yours turn out! Did you try a different seasoning blend? Did you use the air fryer method? Drop a comment below and let me know. And if you’re looking for more fall-inspired snacks, check out my crispy garlic chicken recipe—it uses the same garlic-Parmesan magic in a completely different way. Happy snacking, friends!
Frequently Asked Questions
Can I use store-bought raw pumpkin seeds?
Yes, absolutely. If you’re buying pre-packaged seeds, just make sure they’re raw and unsalted. Roasted or salted seeds won’t absorb the oil and seasonings the same way, and they’ll already have a head start on cooking, which can throw off the timing. I’ve tested this with store-bought raw seeds, and they work perfectly—just follow the same instructions.
Why are my pumpkin seeds chewy instead of crispy?
Chewy seeds usually mean one of two things: they weren’t dried thoroughly before roasting, or they weren’t roasted long enough. Make sure you pat the seeds dry after rinsing and let them air-dry for at least 10 minutes. If they’re still chewy after following the recipe, pop them back in the oven at 300°F for another 5-10 minutes. They’ll firm up as they cool.
Can I make these in an air fryer?
Yes! Air fryers work great for this recipe. Preheat to 300°F, cook the seasoned seeds for 10 minutes, then add the Parmesan and increase to 350°F for another 3-5 minutes. Shake the basket halfway through each stage. Keep a close eye on them during the last few minutes—air fryers can burn things faster than ovens.
How long do these seeds stay fresh?
Stored in an airtight container at room temperature, they’ll stay crispy for up to 2 weeks. Don’t refrigerate them—the moisture will soften them. If you notice them losing crunch after a few days, spread them on a baking sheet and reheat at 300°F for 5 minutes. Let them cool completely before eating.
Can I skip the Parmesan for a dairy-free version?
Absolutely. Use 2 tablespoons of nutritional yeast instead of the Parmesan. It gives a similar cheesy, savory flavor without any dairy. You might want to add an extra ¼ teaspoon of garlic powder to make up for the lost depth. I’ve made this version many times, and it’s just as addictive as the original.
Pin This Recipe!
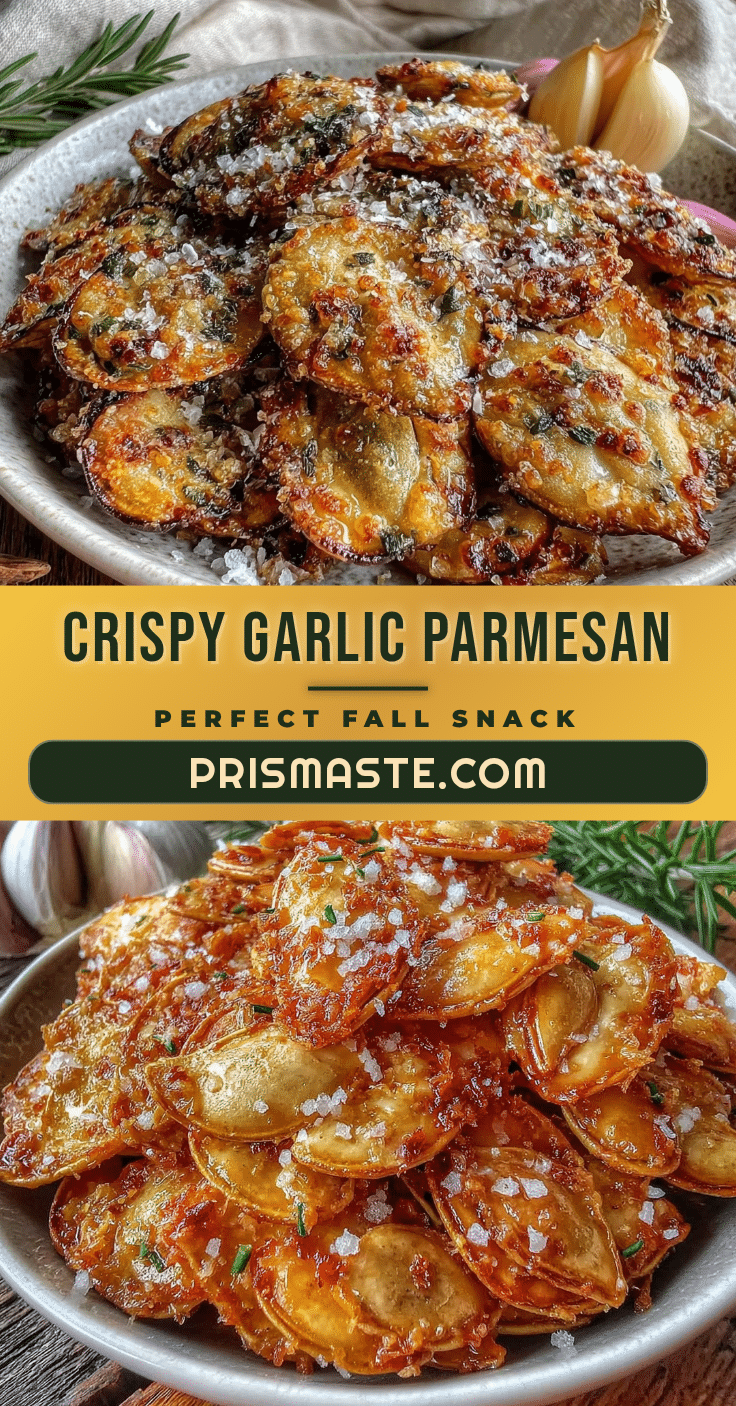
Crispy Garlic Parmesan Pumpkin Seeds: Easy Fall Snack
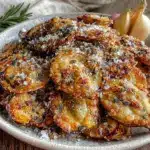
These crispy garlic Parmesan pumpkin seeds are roasted using a double-roast method for a shatter-crunch texture. They’re savory, salty, and absolutely addictive—perfect for fall gatherings or a healthy snack.
- Prep Time: 15 minutes
- Cook Time: 30 minutes
- Total Time: 45 minutes
- Yield: 4 servings 1x
- Category: Snack
- Cuisine: American
Ingredients
- 1 cup (120g) fresh pumpkin seeds, cleaned and patted dry
- 1 tablespoon (15ml) olive oil
- 1 teaspoon (3g) garlic powder
- 3 tablespoons (15g) finely grated Parmesan cheese
- ½ teaspoon (2g) kosher salt
- ⅛ teaspoon cayenne pepper (optional)
Instructions
- Preheat your oven to 300°F (150°C). Line a baking sheet with parchment paper or a silicone mat.
- Clean the pumpkin seeds: Place seeds in a colander and rinse under cold water, rubbing away pulp. Shake off excess water, then spread on a kitchen towel and pat dry. Let air-dry for 10 minutes if possible.
- In a medium bowl, toss dried seeds with olive oil, garlic powder, and kosher salt until evenly coated. Spread in a single layer on the prepared baking sheet.
- First roast (drying phase): Bake at 300°F for 20 minutes, stirring halfway through. Seeds will look pale and feel dry but not crispy.
- Remove pan from oven and sprinkle grated Parmesan over seeds. Stir gently to coat.
- Second roast (crisping phase): Increase oven temperature to 350°F (175°C). Return pan to oven and bake for 10-15 minutes, stirring once halfway. Watch closely during the last 3 minutes—seeds are done when deep golden brown and cheese forms a crispy crust.
- Cool completely on the pan for at least 10 minutes. Seeds will continue to crisp as they cool.
- Break apart any clusters with your hands and serve immediately or store for later.
Notes
Dry seeds thoroughly before roasting to ensure crispiness. Use freshly grated Parmesan for best melting. Watch the second roast closely to prevent burning. Cool completely before storing to maintain crunch.
Nutrition
- Serving Size: ¼ cup (30g)
- Calories: 180
- Sugar: 1
- Sodium: 280
- Fat: 14
- Saturated Fat: 3
- Carbohydrates: 5
- Fiber: 2
- Protein: 8
Keywords: pumpkin seeds, garlic Parmesan, fall snack, crispy seeds, roasted pumpkin seeds, easy snack


