“Are you sure this is no-bake?” my friend asked, eyeing the glossy lime-green squares chilled on my kitchen counter. Honestly, I was half-expecting skepticism myself when I first whipped up these creamy no-bake key lime pie bars. It happened on one of those sweltering late afternoons when turning on the oven felt like a cruel joke. I needed something cool, tangy, and fast—no fuss, no heat waves added to the mix.
I tossed together a crust with graham crackers I had stashed away, squeezed fresh key limes (because, you know, bottled just wouldn’t cut it here), and stirred in sweetened condensed milk and cream cheese. After a couple of hours in the fridge, the bars set into a silky, tart, and perfectly balanced dessert that tasted like summer itself. My reluctant taste-testers quickly turned into fans, asking for the recipe between bites.
Later, I realized this recipe stuck with me because it’s that rare sweet spot: quick enough for a weekday treat but special enough to bring to backyard parties or casual get-togethers. Plus, its creamy texture with that bright lime zing makes you close your eyes and savor the moment, especially when the sun’s still shining outside. If you’ve ever felt the itch for something refreshing without the oven drama, these bars might just become your new go-to.
Why You’ll Love This Recipe
This creamy no-bake key lime pie bars recipe has become a staple in my summer dessert lineup for plenty of reasons I think you’ll appreciate:
- Quick & Easy: Ready in under 30 minutes prep time, then just chill—perfect for those hot evenings when you want dessert without the wait.
- Simple Ingredients: No exotic or hard-to-find items here. Most are pantry staples or easy-to-grab fresh produce like key limes.
- Perfect for Summer Gatherings: Whether it’s a potluck, picnic, or spontaneous backyard hangout, these bars bring fresh, zesty vibes.
- Crowd-Pleaser: Kids, adults, picky eaters—they all seem to flock to these bars. The creamy texture and tart flavor hit a delightful balance.
- Unbelievably Delicious: The silky cream cheese layer combined with the tang of fresh key lime juice is a refreshing twist on classic key lime pie.
What sets this recipe apart? I blend the cream cheese until ultra-smooth before folding in the lime juice and condensed milk, which gives the filling a luscious, melt-in-your-mouth texture. Plus, the no-bake graham cracker crust is buttery and crisp without any oven time. It’s comfort food reinvented for hot days when the last thing you want is to heat up your kitchen.
Honestly, this recipe has become one of those treats I make repeatedly, like when I need a quick cool-down after a long day or when friends spontaneously pop by. It’s that kind of dessert that feels like a little slice of sunshine—simple, satisfying, and just right.
What Ingredients You Will Need
This recipe uses simple, wholesome ingredients to deliver bold flavor and satisfying texture without the fuss. You probably have most of these in your kitchen already, and a few fresh key limes will give it that authentic zing.
- For the Crust:
- Graham cracker crumbs – about 1 ½ cups (150g), finely crushed (I prefer using classic honey graham crackers for a slightly sweet note)
- Unsalted butter – 6 tablespoons (85g), melted (gives the crust a rich, buttery crunch)
- Granulated sugar – 2 tablespoons (25g), to balance the tang
- For the Filling:
- Cream cheese – 8 ounces (225g), softened to room temperature (I always use full-fat for creaminess)
- Sweetened condensed milk – 1 can (14 ounces / 396g) (the magic ingredient for that silky texture)
- Fresh key lime juice – ½ cup (120ml), strained (about 10–12 limes; fresh is non-negotiable here!)
- Key lime zest – 1 teaspoon, finely grated (adds an extra punch of citrus aroma)
- Vanilla extract – ½ teaspoon (rounds out the flavor)
- Salt – a pinch (balances sweetness and brightens flavors)
- Optional Topping:
- Whipped cream – for serving (homemade or store-bought works fine)
- Extra lime zest or thin lime slices – for garnish
For substitutions, you can swap the graham cracker crumbs with gluten-free crackers or almond flour if you need a gluten-free crust. Dairy-free cream cheese and coconut condensed milk work too if you’re avoiding dairy, though the texture will be slightly different.
Equipment Needed
- 8×8-inch (20×20 cm) square baking pan or similar size dish – lined with parchment paper for easy removal.
- Mixing bowls – one medium for the crust and one large for the filling.
- Electric mixer or hand mixer – highly recommended for smooth cream cheese blending.
- Measuring cups and spoons – for precise ingredient proportions.
- Microplane or fine grater – to zest the key limes.
- Citrus juicer or reamer – helps extract fresh key lime juice efficiently.
- Spatula – for folding ingredients gently and spreading the filling evenly.
If you don’t have an electric mixer, a sturdy whisk and some elbow grease can get the job done, but expect a little more arm workout. I’ve tried this recipe with both stand mixers and handheld blenders; both work well, but the handheld mixer is more convenient for quick cleanups.
Preparation Method

- Prepare the crust: In a medium bowl, combine 1 ½ cups (150g) of graham cracker crumbs, 2 tablespoons (25g) granulated sugar, and 6 tablespoons (85g) melted unsalted butter. Stir until the crumbs are evenly coated and look like wet sand. This should take about 2-3 minutes.
- Press the crust: Line your 8×8-inch pan with parchment paper, leaving overhang on two sides to lift the bars out later. Press the crumb mixture firmly and evenly into the bottom of the pan. I like to use the bottom of a glass or measuring cup to compact it tightly. Chill in the refrigerator while you make the filling, about 10 minutes.
- Make the filling: In a large bowl, beat 8 ounces (225g) softened cream cheese until smooth and creamy, about 2-3 minutes with an electric mixer. Scrape down the sides as needed to avoid lumps.
- Add condensed milk and lime: Slowly pour in the 14-ounce (396g) can of sweetened condensed milk while mixing on low. Next, add ½ cup (120ml) freshly squeezed and strained key lime juice, 1 teaspoon lime zest, ½ teaspoon vanilla extract, and a pinch of salt. Beat everything together until fully combined and glossy, about 1-2 minutes.
- Pour filling over crust: Remove the crust from the fridge and pour the filling on top. Use a spatula to smooth it out into an even layer. This should take about 2 minutes.
- Chill to set: Refrigerate the bars for at least 3 hours, ideally 4, to let the filling firm up properly. You can leave them overnight if you want to prep ahead.
- Slice and serve: Using the parchment paper overhang, lift the bars out of the pan. Cut into 9 or 12 squares with a sharp knife (wipe the knife clean between cuts for neat edges). Serve chilled with a dollop of whipped cream and a sprinkle of lime zest for a pretty touch.
Quick tip: If your filling seems too soft or watery, make sure your cream cheese was fully softened but not melted, and your condensed milk is fresh. Also, the lime juice should be freshly squeezed, not bottled, or the filling won’t set as well.
Cooking Tips & Techniques
Making creamy no-bake key lime pie bars is straightforward, but a few tricks help get them just right every time:
- Softening cream cheese: Let it sit at room temperature for at least 30 minutes before mixing. This prevents lumps and helps achieve that silky smooth filling.
- Fresh key lime juice: Bottled lime juice just doesn’t cut it here. Fresh juice gives you that bright, tangy flavor and helps the filling set properly.
- Pressing the crust: Compacting the graham cracker crust firmly prevents it from crumbling when you cut the bars. Using a flat-bottomed glass works wonders.
- Chilling time: Don’t rush the refrigeration step. The longer the bars chill, the better the texture. I usually leave mine overnight for clean cuts.
- Cutting bars: Warm the knife under hot water, dry it well, and slice slowly for neat edges. Wiping the blade between cuts keeps lines clean.
- Multitasking tip: While the bars chill, you can prep a quick dinner like my easy budget-friendly loaded pasta bake to keep the kitchen busy without breaking a sweat.
One lesson I learned the hard way was rushing the chilling process. The first time I tried cutting these bars too soon, the filling squished out and turned the bars into a gooey mess. Now I give them at least 3 hours, and it’s a night-and-day difference.
Variations & Adaptations
This recipe is pretty flexible, so feel free to tweak it to suit your tastes or dietary needs:
- Dairy-Free Version: Use dairy-free cream cheese and canned coconut condensed milk. The texture will be a bit lighter, and the coconut adds a subtle tropical twist.
- Graham Cracker Alternatives: Swap the crust with crushed digestive biscuits, vanilla wafers, or even gluten-free crackers for dietary preferences.
- Flavor Boost: Add a teaspoon of finely grated ginger or a pinch of cayenne for a surprising warm kick that contrasts the tart lime.
- Mini Bars: Make these in a muffin tin lined with paper cups for portable, single-serving-sized treats, perfect for picnics.
- Personal Favorite: I once stirred in finely chopped fresh mint leaves into the filling for a refreshing herbal note—unexpected but delightful.
If you want to mix things up with other citrus, lemon juice works well but changes the flavor profile noticeably. For a richer dessert, try a swirl of passion fruit puree on top before chilling.
Serving & Storage Suggestions
Serve these creamy no-bake key lime pie bars chilled, ideally straight from the fridge. They’re a perfect palate cleanser after a heavy meal or a cool-down treat on a hot day. Garnishing with whipped cream and a sprinkle of lime zest or thin lime slices adds a pretty, professional touch.
These bars pair wonderfully with light beverages like iced tea, sparkling water with lime, or even a crisp white wine if you’re entertaining. For a casual get-together, they fit right in alongside savory dishes like my easy sheet pan loaded fajita bowl.
Store leftovers covered tightly in the refrigerator for up to 4 days. They hold their texture well and actually taste better after a day as the flavors meld. For longer storage, you can freeze the bars wrapped in plastic and foil for up to 2 months. Thaw overnight in the fridge before serving.
Reheat is generally not recommended since they’re best enjoyed cold, but if you want a softer texture, leave them at room temperature for 15-20 minutes before serving.
Nutritional Information & Benefits
Each creamy no-bake key lime pie bar (assuming 12 servings) contains approximately:
| Calories | 220 kcal |
|---|---|
| Fat | 12g (mostly from cream cheese and butter) |
| Carbohydrates | 25g (includes sugar from condensed milk and crust) |
| Protein | 3g |
| Sugar | 20g |
Key limes provide vitamin C and antioxidants, and the recipe’s use of cream cheese adds calcium and protein. While this is a sweet treat, it’s made with real ingredients—no artificial flavors or preservatives.
For those watching carbs, swapping the crust for almond flour and using a sugar-free condensed milk alternative can reduce sugar and increase healthy fats. Just remember that any substitution may change texture and flavor slightly.
Conclusion
Creamy no-bake key lime pie bars are a refreshing, fuss-free dessert that’s earned a permanent spot in my recipe box. They manage to be both simple and special—perfect when you want a cool, tangy treat without the oven heat or complicated steps. Feel free to tweak the crust, add a personal twist with herbs or spices, or keep it classic with just a dollop of whipped cream.
I love how this recipe reliably delivers that perfect balance of creamy and zesty, making it my go-to for summer celebrations or just a casual sweet fix. If you try it, I’d love to hear what variations you come up with or how you serve yours.
Enjoy the bright flavors and cool comfort of these bars all summer long!
Frequently Asked Questions
Can I use regular limes instead of key limes?
Yes, regular limes work fine, but key limes offer a unique floral and slightly more tart flavor. If using regular limes, you might want to adjust the amount of juice to taste.
How long do these bars need to chill before serving?
At least 3 hours in the refrigerator is best to allow the filling to set properly. Overnight chilling yields the best texture and easiest slicing.
Can I make these bars ahead of time?
Absolutely! They keep well in the fridge for up to 4 days and freeze nicely for up to 2 months.
Is there a way to make these bars gluten-free?
Yes, substitute the graham cracker crust with gluten-free crackers or almond flour mixed with a bit of sugar and butter.
What’s the best way to get a smooth filling without lumps?
Make sure the cream cheese is fully softened before mixing, and beat it well with an electric mixer. Scraping down the bowl sides helps achieve a silky texture.
Pin This Recipe!
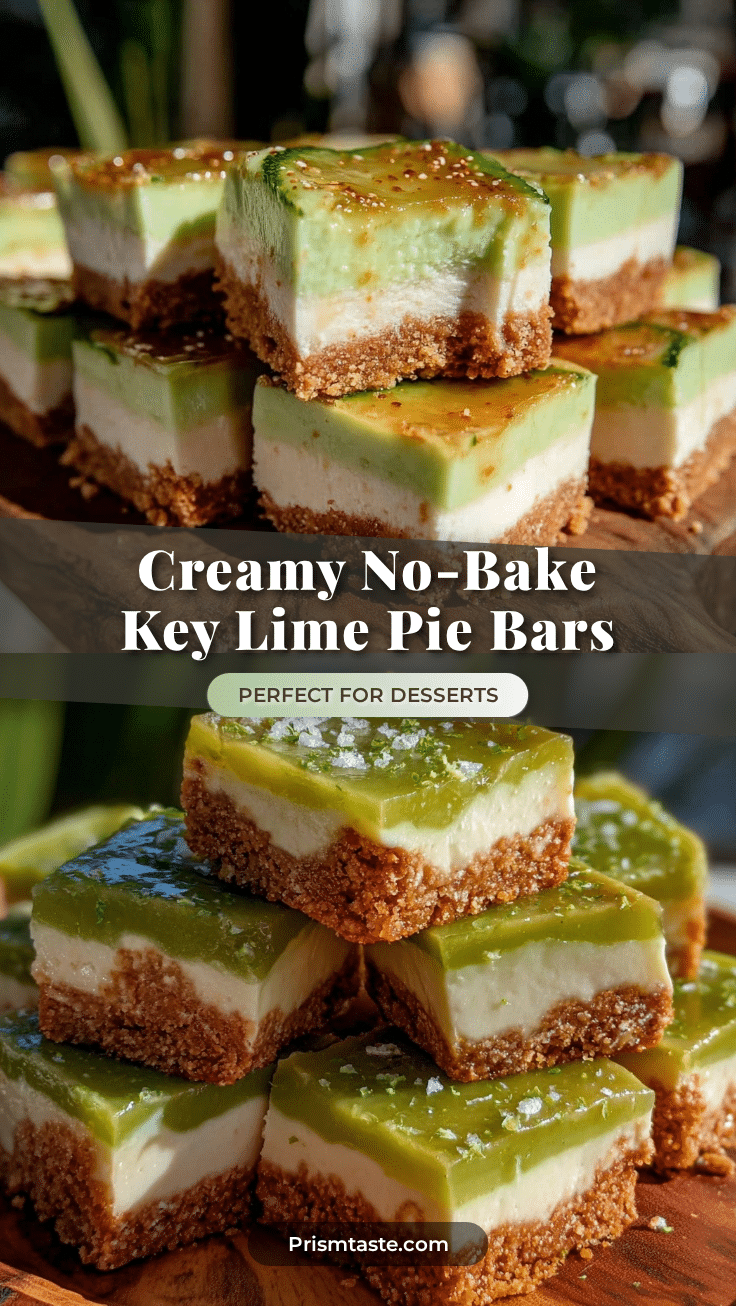
Creamy No-Bake Key Lime Pie Bars
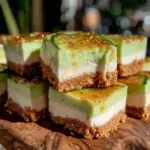
A quick and easy no-bake dessert featuring a buttery graham cracker crust and a silky, tangy key lime cream cheese filling. Perfect for summer gatherings and hot days when you want a refreshing treat without turning on the oven.
- Prep Time: 15 minutes
- Cook Time: 0 minutes
- Total Time: 3 hours 15 minutes
- Yield: 9 to 12 servings 1x
- Category: Dessert
- Cuisine: American
Ingredients
- 1 ½ cups (150g) graham cracker crumbs
- 6 tablespoons (85g) unsalted butter, melted
- 2 tablespoons (25g) granulated sugar
- 8 ounces (225g) cream cheese, softened to room temperature
- 1 can (14 ounces / 396g) sweetened condensed milk
- ½ cup (120ml) fresh key lime juice, strained (about 10–12 limes)
- 1 teaspoon key lime zest, finely grated
- ½ teaspoon vanilla extract
- Pinch of salt
- Whipped cream (optional, for serving)
- Extra lime zest or thin lime slices (optional, for garnish)
Instructions
- In a medium bowl, combine graham cracker crumbs, granulated sugar, and melted unsalted butter. Stir until the crumbs are evenly coated and look like wet sand, about 2-3 minutes.
- Line an 8×8-inch (20×20 cm) baking pan with parchment paper, leaving overhang on two sides for easy removal. Press the crumb mixture firmly and evenly into the bottom of the pan using the bottom of a glass or measuring cup. Chill in the refrigerator for about 10 minutes.
- In a large bowl, beat softened cream cheese until smooth and creamy, about 2-3 minutes with an electric mixer, scraping down the sides as needed.
- Slowly pour in the sweetened condensed milk while mixing on low. Add fresh key lime juice, lime zest, vanilla extract, and a pinch of salt. Beat until fully combined and glossy, about 1-2 minutes.
- Remove the crust from the fridge and pour the filling on top. Use a spatula to smooth it out into an even layer, about 2 minutes.
- Refrigerate the bars for at least 3 hours, ideally 4, to let the filling firm up properly. You can leave them overnight if desired.
- Using the parchment paper overhang, lift the bars out of the pan. Cut into 9 or 12 squares with a sharp knife, wiping the knife clean between cuts for neat edges.
- Serve chilled with a dollop of whipped cream and a sprinkle of lime zest or thin lime slices if desired.
Notes
Use fresh key lime juice for best flavor and proper setting of the filling. Soften cream cheese at room temperature for at least 30 minutes before mixing to avoid lumps. Chill bars for at least 3 hours or overnight for best texture. Warm and dry the knife between cuts for clean slices. For gluten-free, substitute graham cracker crumbs with gluten-free crackers or almond flour. Dairy-free options include dairy-free cream cheese and coconut condensed milk.
Nutrition
- Serving Size: 1 bar (if cut into 1
- Calories: 220
- Sugar: 20
- Fat: 12
- Carbohydrates: 25
- Protein: 3
Keywords: no-bake, key lime pie bars, summer dessert, creamy, easy recipe, graham cracker crust, refreshing, quick dessert