It was 11:47 PM on a random Wednesday in late October, and I had a very specific, almost irrational craving for something warm, spiced, and absurdly easy. I didn’t have the energy for a full layer cake or the patience for a fussy pie crust, but I had a lone can of pumpkin puree in the pantry and a half-empty box of yellow cake mix that was probably a few months past its “best by” date. The idea that hit me was so simple it felt almost like cheating: just layer the pumpkin, sprinkle the cake mix, and let the butter do its magic. Honestly, I was tired, and the thought of washing a million dishes was enough to make me abandon the whole project. But this—this was a one-bowl, one-pan situation. I mean, it was practically daring me to make it. I grabbed a small baking dish, the one that always feels just a little too big for a single serving but perfect for a small batch, and I just went for it. Let me tell you, the smell that filled my tiny kitchen at midnight was better than any candle. Maybe you’ve been there, standing in your kitchen at an ungodly hour, just needing a little bit of comfort without a whole lot of work. This dump cake became my go-to that fall, and it’s the kind of recipe that feels like a secret you’re almost too happy to share. It’s not fancy, but it’s exactly right.
Why You’ll Love This Recipe
This isn’t just another pumpkin dessert. This is the one you’ll make when you want the soul-soothing warmth of pumpkin pie but you’re short on time, energy, or both. I’ve tested this small-batch version more times than I can count, tweaking the butter-to-cake-mix ratio and the spice level until it was absolutely perfect. It’s a recipe that delivers on every promise.
- Quick & Easy: From start to finish, this is ready in under an hour. Most of that time is hands-off baking, so you can get cozy on the couch.
- Simple Ingredients: You likely have everything in your pantry right now. No fancy grocery store trips for obscure spices or hard-to-find extracts.
- Perfect for Cozy Nights: This is the ideal dessert for a quiet evening at home, a cold, rainy day, or any time you need a little edible hug.
- Crowd-Pleaser (for a Small Crowd): It’s the perfect size for two, or for one person with leftovers for breakfast (no judgment here).
- Unbelievably Delicious: The texture is a glorious cross between a soft, gooey cake and a crisp, buttery crumble. The pumpkin filling is spiced just right, and the top gets this amazing golden, crunchy crust.
What makes this recipe different is the technique. Instead of just dumping everything in a pan, we take two minutes to whisk the pumpkin filling until it’s silky smooth. This small step prevents any lumps and creates a luscious, custard-like base that perfectly contrasts the crunchy topping. It’s comfort food reimagined—simpler, faster, but with the same deep, satisfying flavor that makes you close your eyes after the first bite.
What Ingredients You Will Need
This recipe relies on a handful of pantry staples to deliver maximum flavor with minimum effort. Each ingredient plays a specific role in creating that perfect, cozy texture and taste.
- For the Pumpkin Filling:
- 1 cup (240g) pure pumpkin puree: Not pumpkin pie filling! Make sure you grab the 100% pure stuff. I personally like Libby’s for its consistent texture and deep color. (adds rich pumpkin flavor and moisture)
- 1/2 cup (120ml) evaporated milk: This is the secret to a silky, non-watery filling. You can substitute with heavy cream for an even richer result, or with whole milk for a lighter version. (adds creaminess)
- 1 large egg: This helps bind the filling and gives it structure. Make sure it’s at room temperature for the smoothest mix. (adds richness and structure)
- 1/4 cup (50g) granulated sugar: Just enough to sweeten the pumpkin without overpowering the spice. (adds sweetness)
- 1 teaspoon pumpkin pie spice: If you don’t have a blend, use 1/2 teaspoon cinnamon, 1/4 teaspoon ginger, 1/8 teaspoon nutmeg, and a pinch of cloves. (adds warm, cozy flavor)
- 1/4 teaspoon salt: This is crucial! It balances the sweetness and enhances all the other flavors. Don’t skip it.
- For the Topping:
- 1 cup (about 120g) yellow cake mix: This is the magic ingredient. Just the dry mix, straight from the box. You can use a standard 15.25 oz box and measure out 1 cup. A generic brand works perfectly fine here. (creates the crispy, buttery crust)
- 1/4 cup (55g) unsalted butter, melted: This is what turns the dry cake mix into a golden, crunchy topping. Use real butter for the best flavor. (adds richness and crispness)
- 1/4 cup (30g) chopped pecans or walnuts (optional): For a little extra crunch and a nutty flavor that pairs beautifully with pumpkin. (adds texture)
Substitution Guidance: For a dairy-free version, use full-fat canned coconut milk instead of evaporated milk and a good quality vegan butter. A gluten-free yellow cake mix works beautifully in this recipe, just make sure it’s a 1:1 substitute. If you don’t have pumpkin pie spice, a mix of cinnamon, ginger, nutmeg, and a tiny pinch of cloves will work perfectly.
Equipment Needed
You don’t need a fancy kitchen to make this dump cake. The beauty is in its simplicity. Here’s what you’ll need:
- An 8×8-inch or similar small baking dish: A 9-inch pie plate or a 1.5-quart baking dish works great too. The key is that it’s not too large, or the layers will be too thin. I’ve used a slightly warped 8×8 pan for years, and it works like a charm.
- A medium mixing bowl and a whisk: For combining the pumpkin filling. A fork works in a pinch, but a whisk ensures a smooth, lump-free base.
- Measuring cups and spoons: For accuracy, especially with the spices.
- A rubber spatula: To scrape every last bit of that delicious filling into the dish.
Budget-Friendly Tip: Don’t have an 8×8 pan? A small cast-iron skillet is a fantastic alternative. It heats evenly and gives the bottom a nice, slightly caramelized edge. You can often find them at thrift stores for a steal.
Preparation Method
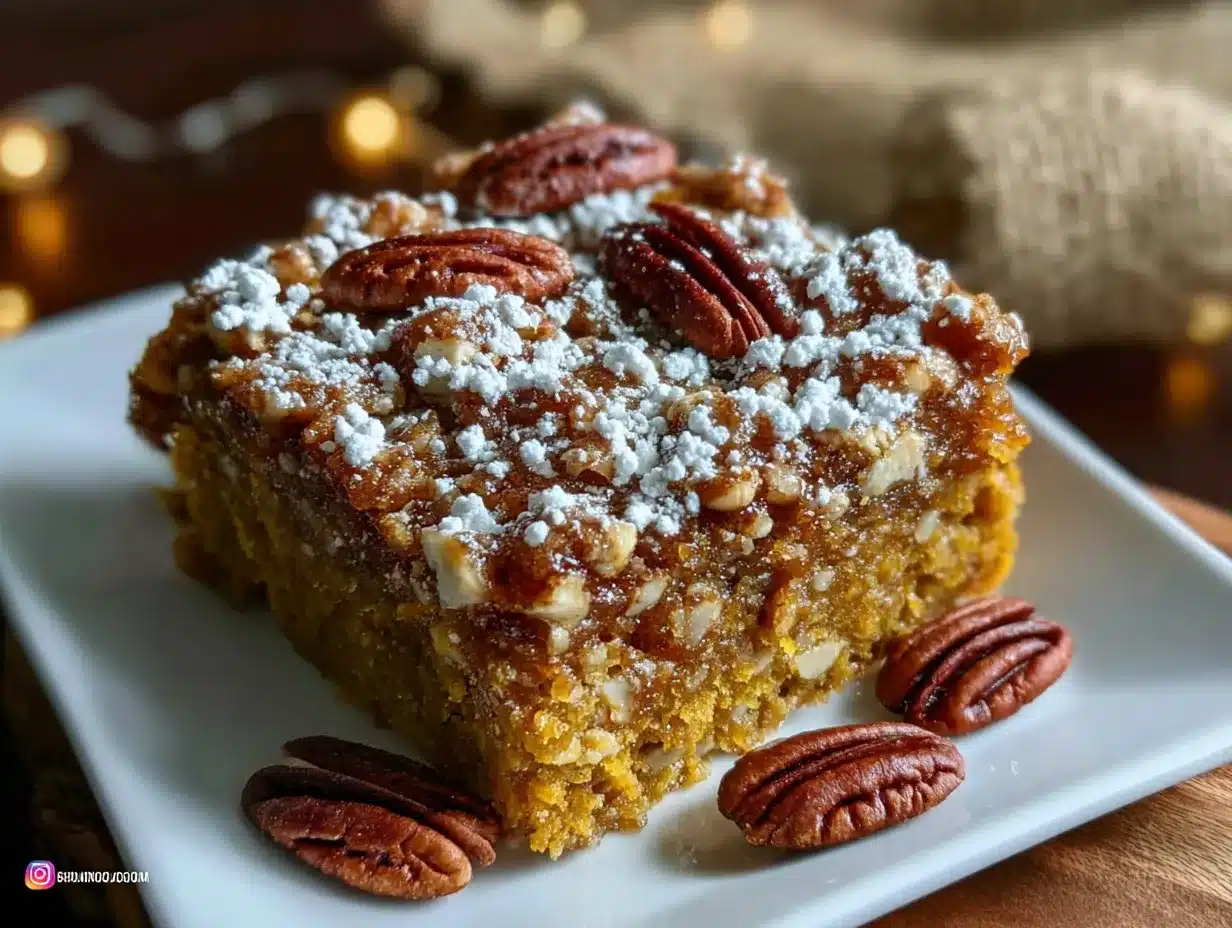
Let’s get to the good part. This is so easy, you’ll be amazed at the results.
- Preheat and Prep: Preheat your oven to 350°F (175°C). Lightly grease your 8×8-inch baking dish with butter or non-stick spray. This isn’t strictly necessary, but it makes for easier cleanup and a slightly crispier edge.
- Make the Pumpkin Filling: In your medium bowl, whisk together the 1 cup of pumpkin puree, 1/2 cup of evaporated milk, 1 large egg, 1/4 cup of granulated sugar, 1 teaspoon of pumpkin pie spice, and 1/4 teaspoon of salt. Whisk until the mixture is completely smooth and a beautiful, uniform orange color. This should take about 30 seconds. Don’t rush this step—a smooth filling is the key to a perfect texture.
- Pour the Filling: Pour the pumpkin mixture into your prepared baking dish. Use your rubber spatula to spread it into an even layer. It will be a thin layer, and that’s exactly what you want.
- Add the Topping: Evenly sprinkle the 1 cup of dry yellow cake mix over the entire surface of the pumpkin filling. Don’t stir it in! Just let it sit on top like a blanket. If you’re using nuts, sprinkle them over the cake mix now.
- Drizzle with Butter: Drizzle the 1/4 cup of melted butter as evenly as you can over the top of the cake mix. It won’t cover everything perfectly, and that’s okay. The butter will melt and spread as it bakes, creating those signature buttery, crunchy pockets.
- Bake to Golden Perfection: Place the dish in the preheated oven and bake for 35-40 minutes. The top should be a deep golden brown and the filling should be bubbly around the edges. You’ll know it’s done when the top is set and feels firm to a gentle touch. The house will smell like a pumpkin spice dream.
- Cool and Serve: Let the dump cake cool on a wire rack for at least 10-15 minutes. This is the hardest part! It allows the filling to set up a bit, making it easier to serve. Serve warm, and prepare to be amazed.
Sensory Cue: At the 20-minute mark, you’ll start to see the edges bubbling and the top turning a light golden brown. By 35 minutes, the kitchen will be filled with the scent of toasted sugar and warm spices—that’s your signal that it’s almost time.
Cooking Tips & Techniques
I’ve made this recipe a dozen times, and I’ve learned a few things the hard way. Here are my best tips for a perfect dump cake every time.
- Don’t Over-mix the Filling: While you want a smooth filling, don’t whisk it for minutes on end. Over-mixing can incorporate too much air, which can lead to a slightly spongy texture instead of the desired custard-like one. Just whisk until it’s smooth.
- The Butter is Key: The single biggest mistake is not using enough melted butter or drizzling it unevenly. The butter is what transforms the dry cake mix into a golden, crunchy crust. If you skimp, you’ll end up with patches of dry, powdery cake mix. Be generous and try to cover the surface as evenly as possible.
- Patience is a Virtue: I know it’s tempting to dig in the second it comes out of the oven, but letting it cool for 15 minutes is non-negotiable. The filling needs that time to set. If you serve it piping hot, it will be runny. Trust me, I’ve been there with a puddle on my plate, and it’s still delicious, but not nearly as good as when it’s had time to rest.
- Check for Doneness: Ovens vary, so start checking at the 30-minute mark. The top should be a deep, even golden brown. If it’s browning too quickly, tent it loosely with aluminum foil for the last 10 minutes of baking.
Variations & Adaptations
This recipe is a fantastic base for your own creativity. Here are a few ways to switch it up.
- Spice It Up: For a more intense flavor, add 1/4 teaspoon of ground cardamom or a pinch of cayenne pepper to the pumpkin filling. The cayenne won’t make it spicy, but it will add a lovely warmth that deepens the other spices.
- Go Nutty: Swap the pecans for toasted pepitas (pumpkin seeds) for a double-pumpkin punch, or use sliced almonds for a milder crunch. I once used a handful of crushed gingersnap cookies mixed into the topping, and it was incredible.
- Chocolate Lover’s Version: Sprinkle 1/4 cup of semi-sweet or dark chocolate chips over the pumpkin filling before adding the cake mix. The melted chocolate is a fantastic pairing with the pumpkin and spice.
- Dairy-Free & Gluten-Free: As mentioned, use full-fat coconut milk and vegan butter. Use a certified gluten-free yellow cake mix. The results are just as delicious and cozy.
- Make it a Cobbler: For a more cobbler-like texture, use a spice cake mix instead of yellow cake mix. The extra cinnamon and nutmeg in the mix are a natural fit for pumpkin.
Serving & Storage Suggestions
This dump cake is best served warm, and it’s even better with a little something on top. Here’s how to serve and store it.
- Serving: Scoop it into bowls while it’s still warm. The classic topping is a scoop of vanilla ice cream or a generous dollop of lightly sweetened whipped cream. A drizzle of salted caramel sauce takes it over the top. For a breakfast twist (I won’t tell), a dollop of Greek yogurt is surprisingly good.
- Complementary Dishes: This is a rich dessert, so it pairs well with a cup of black coffee or a hot mug of chai tea. A small glass of bourbon or spiced rum is a lovely adult pairing for a cozy evening.
- Storage: Cover the baking dish tightly with plastic wrap or aluminum foil. Store any leftovers in the refrigerator for up to 3 days. The topping will soften slightly, but it will still be delicious.
- Reheating: The best way to reheat it is in the oven. Place it in a 300°F (150°C) oven for 10-15 minutes, until warmed through. This will help re-crisp the top. You can also microwave individual portions for 20-30 seconds, but the topping will be softer.
- Flavor Development: Honestly, the flavors meld and deepen overnight. It’s almost better the next day, cold from the fridge, eaten straight from the dish. Don’t knock it till you try it.
Nutritional Information & Benefits
While this is a dessert, it does have a few redeeming qualities. Here’s a look at the nutritional side (per serving, based on 4 servings).
- Estimated Calories: ~380 per serving
- Key Nutrients: This recipe is a good source of Vitamin A from the pumpkin, which is excellent for eye health and immune function. Pumpkin is also packed with fiber and antioxidants.
- Dietary Considerations: This recipe can easily be made gluten-free and dairy-free with simple substitutions. It is a vegetarian dessert.
- Potential Allergens: Contains wheat (from the cake mix), dairy (butter and evaporated milk), and eggs. Nuts are optional but are a common allergen.
I love that this dessert feels indulgent but uses a vegetable as its base. It’s a comforting treat that doesn’t leave you feeling overly heavy or guilty, especially when enjoyed in a reasonable portion.
Conclusion
This Small-Batch Pumpkin Dump Cake is more than just a recipe; it’s a moment of pure, uncomplicated comfort. It’s proof that you don’t need a dozen ingredients or a culinary degree to create something that tastes like a warm hug. It’s for those nights when you need a little sweetness without a lot of fuss, and it delivers every single time. I love this recipe because it feels like a little secret—a way to treat myself without a huge production. So, please, make this your own. Add your favorite nuts, a pinch of extra spice, or a mountain of whipped cream. I’d love to hear how it turns out for you! Drop a comment below and tell me your favorite way to serve it, or share a photo of your cozy creation. Happy baking!
Frequently Asked Questions
Can I use pumpkin pie filling instead of pumpkin puree?
No, I wouldn’t recommend it. Pumpkin pie filling is already sweetened and spiced, which will throw off the balance of this recipe. Using it will result in an overly sweet and mushy filling. Stick with 100% pure pumpkin puree for the best texture and control over the flavor.
My cake mix topping turned out dry in spots. What did I do wrong?
This is usually a sign that the melted butter wasn’t distributed evenly. The butter is what hydrates the dry cake mix and turns it into a crispy crust. Next time, try drizzling the butter in a zig-zag pattern and then gently pressing down on the top with a spatula to help it absorb.
Can I double this recipe?
Absolutely! To double it, simply use a 9×13-inch baking dish and double all the ingredients. The baking time will likely need to be increased by 5-10 minutes, so keep an eye on it. You’ll know it’s done when the top is golden and the filling is bubbly.
Can I make this in advance?
Yes, you can assemble the entire dish (without baking) up to 24 hours in advance. Cover it tightly and store it in the refrigerator. When you’re ready to bake, you may need to add an extra 5-10 minutes to the baking time since you’re starting from a cold dish.
How should I store leftovers, and how long do they last?
Store any leftovers covered in the refrigerator. They will keep well for up to 3 days. The topping will soften over time, but the flavors will continue to meld. It’s delicious cold, or you can reheat it in the oven to re-crisp the top.
Pin This Recipe!
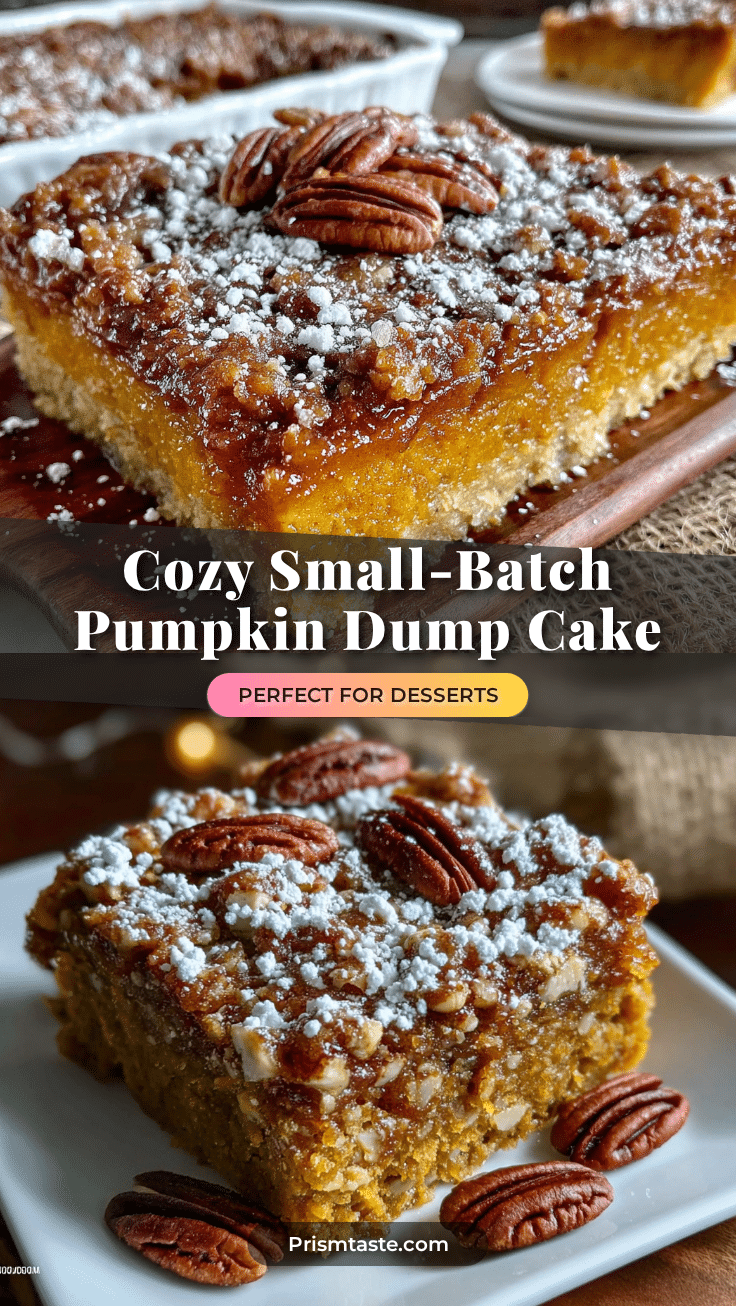
Best Small-Batch Pumpkin Dump Cake – Easy Cozy Dessert
This small-batch pumpkin dump cake is the ultimate easy dessert for cozy nights. With a silky pumpkin filling and a buttery, crunchy cake mix topping, it delivers all the comfort of pumpkin pie with minimal effort.
- Prep Time: 10 minutes
- Cook Time: 35-40 minutes
- Total Time: 45-50 minutes
- Yield: 4 servings 1x
- Category: Dessert
- Cuisine: American
Ingredients
- 1 cup (240g) pure pumpkin puree
- 1/2 cup (120ml) evaporated milk
- 1 large egg
- 1/4 cup (50g) granulated sugar
- 1 teaspoon pumpkin pie spice
- 1/4 teaspoon salt
- 1 cup (about 120g) yellow cake mix
- 1/4 cup (55g) unsalted butter, melted
- 1/4 cup (30g) chopped pecans or walnuts (optional)
Instructions
- Preheat your oven to 350°F (175°C). Lightly grease an 8×8-inch baking dish with butter or non-stick spray.
- In a medium bowl, whisk together the pumpkin puree, evaporated milk, egg, sugar, pumpkin pie spice, and salt until completely smooth.
- Pour the pumpkin mixture into the prepared baking dish and spread into an even layer.
- Evenly sprinkle the dry yellow cake mix over the entire surface of the pumpkin filling. Do not stir.
- If using nuts, sprinkle them over the cake mix.
- Drizzle the melted butter as evenly as possible over the top of the cake mix.
- Bake for 35-40 minutes, until the top is deep golden brown and the filling is bubbly around the edges.
- Let the dump cake cool on a wire rack for at least 10-15 minutes before serving. Serve warm.
Notes
Let the cake cool for at least 15 minutes before serving to allow the filling to set. For a dairy-free version, use full-fat coconut milk and vegan butter. A gluten-free yellow cake mix works as a 1:1 substitute.
Nutrition
- Serving Size: 1 serving (1/4 of re
- Calories: 380
- Sugar: 28
- Sodium: 420
- Fat: 18
- Saturated Fat: 9
- Carbohydrates: 50
- Fiber: 3
- Protein: 5
Keywords: pumpkin dump cake, small batch dessert, easy pumpkin dessert, cozy dessert, fall dessert, dump cake


