I burned the first batch of apple crisp topping I ever made. Not a little brown around the edges—I mean, blackened, smoky, set-off-the-smoke-alarm burnt. I was nineteen, trying to impress someone, and I thought I could just throw oats and butter in a pan and hope for the best. Spoiler: it did not work. That night, I scraped the burnt bits into the trash, ate the plain, warm apples straight from the pot, and realized something important. The apples were the good part. The crunch was just a bonus.
Years later, I still think about that night whenever I make these Easy No-Bake Apple Crisp Parfaits in a Jar. Because here’s the thing—I don’t actually need an oven to get that crisp texture. I just needed to stop trying so hard. These parfaits skip the baking entirely, using a quick stovetop apple filling and a crunchy granola topping that stays crisp for days. No preheating, no burnt topping, no smoke alarms. Just layers of cinnamon-spiced apples, creamy yogurt or whipped topping, and that signature crunch we all crave.
I bring these to fall potlucks and they disappear before the main course. People assume I spent hours in the kitchen. I don’t correct them, but honestly, it takes about twenty minutes from start to finish. The jars make them portable, which means I can prep a batch on Sunday and grab one for a weekday dessert that feels special. That burnt topping from my twenties taught me something—sometimes the best recipes are the ones that don’t require heat at all.
Why You’ll Love This Recipe
I have tested this recipe about a dozen times now, tweaking the apple-to-granola ratio, adjusting the cinnamon, trying different yogurt bases. What I landed on is the version that works every single time, no oven required. Here is why it stands out:
- No Oven, No Sweat — Everything comes together on the stovetop or in a bowl. Perfect for hot days when turning on the oven feels like a crime, or for dorm rooms and small apartments with limited kitchen space.
- Ready in 20 Minutes — The apples cook in under fifteen minutes, and assembly takes five. You can have dessert on the table before the oven would even finish preheating.
- Pantry-Friendly Ingredients — Apples, butter, brown sugar, cinnamon, granola, and yogurt. That’s it. No trips to specialty stores, no obscure ingredients you will use once and forget about.
- Perfect for Meal Prep — Assemble them in mason jars and they keep in the fridge for up to four days. The granola stays crunchy if you layer it right (I will show you how).
- Crowd-Pleaser Across Ages — Kids love the fun jar presentation, adults appreciate the not-too-sweet apple filling, and everyone goes back for seconds.
- Endlessly Customizable — Swap the yogurt for dairy-free, use gluten-free granola, or change up the fruit. I have made a pear version and a peach version, and both were fantastic.
What makes this recipe different from other apple crisps is the texture control. Because the apples cook separately from the topping, nothing gets soggy. The granola stays crunchy, the apples stay tender but not mushy, and every spoonful gives you that contrast. It is comfort food reimagined—faster, cooler, and somehow more satisfying than the baked version.
What Ingredients You Will Need
This recipe uses simple, wholesome ingredients that come together to create something that tastes way more complex than it is. Here is what you will need:
For the Apple Filling
- Apples — 4 medium apples (about 500g), peeled, cored, and diced into ½-inch cubes. I prefer Honeycrisp or Granny Smith for their balance of sweetness and tartness. Fuji works well too, but reduces the sugar slightly if using them.
- Unsalted Butter — 2 tablespoons (28g). Adds richness and helps the apples soften without sticking.
- Brown Sugar — ¼ cup (50g), packed. Light or dark both work. Dark brown sugar gives a deeper, almost molasses-like flavor that I personally love.
- Ground Cinnamon — 1 teaspoon. The backbone of any apple dessert.
- Ground Nutmeg — ¼ teaspoon. Optional but recommended. It adds that warm, cozy undertone.
- Salt — A pinch. Balances the sweetness and brightens the apple flavor.
- Lemon Juice — 1 tablespoon (15ml). Prevents the apples from browning and adds a subtle brightness.
- Water — 2 tablespoons (30ml). Helps the apples steam and soften without burning.
- Cornstarch — 1 teaspoon, mixed with 1 tablespoon cold water to make a slurry. This thickens the juices into a light syrup.
For the Parfait Layers
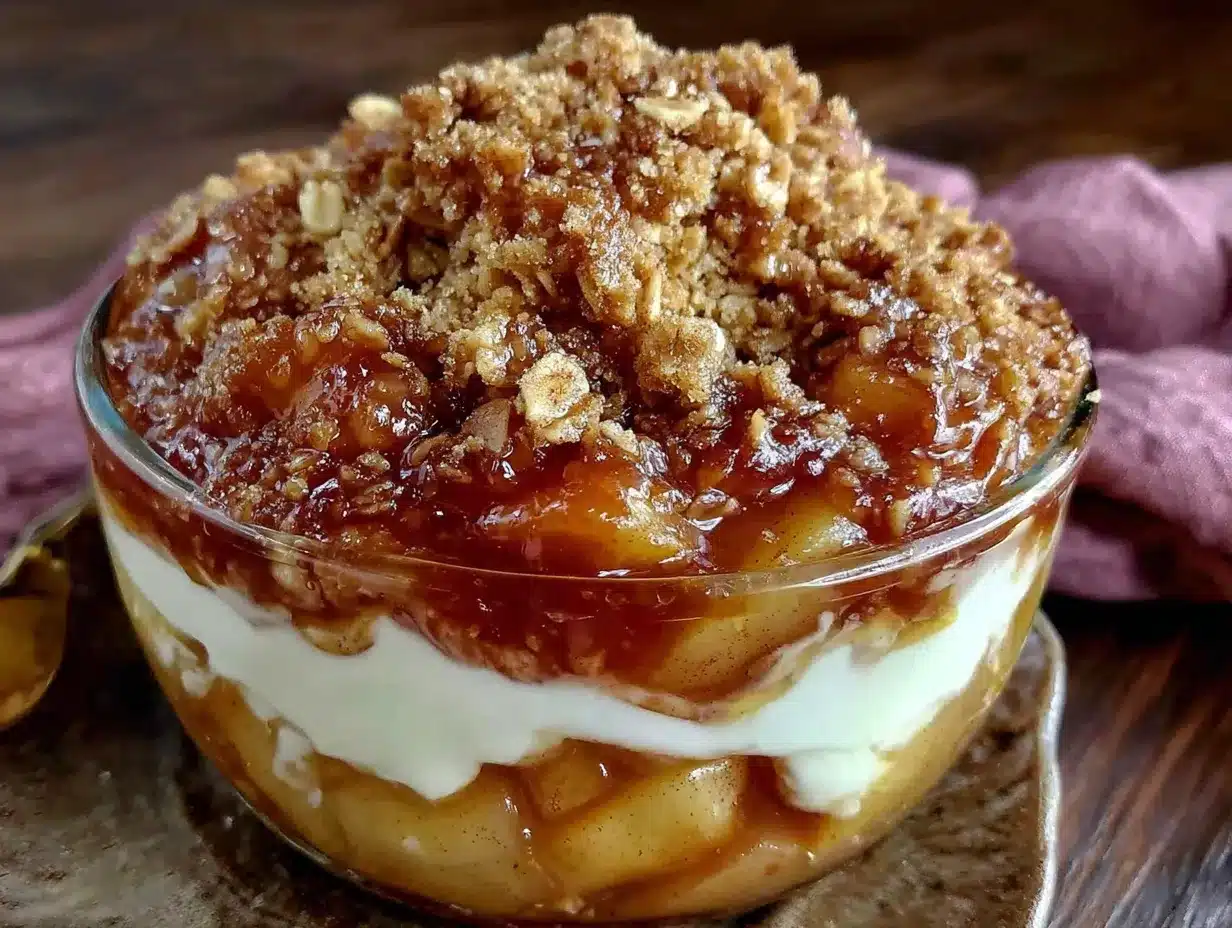
- Granola — 1½ cups (about 150g). Use your favorite store-bought or homemade granola. I recommend a crunchy, cluster-style granola with oats and nuts. Avoid overly soft or chewy granola bars crumbled up—they will not hold up.
- Yogurt or Whipped Topping — 2 cups (about 480g) of plain or vanilla Greek yogurt, or 1½ cups (360ml) of whipped topping like Cool Whip. Greek yogurt adds protein and tang; whipped topping makes it feel more indulgent. Both work beautifully.
- Optional Garnishes — A drizzle of caramel sauce, a dusting of cinnamon, or a few toasted pecans on top.
Ingredient Tips from My Kitchen: I have tried this with both store-bought granola and homemade, and honestly, the store-bought version from Trader Joe’s (their maple pecan granola) is my favorite. It has the perfect crunch and sweetness. For yogurt, I use Fage 5% Greek yogurt because it is thick and creamy, but any brand works. If you are dairy-free, coconut yogurt or almond milk yogurt substitutes perfectly.
For the apples, I recommend buying them a few days ahead and letting them sit at room temperature. Cold apples take longer to cook through. And if you are in a rush, you can skip peeling them—just wash them well and dice them small. The peel adds fiber and a bit of color, though the texture is slightly different.
Equipment Needed
You do not need much for this recipe, which is part of its charm. Here is what you will need:
- Medium Skillet or Saucepan — A 10-inch skillet works best for even cooking. A non-stick surface makes cleanup easier, but stainless steel works fine too.
- Cutting Board and Sharp Knife — For dicing the apples. A good chef’s knife makes the job faster and safer.
- Vegetable Peeler — If you are peeling the apples. I have a Y-shaped peeler that I swear by.
- Measuring Cups and Spoons — For accuracy. Baking is more forgiving than pastry, but proper measurements still matter.
- Wooden Spoon or Silicone Spatula — For stirring the apples as they cook.
- Small Bowl — For mixing the cornstarch slurry.
- Four 8-Ounce Mason Jars or Similar Containers — Wide-mouth jars are easiest to layer and eat from. You can also use small glass bowls or even disposable cups for parties.
- Optional but Helpful — A small ladle for spooning the apple filling into jars, and a kitchen scale if you want to be precise with measurements.
I have made these parfaits using just a saucepan and a butter knife when I was traveling and staying at an Airbnb with minimal kitchen tools. It worked. The apples were a little unevenly diced, but they still tasted amazing. Do not let missing equipment stop you.
Preparation Method
Let me walk you through this step by step. I have included timestamps and visual cues so you know exactly what to look for at each stage.
Step 1: Prep the Apples (5 minutes)
Peel, core, and dice the apples into ½-inch cubes. Try to keep them uniform in size so they cook evenly. If you are in a hurry, you can leave the peel on—just wash the apples thoroughly first. Place the diced apples in a bowl and toss them with the lemon juice to prevent browning while you get the pan ready.
Step 2: Cook the Apples (10-12 minutes)
Place a medium skillet over medium heat and add the butter. Let it melt completely, then swirl the pan to coat the bottom. Add the diced apples, brown sugar, cinnamon, nutmeg, and salt. Stir everything together until the apples are evenly coated. Add the water and bring the mixture to a gentle simmer.
Cook the apples for 8-10 minutes, stirring occasionally. You want them to soften but still hold their shape—they should be tender when pierced with a fork but not mushy. The liquid around them will become syrupy and fragrant. If the pan looks dry at any point, add another tablespoon of water.
Step 3: Thicken the Syrup (1 minute)
In a small bowl, whisk together the cornstarch and cold water until smooth. Pour this slurry into the skillet while stirring constantly. The liquid will thicken almost immediately. Let it cook for another 30 seconds, then remove the pan from the heat. The apples should be glossy and coated in a light, translucent syrup.
Visual cue: The syrup should coat the back of a spoon but still drip off easily. If it is too thick, stir in a teaspoon of water. If it is too thin, let it simmer for another minute.
Step 4: Cool the Apples (10 minutes)
Transfer the cooked apples to a bowl and let them cool for at least 10 minutes at room temperature. This step is important—if you layer warm apples directly onto yogurt, the yogurt will thin out and become watery. I learned this the hard way when my first attempt turned into apple soup.
If you are in a rush, spread the apples on a plate and pop them in the fridge for 5 minutes to speed things up.
Step 5: Layer the Parfaits (5 minutes)
Grab your four jars and start layering. Here is the order I use:
- Bottom layer: 2-3 tablespoons of granola. This creates a crunchy base that stays dry because it is not sitting directly against the apples.
- Second layer: ¼ cup of yogurt or whipped topping. Spread it evenly over the granola.
- Third layer: ¼ cup of the cooled apple filling. Spoon it gently over the yogurt.
- Fourth layer: Another 2 tablespoons of granola. This is the crunch you will taste first.
- Top layer: Another ¼ cup of yogurt or whipped topping, plus a final sprinkle of granola for looks.
Repeat for all four jars. If you have extra apple filling, spoon it over the top layer—no one will complain about extra apples.
Step 6: Chill or Serve Immediately (0-30 minutes)
You can serve these right away, but I find they taste even better after 30 minutes in the fridge. The flavors meld together, and the granola stays surprisingly crunchy thanks to the yogurt barrier. If you are meal-prepping, seal the jars with lids and refrigerate for up to 4 days.
Cooking Tips & Techniques
I have made this recipe more times than I care to count, and I have made every mistake in the book. Here is what I learned:
Do not overcook the apples. This was my biggest failure early on. I thought softer apples meant better apples, so I let them cook for 20 minutes. They turned into applesauce. You want them tender but still holding their shape—think al dente pasta, but for fruit. Eight to ten minutes is usually perfect, depending on the apple variety.
Layer strategically. The granola needs protection from moisture. If you put it directly under the apples, it will get soggy within an hour. The yogurt acts as a moisture barrier, so always sandwich the granola between yogurt layers or place it on top. I have tested this extensively—trust me on this one.
Use room temperature yogurt. Cold yogurt straight from the fridge makes the apples seize up and creates an unpleasant temperature contrast. Let the yogurt sit on the counter for 10 minutes before assembling, or use whipped topping which is less temperature-sensitive.
Toast your granola first. If your granola has been sitting in the pantry for a while, spread it on a baking sheet and toast it in a 350°F oven for 5 minutes. Let it cool completely before using. This revives the crunch and makes a noticeable difference.
Double the apple filling. Seriously. The recipe makes exactly enough for four parfaits, but I always make a double batch because I end up eating spoonfuls straight from the pan while I am layering. The leftovers are amazing over ice cream or oatmeal the next morning.
Timing trick: Cook the apples while you are cleaning up dinner dishes. By the time the kitchen is tidy, the apples are cool enough to assemble. It turns dessert into a seamless part of your evening routine.
Variations & Adaptations
One of the best things about this recipe is how flexible it is. Here are some variations I have tried and loved:
Vegan Version
Use coconut oil or vegan butter instead of regular butter for cooking the apples. Swap the Greek yogurt for a thick coconut yogurt or cashew-based yogurt. Most store-bought granola is already vegan, but double-check the label. I have made this for vegan friends and they could not tell the difference.
Gluten-Free Adaptation
Use certified gluten-free granola and ensure your cornstarch is gluten-free (most brands are). Everything else in the recipe is naturally gluten-free. This is one of the easiest desserts to adapt for gluten-sensitive guests.
Pear or Peach Version
Swap the apples for ripe but firm pears or peaches. Pears need slightly less cooking time—about 6-8 minutes—because they are softer. Peaches are even faster at 4-5 minutes. I made a pear version last fall using the same cinnamon vanilla pear halves technique, and it was incredible.
Low-Sugar Option
Reduce the brown sugar to 2 tablespoons and rely on the natural sweetness of the apples. Add an extra pinch of cinnamon and a dash of vanilla extract to compensate. The parfaits will be less sweet but still satisfying, especially if you use vanilla yogurt.
Spiced Chai Variation
Add ½ teaspoon of chai spice blend (cardamom, ginger, cloves, black pepper) along with the cinnamon. It gives the apples a warm, aromatic complexity that pairs beautifully with a cup of hot tea. I serve this version during the holidays and it always gets compliments.
Serving & Storage Suggestions
These parfaits are best served chilled or at room temperature. I prefer them straight from the fridge on a warm afternoon, but they are also lovely at room temperature for a fall dessert table.
Presentation ideas: Tie a piece of twine around the jar neck with a small cinnamon stick tucked in. It makes them look gift-ready and adds a subtle aroma. For parties, set up a parfait bar with jars, the apple filling, granola, and yogurt in separate bowls, and let guests build their own. It is interactive and reduces your prep work.
What to serve alongside: These parfaits pair beautifully with a cup of hot apple cider or a chai latte. For a full dessert spread, serve them alongside moist cinnamon zucchini bread with brown butter glaze for a double dose of warm spices. They also work well as a lighter finish after a heavy meal like old-fashioned brown sugar glazed meatloaf.
Storage instructions: Seal the jars tightly and refrigerate for up to 4 days. The granola will stay crunchy for the first 2 days, then gradually soften. If you are meal-prepping for the week, store the granola separately and add it just before serving. The apple filling and yogurt layers keep perfectly for 4-5 days.
Freezing: I do not recommend freezing assembled parfaits because the yogurt texture changes upon thawing. However, you can freeze the apple filling in an airtight container for up to 3 months. Thaw it in the fridge overnight, then assemble fresh parfaits with new granola and yogurt.
Reheating note: If you prefer warm apples, you can microwave the apple filling for 20-30 seconds before layering. Just make sure it is not hot when it touches the yogurt, or you will end up with melted yogurt. Let it cool to warm, not hot.
Nutritional Information & Benefits
Here is an approximate nutritional breakdown for one parfait made with Greek yogurt and a standard oat-based granola:
| Nutrient | Amount Per Serving |
|---|---|
| Calories | 320-350 |
| Protein | 12-15g |
| Carbohydrates | 48-52g |
| Fiber | 5-7g |
| Sugar | 28-32g |
| Fat | 10-12g |
| Calcium | 15-20% DV |
| Vitamin C | 8-10% DV |
Health benefits worth noting: Apples are rich in soluble fiber, particularly pectin, which supports digestive health and helps maintain steady blood sugar levels. The cinnamon in this recipe has anti-inflammatory properties and may help regulate blood sugar. Greek yogurt provides probiotics for gut health and a solid dose of protein, making this dessert more satisfying than your average sweet treat.
Dietary considerations: This recipe is vegetarian and can easily be made vegan or gluten-free with the substitutions listed above. It contains dairy and gluten in its standard form. The sugar content is moderate for a dessert, and you can reduce it further by using unsweetened yogurt and cutting the brown sugar in half.
I personally love that this dessert feels indulgent but is built on whole-food ingredients. It is the kind of treat I feel good about eating and even better about serving to my family.
Frequently Asked Questions
Can I use canned apple pie filling instead of cooking fresh apples?
You can, but I would not recommend it. Canned apple pie filling is much sweeter and softer than the stovetop version, and it contains thickeners that can make the parfaits gummy. If you are in a pinch, drain the canned filling well and warm it briefly on the stovetop to reduce some of the syrup. Fresh apples take only 10 minutes and taste noticeably better.
How do I keep the granola from getting soggy overnight?
The trick is the yogurt barrier. Always place a layer of yogurt between the granola and the apple filling. The yogurt acts as a moisture shield. I also recommend using cluster-style granola with larger pieces, as they hold up better than fine, crumbly granola. If you are prepping more than 2 days ahead, store the granola separately and add it just before serving.
What kind of apples work best for this recipe?
Honeycrisp and Granny Smith are my top choices. Honeycrisp holds its shape well and has a good balance of sweet and tart. Granny Smith is firmer and tarter, which pairs beautifully with the brown sugar. Fuji and Gala work too, but they are sweeter and softer, so reduce the sugar slightly and watch the cooking time closely. Stay away from Red Delicious—they turn mushy too quickly.
Can I make these parfaits in advance for a party?
Absolutely. Assemble them up to 24 hours in advance, but follow the layering order I outlined above. Keep them refrigerated with lids on. If you want the granola to stay extra crunchy, add the top layer of granola right before serving. I have brought these to potlucks and picnics many times, and they always travel well in a cooler bag.
Is there a way to make this recipe nut-free?
Yes. Choose a granola that is nut-free—many oat-based granolas use only seeds like pumpkin or sunflower seeds. Alternatively, make your own nut-free granola by toasting oats with a little coconut oil and maple syrup. The rest of the recipe is naturally nut-free as written. Just double-check your granola label if serving someone with allergies.
Conclusion
These Easy No-Bake Apple Crisp Parfaits in a Jar have become my go-to dessert for every occasion—weekday treats, holiday gatherings, last-minute dinner parties, and everything in between. They are the kind of recipe that makes you look like you tried harder than you actually did, which is my favorite kind of cooking.
The apples are warm and spiced, the granola is crunchy, the yogurt is creamy, and every spoonful gives you a different combination of textures. No oven required, no complicated techniques, no stress. Just good food that comes together in twenty minutes.
I would love to hear how these turn out for you. Did you try a variation? Use a different fruit? Add a secret spice? Drop a comment below and let me know. And if you are looking for another no-bake treat to round out your dessert rotation, try these spooky graveyard dirt cup pudding cups—they are just as easy and equally fun to make. Happy cooking, friends.
Pin This Recipe!
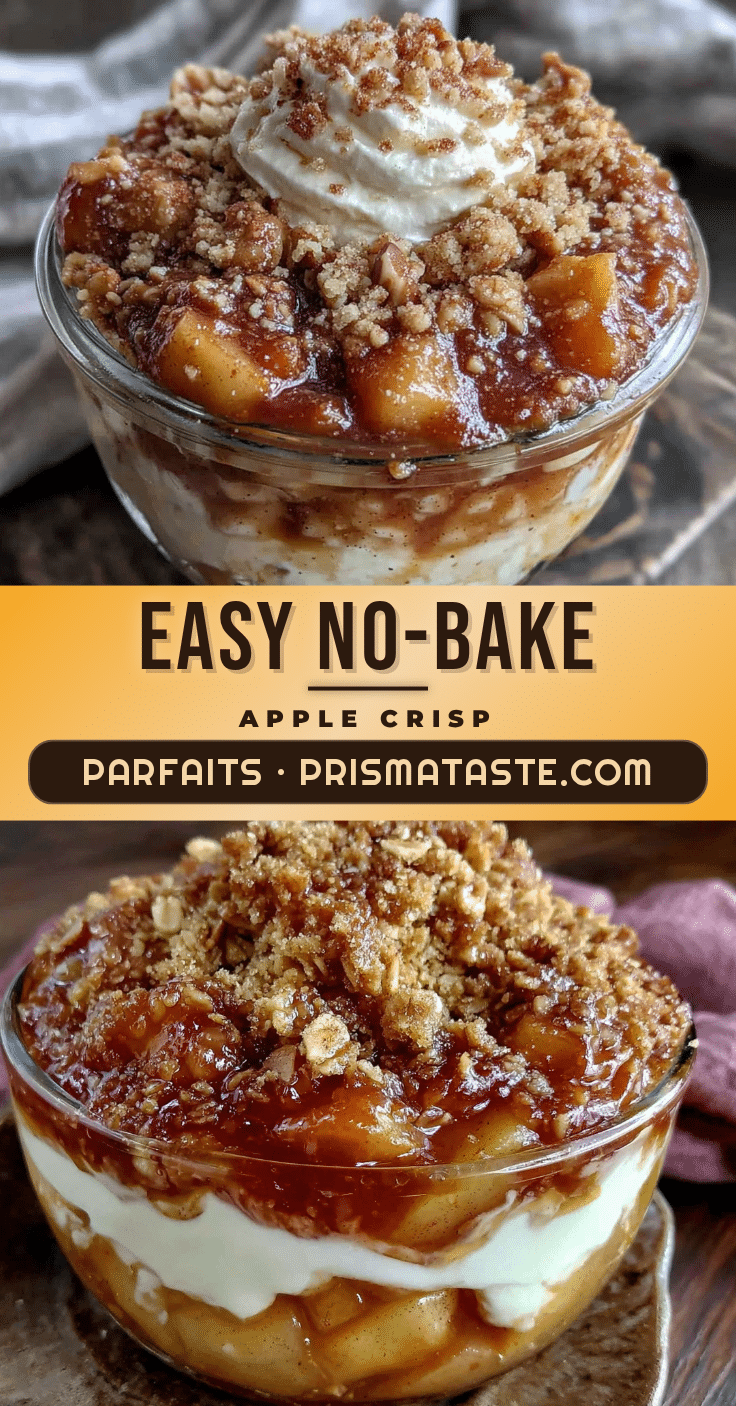
Easy No-Bake Apple Crisp Parfaits in a Jar
These no-bake apple crisp parfaits layer cinnamon-spiced apples, creamy yogurt, and crunchy granola in a jar for a quick, portable dessert that comes together in 20 minutes.
- Prep Time: 5 minutes
- Cook Time: 12 minutes
- Total Time: 20 minutes
- Yield: 4 servings 1x
- Category: Dessert
- Cuisine: American
Ingredients
- 4 medium apples (about 500g), peeled, cored, and diced into ½-inch cubes
- 2 tablespoons unsalted butter (28g)
- ¼ cup brown sugar (50g), packed
- 1 teaspoon ground cinnamon
- ¼ teaspoon ground nutmeg
- A pinch of salt
- 1 tablespoon lemon juice (15ml)
- 2 tablespoons water (30ml)
- 1 teaspoon cornstarch mixed with 1 tablespoon cold water
- 1½ cups granola (about 150g)
- 2 cups plain or vanilla Greek yogurt (about 480g) or 1½ cups whipped topping (360ml)
- Optional: caramel sauce, cinnamon, toasted pecans for garnish
Instructions
- Peel, core, and dice the apples into ½-inch cubes. Toss with lemon juice to prevent browning.
- In a medium skillet over medium heat, melt the butter. Add the diced apples, brown sugar, cinnamon, nutmeg, and salt. Stir to coat. Add water and bring to a gentle simmer.
- Cook for 8-10 minutes, stirring occasionally, until apples are tender but still hold their shape.
- In a small bowl, whisk cornstarch with cold water to make a slurry. Pour into the skillet while stirring constantly. Cook for 30 seconds until thickened. Remove from heat.
- Transfer the apple filling to a bowl and let cool for at least 10 minutes at room temperature.
- Layer the parfaits in four 8-ounce jars: bottom layer of 2-3 tablespoons granola, then ¼ cup yogurt, then ¼ cup apple filling, then another 2 tablespoons granola, then another ¼ cup yogurt, and a final sprinkle of granola on top.
- Serve immediately or refrigerate for up to 30 minutes for best flavor. For meal prep, seal jars and refrigerate for up to 4 days.
Notes
Do not overcook the apples; they should be tender but not mushy. Layer granola between yogurt to keep it crunchy. Use room temperature yogurt to avoid temperature shock. Toast granola for extra crunch if desired. Double the apple filling for extra servings or leftovers.
Nutrition
- Serving Size: 1 parfait
- Calories: 335
- Sugar: 30
- Sodium: 120
- Fat: 11
- Saturated Fat: 4
- Carbohydrates: 50
- Fiber: 6
- Protein: 13
Keywords: no-bake apple crisp, apple parfait, easy dessert, mason jar dessert, fall dessert, apple recipe, no oven dessert


