The Fourth of July cookout was in six hours and I’d completely forgotten I was supposed to bring dessert. Everyone else would be bringing their grandmother’s famous pies or those elaborate flag cakes you see on Pinterest. I stood in my kitchen, staring into my pantry like it might magically produce something impressive. A box of graham crackers. A bag of marshmallows. Some chocolate bars left over from a camping trip that never happened. I mean, honestly. That’s not a dessert, that’s a snack for a five-year-old.
But here’s the thing about desperation — it makes you creative. Or maybe just reckless. I grabbed a mixing bowl and started layering things, hoping for the best. I won’t pretend I wasn’t sweating a little when I pulled that pan out of the freezer at the party. But let me tell you, when people took that first bite, the reaction was something else. Someone actually asked me which bakery I’d ordered from. I just smiled and said nothing.
This Summer’s Best No-Bake S’mores Icebox Cake became my secret weapon after that day. It’s the dessert that makes you look like you planned ahead when you absolutely did not. And honestly, that’s a superpower worth keeping.
Why You’ll Love This Recipe
Let me be real with you — I’ve tested this recipe about a dozen times to get it just right. The first version was too soggy. The second one didn’t set properly. But this version? This is the one.
Here’s what makes it special:
- No Oven Required : When it’s ninety degrees outside, the last thing you want to do is turn on your oven. This comes together on your countertop and sets in the fridge.
- Simple Ingredients : You probably already have everything you need. No fancy baking chocolate or obscure extracts here.
- Perfect for Summer Gatherings : This is your go-to for backyard barbecues, pool parties, and holiday cookouts. It travels well and feeds a crowd.
- Crowd-Pleaser : Kids love it because it tastes like campfire s’mores. Adults love it because it’s nostalgic without being childish.
- Make-Ahead Friendly : You can assemble this the day before and just pull it out when you’re ready to serve. Less stress, more fun.
What makes this different from other icebox cakes? It’s the texture. The graham crackers soften just enough to feel like cake layers, but they still have a little bite. The chocolate pudding filling is rich without being heavy. And that marshmallow topping? It gets this slight toastiness from a quick broil that takes it over the top. This isn’t just another no-bake dessert — it’s the one that’ll have people asking for the recipe before they even finish their slice.
I remember the first time I made this for my book club. I was nervous because one of the members is a pastry chef. She took one bite, closed her eyes, and said, “This is dangerously good.” That’s when I knew I had something special.
What Ingredients You Will Need
This recipe uses simple, everyday ingredients to create something that feels way more complicated than it actually is. The magic happens in the layering and the chilling time.
For the Chocolate Pudding Layer:
- 2 boxes (3.9 ounces each) instant chocolate pudding mix (I prefer Jell-O brand for consistent results)
- 3 cups cold whole milk (don’t use skim — the pudding needs the fat to set properly)
- 1 teaspoon vanilla extract (adds depth and rounds out the chocolate flavor)
For the Graham Cracker Layers:
- 1 box (14.4 ounces) graham crackers (you’ll need about 24 full sheets; Honey Maid works great)
- 1 cup chocolate chips (semi-sweet or milk chocolate, whichever you prefer)
- 2 tablespoons coconut oil or vegetable shortening (helps the chocolate melt smoothly)
For the Marshmallow Topping:
- 1 jar (7 ounces) marshmallow creme or fluff (Jet-Puffed is my go-to)
- 1 cup heavy whipping cream (for making stabilized whipped cream to mix with the marshmallow)
- 2 tablespoons powdered sugar
- 1/2 teaspoon vanilla extract
For Garnish (Optional but Recommended):
- Extra chocolate shavings or curls
- Crushed graham crackers for sprinkling
- Mini marshmallows for toasting on top
A few notes on ingredient selection: Use instant pudding mix, not cook-and-serve. The instant kind sets up in the fridge without any heat, which is exactly what you want here. For the chocolate chips, I like using Ghirardelli semi-sweet chips because they melt beautifully and have a nice flavor. But honestly, any brand works fine.
If you’re dairy-free, you can substitute the whole milk with oat milk or full-fat coconut milk. Just know the texture will be slightly less firm. The heavy cream in the topping can be swapped for canned coconut cream if you whip it cold enough.
One thing I learned the hard way — don’t use low-fat graham crackers. They’re too fragile and get mushy instead of softening nicely. Stick with the regular ones.
Equipment Needed
You don’t need a lot of fancy equipment for this recipe, which is part of its charm.
- 9×13 inch baking dish : Glass or ceramic works best. I use a Pyrex dish and it’s perfect. Metal can work but it might affect the chilling time.
- Electric mixer : Hand mixer or stand mixer for whipping the cream. You can do it by hand with a whisk, but your arm will hate you.
- Mixing bowls : One medium bowl for the pudding, one large bowl for the whipped topping.
- Spatula : A rubber spatula for spreading layers evenly.
- Small saucepan or microwave-safe bowl : For melting the chocolate chips.
- Plastic wrap or aluminum foil : For covering the dish while it chills.
- Sharp knife : For cutting clean slices. A serrated knife works best.
If you don’t have a 9×13 dish, you can use two 8×8 square pans instead. Just adjust the layering pattern. I’ve also made this in a springform pan for a round, cake-like presentation. It works great and looks fancy.
For the chocolate melting, I prefer using a double boiler setup, but the microwave works fine. Just do it in 30-second bursts and stir between each one. Trust me on this — burnt chocolate is not salvageable.
Preparation Method
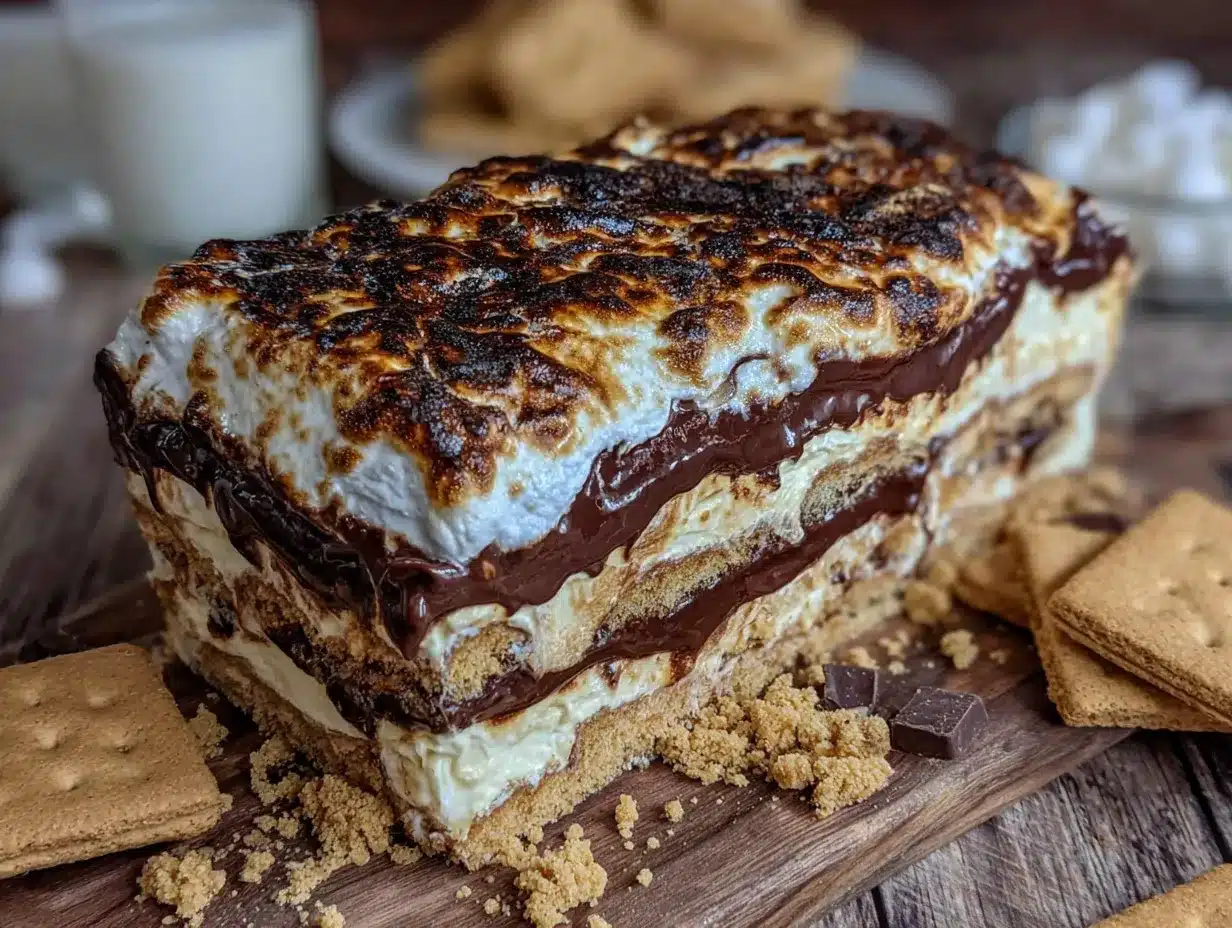
Let me walk you through this step by step. It’s easier than you think.
Step 1: Make the Chocolate Pudding
In a medium mixing bowl, whisk together both boxes of instant chocolate pudding mix with 3 cups of cold whole milk. Whisk for about 2 minutes until it starts to thicken. Add the vanilla extract and give it one more stir. Let it sit for 5 minutes to set up completely. You want it to be thick but still spreadable — like a soft custard.
Step 2: Prepare the Graham Cracker Base
Line the bottom of your 9×13 baking dish with a single layer of graham crackers. You’ll need to break some to fit the edges. Don’t worry about perfection here — the pudding will hide any gaps. I usually do about 8 full sheets per layer, depending on how I break them.
Step 3: Melt the Chocolate
In a microwave-safe bowl, combine 1 cup of chocolate chips with 2 tablespoons of coconut oil. Microwave in 30-second intervals, stirring after each, until smooth and glossy. This usually takes about 90 seconds total. Let it cool for a minute or two while you work on the next step.
Step 4: First Layer Assembly
Spread half of the chocolate pudding evenly over the first layer of graham crackers. Use your spatula to get it into all the corners. Drizzle about half of the melted chocolate over the pudding layer. Don’t worry if it doesn’t cover everything evenly — it’ll spread as you add the next layer.
Step 5: Second Layer
Add another layer of graham crackers on top of the pudding. Press down gently so they make contact with the filling. Spread the remaining pudding over this layer, then drizzle the rest of the melted chocolate on top.
Step 6: Final Graham Cracker Layer
Add one more layer of graham crackers on top. Press down gently. This will be the base for your marshmallow topping, so make sure it’s relatively even.
Step 7: Make the Marshmallow Topping
In a large mixing bowl, combine the heavy whipping cream, powdered sugar, and vanilla extract. Beat with an electric mixer on medium-high speed until soft peaks form — about 3-4 minutes. The cream should be thick and billowy but not stiff. Gently fold in the marshmallow creme until fully combined. Don’t overmix or you’ll deflate the cream.
Step 8: Top and Chill
Spread the marshmallow mixture evenly over the top layer of graham crackers. Cover the dish with plastic wrap and refrigerate for at least 6 hours, but overnight is better. The longer it chills, the more the layers meld together and the graham crackers soften into cake-like texture.
Step 9: Garnish and Serve
Before serving, you can add optional garnishes. Sprinkle crushed graham crackers on top, add chocolate shavings, or arrange mini marshmallows and broil for 1-2 minutes for that toasted effect. I like doing the broiler thing — it makes the kitchen smell amazing and gives it that campfire vibe.
Step 10: Slice and Enjoy
Use a sharp knife to cut clean slices. Wipe the knife between cuts for the prettiest presentation. Serve cold directly from the fridge.
Cooking Tips & Techniques
After making this cake more times than I can count, here are the things I’ve learned the hard way.
Don’t Rush the Chilling Time
I know it’s tempting to cut into this after a few hours, but trust me — wait the full 8 hours or overnight. The first time I made this, I was impatient and served it after 4 hours. The graham crackers were still crunchy in the middle and the layers slid apart when I tried to cut it. It was a mess. A delicious mess, but still a mess.
Temperature Matters for the Cream
Make sure your heavy cream is really cold before you whip it. I put my bowl and beaters in the freezer for 10 minutes before starting. Cold cream whips up faster and holds its shape better. If your cream is even slightly warm, it’ll never get to soft peaks.
Watch the Chocolate
When melting chocolate, less is more with the microwave. I burned my first batch because I got distracted and let it go too long. Burnt chocolate smells terrible and tastes worse. Do 30-second bursts and stir between each one. When it looks almost melted, stop microwaving and just stir until it’s smooth.
Layer Evenly
Take your time spreading each pudding layer. If one side is thicker than the other, your cake will be lopsided when you cut it. I use an offset spatula for this — it makes a huge difference in how even the layers end up.
Make Extra Topping
Honestly, I always make a little extra marshmallow topping. It’s so good that someone always ends up eating some straight from the bowl. Plus, having extra means you can pile it high on each slice.
Variations & Adaptations
This recipe is super flexible. Here are some ways I’ve changed it up over the years.
Peanut Butter S’mores Icebox Cake
Add a layer of peanut butter between the pudding and graham crackers. About 1/2 cup of creamy peanut butter, warmed slightly so it spreads easily. The chocolate-peanut butter combo is ridiculous. I made this for a Super Bowl party and it disappeared in 20 minutes.
Mint Chocolate Version
Use mint chocolate chips instead of regular ones, and add 1/4 teaspoon of peppermint extract to the pudding. Top with crushed Andes mints. This is perfect for summer when you want something refreshing.
Berry S’mores Twist
Layer fresh strawberries or raspberries between the pudding layers. The tartness of the berries cuts through the sweetness beautifully. I did this with fresh summer strawberries from the farmer’s market and it was incredible.
Gluten-Free Option
Use gluten-free graham crackers. Most brands make them now, and they work exactly the same way. Just check the package to make sure they’re the same size as regular graham crackers.
Vegan Version
Use coconut cream instead of heavy cream, dairy-free chocolate chips, and a plant-based milk for the pudding. There are also vegan marshmallow cremes available. The texture will be slightly different but still delicious.
My personal favorite variation? The peanut butter one. I’m not even a huge peanut butter fan, but something about the combination with the chocolate and marshmallow just works. It reminds me of those peanut butter cup s’mores you can make over a campfire.
Serving & Storage Suggestions
This cake is best served cold, straight from the fridge. I like to let it sit out for about 5 minutes before cutting — just enough to take the chill off without losing the structure.
For presentation, I dust the top with a little cocoa powder and add some fresh mint leaves. It sounds fancy but takes 10 seconds. If you want to go all out, add some fresh berries on the side of each plate.
This pairs beautifully with coffee or iced tea. The bitterness of the coffee balances the sweetness of the cake. For a summer party, serve it with cold brew or lemonade.
Storage Instructions
Cover the dish tightly with plastic wrap or foil and store in the refrigerator for up to 5 days. The cake actually gets better on day 2 and 3 as the flavors meld together. Just keep it covered so it doesn’t absorb fridge odors.
Freezer Instructions
You can freeze this cake for up to 2 months. Assemble it completely but don’t add any garnishes. Wrap the whole dish in plastic wrap, then a layer of foil. To serve, thaw in the refrigerator overnight. Add garnishes just before serving.
One thing to note — the marshmallow topping might weep a little after freezing and thawing. Just blot it gently with a paper towel before serving and it’ll be fine.
Nutritional Information & Benefits
Let’s be honest — this is a treat, not a health food. But here’s the breakdown if you’re curious.
Per serving (based on 12 servings):
- Calories: 385
- Total Fat: 18g
- Saturated Fat: 11g
- Cholesterol: 35mg
- Sodium: 320mg
- Total Carbohydrates: 54g
- Dietary Fiber: 2g
- Sugars: 38g
- Protein: 5g
On the plus side, this dessert does contain some calcium from the milk and cream. The graham crackers provide a small amount of whole grains. And chocolate has antioxidants — I’m absolutely counting that.
For dietary considerations, this recipe contains dairy and gluten. It can be adapted for gluten-free and vegan diets with the substitutions I mentioned earlier. There are no nuts in the base recipe, but check your chocolate chips if you have allergies.
My personal philosophy? Dessert is supposed to be indulgent. I’d rather have one slice of this amazing cake than a whole pan of something mediocre that’s supposedly healthier. Everything in moderation, right?
Conclusion
This Summer’s Best No-Bake S’mores Icebox Cake is the dessert that keeps on giving. It’s simple enough for a Tuesday night treat but impressive enough for a holiday party. It requires no oven, no complicated techniques, and no fancy ingredients. Just good, honest layers of flavor that come together into something magical.
I love this recipe because it reminds me that you don’t need to be a professional baker to create something memorable. Sometimes the best dishes come from a moment of panic and a pantry full of possibilities. That first Fourth of July cake taught me that simple can be spectacular.
Now I want to hear from you. Have you tried making this? Did you add your own twist? Drop a comment below and let me know how it turned out. And if you share it on social media, tag me so I can see your creation. Happy summer cooking, friends!
Frequently Asked Questions
Can I use homemade pudding instead of instant?
You can, but the texture will be different. Homemade pudding is thinner and might make the graham crackers too soggy. Instant pudding sets up firmer, which gives the cake better structure. Stick with instant for best results.
How long does this cake need to chill?
At least 6 hours, but overnight is ideal. The longer it chills, the more the layers meld together and the graham crackers soften into that cake-like texture. Don’t rush this step.
Can I use a different size pan?
Absolutely. A 9×13 pan is standard, but you can use two 8×8 square pans or even a springform pan for a round cake. Just adjust the layering pattern to fit your pan size.
Why did my graham crackers stay crunchy?
They probably didn’t have enough contact with the pudding. Make sure your pudding layers are thick enough and press the graham crackers down gently so they make contact. Also, check that you chilled it long enough.
Can I make this ahead of time?
Yes! This is perfect for making ahead. Assemble it the day before, cover it, and refrigerate. Add any garnishes just before serving. It actually tastes better on day two.
Pin This Recipe!
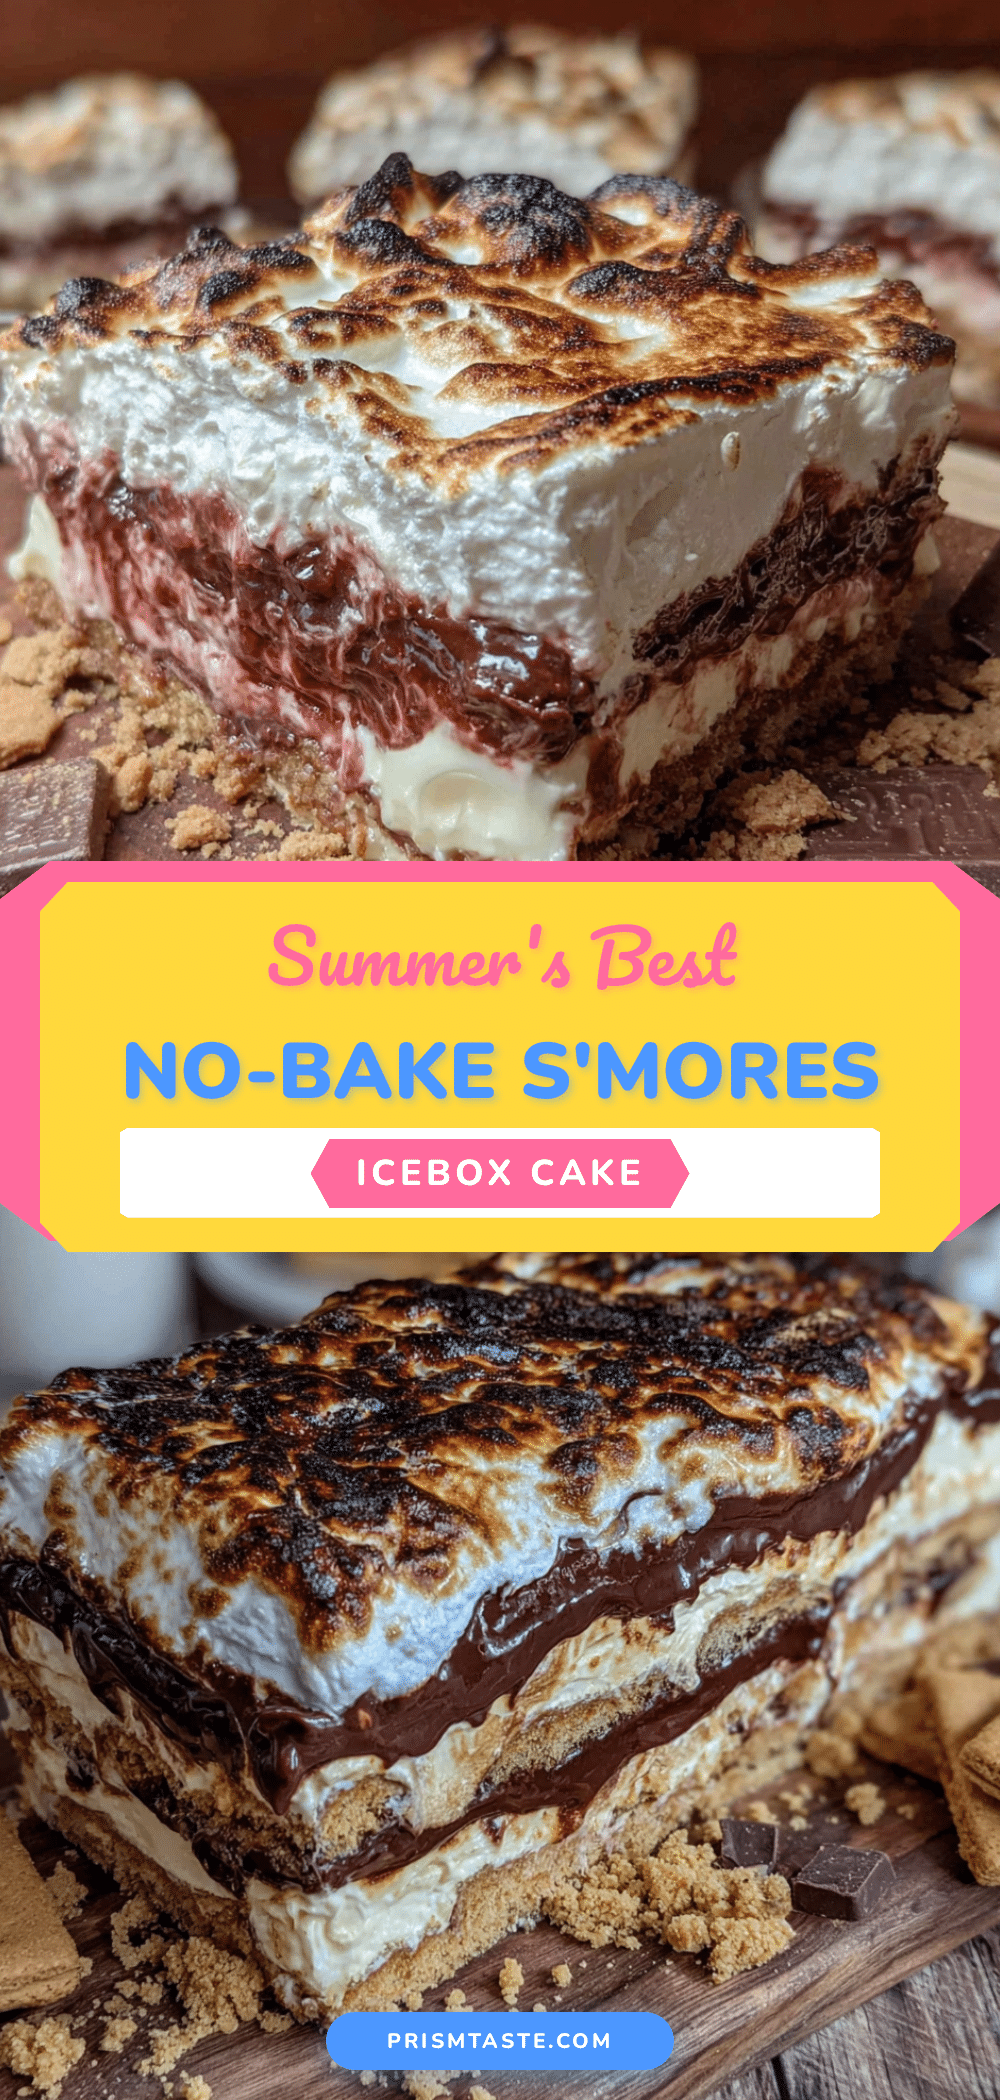
Summer’s Best No-Bake S’mores Icebox Cake
A no-bake dessert that layers graham crackers, chocolate pudding, and marshmallow topping for a campfire-inspired treat. Perfect for summer gatherings and make-ahead friendly.
- Prep Time: 20 minutes
- Cook Time: 0 minutes
- Total Time: 6 hours 20 minutes (includes chilling)
- Yield: 12 servings 1x
- Category: Dessert
- Cuisine: American
Ingredients
- 2 boxes (3.9 ounces each) instant chocolate pudding mix
- 3 cups cold whole milk
- 1 teaspoon vanilla extract
- 1 box (14.4 ounces) graham crackers (about 24 full sheets)
- 1 cup chocolate chips (semi-sweet or milk chocolate)
- 2 tablespoons coconut oil or vegetable shortening
- 1 jar (7 ounces) marshmallow creme or fluff
- 1 cup heavy whipping cream
- 2 tablespoons powdered sugar
- 1/2 teaspoon vanilla extract
- Extra chocolate shavings or curls (optional)
- Crushed graham crackers for sprinkling (optional)
- Mini marshmallows for toasting on top (optional)
Instructions
- In a medium mixing bowl, whisk together both boxes of instant chocolate pudding mix with 3 cups of cold whole milk. Whisk for about 2 minutes until it starts to thicken. Add the vanilla extract and give it one more stir. Let it sit for 5 minutes to set up completely.
- Line the bottom of a 9×13 inch baking dish with a single layer of graham crackers, breaking some to fit the edges.
- In a microwave-safe bowl, combine 1 cup of chocolate chips with 2 tablespoons of coconut oil. Microwave in 30-second intervals, stirring after each, until smooth and glossy. Let cool for a minute or two.
- Spread half of the chocolate pudding evenly over the first layer of graham crackers. Drizzle about half of the melted chocolate over the pudding layer.
- Add another layer of graham crackers on top of the pudding. Press down gently. Spread the remaining pudding over this layer, then drizzle the rest of the melted chocolate on top.
- Add one more layer of graham crackers on top. Press down gently.
- In a large mixing bowl, combine the heavy whipping cream, powdered sugar, and vanilla extract. Beat with an electric mixer on medium-high speed until soft peaks form, about 3-4 minutes. Gently fold in the marshmallow creme until fully combined.
- Spread the marshmallow mixture evenly over the top layer of graham crackers. Cover the dish with plastic wrap and refrigerate for at least 6 hours, but overnight is better.
- Before serving, add optional garnishes such as crushed graham crackers, chocolate shavings, or mini marshmallows broiled for 1-2 minutes.
- Use a sharp knife to cut clean slices. Serve cold directly from the fridge.
Notes
Use instant pudding mix, not cook-and-serve. Don’t rush the chilling time; overnight is ideal for best texture. For dairy-free, substitute whole milk with oat milk or full-fat coconut milk, and heavy cream with canned coconut cream. Avoid low-fat graham crackers as they get mushy.
Nutrition
- Serving Size: 1 slice (1/12 of cak
- Calories: 385
- Sugar: 38
- Sodium: 320
- Fat: 18
- Saturated Fat: 11
- Carbohydrates: 54
- Fiber: 2
- Protein: 5
Keywords: no-bake dessert, s'mores, icebox cake, summer dessert, graham cracker, chocolate pudding, marshmallow


