My starter, affectionately named “Gus,” had been sitting in the back of the fridge for almost two weeks. I felt a twinge of guilt every time I opened the door and saw that jar of bubbly neglect staring back at me. Honestly, I thought combining him with pumpkin puree was a one-way ticket to a dense, gummy brick. Pumpkin and sourdough? It felt like forcing two friends who had nothing in common to hang out. But a half-can of pumpkin was staring at me from the counter, and the idea of tossing it felt wasteful. So, with a heavy sigh and low expectations, I decided to see what would happen.
I mixed the tangy starter into the pumpkin batter, expecting a flavor clash. The kitchen smelled like fall and fermentation—a weird but promising combo. When I pulled the loaf out of the oven, it had domed beautifully, the top a deep golden brown with melted chocolate peeking through. I let it cool, my skepticism still hanging in the air. Then I cut a slice. The crumb was soft and pillowy, not dense at all. The pumpkin and sourdough weren’t fighting; they were dancing. The chocolate chips were little pockets of sweetness against the subtle tang. That first bite was a quiet little victory. I realized then that sometimes the best recipes come from a bit of doubt and a lot of curiosity. This bread is proof that taking a chance on a strange pairing can lead to something truly special.
Why You’ll Love This Recipe
This isn’t your average quick bread. It has a depth of flavor that you just can’t get from a box mix. Over years of testing sourdough discard recipes, I’ve learned that the key is balancing the tang with the right sweetness. This recipe nails that balance.
- Soft & Fluffy Texture: The sourdough starter, combined with the pumpkin, creates an incredibly tender crumb that stays moist for days.
- Perfectly Balanced Flavor: The subtle tang of the sourdough cuts through the sweetness of the chocolate and the earthiness of the pumpkin. It’s not too sweet, not too sour—it’s just right.
- Great for Discard: This is the perfect way to use up that unfed starter sitting in your fridge. No need to feed it first!
- Simple Ingredients: You probably already have most of these in your pantry. No fancy flours or hard-to-find extracts.
- Fall Favorite, All Year: While it screams autumn, the flavor is so good you’ll want to make it in July, too. It’s a crowd-pleaser that disappears fast.
This recipe is different because it treats the sourdough starter as a flavor agent, not just a leavener. The result is a loaf that tastes complex and homemade, like something you’d find in a cozy bakery. It’s the kind of bread that makes you close your eyes after the first bite—comfort food, reimagined.
What Ingredients You Will Need
This recipe uses simple, wholesome ingredients to deliver that signature soft texture and bold flavor. Most of these are pantry staples, making this an easy last-minute bake.
- All-Purpose Flour: 2 cups (250g). This gives the bread its structure. I usually use unbleached all-purpose flour for the best texture. You can substitute up to half with whole wheat pastry flour, but the bread will be a bit denser.
- Baking Soda: 1 teaspoon. This is the primary leavening agent, working with the acidity of the sourdough and pumpkin to help the bread rise.
- Baking Powder: 1 teaspoon. Adds a little extra lift for a fluffy crumb.
- Pumpkin Pie Spice: 2 teaspoons. You can use a store-bought blend or make your own with cinnamon, nutmeg, ginger, and cloves. (adds that warm, cozy flavor)
- Cinnamon: 1 teaspoon. Because you can never have too much cinnamon in a pumpkin recipe.
- Salt: ½ teaspoon. Balances the sweetness and enhances all the other flavors.
- Unsalted Butter: ½ cup (1 stick, 113g), melted and slightly cooled. Adds richness and moisture. You can use coconut oil for a dairy-free option.
- Brown Sugar: 1 cup (200g), packed. I prefer light brown sugar for its molasses flavor, but dark brown sugar works too for a deeper taste.
- Granulated Sugar: ¼ cup (50g). Adds a bit of extra sweetness and helps with browning.
- Large Eggs: 2, at room temperature. They help bind everything together and add structure.
- Pumpkin Puree: 1 cup (240g). Make sure you grab 100% pure pumpkin puree, not pumpkin pie filling. Libby’s is my go-to brand for consistent results.
- Sourdough Starter: ½ cup (120g), unfed/discard. This is the star of the show. It doesn’t need to be active or bubbly—just straight from the fridge.
- Vanilla Extract: 1 teaspoon. Rounds out the flavors beautifully.
- Semi-Sweet Chocolate Chips: 1 cup (175g). I like using a mix of regular and mini chips for chocolate in every bite. You can use dark or milk chocolate if you prefer.
Substitution Guidance: For a gluten-free option, you can use a 1:1 gluten-free baking flour blend. The texture will be slightly different, but still delicious. If you don’t have sourdough discard, you can replace it with ½ cup of buttermilk or plain yogurt, but you will miss out on that signature tangy flavor.
Equipment Needed
You don’t need a lot of fancy gadgets for this recipe, which is part of its charm. Here’s what you’ll need:
- 9×5-inch Loaf Pan: A standard metal or glass loaf pan works best. If you use a dark, non-stick pan, your bread might brown a little faster, so keep an eye on it.
- Large Mixing Bowls: One for the dry ingredients and one for the wet ingredients.
- Whisk and Rubber Spatula: A whisk for combining the dry ingredients and a spatula for folding everything together gently.
- Measuring Cups and Spoons: For accurate measurements. A kitchen scale is even better for the flour, but cups work just fine.
- Parchment Paper: Optional, but highly recommended. It makes lifting the bread out of the pan a breeze and ensures easy cleanup.
- Cooling Rack: Essential for letting the bread cool evenly so the bottom doesn’t get soggy.
I’ve found that a good quality loaf pan is worth the investment. It heats evenly and prevents the edges from burning before the center is done. If you don’t have a cooling rack, you can use the grates from your oven—just make sure they’re clean.
Preparation Method
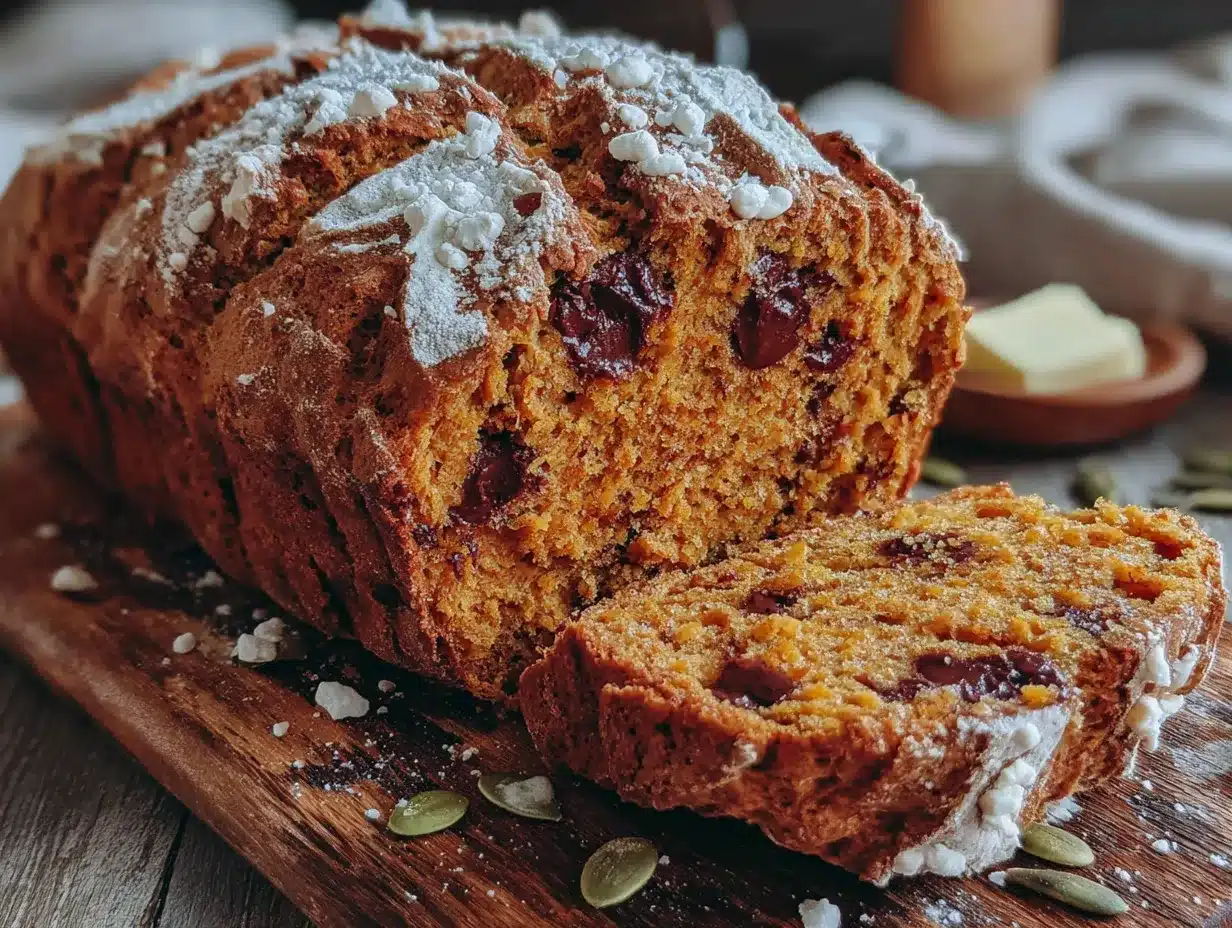
Let’s get baking! This process is straightforward, but a few little tricks will make all the difference.
- Preheat and Prep: Preheat your oven to 350°F (175°C). Grease your 9×5-inch loaf pan with butter or non-stick spray. For extra insurance, line it with a strip of parchment paper, leaving an overhang on the two long sides. This will be your “handle” later.
- Whisk Dry Ingredients: In a medium bowl, whisk together the 2 cups of all-purpose flour, 1 teaspoon of baking soda, 1 teaspoon of baking powder, 2 teaspoons of pumpkin pie spice, 1 teaspoon of cinnamon, and ½ teaspoon of salt. Whisking aerates the flour and ensures all the spices are evenly distributed.
- Combine Wet Ingredients: In a large bowl, whisk together the ½ cup of melted and cooled unsalted butter with the 1 cup of packed brown sugar and ¼ cup of granulated sugar. Whisk until it’s smooth and well combined. It will look a bit like wet sand.
- Add Eggs and Pumpkin: Whisk in the 2 room-temperature eggs, one at a time, making sure each is fully incorporated before adding the next. Then, add the 1 cup of pumpkin puree, ½ cup of sourdough starter, and 1 teaspoon of vanilla extract. Whisk until the batter is smooth and creamy. It will be a beautiful, rich orange color.
- Fold in the Dry Ingredients: Pour the dry ingredients into the wet ingredients. Using a rubber spatula, gently fold the mixture together. You want to stir just until you see no more streaks of flour. A few small lumps are totally fine. Overmixing at this stage will develop the gluten and make your bread tough, so be gentle.
- Fold in the Chocolate Chips: Add the 1 cup of semi-sweet chocolate chips to the batter. Reserve about 2 tablespoons to sprinkle on top later. Fold the chips in gently with your spatula until they are evenly distributed.
- Bake: Pour the batter into your prepared loaf pan and spread it into an even layer. Sprinkle the reserved chocolate chips on top. Bake for 55-65 minutes. The bread is done when a wooden skewer or toothpick inserted into the center comes out clean or with just a few moist crumbs. If the top is browning too quickly after 40 minutes, tent the loaf loosely with aluminum foil.
- Cool: Let the bread cool in the pan on a wire rack for about 15-20 minutes. Then, using the parchment paper handles, lift the bread out of the pan and transfer it to the cooling rack to cool completely. This is the hardest part—waiting! But if you cut it too soon, it will be gummy.
Tip: If your sourdough starter is very cold from the fridge, let it sit out for 30 minutes before adding it to the batter. This helps it incorporate more smoothly and prevents the butter from seizing up.
Cooking Tips & Techniques
I’ve made this bread about a dozen times, and I’ve learned a thing or two along the way. Here are my best tips for success.
- Don’t Overmix: This is the number one rule for tender quick breads. Once you add the flour, switch to a folding motion and stop as soon as it’s combined. A few streaks of flour are better than a tough loaf. I learned this the hard way after making a brick-like pumpkin bread that nobody wanted to eat.
- Room Temperature Ingredients Matter: Taking the chill off your eggs and pumpkin helps the batter come together smoothly. Cold ingredients can make the melted butter clump up, which leads to an uneven texture. Just let them sit on the counter for 20 minutes while you prep your pan.
- Check for Doneness: Ovens run differently. Start checking your bread at the 50-minute mark. If the skewer comes out with wet batter, give it 5 more minutes. If it’s got a few moist crumbs, it’s done. The internal temperature should be around 200-205°F (93-96°C).
- Toast Your Spices (Optional): For a deeper, more aromatic flavor, you can gently toast the pumpkin pie spice and cinnamon in a dry pan for about 30 seconds before adding them to the flour. It’s a small step that makes a big difference.
I once forgot the baking soda entirely. The bread was flat and sad. So, double-check your ingredients before you start mixing! It’s an easy mistake to make when you’re in a hurry.
Variations & Adaptations
This recipe is a great base for all sorts of delicious twists. Feel free to get creative!
- Nutty Delight: Fold in ½ cup of chopped pecans or walnuts along with the chocolate chips. Toasting the nuts beforehand really brings out their flavor.
- Spiced Up: Add ¼ teaspoon of ground cloves or cardamom to the spice mix for a more complex, warming flavor profile. It’s amazing during the holidays.
- Dairy-Free & Vegan: Use a flax egg (1 tablespoon ground flaxseed mixed with 3 tablespoons water) for each egg, and replace the butter with melted coconut oil or vegan butter. The texture will be slightly different, but it will still be delicious.
- Gluten-Free: Swap the all-purpose flour for a high-quality 1:1 gluten-free baking blend that contains xanthan gum. I’ve had great results with King Arthur Measure for Measure.
- White Chocolate & Cranberry: Swap the semi-sweet chocolate chips for white chocolate chips and fold in ½ cup of dried cranberries. This is a fantastic fall twist that feels extra festive.
I tried a version with chopped crystallized ginger once, and it was incredible. The spicy, chewy bits of ginger were a perfect counterpoint to the sweet chocolate.
Serving & Storage Suggestions
This bread is wonderful in so many ways. Here’s how to enjoy it best.
Serving: Serve it warm or at room temperature. A slice is perfect on its own, but it’s absolutely divine when lightly toasted and spread with a pat of salted butter. For a real treat, you can even use it to make a decadent French toast. If you’re in the mood for a cozy breakfast, this pairs beautifully with a warm mug of coffee or tea. For a fun dessert, try it alongside a scoop of creamy no-churn strawberry cheesecake ice cream for a flavor contrast that works surprisingly well.
Storage: Store the bread in an airtight container at room temperature for up to 4 days. The moisture from the pumpkin keeps it soft. For longer storage, you can wrap it tightly in plastic wrap and then in foil, and freeze it for up to 3 months. Thaw it overnight in the refrigerator or on the counter.
Reheating: The best way to reheat a slice is in a toaster or toaster oven. It gets the edges slightly crispy while keeping the inside soft. You can also microwave it for 15-20 seconds, but it won’t have that same texture. The flavors actually deepen and meld together even more on the second day, so it might taste even better tomorrow!
Nutritional Information & Benefits
While this is definitely a treat, it does have some redeeming qualities! Please note that these are estimates and will vary based on specific ingredients used.
| Nutrient | Per Slice (1/12 of loaf) |
|---|---|
| Calories | ~320 |
| Fat | 14g |
| Carbohydrates | 47g |
| Protein | 5g |
| Fiber | 2g |
| Sugar | 28g |
Health Benefits: Pumpkin is packed with Vitamin A and fiber, which is great for eye health and digestion. The sourdough fermentation process can make the bread easier to digest for some people compared to bread made with commercial yeast. Plus, dark chocolate is a good source of antioxidants. So, while you shouldn’t eat the whole loaf in one sitting (trust me, I’ve been tempted), you can feel a little bit better about that second slice!
Dietary Considerations: This recipe contains gluten, dairy, and eggs. See the variations section above for vegan and gluten-free adaptations. It is perfect for using up sourdough discard, which is a great way to reduce food waste.
Conclusion
This Soft & Fluffy Pumpkin Chocolate Chip Sourdough Bread is more than just a recipe—it’s a little experiment that paid off. It’s the answer to what to do with that lonely jar of starter and the half-can of pumpkin in your fridge. The combination of tangy sourdough, sweet pumpkin, and rich chocolate is unexpected, but it works in the most delicious way. I love how it makes my whole house smell like fall, and I love even more how it brings a smile to my family’s faces when I pull it out of the oven.
I really hope you give this one a try. Don’t be afraid to make it your own—swap in different chips, add some nuts, or double the spice. And when you do, I’d love to hear about it! Leave a comment below and let me know how it turned out. Did you make any fun changes? Share your photos with us, too. Happy baking, friends!
Frequently Asked Questions
Can I use active sourdough starter instead of discard?
Yes, you can! If you use an active, bubbly starter, the bread will still be delicious. It might rise a little more and have a slightly less pronounced tang, but it will work perfectly. Just reduce the amount of batter you pour into the pan by a few spoonfuls to avoid overflow.
My bread is too dense. What went wrong?
Dense bread is usually a sign of overmixing the batter or using too much flour. When you mix the dry and wet ingredients, stop as soon as they are combined. Also, make sure you are measuring your flour correctly—spoon it into the measuring cup and level it off with a knife, rather than scooping directly from the bag, which packs it down.
Can I make this into muffins instead of a loaf?
Absolutely! Grease a 12-cup muffin tin and divide the batter evenly among the cups. Bake at 350°F (175°C) for 18-22 minutes, or until a toothpick inserted into the center of a muffin comes out clean. This is a great option for a grab-and-go breakfast or snack.
How do I know when the bread is fully baked?
The best test is the toothpick test. Insert a wooden skewer or toothpick into the very center of the loaf. If it comes out clean or with just a few moist crumbs attached, it’s done. If it has wet batter on it, it needs more time. The top should also be a deep golden brown and feel firm to the touch.
Can I use canned pumpkin pie filling instead of pure pumpkin puree?
I wouldn’t recommend it. Pumpkin pie filling is pre-sweetened and spiced, which will throw off the balance of the recipe. It also has a different consistency that can make the bread too wet or overly sweet. Stick with 100% pure pumpkin puree for the best results.
Pin This Recipe!

Soft & Fluffy Pumpkin Chocolate Chip Sourdough Bread
This soft and fluffy pumpkin chocolate chip sourdough bread combines tangy sourdough starter with sweet pumpkin and rich chocolate chips for a perfectly balanced, moist loaf. It’s the ideal way to use up sourdough discard and makes a delicious fall-inspired treat any time of year.
- Prep Time: 15 minutes
- Cook Time: 55-65 minutes
- Total Time: 1 hour 20 minutes
- Yield: 12 servings 1x
- Category: Bread
- Cuisine: American
Ingredients
- 2 cups (250g) all-purpose flour
- 1 teaspoon baking soda
- 1 teaspoon baking powder
- 2 teaspoons pumpkin pie spice
- 1 teaspoon cinnamon
- ½ teaspoon salt
- ½ cup (1 stick, 113g) unsalted butter, melted and slightly cooled
- 1 cup (200g) packed light brown sugar
- ¼ cup (50g) granulated sugar
- 2 large eggs, at room temperature
- 1 cup (240g) 100% pure pumpkin puree
- ½ cup (120g) unfed sourdough starter (discard)
- 1 teaspoon vanilla extract
- 1 cup (175g) semi-sweet chocolate chips
Instructions
- Preheat your oven to 350°F (175°C). Grease a 9×5-inch loaf pan with butter or non-stick spray. Line with parchment paper, leaving an overhang on the two long sides.
- In a medium bowl, whisk together the all-purpose flour, baking soda, baking powder, pumpkin pie spice, cinnamon, and salt.
- In a large bowl, whisk together the melted butter, brown sugar, and granulated sugar until smooth.
- Whisk in the eggs one at a time, then add the pumpkin puree, sourdough starter, and vanilla extract. Whisk until smooth and creamy.
- Pour the dry ingredients into the wet ingredients. Using a rubber spatula, gently fold until just combined (a few lumps are fine). Do not overmix.
- Fold in the chocolate chips, reserving about 2 tablespoons to sprinkle on top.
- Pour the batter into the prepared loaf pan and spread evenly. Sprinkle the reserved chocolate chips on top.
- Bake for 55-65 minutes, until a wooden skewer inserted into the center comes out clean or with a few moist crumbs. If the top browns too quickly, tent loosely with aluminum foil after 40 minutes.
- Let the bread cool in the pan on a wire rack for 15-20 minutes. Then lift it out using the parchment paper handles and transfer to the rack to cool completely before slicing.
Notes
For best results, use room temperature ingredients. If your sourdough starter is very cold, let it sit out for 30 minutes before adding. Do not overmix the batter to avoid a dense loaf. Start checking for doneness at 50 minutes. The bread can be stored in an airtight container at room temperature for up to 4 days, or frozen for up to 3 months.
Nutrition
- Serving Size: 1 slice (1/12 of loa
- Calories: 320
- Sugar: 28
- Sodium: 280
- Fat: 14
- Saturated Fat: 8
- Carbohydrates: 47
- Fiber: 2
- Protein: 5
Keywords: pumpkin chocolate chip sourdough bread, sourdough discard recipe, pumpkin bread, soft pumpkin bread, fall baking, easy sourdough bread


