I was standing in line at the hardware store last October, holding a bag of mulch I didn’t really need, when the guy in front of me turned around and said, “You know what’s harder than fixing a leaky faucet? Getting royal icing to look like turkey feathers.” His name was Dennis, and he was the store’s plumbing specialist. I’d only asked him where the garden hoses were. But Dennis, it turned out, had a side gig — he decorated cookies for his church’s annual fall bake sale. And he was clearly stressed about it.
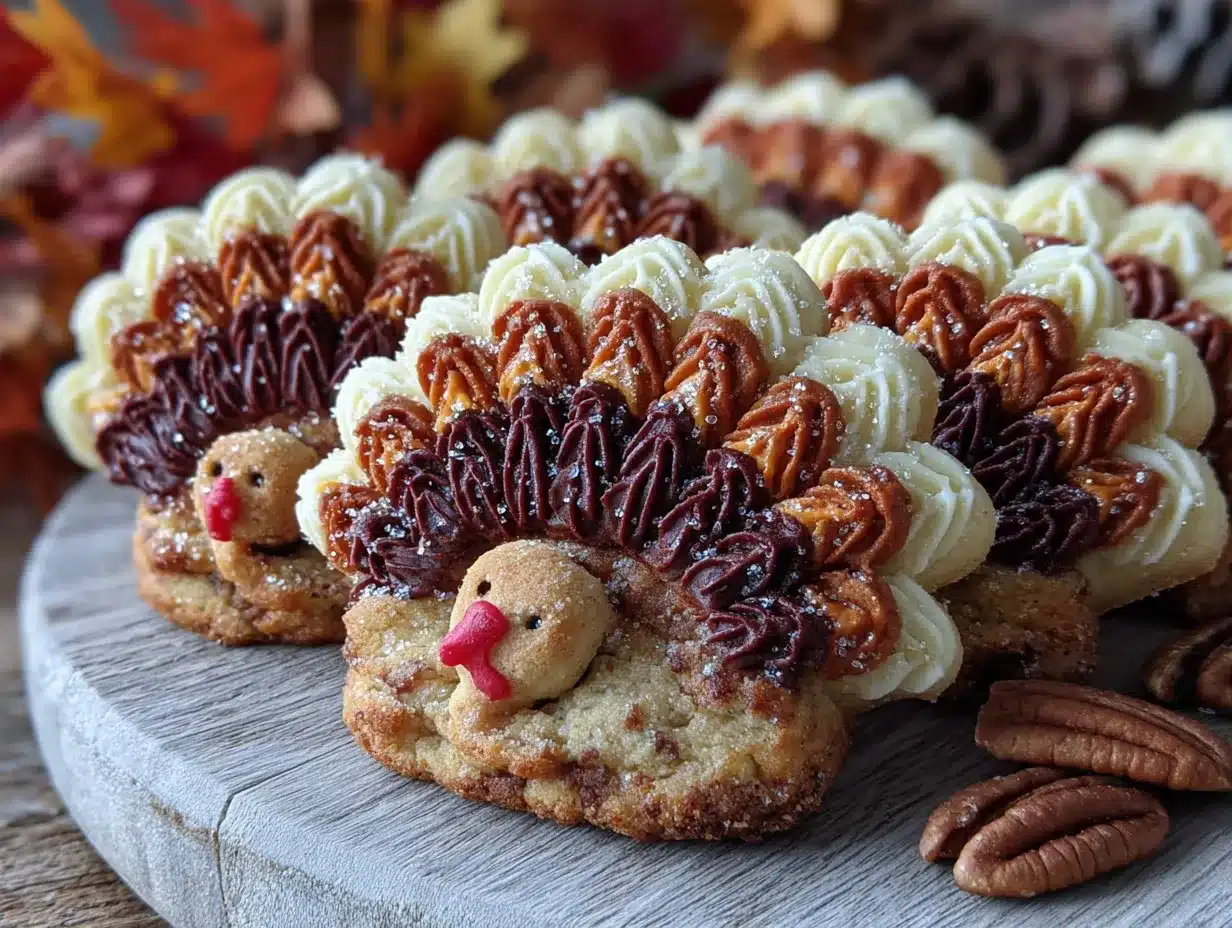
Honestly, I almost laughed. A plumber giving cookie decorating advice in the paint aisle? But then he pulled out his phone and showed me a picture of his turkey cookies from the year before. And let me tell you — they were gorgeous. Perfect little butter cookies with royal icing feathers in shades of rust, gold, and deep red. Each turkey had a tiny candy corn beak. I was genuinely impressed. I mean, I’ve been baking for years, and my royal icing work is decent, but his turkeys had something special. A kind of precision that made them look professional.
So I asked him how he did it. And Dennis — the plumbing guy at my local hardware store — spent the next ten minutes explaining his exact process for autumn royal icing turkey sugar cookies. He talked about icing consistency like he was discussing pipe fittings. He had strong opinions about food coloring brands. He even told me which cookie cutter he swears by (it’s a specific one from a craft store, not the cheap sets). I scribbled notes on the back of my receipt.
I went home that afternoon and made a batch. They weren’t perfect — my first turkey looked more like a confused duck — but by the third try, I had it. These cookies have become my fall baking staple ever since. Maybe you’ve been there, trying to make holiday cookies that actually look like what they’re supposed to be. If so, Dennis’s method is exactly what you need.
Why You’ll Love This Recipe
These autumn royal icing turkey sugar cookies aren’t just pretty — they’re genuinely fun to make. And after testing this recipe about a dozen times (with varying degrees of success, trust me), I can tell you exactly why it works.
- Foolproof Royal Icing: Most royal icing recipes are finicky, but this one uses a specific ratio that dries perfectly every time. No more runny icing disasters.
- Simple Sugar Cookie Base: The cookie itself is a classic cut-out recipe that holds its shape beautifully. No spreading, no puffing up — just crisp, clean edges for decorating.
- Perfect for Fall Gatherings: These turkeys are ideal for Thanksgiving parties, classroom treats, or just a cozy afternoon baking session when the leaves start turning.
- Crowd-Pleasing Design: Kids love the colorful feathers, and adults appreciate the professional look. They’re always the first cookies to disappear from the platter.
- Make-Ahead Friendly: You can bake the cookies days in advance and decorate them later. The icing also stores well, so you can prep everything ahead of time.
What makes this recipe different from the dozens of turkey cookie tutorials out there? It’s the technique. Dennis taught me to pipe the feathers in layers, letting each color dry slightly before adding the next. That little trick creates dimension that flat icing just can’t match. Plus, I’ve tested this with multiple butter brands, different types of flour, and various food coloring gels — so you’re getting a version that’s been thoroughly road-tested.
These cookies are the kind that make people say, “Wait, you made these?” That moment never gets old. And honestly, there’s something deeply satisfying about creating something that looks this polished with your own two hands. It’s comfort baking at its finest — a little messy, a little therapeutic, and completely worth every minute.
What Ingredients You Will Need
This recipe uses simple, wholesome ingredients to create cookies that are sturdy enough for decorating but tender enough to actually enjoy eating. Here’s what you’ll need for both the cookies and the royal icing.
For the Sugar Cookies
- Unsalted butter, softened — 1 cup (2 sticks or 226g). I prefer using Kerrygold for its rich flavor, but any good-quality unsalted butter works. Let it sit at room temperature for at least 30 minutes before starting.
- Granulated sugar — 1 cup (200g). Regular white sugar gives these cookies the right structure without making them too sweet.
- Large egg — 1, at room temperature. Cold eggs can cause the butter to seize up, so leave yours on the counter for about 15 minutes.
- Vanilla extract — 1 teaspoon. Use pure vanilla if you can — the flavor difference is noticeable in a simple cookie like this.
- All-purpose flour — 2 ½ cups (312g). Spoon and level your flour for accuracy; scooping directly from the bag packs in too much and makes cookies tough.
- Baking powder — ½ teaspoon. Just enough to give a slight lift without making the cookies puff up and lose their shape.
- Salt — ¼ teaspoon. Balances the sweetness and enhances the butter flavor.
For the Royal Icing
- Powdered sugar — 4 cups (480g), sifted. Sifting is non-negotiable here — lumps will clog your piping tips and ruin the smooth finish.
- Meringue powder — 3 tablespoons. This is what gives royal icing its structure and glossy finish. I recommend Wilton brand for consistent results.
- Warm water — about 5-6 tablespoons. Add it slowly; you can always add more, but you can’t take it out.
- Vanilla extract — ½ teaspoon (optional). For a subtle flavor, though many prefer plain icing for decorating.
- Gel food coloring — in autumn shades: deep orange, rust red, golden yellow, warm brown, and white for the base. I use Americolor gels — they’re concentrated and don’t thin the icing like liquid colors do.
- Candy corn — for the beaks (optional but highly recommended).
- Edible eyes — small black ones, available at baking supply stores or online.
Ingredient Tips from Experience
A few things I’ve learned the hard way. First, don’t substitute margarine or spreadable butter — these cookies need real butter to hold their shape. Second, if you’re using a gluten-free flour blend, add ¼ teaspoon of xanthan gum to prevent crumbling. And for the icing, never use liquid food coloring; it throws off the consistency and leaves you with a runny mess that won’t dry properly. Trust me on that one — I learned it during a particularly frustrating batch of Easter cookies.
Equipment Needed
You don’t need a professional bakery setup, but a few specific tools make a big difference with royal icing work.
- Turkey-shaped cookie cutter — about 3-4 inches tall. I found mine at Michael’s, but any craft store carries them seasonally. Look for one with clear feather definition.
- Rolling pin with thickness guides — adjustable ones are worth the investment. You want cookies that are uniformly ¼ inch thick.
- Baking sheets — light-colored aluminum sheets work best. Dark pans cause cookies to brown too quickly on the bottom.
- Parchment paper or silicone baking mats — prevents sticking and makes cleanup easier.
- Electric mixer — a stand mixer is ideal, but a hand mixer works fine. You’ll need it for both the cookie dough and the icing.
- Piping bags — disposable ones are easiest. Get the 12-inch size for better control.
- Piping tips — round tips in sizes #2 and #3 for outlining and flooding. A #1 tip is useful for fine details.
- Icing spatula — small offset spatula for spreading and smoothing.
- Toothpicks — essential for popping air bubbles and guiding icing into corners.
- Cooling rack — wire racks allow cookies to cool evenly and provide a surface for icing to drip off.
If you don’t have piping bags, you can use zip-top bags with a tiny corner snipped off. It’s not as precise, but it works in a pinch. I’ve done it many times when I ran out of proper bags mid-project.
Preparation Method
This process has several stages, so give yourself about 3 hours total — including chilling and drying time. The actual hands-on work is about 45 minutes.
Make the Cookie Dough
- Cream the butter and sugar — In a large bowl, beat the softened butter and granulated sugar together on medium speed until light and fluffy, about 3 minutes. Scrape down the sides halfway through. The mixture should look pale and airy.
- Add the egg and vanilla — Beat in the egg and vanilla extract until fully combined. The mixture might look slightly curdled at this point — that’s normal, don’t panic.
- Mix the dry ingredients — In a separate bowl, whisk together the flour, baking powder, and salt. Gradually add this to the butter mixture on low speed, mixing just until the dough comes together. Overmixing creates tough cookies.
- Chill the dough — Divide the dough in half, flatten each into a disk, wrap tightly in plastic wrap, and refrigerate for at least 1 hour. Chilling is crucial — it prevents spreading and makes rolling easier.
Bake the Cookies
- Preheat and prep — Preheat your oven to 350°F (175°C). Line baking sheets with parchment paper.
- Roll and cut — On a lightly floured surface, roll one disk of dough to ¼-inch thickness. Cut out turkey shapes and place them 2 inches apart on the prepared baking sheets. Re-roll scraps once — after that, the dough gets tough.
- Chill again — Pop the cut cookies into the freezer for 10 minutes before baking. This step is non-negotiable for sharp edges. I learned this after a batch of turkeys that looked more like blobs.
- Bake — Bake for 8-10 minutes, rotating the pan halfway through. The edges should be just barely golden. The centers will look slightly underdone — that’s perfect.
- Cool completely — Let cookies rest on the baking sheet for 5 minutes, then transfer to a wire rack to cool completely. Do not decorate warm cookies; the icing will melt and slide right off.
Make the Royal Icing
- Combine dry ingredients — In a clean mixer bowl, whisk together the sifted powdered sugar and meringue powder.
- Add water slowly — With the mixer on low, add 4 tablespoons of warm water. Beat until combined, then increase to medium speed and beat for 5 minutes. The icing should be thick and glossy.
- Check consistency — Lift the beater — the icing should fall in a ribbon that disappears back into the surface within 10 seconds. If it’s too thick, add water a teaspoon at a time. If too thin, add more sifted powdered sugar.
- Divide and color — Separate the icing into bowls for each color. Use gel food coloring sparingly — a toothpick dipped in the gel is usually enough. Cover bowls with damp paper towels to prevent drying.
- Adjust for flooding — For the base coat (flooding consistency), thin a portion of each color with a few drops of water until it flows like honey. It should spread smoothly but hold its shape.
Decorate the Turkeys
- Outline the body — Using stiff consistency white icing with a #2 tip, outline the turkey body. Let this dry for 10 minutes.
- Flood the body — Fill the outlined area with thinned white icing, using a toothpick to guide it into corners. Let dry completely — about 1 hour.
- Pipe the feathers — Using stiff icing in autumn colors with a #3 tip, pipe feather shapes in layers. Start with the bottom layer (darkest color), let dry 15 minutes, then add the next layer. I usually do brown first, then rust, then orange, then golden yellow on top.
- Add details — Pipe a small orange beak using stiff icing and a #2 tip. Attach candy corn if using. Add edible eyes with a dot of icing as glue.
- Let dry completely — Allow decorated cookies to dry uncovered for at least 4 hours or overnight. The icing should be hard to the touch before stacking.
Cooking Tips & Techniques
Here’s where experience really matters. I’ve made every mistake possible with these cookies, so you don’t have to.
Icing consistency is everything. If your flooding icing is too thin, it will run off the cookie entirely. Too thick, and it won’t level out smoothly. The test: drag a knife through the icing — the line should disappear in about 8 seconds. That’s the sweet spot.
Work in a cool, dry room. Humidity is royal icing’s enemy. If it’s a rainy day, crank up the air conditioning or wait for a drier day. I once ruined an entire batch during a summer thunderstorm — the icing never set properly and stayed tacky for hours.
Don’t rush the drying. Between layers, give the icing at least 15-20 minutes to form a skin. If you add the next color too soon, they’ll bleed together and look muddy. I use a fan pointed at the cookies to speed things up — just make sure it’s on low so it doesn’t blow the icing around.
Keep your piping bags covered. Royal icing dries out fast. When you’re not using a bag, keep it wrapped in a damp paper towel inside a sealed plastic bag. This gives you more working time without the icing crusting in the tip.
Use a scribe tool. A scribe tool (or just a toothpick) is your best friend for popping air bubbles and coaxing icing into tight spaces. Keep several on hand because they get sticky fast.
Plan your color order. Always pipe the darkest colors first and work toward the lightest. That way, if your hand slips, the lighter color can cover any mistakes. I learned this after a particularly disastrous batch where my orange feathers ended up looking brown from all the corrections.
Variations & Adaptations
One of the best things about this recipe is how flexible it is. Here are some variations I’ve tried over the years.
Gluten-Free Version: Substitute the all-purpose flour with a 1:1 gluten-free baking blend. Add ¼ teaspoon xanthan gum if your blend doesn’t already include it. The dough will be slightly more fragile, so chill it extra well before rolling.
Vegan Adaptation: Use vegan butter sticks (not spreadable margarine) and replace the egg with ¼ cup unsweetened applesauce. For the royal icing, use aquafaba (chickpea liquid) instead of meringue powder — 3 tablespoons of aquafaba whipped to stiff peaks replaces the meringue powder and water combination.
Different Cookie Cutters: This icing technique works beautifully for other fall shapes — pumpkins, leaves, acorns. Just adjust the color palette accordingly. I’ve done a whole autumn forest scene using the same method.
Spiced Cookie Base: Add 1 teaspoon of cinnamon, ½ teaspoon of nutmeg, and ¼ teaspoon of cloves to the flour mixture. It gives the cookies a warm, cozy flavor that pairs perfectly with the autumn theme.
Quick Version: Skip the layered feather technique and do a single flood of brown icing for the entire turkey. Add candy corn feathers pressed into the wet icing. It’s not as fancy, but it’s much faster and still adorable.
Chocolate Turkey Cookies: Replace ¼ cup of the flour with unsweetened cocoa powder. The chocolate cookies provide a beautiful dark background for bright autumn icing colors.
Serving & Storage Suggestions
These cookies are best served at room temperature, ideally within 2-3 days of decorating. The royal icing stays crisp, and the cookie underneath remains tender.
For serving, arrange the turkeys on a platter with the feathers fanning out in a circle pattern. It makes a stunning centerpiece for a Thanksgiving dessert table. I like to scatter a few mini pumpkins and autumn leaves around the platter for extra visual appeal.
Pairing suggestions: These cookies go beautifully with hot apple cider, spiced chai tea, or a pumpkin spice latte. For a dessert spread, serve them alongside pumpkin bread pudding with caramel sauce for a full autumn experience.
Storage instructions: Store decorated cookies in a single layer in an airtight container at room temperature. Place a sheet of parchment paper between layers if you must stack them. Do not refrigerate — the moisture will soften the royal icing and make it sticky.
Freezing: You can freeze undecorated baked cookies for up to 3 months. Wrap them tightly in plastic wrap and then foil. Thaw at room temperature before decorating. Do not freeze decorated cookies — the icing will crack and become tacky.
Flavor development: The cookies actually taste better the day after baking. The flavors meld together, and the texture softens slightly. If you’re planning ahead, bake the cookies two days before you need them and decorate the day before serving.
Nutritional Information & Benefits
Let’s be real — these are decorated sugar cookies, so they’re a treat, not a health food. But here’s the estimated nutritional breakdown per cookie (based on a 3-inch turkey with royal icing):
- Calories: 180-200
- Fat: 8g
- Carbohydrates: 28g
- Sugar: 18g
- Protein: 2g
- Sodium: 55mg
Dietary considerations: This recipe contains dairy (butter), eggs, and gluten. For allergen-friendly versions, see the variations section above.
Health perspective: I believe in enjoying treats in moderation. These cookies are about celebration and connection — sharing something beautiful you made with your own hands. That has value beyond the nutritional numbers. Plus, the act of decorating is genuinely meditative. There’s something calming about focusing on piping smooth lines and perfecting tiny details. It’s baking as self-care, honestly.
Ingredient benefits: Butter provides vitamin A and healthy fats. Eggs offer protein and B vitamins. And royal icing contains egg whites (or meringue powder) which is low in fat. It’s not a salad, but it’s not the worst thing you could eat either.
Conclusion
These autumn royal icing turkey sugar cookies have become my favorite fall baking project, and I think they’ll become yours too. They look complicated, but once you break down the process, they’re surprisingly achievable. And the pride you feel when you step back and see a whole flock of perfectly decorated turkeys? That’s worth every minute of piping.
What I love most about this recipe is how it brings people together. I think about Dennis every time I make these cookies — that random conversation in the hardware store turned into a tradition I look forward to all year. You never know where you’ll find inspiration, and sometimes the best recipes come from the most unexpected places.
I’d love to see your turkey cookies! Tag me when you make them, and tell me about your own decorating adventures. Did you try a different color scheme? Add sparkly sanding sugar? Use chocolate chips instead of candy corn? Share your twists — I’m always looking for new ideas to try. Happy fall baking, friends. Let’s make this season delicious.
Frequently Asked Questions
Can I make the dough ahead of time?
Absolutely. The cookie dough can be refrigerated for up to 3 days or frozen for up to 3 months. Just wrap it tightly in plastic wrap and then foil. Thaw overnight in the refrigerator before rolling and cutting.
Why did my royal icing turn out runny?
You probably added too much water. Royal icing is finicky — add water just a teaspoon at a time. If you’ve already made it too thin, you can try whisking in more sifted powdered sugar, but the texture won’t be quite the same. It’s better to start thick and thin gradually.
How long do decorated cookies last?
Properly stored in an airtight container at room temperature, decorated cookies will stay fresh for up to 5 days. The royal icing will remain crisp, and the cookie will stay tender. After that, the cookie starts to dry out and the icing may crack.
Can I use liquid food coloring instead of gel?
I don’t recommend it. Liquid food coloring adds too much moisture to royal icing, which throws off the consistency and can make it runny. Gel colors are concentrated, so you use less, and they don’t affect the icing texture. They’re worth the small investment.
My cookies spread during baking. What went wrong?
This usually happens for one of three reasons: the dough wasn’t chilled enough, the butter was too soft, or the baking sheet was too warm. Always chill cut cookies for at least 10 minutes before baking, and use cool baking sheets. If you’re reusing a pan, let it cool completely between batches.
Pin This Recipe!
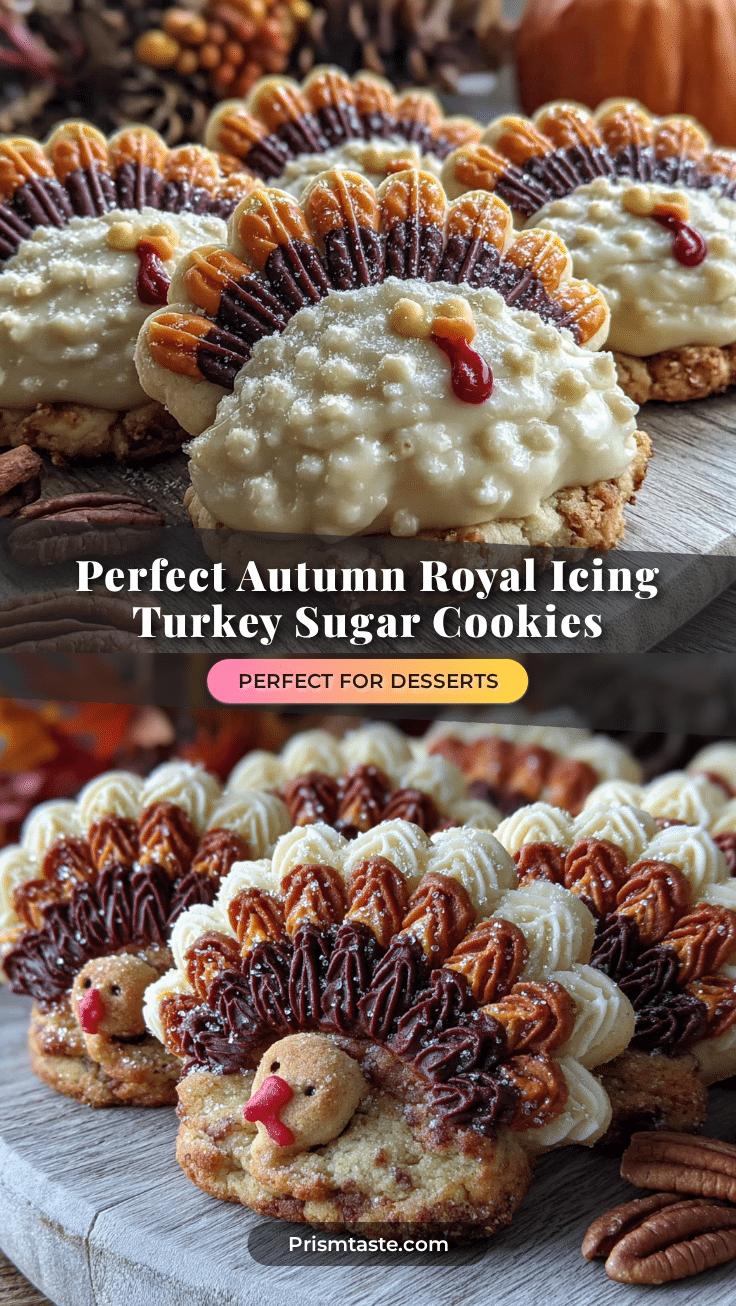
Perfect Royal Icing Turkey Cookies Easy Fall Recipe

These autumn royal icing turkey sugar cookies are fun to make and feature a foolproof royal icing technique that creates dimension with layered feathers. Perfect for Thanksgiving parties, classroom treats, or cozy fall baking sessions.
- Prep Time: 45 minutes
- Cook Time: 10 minutes
- Total Time: 3 hours (including chilling and drying)
- Yield: 24 servings 1x
- Category: Dessert
- Cuisine: American
Ingredients
- 1 cup (2 sticks or 226g) unsalted butter, softened
- 1 cup (200g) granulated sugar
- 1 large egg, at room temperature
- 1 teaspoon vanilla extract
- 2 ½ cups (312g) all-purpose flour
- ½ teaspoon baking powder
- ¼ teaspoon salt
- 4 cups (480g) powdered sugar, sifted
- 3 tablespoons meringue powder
- 5–6 tablespoons warm water
- ½ teaspoon vanilla extract (optional)
- Gel food coloring in autumn shades (deep orange, rust red, golden yellow, warm brown, white)
- Candy corn (optional, for beaks)
- Small black edible eyes
Instructions
- Cream the butter and sugar: In a large bowl, beat the softened butter and granulated sugar together on medium speed until light and fluffy, about 3 minutes. Scrape down the sides halfway through.
- Add the egg and vanilla: Beat in the egg and vanilla extract until fully combined. The mixture might look slightly curdled; that’s normal.
- Mix the dry ingredients: In a separate bowl, whisk together the flour, baking powder, and salt. Gradually add this to the butter mixture on low speed, mixing just until the dough comes together. Do not overmix.
- Chill the dough: Divide the dough in half, flatten each into a disk, wrap tightly in plastic wrap, and refrigerate for at least 1 hour.
- Preheat and prep: Preheat oven to 350°F (175°C). Line baking sheets with parchment paper.
- Roll and cut: On a lightly floured surface, roll one disk of dough to ¼-inch thickness. Cut out turkey shapes and place them 2 inches apart on prepared baking sheets. Re-roll scraps once only.
- Chill again: Place cut cookies in the freezer for 10 minutes before baking.
- Bake: Bake for 8-10 minutes, rotating the pan halfway through. Edges should be just barely golden. Centers will look slightly underdone.
- Cool completely: Let cookies rest on baking sheet for 5 minutes, then transfer to a wire rack to cool completely.
- Make the royal icing: In a clean mixer bowl, whisk together sifted powdered sugar and meringue powder. With mixer on low, add 4 tablespoons warm water. Beat until combined, then increase to medium speed and beat for 5 minutes. Icing should be thick and glossy.
- Check consistency: Lift the beater; icing should fall in a ribbon that disappears back into the surface within 10 seconds. Adjust with water or powdered sugar as needed.
- Divide and color: Separate icing into bowls for each color. Use gel food coloring sparingly. Cover bowls with damp paper towels.
- Adjust for flooding: For base coat, thin a portion of each color with a few drops of water until it flows like honey.
- Outline the body: Using stiff consistency white icing with a #2 tip, outline the turkey body. Let dry for 10 minutes.
- Flood the body: Fill outlined area with thinned white icing, using a toothpick to guide it into corners. Let dry completely, about 1 hour.
- Pipe the feathers: Using stiff icing in autumn colors with a #3 tip, pipe feather shapes in layers. Start with darkest color (brown), let dry 15 minutes, then add next layer (rust, then orange, then golden yellow on top).
- Add details: Pipe a small orange beak using stiff icing and a #2 tip. Attach candy corn if using. Add edible eyes with a dot of icing as glue.
- Let dry completely: Allow decorated cookies to dry uncovered for at least 4 hours or overnight until icing is hard to the touch.
Notes
Icing consistency is key: drag a knife through the icing; the line should disappear in about 8 seconds. Work in a cool, dry room. Don’t rush drying between layers; use a fan on low to speed up. Keep piping bags covered with a damp paper towel inside a sealed plastic bag. Pipe darkest colors first and work toward lightest. For gluten-free, use a 1:1 gluten-free baking blend with ¼ tsp xanthan gum. For vegan, use vegan butter sticks, ¼ cup unsweetened applesauce instead of egg, and aquafaba instead of meringue powder.
Nutrition
- Serving Size: 1 cookie
- Calories: 190
- Sugar: 18
- Sodium: 55
- Fat: 8
- Saturated Fat: 5
- Carbohydrates: 28
- Protein: 2
Keywords: turkey cookies, royal icing, fall cookies, Thanksgiving cookies, sugar cookies, decorated cookies, autumn baking