I want pumpkin sourdough bread right now. Not sweet pumpkin bread, not pumpkin spice latte in bread form—I want a real loaf of sourdough that happens to have pumpkin in it. And I’m standing in my kitchen staring at my sourdough starter, a can of pumpkin puree, and a bag of pepitas that I bought on a whim last week. The thing is, I’ve made a lot of sourdough. I’ve made it when my starter was sluggish, when my kitchen was too cold, when I forgot to feed it for three days and it looked like a science experiment gone wrong. But I’ve never combined it with pumpkin. And honestly? I wasn’t sure it would work. Pumpkin adds moisture, sugar, and density—three things that can absolutely wreck a sourdough loaf if you’re not careful. But the pepitas caught my eye. They’re salty, crunchy, and begging to be toasted and pressed into the top of a dark, blistered loaf.
So I grabbed my bench scraper, my banneton, and decided to figure it out. This Perfect Pumpkin Sourdough Bread with Toasted Pepitas became my fall baking obsession after three failed attempts and one loaf that looked like a deflated football. But that fourth loaf? That one had the open crumb I wanted, the subtle tang of fermented dough, and a crust so crackly it sang when I tapped it. The pepitas toasted right into the surface, giving every slice a salty, nutty crunch against the soft, slightly sweet pumpkin crumb. It’s the kind of bread that makes you forget about sandwiches entirely—you just want another slice with butter and flaky salt. I knew this recipe was worth sharing because it’s not complicated. It’s just sourdough with a little autumn magic thrown in.
Why You’ll Love This Recipe
This isn’t just another pumpkin bread recipe. This is real sourdough that happens to be pumpkin-flavored, and that makes all the difference. I’ve tested this recipe more times than I care to admit, tweaking hydration levels and fermentation times until the crumb was exactly right. Here’s why this loaf is worth your time:
- Perfectly Tangy & Sweet: The natural sourness of fermented dough balances the subtle sweetness of pumpkin puree. No added sugar needed—just pure, complex flavor.
- That Crackling Crust: The pepitas toast directly on the loaf while it bakes, creating a crunchy, salty topping that contrasts beautifully with the soft interior.
- Simple Ingredients: You only need flour, water, sourdough starter, pumpkin puree, salt, and pepitas. No fancy equipment or hard-to-find items.
- Great for Fall Baking: This loaf captures the essence of autumn without being overly sweet or dessert-like. It’s perfect for breakfast, sandwiches, or just snacking.
- Beginner-Friendly Sourdough: If you’ve been nervous about making sourdough, this recipe is forgiving. The pumpkin adds moisture that helps with oven spring and creates a tender crumb.
I’ve been baking sourdough for years, and this pumpkin version has become my most-requested fall loaf. It’s the kind of bread that makes people stop mid-bite and say, “Wait, what’s in this?” The pepitas are the secret weapon—they add texture and a savory note that keeps you coming back for more. And if you’re looking for more cozy fall baking, you’ll love our cozy one loaf pumpkin banana bread with cream cheese frosting for those days when you want something sweeter.
What Ingredients You Will Need
This recipe uses simple, wholesome ingredients to create a loaf that’s both rustic and refined. Most of these are pantry staples for any sourdough baker, with a few fall additions that make all the difference.
- Bread Flour (500g): High-protein flour gives this loaf structure and helps it rise beautifully. I prefer King Arthur Bread Flour for its consistent protein content, but any good bread flour works. If you want a slightly nuttier flavor, you can substitute up to 100g with whole wheat flour.
- Pumpkin Puree (200g): Make sure you’re using pure pumpkin puree, not pumpkin pie filling. I like Libby’s for its consistent texture and moisture content. The pumpkin adds subtle sweetness, a beautiful orange hue, and extra moisture that makes the crumb tender.
- Sourdough Starter (100g): Use an active, bubbly starter that’s been fed within the last 4-6 hours. If your starter is sluggish, this loaf won’t rise as well. I keep mine on the counter and feed it twice a day when I’m baking regularly.
- Water (250g): Room temperature water works best. Since pumpkin puree already contains moisture, we’re using less water than a standard sourdough recipe. This prevents the dough from becoming too sticky or dense.
- Salt (10g): Fine sea salt is my go-to. It enhances the flavor of the pumpkin and balances the tanginess of the sourdough. Don’t skip it—salt is crucial for gluten development and flavor.
- Toasted Pepitas (50g): Raw pepitas work fine, but toasting them first brings out their nutty flavor. I toast mine in a dry skillet until they start to pop and smell fragrant. You’ll press these into the top of the loaf before baking.
- Optional Add-Ins: A teaspoon of pumpkin pie spice or cinnamon can be added to the dough for extra warmth. I sometimes add a handful of dried cranberries or chopped pecans for variety.
For the best results, make sure your pumpkin puree is at room temperature before mixing. Cold ingredients can slow down fermentation and make the dough harder to work with. And if you’re looking for another way to use up your sourdough discard, try our crispy sourdough discard pumpkin bagels with everything seasoning—they’re a completely different but equally delicious fall treat.
Equipment Needed
You don’t need a professional bakery setup to make this bread, but a few key tools will make the process much smoother.
- Dutch Oven: A 5-6 quart Dutch oven is ideal for baking sourdough. The enclosed environment creates steam, which helps develop that beautiful crust. I use a Lodge cast iron Dutch oven, and it’s never let me down.
- Banneton or Proofing Basket: A round banneton gives the loaf its shape and helps it hold structure during the final proof. If you don’t have one, a bowl lined with a floured kitchen towel works perfectly.
- Bench Scraper: This is essential for handling sticky dough. I have a metal bench scraper that I’ve used for years, and it makes dividing and shaping dough so much easier.
- Kitchen Scale: For consistent results, weigh your ingredients. Volume measurements for flour can vary wildly, but a scale ensures accuracy every time.
- Lame or Sharp Knife: Scoring the loaf before baking allows it to expand properly. A lame is ideal, but a very sharp serrated knife works in a pinch.
- Parchment Paper: This makes transferring the dough to the Dutch oven a breeze. No sticking, no mess.
If you’re new to sourdough baking, don’t feel pressured to buy everything at once. Start with the basics—a bowl, a scale, and a Dutch oven—and build your collection over time. The most important tool is patience, and that’s free.
Preparation Method
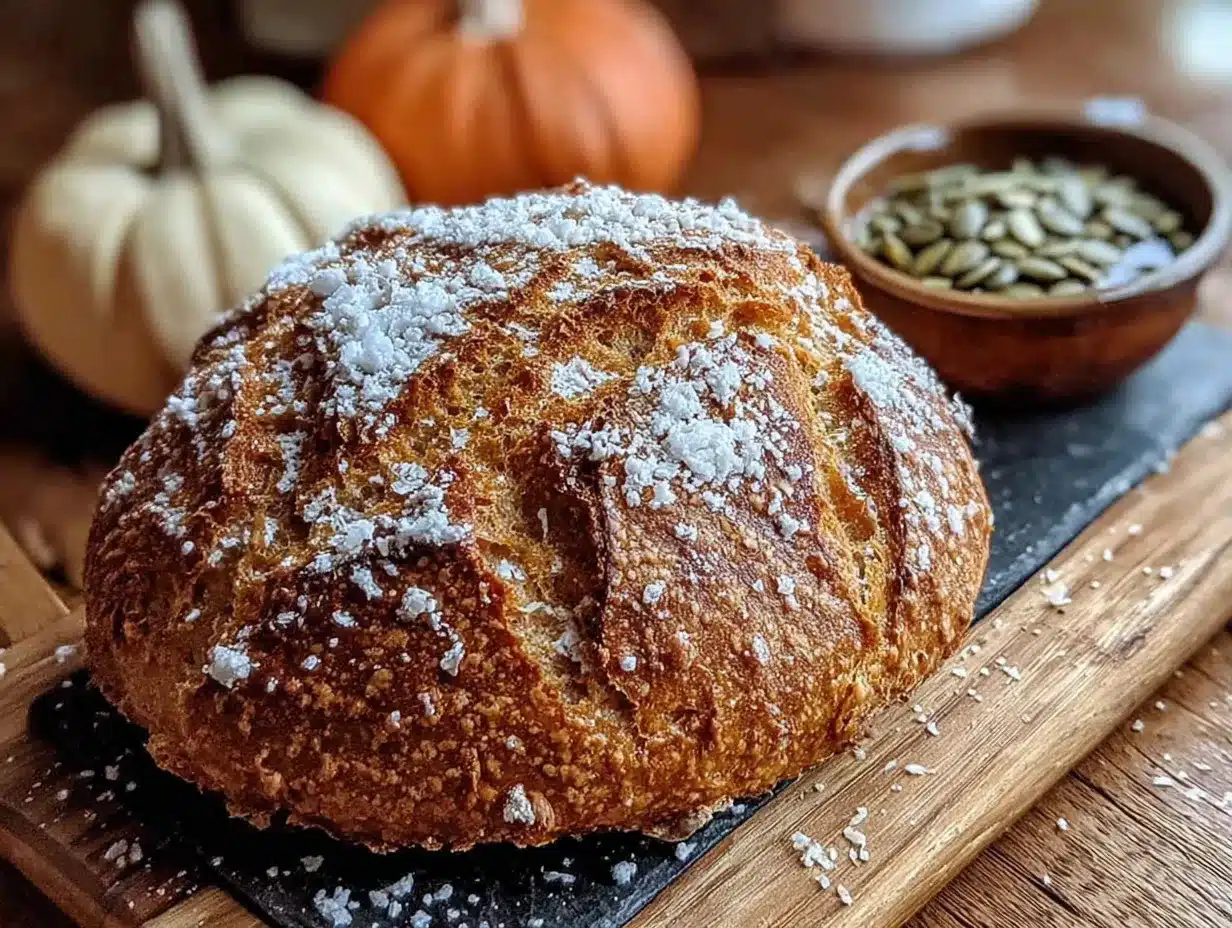
This process takes about 24 hours from start to finish, but most of that time is hands-off fermentation. Here’s how to make the perfect loaf.
Step 1: Feed Your Starter (Morning, Day 1)
Feed your sourdough starter 4-6 hours before you plan to mix the dough. I use a 1:1:1 ratio—50g starter, 50g flour, 50g water. Leave it at room temperature until it’s bubbly, doubled in size, and passes the float test (a spoonful of starter floats in water).
Step 2: Mix the Dough (Afternoon, Day 1)
In a large bowl, combine 500g bread flour, 250g water, and 200g pumpkin puree. Mix until no dry flour remains, then let it rest for 30 minutes. This autolyse step allows the flour to absorb the liquid and makes the dough easier to handle. After the rest, add 100g active sourdough starter and 10g salt. Wet your hands and mix everything together by folding the dough over itself until the starter and salt are fully incorporated. The dough will be sticky—that’s normal.
Step 3: Bulk Fermentation (Afternoon to Evening, Day 1)
Cover the bowl with a damp towel and let it rest at room temperature. Perform a series of stretch and folds every 30 minutes for the first 2 hours. To do this, wet your hand, grab one side of the dough, stretch it up, and fold it over the top. Rotate the bowl and repeat on all four sides. This builds gluten strength without kneading. After the folds, let the dough rest for another 2-4 hours, depending on your kitchen temperature. The dough should be puffy, have visible bubbles on the surface, and increase in volume by about 50%. In a warm kitchen (75°F), this takes about 4-5 hours total. In a cooler kitchen, it might take 6-8 hours.
Step 4: Shape the Loaf (Evening, Day 1)
Generously flour your work surface. Gently turn the dough out onto the floured surface. Using your bench scraper, shape the dough into a round by folding the edges toward the center. Flip it over so the seam side is down, then use your hands to create surface tension by dragging the dough toward you in a circular motion. The loaf should feel tight and smooth on top.
Step 5: Final Proof (Overnight, Day 1 to Day 2)
Lightly flour your banneton or lined bowl. Place the shaped loaf seam-side up into the banneton. Cover it with a plastic bag or damp towel and refrigerate overnight (8-12 hours). Cold proofing slows fermentation, develops flavor, and makes the dough easier to score.
Step 6: Preheat and Prep (Morning, Day 2)
Place your Dutch oven in the oven and preheat to 500°F (260°C) for at least 30 minutes. While the oven heats, remove the dough from the refrigerator. Place a piece of parchment paper on top of the banneton, then invert it to release the dough. The seam side should now be down. Brush the top of the loaf lightly with water—this helps the pepitas stick. Press the toasted pepitas into the surface of the dough, covering it evenly. Don’t press too hard or you’ll deflate the dough.
Step 7: Score and Bake
Using your lame or sharp knife, score the top of the loaf with a deep slash (about 1/2 inch deep). This allows the bread to expand during baking. Carefully transfer the dough to the preheated Dutch oven using the parchment paper as a sling. Cover with the lid and bake at 500°F for 20 minutes. Then reduce the temperature to 450°F (230°C), remove the lid, and bake for another 20-25 minutes, until the crust is deep golden brown and the internal temperature reaches 200°F (93°C).
Step 8: Cool Completely
Transfer the loaf to a wire rack and let it cool for at least 2 hours before slicing. I know it’s tempting to cut into it immediately, but cutting too early will result in a gummy interior. The bread continues to set as it cools.
Cooking Tips & Techniques
I’ve made every mistake in the book with sourdough, and I’m here to save you from the same frustrations. Here are the tips I wish someone had told me when I started.
Watch Your Hydration: Pumpkin puree adds significant moisture to the dough. If your dough feels too wet and sticky after mixing, resist the urge to add more flour. Instead, perform an extra set of stretch and folds to build structure. The dough will firm up as it ferments.
Temperature Matters: Sourdough is all about temperature. If your kitchen is cold (below 70°F), your bulk fermentation could take 8-10 hours instead of 4-5. I keep my dough in the oven with the light on during cold months to maintain a consistent temperature.
Don’t Overproof: One of my earliest failures was letting the dough proof too long. The loaf came out flat and dense. If your dough feels overly jiggly or has large bubbles on the surface, it might be overproofed. When in doubt, err on the side of slightly underproofed—it’s easier to fix than overproofed dough.
Toast Your Pepitas First: This step is non-negotiable. Raw pepitas are fine, but toasting them in a dry skillet over medium heat for 2-3 minutes until they start to pop transforms their flavor. They become nutty, crunchy, and far more aromatic. Let them cool completely before pressing them into the dough.
Steam is Your Friend: The Dutch oven creates steam that helps the bread rise and develops that crackling crust. If you don’t have a Dutch oven, place a metal pan of hot water on the bottom rack of your oven and spray the loaf with water before baking.
If you’re looking for more ways to enjoy pumpkin this season, our cozy pumpkin cream cheese swirl muffins with cinnamon streusel are another fall favorite that comes together quickly.
Variations & Adaptations
This recipe is wonderfully adaptable. Here are some variations I’ve tried and loved.
Spiced Pumpkin Sourdough: Add 1 teaspoon of pumpkin pie spice or cinnamon to the flour before mixing. The warmth of the spices complements the pumpkin beautifully. I’ve also added a pinch of cardamom for a more complex flavor profile.
Seeded Crust Variation: Instead of pepitas, try pressing a mix of sunflower seeds, sesame seeds, and flax seeds into the top of the loaf. This creates a multiseed crust that’s incredibly crunchy and nutritious.
Whole Wheat Version: Substitute 150g of the bread flour with whole wheat flour. The whole wheat adds a nutty flavor and denser texture that pairs well with the pumpkin. You may need to add an extra tablespoon of water since whole wheat absorbs more liquid.
Sweet Addition: For a slightly sweeter loaf, fold in 50g of dried cranberries or golden raisins during the final stretch and fold. The tartness of the cranberries balances the savory pepitas perfectly.
Gluten-Free Option: While I haven’t personally tested this, many readers have had success using a gluten-free bread flour blend. The pumpkin helps add moisture that gluten-free doughs often lack. Just be aware that the texture will be different—denser and more cake-like.
I once made a version with chopped fresh rosemary folded into the dough. The herbal notes paired surprisingly well with the pumpkin and pepitas. It was an accident, but a delicious one.
Serving & Storage Suggestions
This bread is incredibly versatile. Here’s how to enjoy it at its best.
Serving Temperature: Serve at room temperature or lightly toasted. Toasting brings out the nutty flavor of the pepitas and creates a satisfying crunch. A pat of salted butter is all you need, but I also love it with a drizzle of honey or a smear of cream cheese.
Pairing Ideas: This loaf is perfect for fall breakfasts alongside a bowl of soup or stew. It’s especially good with our creamy roasted butternut squash soup with toasted pepitas—the pepitas on both dishes tie everything together beautifully. For a savory option, use it for grilled cheese sandwiches with sharp cheddar and caramelized onions.
Storage: Store the bread at room temperature in a paper bag or bread box for up to 3 days. The crust will soften slightly, but the interior stays moist. Do not store it in plastic—that will make the crust soggy.
Freezing: This bread freezes beautifully. Slice the cooled loaf, wrap individual slices in plastic wrap, and place them in a freezer bag. They’ll keep for up to 3 months. Toast directly from frozen for a quick breakfast or snack.
Reheating: To revive a day-old loaf, wrap it in foil and warm it in a 350°F oven for 10 minutes. This restores the crust’s crispiness and warms the interior without drying it out.
The flavors actually develop more over time. Day-old pumpkin sourdough has a deeper, more complex taste than fresh-baked. Something about the pumpkin and fermentation continuing to meld together makes it even better the next day.
Nutritional Information & Benefits
This bread is made with simple, whole ingredients that offer real nutritional value. Here’s what you’re getting in each slice (based on 12 slices per loaf).
Per Slice (approximate): Calories: 180 | Carbohydrates: 35g | Protein: 6g | Fiber: 2g | Fat: 3g | Sugar: 2g
Health Benefits: Pumpkin is packed with vitamin A (beta-carotene), which supports eye health and immune function. It’s also rich in fiber and antioxidants. Sourdough fermentation breaks down phytic acid in grains, making nutrients more bioavailable and easier to digest. The pepitas add healthy fats, magnesium, and zinc.
Dietary Considerations: This recipe is naturally vegan and contains no added sugars or preservatives. It’s lower in sugar than most pumpkin breads, making it a healthier choice for breakfast or snacking. If you’re gluten-sensitive, use a certified gluten-free flour blend.
Allergen Note: This bread contains wheat (gluten). The pepitas are seed-based, but if you have seed allergies, substitute with sunflower seeds or simply omit them.
I love that this bread feels indulgent but is actually quite wholesome. It’s the kind of food that nourishes your body and soul at the same time—no guilt required.
Conclusion
This Perfect Pumpkin Sourdough Bread with Toasted Pepitas has become my signature fall loaf, and I think it’ll become yours too. It’s the kind of bread that makes your kitchen smell like autumn, that fills your home with warmth and the promise of good things to eat. The combination of tangy sourdough, subtle pumpkin sweetness, and crunchy salted pepitas is honestly addictive.
I want you to make this bread your own. Maybe you’ll add more spice, swap the pepitas for something else, or find a way to make it even better than I did. That’s the beauty of baking—it’s never the same twice. If you try this recipe, I’d love to hear about it. Drop a comment below and tell me how your loaf turned out, what variations you tried, or just share your sourdough journey. Your feedback helps me and other readers too.
So go ahead, feed that starter, grab that pumpkin, and get baking. Your kitchen is about to smell incredible. Happy baking, friends!
Frequently Asked Questions
Can I use canned pumpkin pie filling instead of puree?
No, please use pure pumpkin puree. Pumpkin pie filling contains added sugar, spices, and preservatives that will affect the fermentation and texture of the bread. Stick with 100% pure pumpkin puree for the best results.
Why is my dough so sticky?
Pumpkin puree adds extra moisture, so the dough will be stickier than standard sourdough. This is normal. Don’t add extra flour—instead, perform more stretch and folds to build gluten strength. Wet your hands before handling the dough to prevent sticking.
Can I skip the overnight proof?
Yes, but the flavor won’t be as developed. A cold proof of at least 4 hours is recommended for better structure and taste. If you’re short on time, you can proof at room temperature for 2-3 hours, but watch it carefully to avoid overproofing.
How do I know when the bread is fully baked?
The internal temperature should reach 200°F (93°C) when measured with an instant-read thermometer. The crust should be deep golden brown, and the loaf should sound hollow when tapped on the bottom.
Can I make this without a Dutch oven?
Absolutely. Place a metal pan of hot water on the bottom rack of your oven to create steam. Bake the loaf on a preheated baking stone or sheet pan. The crust won’t be as crackly, but it will still be delicious.
Pin This Recipe!
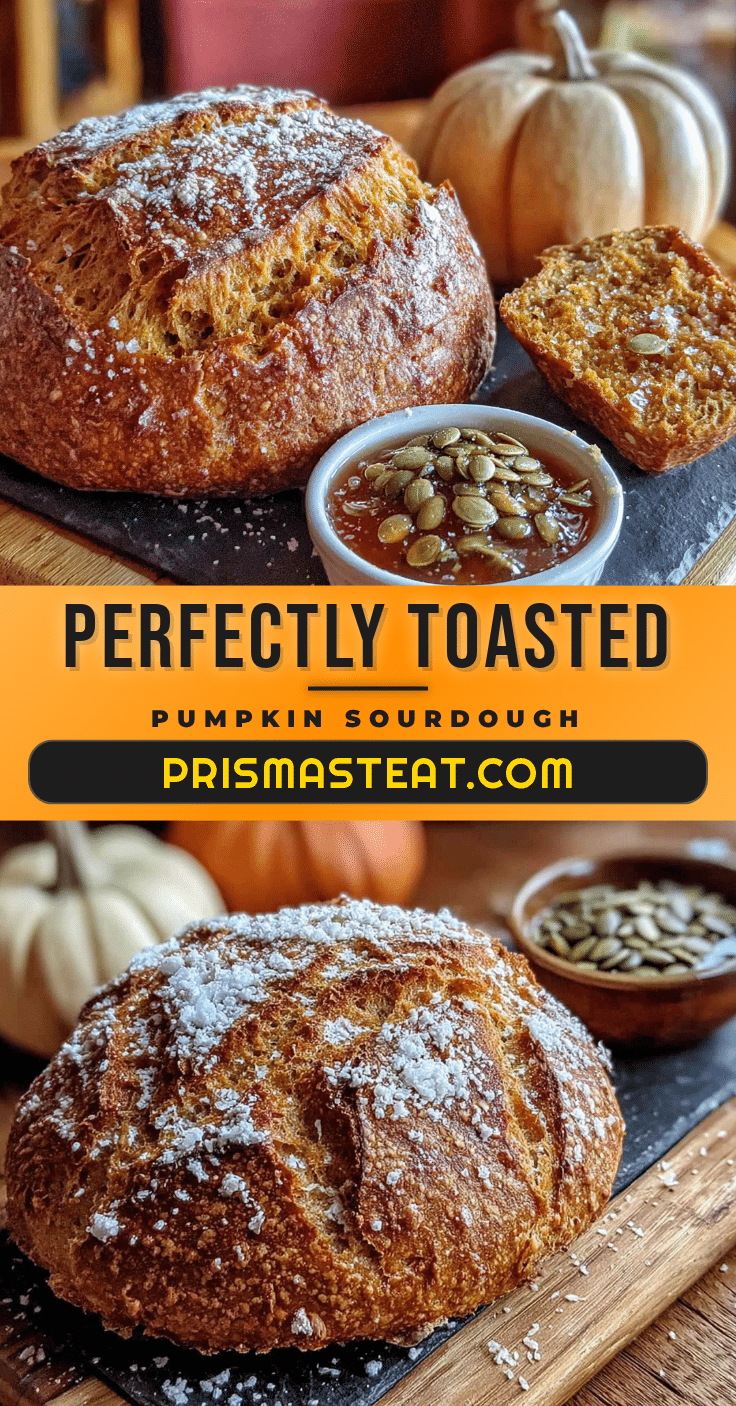
Perfect Pumpkin Sourdough Bread with Toasted Pepitas
A savory sourdough loaf infused with pumpkin puree and topped with crunchy toasted pepitas. This easy homemade recipe yields a tangy, slightly sweet bread with a crackling crust and tender crumb, perfect for fall baking.
- Prep Time: 30 minutes
- Cook Time: 45 minutes
- Total Time: 24 hours (including fermentation and proofing)
- Yield: 12 servings 1x
- Category: Bread
- Cuisine: American
Ingredients
- 500g bread flour
- 250g water, room temperature
- 200g pumpkin puree (not pumpkin pie filling), room temperature
- 100g active sourdough starter (fed within 4–6 hours)
- 10g fine sea salt
- 50g raw pepitas, toasted
Instructions
- Feed your sourdough starter 4-6 hours before mixing. Use a 1:1:1 ratio (50g starter, 50g flour, 50g water) and leave at room temperature until bubbly and doubled.
- In a large bowl, combine bread flour, water, and pumpkin puree. Mix until no dry flour remains. Let rest for 30 minutes (autolyse).
- Add active sourdough starter and salt. Wet your hands and fold the dough over itself until fully incorporated. The dough will be sticky.
- Cover the bowl with a damp towel and let rest at room temperature. Perform stretch and folds every 30 minutes for the first 2 hours. Then let rest for another 2-4 hours until puffy, bubbly, and increased by about 50%.
- Generously flour your work surface. Turn out the dough and shape into a round by folding edges toward the center. Flip seam-side down and create surface tension by dragging the dough in a circular motion.
- Lightly flour a banneton or lined bowl. Place the shaped loaf seam-side up into the banneton. Cover and refrigerate overnight (8-12 hours) for cold proofing.
- Place a Dutch oven in the oven and preheat to 500°F (260°C) for at least 30 minutes. Remove dough from refrigerator. Invert onto parchment paper. Brush top lightly with water and press toasted pepitas into the surface.
- Score the top with a deep slash (about 1/2 inch deep). Carefully transfer dough to the preheated Dutch oven using parchment paper. Cover and bake at 500°F for 20 minutes.
- Reduce oven temperature to 450°F (230°C), remove lid, and bake for another 20-25 minutes until deep golden brown and internal temperature reaches 200°F (93°C).
- Transfer to a wire rack and cool completely for at least 2 hours before slicing.
Notes
Pumpkin puree adds moisture, so dough will be stickier than standard sourdough. Do not add extra flour; use stretch and folds to build structure. Toast pepitas in a dry skillet for 2-3 minutes until they pop and smell fragrant. Let cool completely before pressing into dough. For best flavor, cold proof overnight. Store at room temperature in a paper bag for up to 3 days. Freeze sliced for up to 3 months.
Nutrition
- Serving Size: 1 slice
- Calories: 180
- Sugar: 2
- Sodium: 195
- Fat: 3
- Saturated Fat: 0.5
- Carbohydrates: 35
- Fiber: 2
- Protein: 6
Keywords: pumpkin sourdough bread, sourdough with pumpkin, toasted pepitas bread, fall sourdough recipe, homemade sourdough bread, pumpkin bread savory


