The crackle. That’s what I was after. Not the filling, not even the spicy-sweet scent filling up my kitchen—the specific, shattering sound of a gingersnap crust giving way under a fork. I made this whole batch of mini pumpkin pies just to hear it again. Everything else—the silky pumpkin custard, the faint warmth of clove, the way the cream cheese swirl melts into the crevices—that’s all secondary to that first, perfect break. And honestly? It worked.
I’d been testing pumpkin desserts for weeks, and I kept getting stuck on texture. A lot of mini pies end up with a soggy bottom, or worse, a crust that crumbles before you even get it to your mouth. That’s not a pie. That’s a sad pile of crumbs. So I went back to the drawing board and thought about what makes a crust hold its nerve. Gingersnaps. They’re dense, they’re sturdy, and they bring this deep, molasses-y bite that cuts right through the richness of the pumpkin. No bland pastry crust here.
These little pies are the kind of thing you make when you want all the satisfaction of a full-size pumpkin pie but without the commitment. Or the drama. They bake in a standard muffin tin, they’re ready in under an hour, and they don’t require any fancy pie weights or blind baking tricks. Just press the crust in, pour the filling, and let the oven do the heavy lifting. The gingersnap crust stays crunchy even after a day in the fridge, which is honestly a small miracle in the pie world. I’ve made these three times in the last two weeks, and each batch disappears faster than the last. That crackle never gets old.
Why You’ll Love This Recipe
I’ve tested this recipe six times to get the ratios right—three times with store-bought gingersnaps, twice with homemade, and once with a rogue batch of speculoos cookies that I found at the back of my pantry. (That one worked too, by the way.) Every version confirmed the same thing: the crust-to-filling ratio in a mini pie has to be perfect, or the whole thing falls apart. Too much crust and it overpowers the pumpkin. Too little and you’re eating warm pudding with a spoon. This version nails it.
- Quick & Easy : Ready in about 45 minutes, start to finish. No chilling the dough, no rolling, no mess.
- Simple Ingredients : Canned pumpkin, basic pantry spices, heavy cream, and a box of gingersnaps. That’s it.
- Perfect for Fall Gatherings : These disappear at Thanksgiving, Friendsgiving, or just a random Tuesday when you need a little seasonal comfort.
- Crowd-Pleaser : Kids love the small size, adults love the grown-up gingersnap kick, and everyone loves that they don’t have to share a full slice.
- Unbelievably Delicious : The contrast between the crunchy, spicy crust and the velvety pumpkin filling is next-level. It’s the kind of dessert that makes people close their eyes after the first bite.
What makes this different from every other mini pumpkin pie recipe out there? It’s the crust, plain and simple. Most recipes use a standard graham cracker crust, which is fine, but it’s sweet and kind of one-note. Gingersnaps bring heat, depth, and a texture that holds up to the moisture of the filling without turning into mush. Plus, the cream cheese swirl on top adds a tangy richness that ties everything together. This isn’t just another version—it’s the best version.
What Ingredients You Will Need
This recipe uses simple, wholesome ingredients that come together to create something genuinely special. Most of these are pantry staples, especially if you do a lot of fall baking. The gingersnap crust is the star here, so don’t try to substitute with plain graham crackers—you’ll lose that signature snap.
For the Gingersnap Crust
- Gingersnap cookies – 2 cups (about 200g), finely crushed. I prefer Nabisco or Anna’s brand for consistent texture. You can also use homemade if you have them on hand.
- Unsalted butter – 6 tablespoons (85g), melted. This binds the crumbs and adds richness. Use salted butter if that’s all you have, just skip the added salt in the crust.
- Granulated sugar – 2 tablespoons (25g). Just enough to balance the spice without making the crust overly sweet.
- Pinch of salt – Only if using unsalted butter or unsalted gingersnaps.
For the Pumpkin Filling
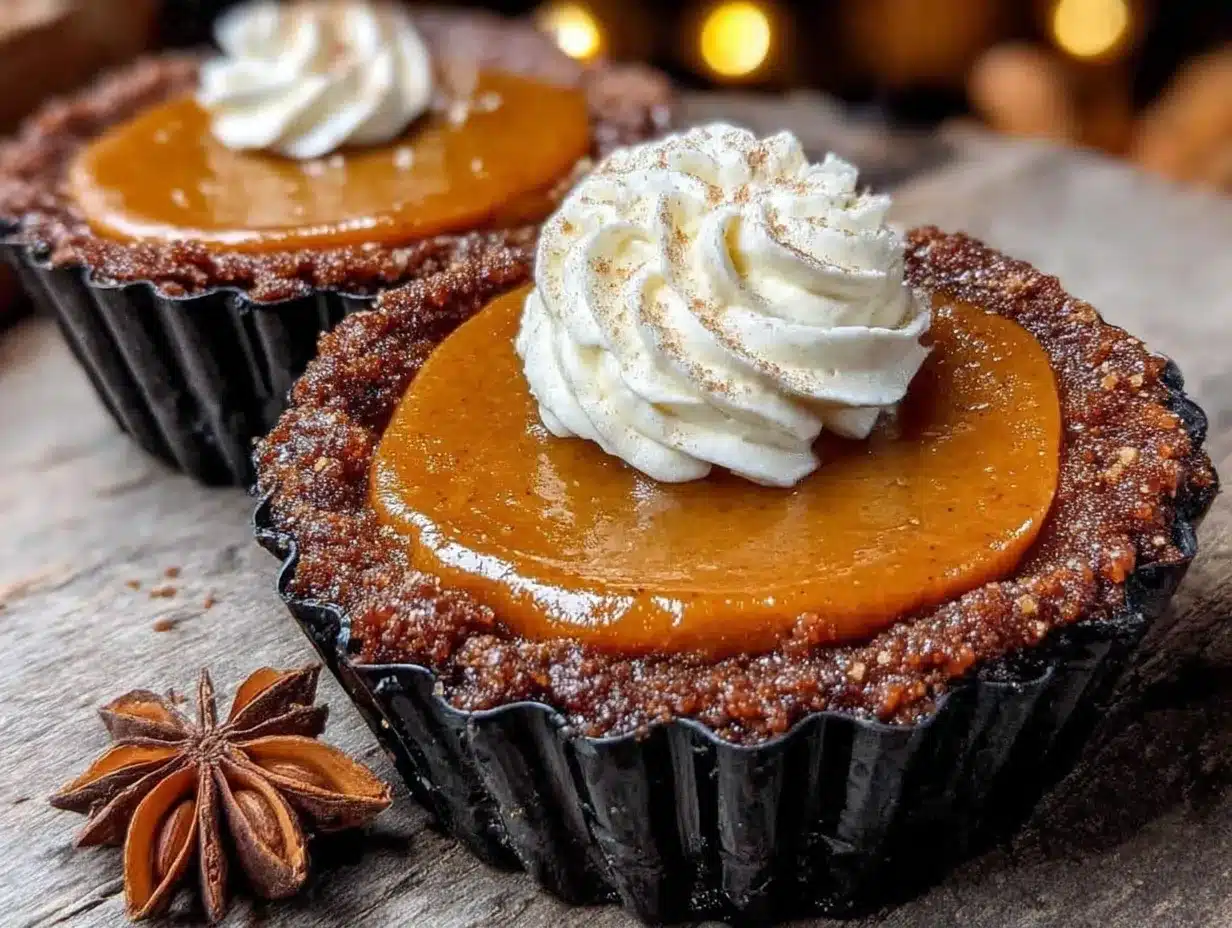
- Canned pumpkin puree – 1 cup (245g). Not pumpkin pie filling—make sure it’s 100% pure pumpkin. Libby’s is my go-to for consistent results.
- Heavy cream – ½ cup (120ml). Adds richness and a silky texture. You can substitute with half-and-half, but the filling won’t be as luxurious.
- Large egg – 1, at room temperature. Helps the filling set properly.
- Brown sugar – ⅓ cup (70g), packed. Light or dark works; dark brown sugar adds more molasses depth.
- Vanilla extract – 1 teaspoon. Pure vanilla is best, but imitation works in a pinch.
- Pumpkin pie spice – 1½ teaspoons. Store-bought is fine, or make your own with cinnamon, ginger, nutmeg, and allspice.
- Cinnamon – ½ teaspoon. Extra warmth because you can never have too much cinnamon.
- Salt – ¼ teaspoon. Balances the sweetness.
For the Cream Cheese Swirl (Optional but Highly Recommended)
- Cream cheese – 4 ounces (113g), softened. Full-fat is best for a smooth swirl.
- Powdered sugar – 2 tablespoons (15g). Adds sweetness without graininess.
- Vanilla extract – ½ teaspoon.
- Milk – 1 tablespoon (15ml), to thin the mixture if needed.
Equipment Needed
You don’t need a lot of fancy gear for these mini pies, which is part of the appeal. Here’s what you’ll want to have on hand:
- Standard 12-cup muffin tin – This is non-negotiable. Mini pie tins work too, but a muffin tin is what most people have, and it creates the perfect size.
- Food processor or rolling pin – For crushing the gingersnaps into fine crumbs. A food processor is faster and more consistent, but a zip-top bag and a rolling pin work just fine if you want to release some frustration.
- Medium mixing bowls – One for the crust, one for the filling.
- Whisk – For smoothing out the pumpkin filling without overmixing.
- Measuring cups and spoons – Accuracy matters here, especially with the spices and cream.
- Small offset spatula or the back of a spoon – For pressing the crust into the muffin cups evenly.
- Piping bag or zip-top bag – For the cream cheese swirl. A small spoon works too, but piping gives you more control.
If you don’t have a food processor, don’t sweat it. I crushed my first batch of gingersnaps with a meat tenderizer and a lot of determination. It worked, but it took forever. I’ve since upgraded, and honestly, the food processor saves about ten minutes of elbow grease. Worth it if you make these often—which you will.
Preparation Method
These mini pumpkin pies come together fast, so I recommend reading through the whole method once before you start. The crust needs to be pressed in while the butter is still warm, and the filling comes together in just a few minutes. Here’s how to do it right.
Step 1: Preheat and Prep
Preheat your oven to 350°F (175°C). Lightly grease a 12-cup muffin tin with butter or non-stick spray. This makes it much easier to pop the pies out later without the crust sticking. Set the tin aside while you make the crust.
Step 2: Make the Gingersnap Crust
Place 2 cups of gingersnap cookies in a food processor and pulse until they turn into fine crumbs. You should have about 1¾ cups of crumbs. Transfer the crumbs to a medium bowl, then add 2 tablespoons of granulated sugar and a pinch of salt. Pour in 6 tablespoons of melted butter and stir with a fork until every crumb is coated. The mixture should look like wet sand and hold together when you squeeze it in your fist.
Divide the crust mixture evenly among the 12 muffin cups—about 2 tablespoons per cup. Use a small offset spatula or the back of a spoon to press the crumbs firmly into the bottom and up the sides of each cup. Don’t leave the crust too thick on the bottom; you want a thin, even layer that bakes up crunchy. Take your time here—pressing firmly is the key to a crust that doesn’t fall apart.
Step 3: Pre-Bake the Crust
Bake the crusts for 8 minutes at 350°F (175°C). This sets them and helps prevent sogginess when you add the filling. You’ll notice the crusts look slightly darker and smell incredibly spicy. Remove the tin from the oven and let it cool for 5 minutes while you make the filling. Leave the oven on.
Step 4: Make the Pumpkin Filling
In a medium bowl, whisk together 1 cup of pumpkin puree, ½ cup of heavy cream, 1 large egg, ⅓ cup of packed brown sugar, 1 teaspoon of vanilla extract, 1½ teaspoons of pumpkin pie spice, ½ teaspoon of cinnamon, and ¼ teaspoon of salt. Whisk until the mixture is completely smooth and uniform. Don’t over-whisk—you don’t want to incorporate too much air, which can cause cracking. Just blend until everything is combined.
Step 5: Make the Cream Cheese Swirl
In a small bowl, beat 4 ounces of softened cream cheese with 2 tablespoons of powdered sugar and ½ teaspoon of vanilla extract until smooth. If the mixture is too thick to pipe, add 1 tablespoon of milk and stir. Transfer the cream cheese mixture to a small piping bag or a zip-top bag with the corner snipped off.
Step 6: Assemble the Pies
Spoon the pumpkin filling into the pre-baked crusts, filling each cup almost to the top—leave about ⅛ inch of space. The filling will puff up slightly as it bakes, so don’t overfill. Pipe a small swirl of cream cheese mixture onto the center of each pie. Use a toothpick to gently swirl the cream cheese into the pumpkin filling, creating a marbled effect. Don’t over-swirl, or the two will blend completely.
Step 7: Bake
Bake the mini pies at 350°F (175°C) for 18 to 22 minutes. You’ll know they’re done when the edges are set and the centers jiggle just slightly when you gently shake the pan. The filling will continue to set as it cools. Remove the tin from the oven and let the pies cool in the pan for 10 minutes. Then, carefully transfer them to a wire rack to cool completely.
Step 8: Chill and Serve
For the best texture, refrigerate the cooled pies for at least 2 hours before serving. This allows the filling to fully set and the crust to firm up. Serve cold or at room temperature, with a dollop of whipped cream if you’re feeling fancy.
Cooking Tips & Techniques
I’ve made these mini pumpkin pies enough times to have a few hard-won insights. Here’s what I’ve learned the hard way so you don’t have to.
Don’t skip the pre-bake. I know it’s tempting to just pour the filling in and bake everything together, but the pre-bake is what gives you that crunchy crust. Without it, the gingersnap crumbs absorb moisture from the pumpkin filling and turn soft. If you want that crackle, pre-bake for the full 8 minutes.
Press the crust firmly. This is the most common mistake I see. If you press the crust too lightly, it will crumble when you try to remove the pies from the tin. Use the back of a spoon or a small glass to really compact the crumbs. You want them to feel dense and solid before they go into the oven.
Room temperature ingredients matter. The egg and cream cheese should both be at room temperature before you start. Cold ingredients don’t blend as smoothly, which can leave lumps in the filling or the swirl. If you forget to take them out ahead of time, place the egg in a bowl of warm water for 5 minutes and microwave the cream cheese for 10 seconds on low power.
Watch the bake time. Ovens vary, so start checking at 18 minutes. The pies are done when the edges are set and the centers have a slight jiggle. Over-baking will cause the filling to crack. If you see cracks forming, pull them out immediately—they’ll still taste great, but they won’t look as pretty.
Let them cool completely. I made the mistake of trying to remove a warm pie from the tin once. It fell apart in my hands. The crust needs time to firm up as it cools, so be patient. Ten minutes in the pan, then at least two hours in the fridge. Trust the process.
Variations & Adaptations
One of the best things about this recipe is how easy it is to adapt. Here are a few variations I’ve tried and loved.
Dairy-Free Version
Substitute the heavy cream with full-fat coconut cream (the thick part from a can of coconut milk). Use a dairy-free cream cheese alternative for the swirl, and replace the butter in the crust with melted coconut oil. The texture will be slightly different—a bit less rich—but the flavor is still fantastic.
Gluten-Free Version
Most store-bought gingersnaps contain wheat flour, but there are gluten-free options available. Look for gluten-free gingersnaps or use gluten-free graham crackers with extra ginger and molasses added. The rest of the ingredients are naturally gluten-free, so this is an easy swap.
Spiced-Up Variation
If you like things hot, add ¼ teaspoon of cayenne pepper or a pinch of black pepper to the pumpkin filling. The heat plays beautifully with the sweet spices and the gingersnap crust. I tried this for a Friendsgiving potluck and it was the first thing to disappear.
Mini Pie Bar
Skip the cream cheese swirl and top each pie with a small dollop of salted caramel sauce after baking. The combination of salty caramel, spicy crust, and creamy pumpkin is absolutely addictive. Drizzle with extra caramel and a sprinkle of flaky sea salt before serving.
Serving & Storage Suggestions
These mini pumpkin pies are best served cold, straight from the fridge. The filling firms up beautifully, and the crust stays crunchy for at least two days. If you prefer them at room temperature, let them sit out for 15 minutes before serving—just know the crust will soften slightly.
For a picture-perfect presentation, top each pie with a swirl of lightly sweetened whipped cream and a dusting of cinnamon or nutmeg. A few candied pecans or a drizzle of maple syrup also make excellent garnishes. These little pies are perfect for dessert tables, Thanksgiving spreads, or as a sweet treat alongside a warm cup of coffee. If you’re planning a fall brunch, they pair wonderfully with a batch of cozy pumpkin bagels with maple cream cheese.
Storage: Store the pies in an airtight container in the refrigerator for up to 5 days. The crust will stay crunchy for the first 2 days, then gradually soften. They’re still delicious after that, just less crackly.
Freezing: These freeze beautifully. Place the cooled, fully set pies on a baking sheet and freeze until solid, then transfer to a freezer-safe container with parchment paper between layers. They’ll keep for up to 3 months. Thaw in the refrigerator overnight before serving. Do not microwave to thaw—it will ruin the crust.
Reheating: I don’t recommend reheating these pies. They’re designed to be served cold or at room temperature. If you absolutely must warm them, pop them in a 300°F (150°C) oven for 5 minutes, but expect the crust to soften.
Nutritional Information & Benefits
Each mini pumpkin pie (with cream cheese swirl) contains approximately:
- Calories: 210
- Fat: 12g
- Carbohydrates: 24g
- Protein: 3g
- Sugar: 14g
- Fiber: 1g
These numbers are estimates and will vary based on the specific brands you use and any substitutions you make.
Pumpkin is a nutritional powerhouse—it’s packed with vitamin A, fiber, and antioxidants, which support eye health and immune function. The gingersnaps add a small amount of iron from molasses, and the cream cheese provides calcium and protein. While these are still a dessert, they’re a more nutrient-dense option than many other fall treats. If you’re looking for a lighter version, you can skip the cream cheese swirl and reduce the sugar in the filling by a tablespoon—though I think the swirl is worth every calorie.
For those with dietary restrictions, this recipe can be adapted to be gluten-free and dairy-free as noted above. It contains eggs, dairy, and gluten in its standard form, so be mindful of allergens when serving guests.
Conclusion
These mini pumpkin pies with gingersnap crust are the kind of recipe that makes you look forward to fall all year. They’re small enough to justify eating two (or three) without guilt, but satisfying enough to stand proudly next to a full-size pie on the Thanksgiving table. The gingersnap crust is the secret weapon here—it’s crunchy, spicy, and completely unforgettable. I’ve made these for family dinners, holiday parties, and quiet nights when I just needed a little something sweet, and they’ve never let me down.
I’d love to hear how yours turn out. Did you try a variation? Add extra spice? Skip the cream cheese swirl? Drop a comment below and let me know—I read every single one. And if you share a photo on social media, tag me so I can see your beautiful creations. These pies are meant to be shared, after all.
Happy baking, and here’s to many more crackly, spicy, perfectly mini pumpkin pies in your future.
Frequently Asked Questions
Can I use fresh pumpkin instead of canned?
Yes, but you’ll need to roast and puree the pumpkin first, then drain off any excess liquid. Fresh pumpkin has more water content than canned, so the filling may be slightly looser. If you go this route, add an extra tablespoon of heavy cream to compensate.
How do I keep the crust from sticking to the muffin tin?
Grease the muffin tin generously with butter or non-stick spray before pressing in the crust. Let the pies cool in the pan for exactly 10 minutes, then run a small knife around the edge of each cup before lifting them out. If they still stick, pop the pan in the freezer for 5 minutes—the cold helps release the crust.
Can I make these ahead of time?
Absolutely. These mini pies actually taste better the next day, after the flavors have had time to meld. You can make them up to 3 days in advance and store them in the refrigerator. They’re perfect for holiday prep because they free up oven space on the big day.
What if I don’t have pumpkin pie spice?
No problem. Make your own by combining 1 teaspoon of cinnamon, ½ teaspoon of ginger, ¼ teaspoon of nutmeg, and ¼ teaspoon of allspice. That’s exactly what’s in most store-bought blends, and it works perfectly here.
Can I double this recipe?
Yes, this recipe doubles easily. Just use two muffin tins and bake them on separate racks. Rotate the pans halfway through baking to ensure even cooking. If you don’t have two tins, bake them in batches—the filling can sit at room temperature while the first batch bakes.
Pin This Recipe!
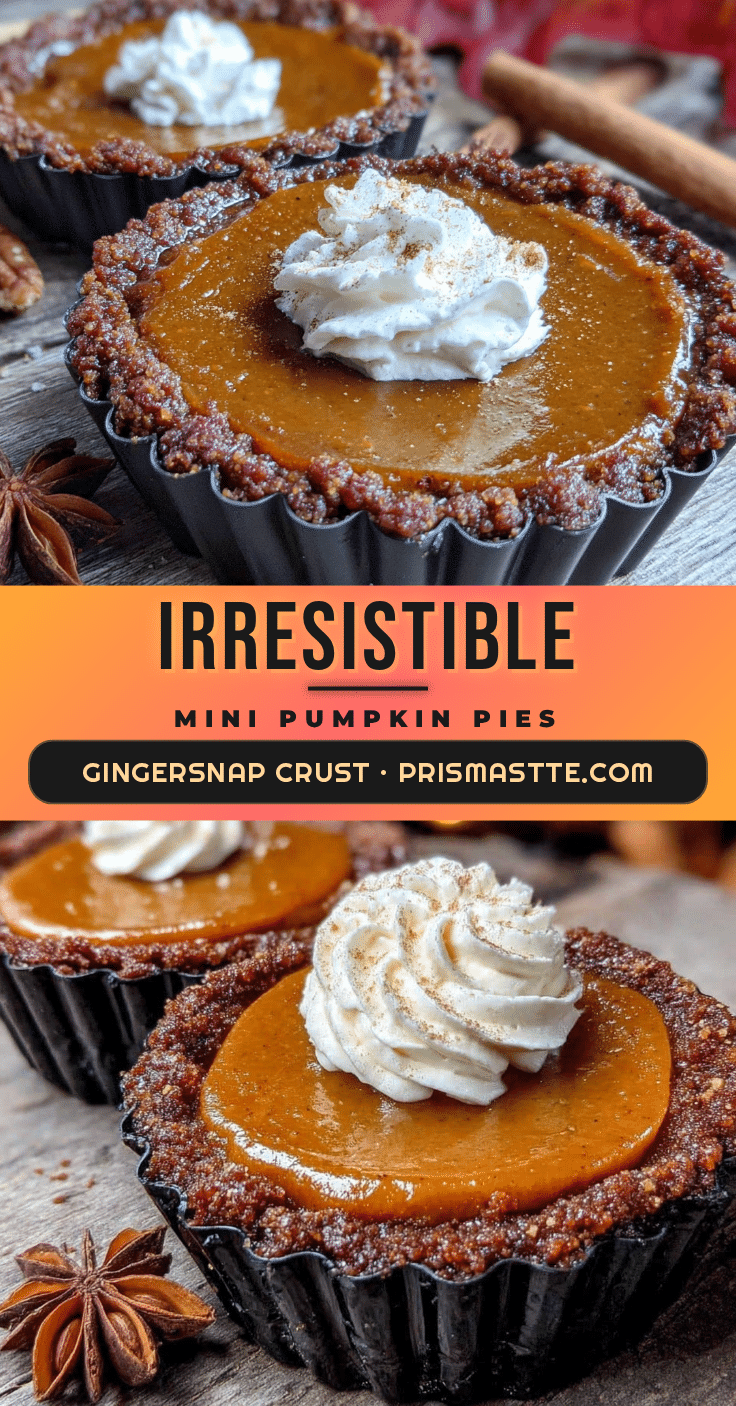
Perfect Mini Pumpkin Pies with Easy Gingersnap Crust
These mini pumpkin pies feature a crunchy, spicy gingersnap crust and a silky pumpkin custard with a cream cheese swirl. They’re quick to make, perfect for fall gatherings, and deliver that satisfying crackle with every bite.
- Prep Time: 15 minutes
- Cook Time: 30 minutes
- Total Time: 45 minutes
- Yield: 12 mini pies 1x
- Category: Dessert
- Cuisine: American
Ingredients
- 2 cups (about 200g) gingersnap cookies, finely crushed
- 6 tablespoons (85g) unsalted butter, melted
- 2 tablespoons (25g) granulated sugar
- Pinch of salt (if using unsalted butter or unsalted gingersnaps)
- 1 cup (245g) canned pumpkin puree (not pumpkin pie filling)
- ½ cup (120ml) heavy cream
- 1 large egg, at room temperature
- ⅓ cup (70g) packed brown sugar (light or dark)
- 1 teaspoon vanilla extract
- 1½ teaspoons pumpkin pie spice
- ½ teaspoon cinnamon
- ¼ teaspoon salt
- 4 ounces (113g) cream cheese, softened
- 2 tablespoons (15g) powdered sugar
- ½ teaspoon vanilla extract
- 1 tablespoon (15ml) milk (to thin if needed)
Instructions
- Preheat oven to 350°F (175°C). Lightly grease a 12-cup muffin tin with butter or non-stick spray.
- Make the crust: Pulse 2 cups gingersnap cookies in a food processor until fine crumbs form. Transfer to a bowl, add 2 tablespoons sugar and a pinch of salt. Pour in 6 tablespoons melted butter and stir until coated. Press about 2 tablespoons of mixture into each muffin cup firmly.
- Pre-bake crusts for 8 minutes. Remove and let cool 5 minutes. Keep oven on.
- Make filling: Whisk together 1 cup pumpkin puree, ½ cup heavy cream, 1 egg, ⅓ cup brown sugar, 1 teaspoon vanilla, 1½ teaspoons pumpkin pie spice, ½ teaspoon cinnamon, and ¼ teaspoon salt until smooth.
- Make cream cheese swirl: Beat 4 ounces softened cream cheese with 2 tablespoons powdered sugar and ½ teaspoon vanilla until smooth. Add 1 tablespoon milk if too thick. Transfer to a piping bag or zip-top bag.
- Assemble: Spoon filling into pre-baked crusts, filling almost to top. Pipe a small swirl of cream cheese mixture onto each. Use a toothpick to gently swirl.
- Bake for 18-22 minutes until edges are set and centers jiggle slightly. Cool in pan 10 minutes, then transfer to wire rack to cool completely.
- Refrigerate for at least 2 hours before serving. Serve cold or at room temperature.
Notes
Don’t skip pre-baking the crust for crunchiness. Press crust firmly to prevent crumbling. Use room temperature ingredients for smooth filling. Check doneness at 18 minutes to avoid over-baking. Let pies cool completely before removing from tin. For best texture, refrigerate at least 2 hours before serving.
Nutrition
- Serving Size: 1 mini pie
- Calories: 210
- Sugar: 14
- Sodium: 180
- Fat: 12
- Saturated Fat: 7
- Carbohydrates: 24
- Fiber: 1
- Protein: 3
Keywords: mini pumpkin pies, gingersnap crust, pumpkin dessert, fall dessert, Thanksgiving, mini pies, cream cheese swirl


