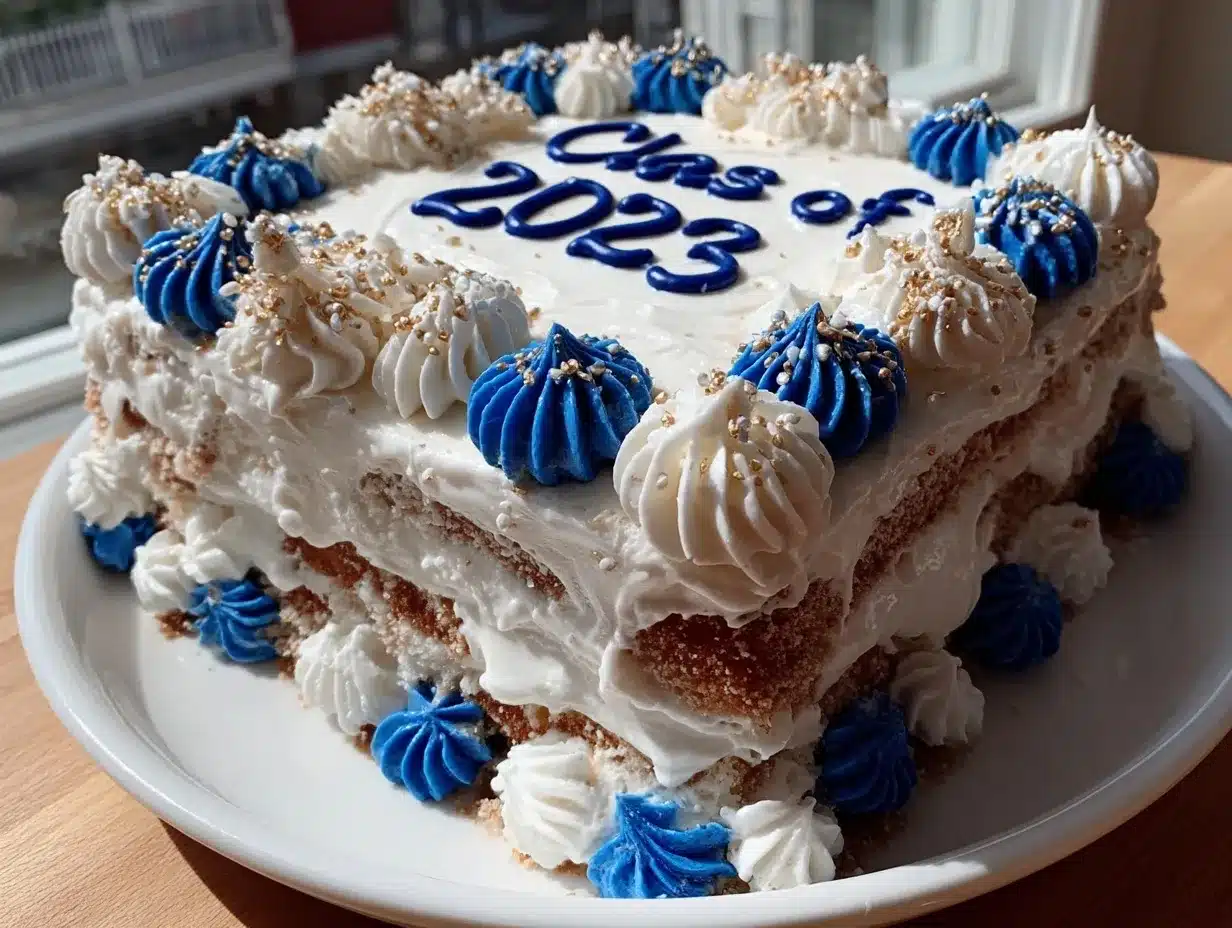
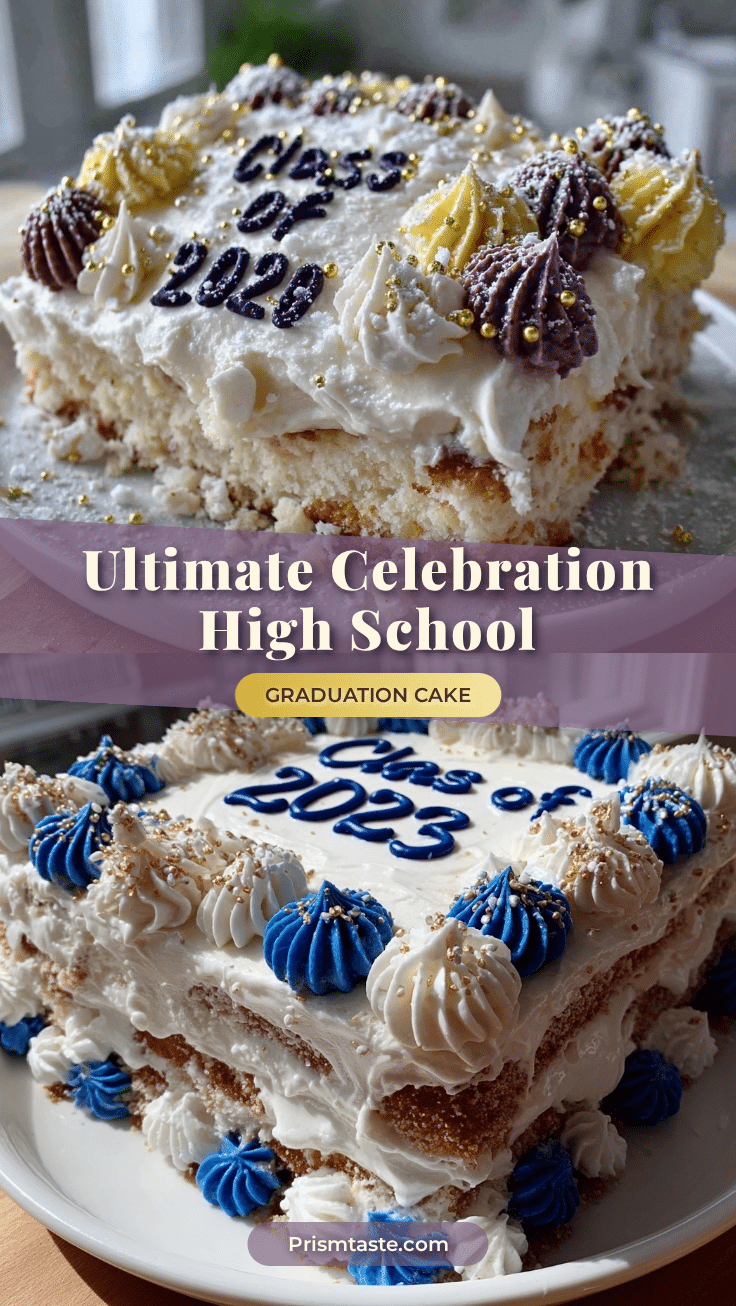
“I can’t believe it’s already time for graduation,” my friend texted me the morning of the big day. Honestly, I was scrambling to put together something special that felt both festive and homemade. The idea of making a perfect high school graduation sheet cake with the Class of 2026 design popped into my head because, well, it needed to be simple, impressive, and just the right kind of celebratory.
The kitchen was buzzing with the smell of fresh vanilla and cocoa, and as I spread the frosting, I remembered how this cake first came to be a tradition. It wasn’t always perfect—there were some frosting disasters and last-minute tweaks—but now it’s my go-to for graduations. The “Class of 2026” design, with its clean lines and bold colors, makes the cake feel personal and somehow captures that mix of excitement and bittersweet goodbyes that graduation carries.
Making this cake felt like more than just baking—it was about marking a moment, a milestone, with something homemade. It stuck with me not because it’s fancy, but because it’s approachable, delicious, and nails the vibe of a high school graduation gathering. I hope you’ll find it just as comforting and fun to make as I did.
Why You’ll Love This Recipe
- Quick & Easy: Comes together in under 1 hour, perfect for last-minute celebrations or busy party prep.
- Simple Ingredients: Uses pantry staples you probably already have, no obscure items needed.
- Perfect for Graduation Parties: The Class of 2026 design is festive yet clean, ideal for high school send-offs.
- Crowd-Pleaser: Moist, fluffy cake with rich buttercream frosting always gets rave reviews from both teens and adults.
- Unbelievably Delicious: The balance between vanilla and chocolate layers creates a comforting, nostalgic flavor everyone loves.
- Unique Design Approach: The Class of 2026 icing design uses a simple stencil technique that anyone can master, making your cake stand out without stress.
This isn’t your typical sheet cake. The technique for the Class of 2026 design adds a personal touch that feels special but doesn’t require professional skills. After a few tries (okay, maybe a dozen cupcakes on the side), I nailed a look that’s both bold and clean—just like a graduation should feel. It’s the kind of cake that makes you pause, smile, and maybe even get a little nostalgic for those high school days.
What Ingredients You Will Need
This perfect high school graduation sheet cake recipe uses simple, wholesome ingredients that deliver a moist, tender crumb with rich flavor. Most are pantry staples, with a few frosting essentials to bring the design to life.
- For the Cake Batter:
- All-purpose flour, 3 cups (360 g)
- Baking powder, 2 ½ teaspoons
- Baking soda, 1 teaspoon
- Salt, ½ teaspoon
- Unsalted butter, 1 cup (226 g), softened (I prefer Land O Lakes for its creaminess)
- Granulated sugar, 2 cups (400 g)
- Large eggs, 4, room temperature
- Whole milk, 1 cup (240 ml), room temperature
- Pure vanilla extract, 2 teaspoons (quality matters—McCormick is reliable)
- Buttermilk, 1 cup (240 ml), room temperature (adds tang and tenderness)
- For the Buttercream Frosting:
- Unsalted butter, 1 cup (226 g), softened
- Powdered sugar, 4 cups (480 g), sifted
- Vanilla extract, 2 teaspoons
- Whole milk or heavy cream, 2-4 tablespoons (adjust for desired consistency)
- Gel food coloring: black, gold, and white (gel colors give vibrant shades without thinning the frosting)
- For the Decoration:
- Edible gold glitter or dust (optional, for a subtle sparkle)
- Class of 2026 stencil (can be homemade with cardstock or purchased online)
If you want a gluten-free option, swap the all-purpose flour for a 1:1 gluten-free baking flour blend. For a dairy-free version, use coconut oil or a plant-based butter substitute, and almond or oat milk instead of regular milk.
Equipment Needed
- Sheet cake pan, 9×13 inches (23×33 cm) – a standard size that bakes evenly
- Electric hand mixer or stand mixer – makes creaming butter and sugar easier
- Mixing bowls – at least two, for batter and frosting
- Measuring cups and spoons – for accuracy in baking
- Offset spatula or butter knife – essential for smooth frosting application
- Rubber spatula – great for scraping down the sides of bowls
- Sifter or fine mesh sieve – to sift powdered sugar for silky frosting
- Stencil for Class of 2026 design – you can cut one yourself or find printable versions online
- Food-safe paintbrush or small spatula – for applying edible glitter
I’ve tried frosting this cake with both an offset spatula and a simple butter knife. The offset spatula really helps with smooth, even layers, but if you’re in a pinch, a butter knife works just fine. Also, if you don’t have a sifter, whisking powdered sugar can help remove lumps.
Preparation Method
- Preheat and Prep: Preheat your oven to 350°F (175°C). Grease your 9×13 inch sheet pan with butter or non-stick spray, then lightly dust it with flour, tapping out the excess.
- Mix Dry Ingredients: In a medium bowl, sift together 3 cups (360 g) all-purpose flour, 2 ½ teaspoons baking powder, 1 teaspoon baking soda, and ½ teaspoon salt. Set aside.
- Cream Butter and Sugar: In a large bowl, beat 1 cup (226 g) softened unsalted butter and 2 cups (400 g) granulated sugar with an electric mixer on medium speed until light and fluffy—about 4-5 minutes. This step is key for a tender crumb.
- Add Eggs and Vanilla: Beat in 4 room temperature eggs, one at a time, mixing well after each. Stir in 2 teaspoons vanilla extract.
- Alternate Adding Dry Ingredients and Milk: Reduce mixer speed to low. Add the dry ingredients in three parts, alternating with 1 cup (240 ml) whole milk and 1 cup (240 ml) buttermilk, beginning and ending with the dry ingredients. Mix just until combined—overmixing can make the cake tough.
- Pour and Bake: Pour batter evenly into the prepared sheet pan. Smooth the top with a spatula. Bake for 35-40 minutes or until a toothpick inserted into the center comes out clean.
- Cool Completely: Let the cake cool in the pan on a wire rack for about 20 minutes. Then, run a knife around the edges and invert onto a cooling rack to cool fully before frosting.
- Prepare Buttercream Frosting: Beat 1 cup (226 g) softened unsalted butter on medium speed until creamy. Gradually add 4 cups (480 g) sifted powdered sugar, mixing on low. Add 2 teaspoons vanilla extract and 2-4 tablespoons milk or cream, beating on medium-high until light and fluffy.
- Divide and Color Frosting: Set aside about ⅓ of the frosting and tint it black with gel food coloring for the lettering. Tint another portion gold, and leave the rest white for the base layer.
- Frost the Cake: Spread the white frosting evenly over the cooled cake with an offset spatula. Chill the cake in the fridge for 20 minutes to firm up the base layer.
- Apply Stencil Design: Place the Class of 2026 stencil gently on top of the cake. Use a small spatula or piping bag to carefully spread the black frosting over the stencil. Remove the stencil carefully for crisp edges.
- Add Gold Accents: Use the gold frosting to highlight details or borders around the lettering. Optionally, brush on a bit of edible gold glitter for a subtle sparkle.
- Final Chill: Refrigerate the cake for another 30 minutes to set the frosting before serving.
Pro tip: If you notice crumbs mixing into your frosting while spreading, chill the cake longer or do a crumb coat—a thin layer of frosting to lock in crumbs before the final layer.
Cooking Tips & Techniques
One big lesson I learned early on is not to rush the creaming process. That butter and sugar stage makes a huge difference in cake texture—so take your time. Also, room temperature eggs and milk help batter come together smoothly without lumps.
When frosting, chilling the cake between layers is a game-changer. It keeps crumbs from mixing in and helps get a smooth finish, especially important for the stencil design. For applying the stencil, use a flexible plastic or acetate sheet you can easily lift off without smudging.
Another heads-up: gel food colors are your best friend here. Liquid dyes can thin the frosting and make it harder to work with. And trust me, the gold gel color really pops—makes the cake feel fancy without extra work.
Last but not least, don’t stress if your first stencil isn’t perfect. Practice on parchment paper or cupcakes first. It helped me nail the lettering without that “homemade mess” look.
Variations & Adaptations
- Flavor Twists: Swap vanilla extract for almond or coconut extract to add a subtle twist. Or, turn the vanilla layer into a chocolate one by replacing ½ cup flour with cocoa powder.
- Dietary Options: Use gluten-free flour blends and dairy-free butter alternatives for allergy-friendly versions.
- Design Changes: Customize the stencil to feature different class years or add a school mascot silhouette. Seasonal colors can replace black and gold for a more personalized palette.
- Baking Method: If you prefer cupcakes for easier serving, bake this batter in cupcake tins for about 18-22 minutes. Frost and decorate with smaller stencils or piping for a coordinated look.
- Personal Variation: I once added a thin layer of raspberry jam between cake layers for a surprise fruity note—unexpected but a big hit.
Serving & Storage Suggestions
Serve this sheet cake at room temperature for the best flavor and texture. The buttercream will taste richest when not chilled straight from the fridge. Pair it with a simple cup of coffee or sparkling lemonade to cut through the sweetness.
Leftovers store well in an airtight container in the fridge for up to 4 days. To reheat, bring slices to room temperature or warm gently in the microwave for 15-20 seconds. The frosting softens beautifully.
If you need to prepare ahead, this cake freezes well without the stencil decoration. Freeze the plain frosted cake tightly wrapped for up to 3 months, then thaw overnight and add the stencil design fresh on the day of the party.
Flavors tend to deepen after a day, so if you have time, make the cake a day before and frost it the next day for a fuller taste experience.
Nutritional Information & Benefits
This classic sheet cake with buttercream frosting is an indulgence, providing energy and comfort more than a strict health boost. Each slice (about 1/12 of the cake) has approximately 400-450 calories, with carbohydrates mainly from sugar and flour, and fats from butter and cream.
Key ingredients like butter and eggs provide fat-soluble vitamins, and using real vanilla and buttermilk adds flavor without artificial additives. Gluten-free and dairy-free adaptations make this recipe accessible for many dietary needs.
Enjoying this cake in moderation as part of a celebration feels balanced and satisfying—sometimes, sharing a slice with friends is the best wellness routine.
Conclusion
This perfect high school graduation sheet cake with the Class of 2026 design is more than just a dessert—it’s a way to mark an unforgettable milestone with something homemade and heartfelt. Its simple ingredients, easy steps, and striking design make it approachable for home bakers of any skill level.
Feel free to tweak the flavors or colors to match your grad’s personality or school spirit. I keep coming back to this recipe because it combines nostalgia, celebration, and a little bit of sparkle all in one pan.
If you try this recipe, I’d love to hear how your cake turned out or what personal touches you added. Share your photos and stories below, and let’s keep celebrating those big moments with good food and great company!
Frequently Asked Questions
Can I make this cake ahead of time?
Yes! You can bake the cake a day or two in advance and keep it wrapped tightly in plastic wrap at room temperature. Frost and decorate on the day you plan to serve for the freshest look.
What if I don’t have gel food coloring?
Gel food coloring is best for vibrant colors without thinning the frosting. If you only have liquid colors, use sparingly and add powdered sugar to thicken the frosting if needed.
How do I make a homemade stencil for the Class of 2026 design?
Print a Class of 2026 design on cardstock, then carefully cut out the letters with a craft knife. Use the stencil by placing it gently on the frosted cake and applying colored frosting over it.
Can I use a different size pan?
A 9×13 inch pan is ideal, but if you use a different size, adjust the baking time accordingly and watch for doneness with a toothpick.
Is it possible to make this cake dairy-free?
Absolutely! Use dairy-free butter substitutes and plant-based milk alternatives like almond or oat milk. The texture will be slightly different but still delicious.
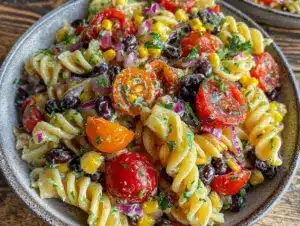
For a cozy, crowd-pleasing dessert that’s perfect for celebrations, this cake pairs wonderfully with hearty dishes like an easy budget-friendly loaded pasta bake recipe or a comforting tender instant pot beef stew. Both offer a great balance to the sweet finish of this graduation sheet cake.
Pin This Recipe!
Perfect High School Graduation Sheet Cake Recipe Easy Class of 2026 Design Tutorial

A moist and fluffy sheet cake with rich buttercream frosting featuring a festive Class of 2026 stencil design, perfect for high school graduation celebrations.
- Prep Time: 20 minutes
- Cook Time: 35-40 minutes
- Total Time: 1 hour 10 minutes
- Yield: 12 servings 1x
- Category: Dessert
- Cuisine: American
Ingredients
- All-purpose flour, 3 cups (360 g)
- Baking powder, 2 ½ teaspoons
- Baking soda, 1 teaspoon
- Salt, ½ teaspoon
- Unsalted butter, 1 cup (226 g), softened
- Granulated sugar, 2 cups (400 g)
- Large eggs, 4, room temperature
- Whole milk, 1 cup (240 ml), room temperature
- Pure vanilla extract, 2 teaspoons
- Buttermilk, 1 cup (240 ml), room temperature
- Unsalted butter, 1 cup (226 g), softened (for frosting)
- Powdered sugar, 4 cups (480 g), sifted
- Vanilla extract, 2 teaspoons (for frosting)
- Whole milk or heavy cream, 2-4 tablespoons (for frosting)
- Gel food coloring: black, gold, and white
- Edible gold glitter or dust (optional)
- Class of 2026 stencil
Instructions
- Preheat oven to 350°F (175°C). Grease a 9×13 inch sheet pan with butter or non-stick spray and dust lightly with flour.
- In a medium bowl, sift together flour, baking powder, baking soda, and salt. Set aside.
- In a large bowl, beat softened butter and granulated sugar with an electric mixer on medium speed until light and fluffy, about 4-5 minutes.
- Beat in eggs one at a time, mixing well after each. Stir in vanilla extract.
- Reduce mixer speed to low. Add dry ingredients in three parts, alternating with whole milk and buttermilk, beginning and ending with dry ingredients. Mix just until combined.
- Pour batter evenly into prepared pan and smooth the top.
- Bake for 35-40 minutes or until a toothpick inserted in the center comes out clean.
- Cool cake in pan on wire rack for 20 minutes, then invert onto rack to cool completely.
- For frosting, beat softened butter until creamy. Gradually add sifted powdered sugar on low speed.
- Add vanilla extract and 2-4 tablespoons milk or cream, beat on medium-high until light and fluffy.
- Divide frosting into three portions: tint one black, one gold, and leave one white.
- Spread white frosting evenly over cooled cake with an offset spatula. Chill cake in fridge for 20 minutes.
- Place Class of 2026 stencil on cake. Carefully spread black frosting over stencil using a small spatula or piping bag. Remove stencil gently.
- Use gold frosting to highlight details or borders. Optionally brush edible gold glitter for sparkle.
- Refrigerate cake for 30 minutes to set frosting before serving.
Notes
Do not rush the creaming of butter and sugar for best texture. Use room temperature eggs and milk for smooth batter. Chill cake between frosting layers to prevent crumbs. Gel food coloring is preferred for vibrant colors without thinning frosting. Practice stencil on parchment or cupcakes before applying to cake. For gluten-free or dairy-free versions, substitute flour and dairy accordingly.
Nutrition
- Serving Size: 1 slice (1/12 of cak
- Calories: 425
- Sugar: 38
- Sodium: 280
- Fat: 22
- Saturated Fat: 13
- Carbohydrates: 55
- Fiber: 1
- Protein: 4
Keywords: graduation cake, sheet cake, buttercream frosting, Class of 2026 cake, easy cake recipe, vanilla cake, celebration cake