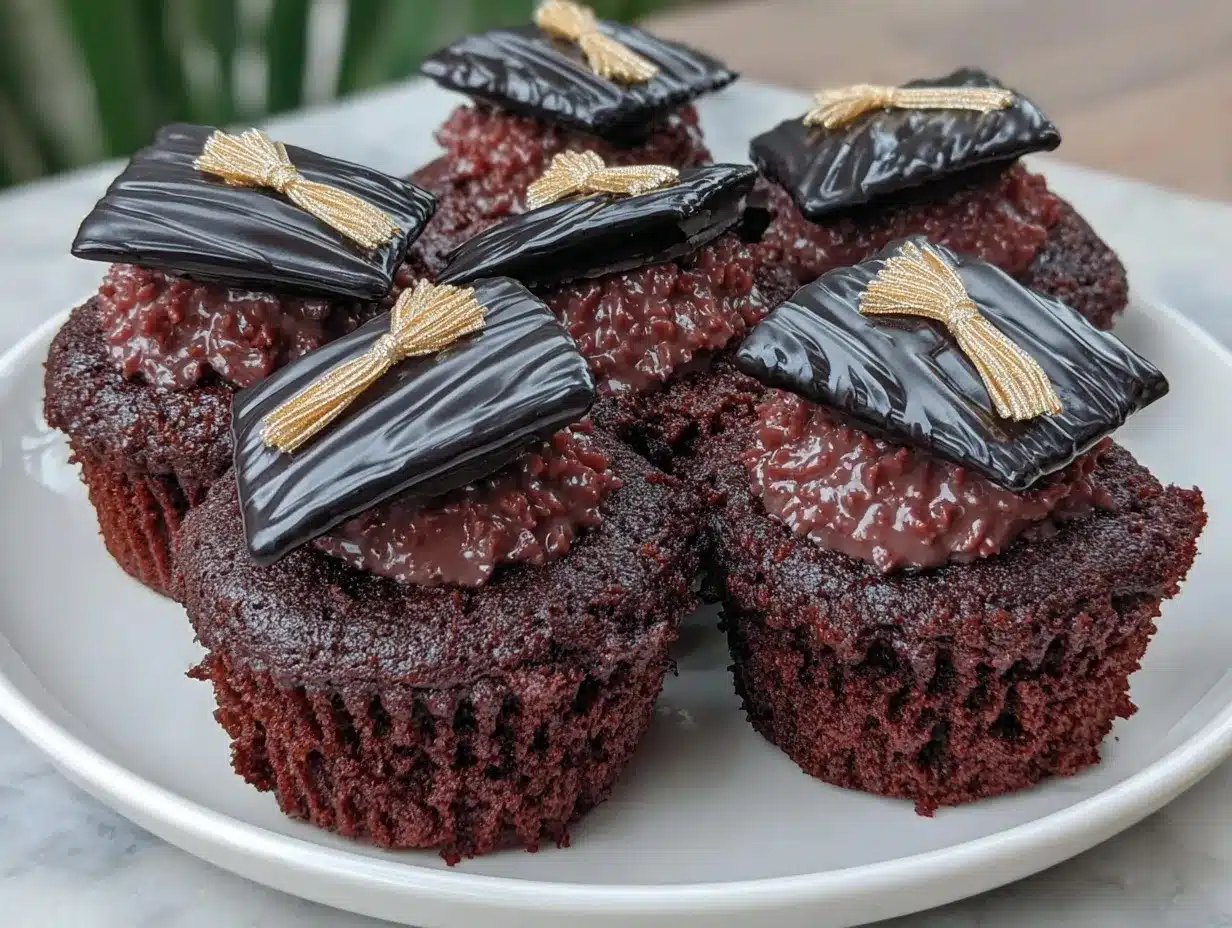
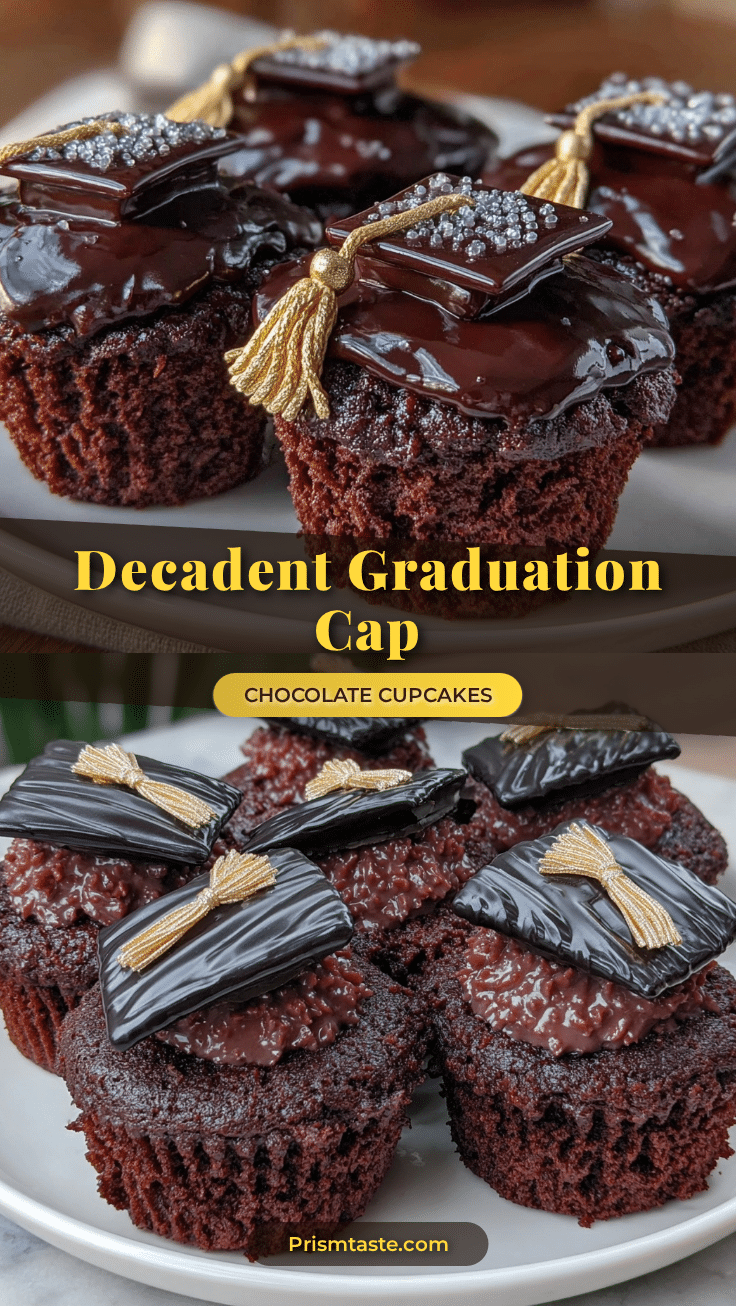
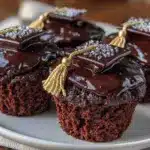
“Hey, can you make those cupcakes again? The ones with the little graduation caps on top?” That text popped up just as I was about to wind down one evening, and honestly, it caught me off guard. I hadn’t planned on baking anything fancy—just a quick chocolate batch to satisfy a sudden craving. But somehow, this simple request pulled me back into the kitchen, where I found myself whipping up these Perfect Graduation Cap Chocolate Cupcakes with Gold Fondant Toppers once more.
They weren’t always destined to be the star of graduation parties. The first time I made them, it was a last-minute save for a friend’s celebration. I remember juggling the batter while trying to shape tiny fondant caps that refused to cooperate. There were a few ruined toppers, and I questioned if the effort was worth it. But when those cupcakes hit the table, the smiles—and the requests for the recipe—made all the chaos fade away.
What’s funny is how these little cupcakes became a symbol of celebration in my kitchen. Each gold-tipped cap carries a memory of excitement, nerves, and joy wrapped in chocolate comfort. It’s not just the taste that sticks with you, but the feeling of sharing something special, handcrafted for a milestone moment. That’s why this recipe stayed in my rotation—it’s more than dessert; it’s a sweet nod to achievements big and small.
Why You’ll Love This Recipe
This recipe has been tested countless times, perfecting the balance between rich chocolate and that crisp, elegant fondant detail. Honestly, it’s become a go-to for busy bakers who want to impress without stress.
- Quick & Easy: You can have these cupcakes ready in about an hour, which is a lifesaver when celebrations sneak up on you.
- Simple Ingredients: No need to hunt down specialty items—most are pantry staples, and the gold fondant adds that wow factor with minimal fuss.
- Perfect for Graduation Parties: They bring a festive vibe that’s both playful and sophisticated, making them ideal for school or college celebrations.
- Crowd-Pleaser: Kids love the fun shape, and adults appreciate the moist, fudgy chocolate flavor. Everyone wants seconds.
- Unbelievably Delicious: The moist crumb combined with the slight chew of fondant makes for a texture combo that’s hard to beat.
What sets this apart? It’s the little details—the way the fondant caps are shaped to look just right, the slight crunch of the edges, and the deep chocolate flavor that isn’t too sweet. This recipe isn’t the typical decorated cupcake; it’s a thoughtful creation that shows you care, without needing a professional’s skill.
And let’s be honest, there’s something satisfying about handing out cupcakes that look like tiny caps of achievement. It’s a subtle way to say, “You did it,” in the most delicious way possible.
What Ingredients You Will Need
This recipe uses simple, wholesome ingredients to deliver bold chocolate flavor and a moist, tender crumb. Most of these items are kitchen staples, and the gold fondant adds a festive touch that’s surprisingly easy to work with.
- For the Chocolate Cupcakes:
- All-purpose flour – 1 ½ cups (190g)
- Unsweetened cocoa powder – ½ cup (50g), sifted for smooth batter
- Baking powder – 1 teaspoon
- Baking soda – ½ teaspoon
- Salt – ¼ teaspoon
- Granulated sugar – 1 cup (200g)
- Large eggs – 2, room temperature (helps batter emulsify better)
- Whole milk – ½ cup (120ml), room temperature
- Vegetable oil – ¼ cup (60ml), adds moistness
- Vanilla extract – 1 teaspoon
- Boiling water – ½ cup (120ml), intensifies the chocolate flavor
- For the Gold Fondant Toppers:
- White fondant – 1 package (about 250g), store-brand or Wilton works well
- Edible gold dust or spray – for that shiny, celebratory finish
- Black food coloring gel – to tint fondant for the cap base
- Edible glue or water – to assemble the caps
- Thin black ribbon or fondant strips – for the tassels
- For the Chocolate Frosting:
- Unsalted butter – ½ cup (113g), softened
- Powdered sugar – 1 ½ cups (190g), sifted
- Unsweetened cocoa powder – ¼ cup (25g)
- Heavy cream – 2 to 3 tablespoons (30-45ml), for desired consistency
- Vanilla extract – 1 teaspoon
- Pinch of salt
If you want a gluten-free version, swapping all-purpose flour with a 1:1 gluten-free baking mix works well. For dairy-free adaptations, almond or oat milk and coconut-based butter substitutes are good alternatives. The fondant is pretty forgiving too; you can shape the caps a day ahead and keep them covered.
Equipment Needed
- Standard 12-cup muffin tin (non-stick preferred for easy cupcake removal)
- Mixing bowls – at least two, medium and large size
- Electric hand mixer or stand mixer (helps achieve fluffy frosting)
- Sifter or fine mesh sieve (for cocoa and powdered sugar)
- Measuring cups and spoons (for accuracy)
- Spatula and wooden spoon (for folding and mixing)
- Rolling pin (to roll out fondant)
- Sharp knife or pizza cutter (for cutting fondant shapes)
- Small paintbrush (to apply edible glue or water on fondant)
If you don’t have a stand mixer, a good hand mixer will do just fine. For fondant shaping, a smooth, clean surface and a rolling pin are essential, but if you’re short on tools, a clean glass bottle can substitute nicely. Keeping your fondant covered with a damp cloth while working prevents it from drying out—trust me, I learned this the hard way one sticky afternoon!
Preparation Method
- Preheat your oven to 350°F (175°C) and line your muffin tin with cupcake liners. This step makes cleanup much easier and keeps your cupcakes from sticking.
- Mix dry ingredients. In a large bowl, sift together 1 ½ cups all-purpose flour, ½ cup cocoa powder, 1 teaspoon baking powder, ½ teaspoon baking soda, and ¼ teaspoon salt. Whisk to combine evenly.
- Combine wet ingredients. In another bowl, beat 1 cup sugar and 2 large eggs until pale and fluffy, about 2-3 minutes. Add ½ cup vegetable oil, ½ cup whole milk, and 1 teaspoon vanilla extract. Mix until smooth.
- Slowly add the dry ingredients to the wet mixture, folding gently with a spatula just until combined. Avoid overmixing or your cupcakes might turn dense.
- Carefully stir in ½ cup boiling water. The batter will be thin—that’s okay! This step helps bring out a richer chocolate flavor and keeps the cupcakes moist.
- Fill the cupcake liners about two-thirds full with batter—no overflow, please. Bake for 18-22 minutes, or until a toothpick inserted in the center comes out clean or with just a few moist crumbs.
- Cool cupcakes in the pan for 5 minutes, then transfer to a wire rack to cool completely. This prevents soggy bottoms and makes frosting easier.
- Prepare the frosting. Beat ½ cup softened unsalted butter until creamy, then gradually add 1 ½ cups powdered sugar and ¼ cup cocoa powder. Add 2 tablespoons heavy cream, 1 teaspoon vanilla, and a pinch of salt. Adjust cream to reach spreadable consistency.
- Frost cooled cupcakes generously using a spatula or piping bag. Smooth or swirl as you like—personally, I prefer a rustic look that feels homemade.
- Shape the fondant caps. Tint the white fondant with black food coloring gel and knead until evenly colored. Roll out to about ¼ inch (6 mm) thickness. Cut squares roughly 1 ½ inches (4 cm) per side for the caps. For the mortarboard base, roll thin strips or cut thin ribbons for the band.
- Assemble the caps. Attach the square to a circle of fondant that fits on top of each cupcake using a dab of edible glue or water. Add a small tassel made from thin ribbons or rolled fondant strips. Brush with edible gold dust or spray for the signature shine.
- Let the fondant set for at least 30 minutes before serving. This helps the decorations hold their shape and adds a polished finish.
If your fondant starts to dry out while working, cover it with a damp cloth or plastic wrap to keep it pliable. And when you bite into these cupcakes, the moist, chocolatey crumb beneath the shiny cap is honestly a little celebration on its own.
Cooking Tips & Techniques
One thing I’ve learned—getting the batter just right is the key. The boiling water step might feel odd, but it really amps up the chocolate’s depth without making the cupcakes heavy. Don’t skip it!
When mixing, folding gently is your friend. Overmix and you risk tough cupcakes, under-mix and you get uneven texture. Aim for a smooth, glossy batter that flows easily.
Frosting consistency can be tricky. Start with less cream and add tablespoon by tablespoon, watching for that perfect spreadability. If it’s too thin, add a bit more powdered sugar.
For fondant, practice cutting and assembling a few caps before tackling the whole batch. It’s okay to have a few “practice” pieces that don’t make the final cut—fondant can be stubborn the first go.
Lastly, multitasking helps: while cupcakes bake, prep your fondant and frosting to save time. This recipe pairs well with other crowd-pleasers like the budget-friendly loaded pasta bake, which can round out any celebration spread.
Variations & Adaptations
- Flavor Twists: Swap cocoa powder for espresso powder in the batter to add a mocha kick that pairs beautifully with the chocolate frosting.
- Dietary Adjustments: Use almond flour and dairy-free milk to make these cupcakes gluten- and dairy-free, perfect for guests with allergies.
- Decor Variations: Instead of black fondant caps, try white with colored tassels to match school colors or add edible glitter for extra sparkle.
- Alternative Frostings: Cream cheese frosting adds a tangy contrast if you prefer something less sweet than chocolate buttercream.
- Seasonal Twist: For spring graduations, top with a small fondant flower alongside the cap for a fresh look.
Personally, I once made a batch with a salted caramel drizzle instead of frosting—unexpected, but the salty-sweet combo was a hit. You can tailor these cupcakes to your crowd, making them truly your own.
Serving & Storage Suggestions
Serve these cupcakes at room temperature so the frosting is soft and the fondant isn’t too chewy. They make a charming centerpiece on any graduation dessert table, especially paired with simple finger foods or a refreshing punch.
Store leftovers in an airtight container at room temperature for up to 2 days or refrigerate for up to 4 days. If refrigerated, bring to room temperature before serving to enjoy the best texture and flavor.
For longer storage, freeze unfrosted cupcakes wrapped tightly in plastic wrap and foil for up to 3 months. Thaw at room temperature, then frost and decorate fresh.
Flavors often deepen after a day, so if you can wait, prepping a day ahead can actually improve the taste. These cupcakes pair surprisingly well with savory dishes like the instant pot beef stew for a hearty celebration meal.
Nutritional Information & Benefits
Each cupcake (including frosting and fondant topper) contains approximately 320 calories, 15g fat, 45g carbohydrates, and 3g protein. They’re a treat that packs indulgent flavor without over-the-top sugar levels.
The cocoa powder adds antioxidants, and using vegetable oil helps keep the texture moist without adding saturated fat. If you swap in almond flour or dairy-free alternatives, these cupcakes can fit into gluten-free or lactose-intolerant diets.
While fondant is mostly sugar, the small amount per cupcake balances the overall treat. Moderation is key, and these cupcakes are best enjoyed as a special celebration dessert.
Conclusion
These Perfect Graduation Cap Chocolate Cupcakes with Gold Fondant Toppers bring a little magic to any graduation celebration. They’re simple enough to whip up on a busy afternoon but special enough to make the moment feel truly memorable.
Whether you stick to the classic recipe or try a variation, these cupcakes invite you to celebrate achievements with something homemade and heartfelt. I’ve found joy in sharing them with friends and family, and I hope they bring the same smile to your table.
Feel free to tweak the decorations or flavors to suit your style—after all, every graduate deserves a sweet treat that’s as unique as they are. If you try this recipe, I’d love to hear about your graduation party successes or any creative twists you make!
FAQs About Perfect Graduation Cap Chocolate Cupcakes
How far ahead can I make the fondant toppers?
You can make the fondant caps up to two days ahead. Keep them covered in an airtight container at room temperature to prevent drying.
Can I use store-bought frosting instead of homemade?
Absolutely! Store-bought chocolate frosting works fine if you’re short on time, but homemade frosting gives a richer, fresher taste.
What’s the best way to color fondant black?
Use gel-based black food coloring and knead it thoroughly into white fondant. It might take a few minutes to get an even color, but avoid liquid coloring to keep fondant from getting sticky.
Can these cupcakes be frozen after decorating?
It’s best to freeze cupcakes before frosting and decorating. Fondant and frosting don’t freeze well together, as decoration can get damaged.
Are these cupcakes suitable for kids’ parties too?
Definitely! Kids love the fun graduation cap design, and the chocolate flavor is usually a big hit with all ages.
Pin This Recipe!
Perfect Graduation Cap Chocolate Cupcakes Easy Homemade Recipe with Gold Fondant Toppers
These moist and fudgy chocolate cupcakes are topped with elegant gold fondant graduation caps, perfect for celebrating milestones with a festive and delicious treat.
- Prep Time: 20 minutes
- Cook Time: 22 minutes
- Total Time: 52 minutes
- Yield: 12 servings 1x
- Category: Dessert
- Cuisine: American
Ingredients
- 1 ½ cups all-purpose flour (190g)
- ½ cup unsweetened cocoa powder (50g), sifted
- 1 teaspoon baking powder
- ½ teaspoon baking soda
- ¼ teaspoon salt
- 1 cup granulated sugar (200g)
- 2 large eggs, room temperature
- ½ cup whole milk (120ml), room temperature
- ¼ cup vegetable oil (60ml)
- 1 teaspoon vanilla extract
- ½ cup boiling water (120ml)
- 1 package white fondant (about 250g)
- Edible gold dust or spray
- Black food coloring gel
- Edible glue or water
- Thin black ribbon or fondant strips
- ½ cup unsalted butter (113g), softened
- 1 ½ cups powdered sugar (190g), sifted
- ¼ cup unsweetened cocoa powder (25g)
- 2 to 3 tablespoons heavy cream (30-45ml)
- 1 teaspoon vanilla extract
- Pinch of salt
Instructions
- Preheat your oven to 350°F (175°C) and line a 12-cup muffin tin with cupcake liners.
- In a large bowl, sift together 1 ½ cups all-purpose flour, ½ cup cocoa powder, 1 teaspoon baking powder, ½ teaspoon baking soda, and ¼ teaspoon salt. Whisk to combine evenly.
- In another bowl, beat 1 cup sugar and 2 large eggs until pale and fluffy, about 2-3 minutes. Add ¼ cup vegetable oil, ½ cup whole milk, and 1 teaspoon vanilla extract. Mix until smooth.
- Slowly add the dry ingredients to the wet mixture, folding gently with a spatula just until combined. Avoid overmixing.
- Carefully stir in ½ cup boiling water. The batter will be thin.
- Fill cupcake liners about two-thirds full with batter. Bake for 18-22 minutes or until a toothpick inserted in the center comes out clean or with a few moist crumbs.
- Cool cupcakes in the pan for 5 minutes, then transfer to a wire rack to cool completely.
- Prepare the frosting by beating ½ cup softened unsalted butter until creamy. Gradually add 1 ½ cups powdered sugar and ¼ cup cocoa powder. Add 2 tablespoons heavy cream, 1 teaspoon vanilla, and a pinch of salt. Adjust cream to reach spreadable consistency.
- Frost cooled cupcakes generously using a spatula or piping bag.
- Tint the white fondant with black food coloring gel and knead until evenly colored. Roll out to about ¼ inch (6 mm) thickness.
- Cut squares roughly 1 ½ inches (4 cm) per side for the caps. Roll thin strips or cut thin ribbons for the mortarboard band.
- Attach the square to a circle of fondant that fits on top of each cupcake using a dab of edible glue or water. Add a small tassel made from thin ribbons or rolled fondant strips.
- Brush the fondant caps with edible gold dust or spray for shine.
- Let the fondant set for at least 30 minutes before serving.
Notes
If fondant starts to dry out, cover with a damp cloth or plastic wrap to keep pliable. For gluten-free, substitute all-purpose flour with a 1:1 gluten-free baking mix. For dairy-free, use almond or oat milk and coconut-based butter substitutes. Store fondant caps covered to prevent drying. Avoid overmixing batter to keep cupcakes tender. Boiling water enhances chocolate flavor and moisture.
Nutrition
- Serving Size: 1 cupcake with frost
- Calories: 320
- Sugar: 30
- Sodium: 150
- Fat: 15
- Saturated Fat: 5
- Carbohydrates: 45
- Fiber: 3
- Protein: 3
Keywords: graduation cupcakes, chocolate cupcakes, fondant toppers, easy chocolate dessert, celebration cupcakes, homemade cupcakes