This was supposed to be a pie. A beautiful, towering, perfectly latticed apple pie for the first crisp weekend of October. I had the flour dusted across the counter, the butter chilling in the freezer, and a whole lot of ambition. But somewhere between peeling the fifth apple and realizing my pie dish was still packed in a box from our move last spring, the plan fell apart. The oven was preheated, the apples were sliced, and I was already running late for a friend’s birthday dinner. I grabbed the wrong bag of sugar—dark brown instead of white—and in a moment of pure panic, I just started cooking. What came out of that kitchen disaster was nothing like the plan. And honestly? It was better.
I ended up with a sticky, glossy pile of caramel-coated apple slices scattered with toffee bits, and I almost threw them in the trash. I mean, they looked like a mess. But then I took a bite—warm, buttery, with that salty-sweet crunch—and I just stood there in the middle of my chaotic kitchen, chewing in disbelief. The pie was gone, but this accidental creation was something I actually wanted to make again. Maybe you’ve been there too—when a recipe goes sideways and you discover something you didn’t even know you were looking for.
These Perfect Caramel Dipped Apple Slices with Toffee Bits have become my go-to fall treat. They’re simpler than pie, faster than cobbler, and honestly, they taste like a carnival in your mouth without the ticket price. I keep making them because they remind me that sometimes the best things come from a little chaos and a lot of brown sugar.
Why You’ll Love This Recipe
Let me tell you why these caramel apple slices have earned a permanent spot in my fall rotation. First off, they come together in under 20 minutes, which means you can satisfy that sweet craving without spending all afternoon in the kitchen. And the ingredients? You probably have most of them sitting in your pantry right now—apples, butter, brown sugar, cream, and toffee bits. No fancy grocery trips required.
- Quick & Easy: From start to finish, you’re looking at about 15 minutes of active work. Perfect for those evenings when you need something sweet, fast.
- Simple Ingredients: No obscure spices or hard-to-find items. Just good, honest pantry staples that come together beautifully.
- Perfect for Fall Gatherings: These slices are a hit at Halloween parties, Thanksgiving dessert tables, or cozy movie nights by the fire.
- Crowd-Pleaser: I’ve served these to kids and adults alike, and the plate always comes back empty. There’s something about that caramel-toffee combo that everyone loves.
- Unbelievably Delicious: The texture is what gets me—crisp apple, silky caramel, and crunchy toffee bits all in one bite. It’s next-level comfort food.
What makes this recipe different from all the other caramel apple recipes out there? It’s the technique. Instead of making a complicated caramel sauce that can seize or separate, we’re using a simple stovetop method that gives you a silky, pourable caramel every single time. And the toffee bits? They add this incredible texture that makes every bite interesting. This isn’t just another dessert—it’s the one that makes you close your eyes after the first bite and forget about the pie that got away.
What Ingredients You Will Need
This recipe uses simple, wholesome ingredients to deliver bold flavor and satisfying texture without the fuss. Most of these are pantry staples, so you can whip these up whenever the craving hits.
- Apples (3-4 medium): I recommend Honeycrisp or Granny Smith for the best balance of sweetness and tartness. Look for firm apples that hold their shape when cooked. Fuji or Gala work well too, but they’re a bit softer. (Pro tip: use a mix of tart and sweet for more complex flavor.)
- Unsalted butter (4 tablespoons, cubed): Using unsalted butter lets you control the salt level in the caramel. I prefer Kerrygold for its rich, creamy taste, but any good-quality butter works.
- Dark brown sugar (½ cup, packed): This is the secret to that deep, molasses-like caramel flavor. Don’t substitute light brown sugar—the darker variety gives you that rich, almost smoky sweetness that makes this recipe special.
- Heavy cream (¼ cup): Heavy cream creates a silky, luscious caramel that coats the apple slices perfectly. You can substitute half-and-half in a pinch, but the caramel will be thinner. (For a dairy-free version, use full-fat coconut cream.)
- Vanilla extract (1 teaspoon): Pure vanilla extract adds warmth and depth. I use Nielsen-Massey Madagascar vanilla, but any pure extract works. Avoid imitation vanilla—it leaves a chemical aftertaste.
- Sea salt (¼ teaspoon): A pinch of flaky sea salt balances the sweetness and makes the caramel pop. Maldon sea salt is my go-to, but any coarse sea salt works.
- Toffee bits (½ cup): You can use store-bought toffee bits (Heath bar bits are great) or make your own by crushing store-bought toffee bars. I prefer the bits because they’re already the perfect size for sprinkling.
- Popsicle sticks (optional): If you’re serving these at a party, sticks make them easier to handle. For a casual snack, you can skip them.
Equipment Needed
You don’t need a lot of fancy equipment for this recipe, which is part of its charm. Here’s what you’ll need:
- Medium saucepan: A heavy-bottomed saucepan works best for even heat distribution. I use a 2-quart stainless steel pan, but non-stick works too.
- Wooden spoon or silicone spatula: For stirring the caramel. Avoid metal utensils if using a non-stick pan.
- Sharp knife and cutting board: For slicing the apples. A sharp knife makes clean cuts and prevents bruising.
- Apple corer (optional): If you want perfect, round slices, an apple corer is handy. Otherwise, just cut around the core.
- Parchment paper or silicone baking mat: For placing the dipped slices on while they set. Trust me, you don’t want them sticking to the counter.
- Small bowl: For holding the toffee bits for dipping or sprinkling.
If you don’t have a candy thermometer, don’t worry—we’re not making traditional caramel that requires precise temperatures. This stovetop method is forgiving and doesn’t need special equipment. I’ve made it in a cheap saucepan from a discount store, and it worked just fine. The key is patience, not fancy tools.
Preparation Method
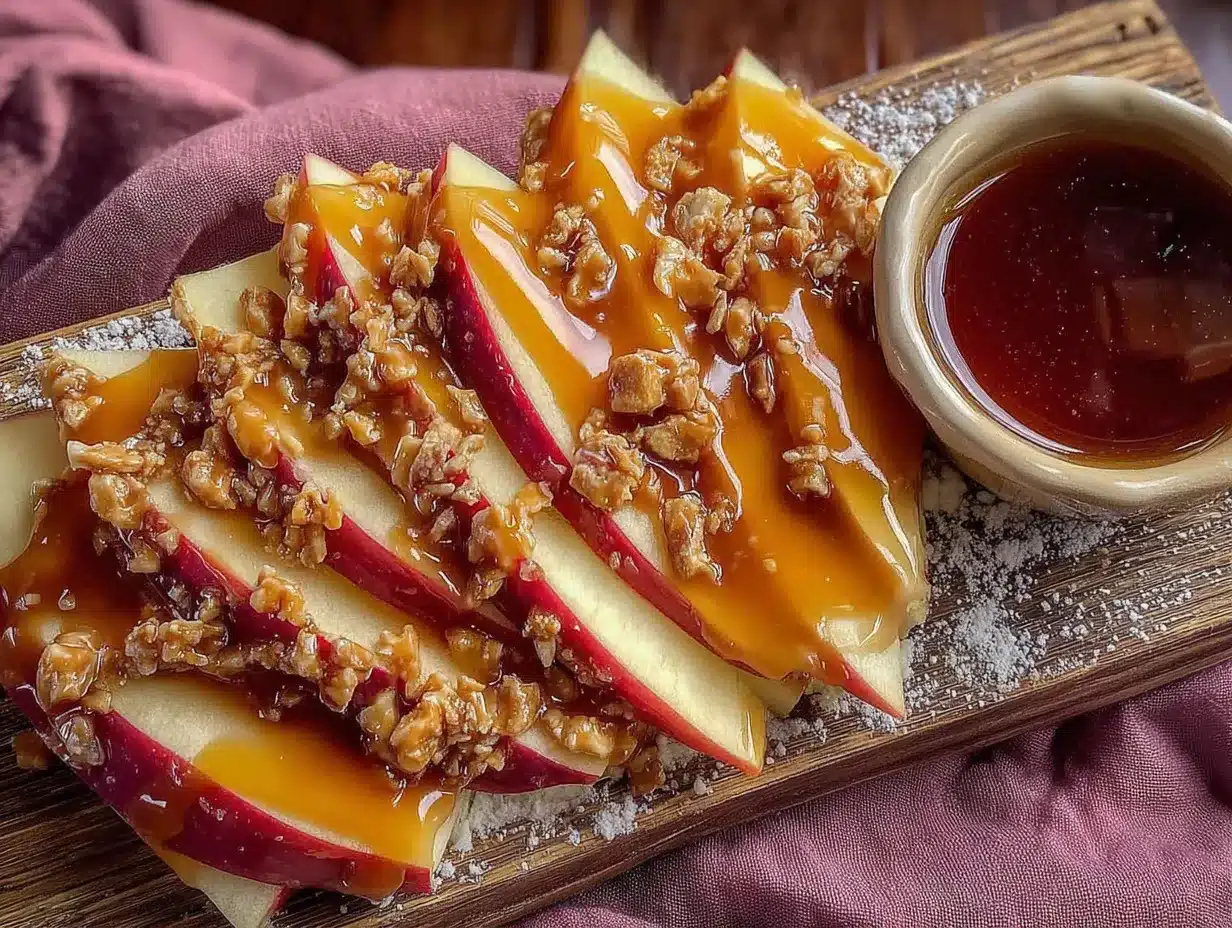
Let’s get cooking! This recipe comes together quickly, so have everything prepped before you start.
- Prep the apples (5 minutes): Wash and dry your apples thoroughly. If you’re using popsicle sticks, insert them into the top of each apple now. Slice the apples into ½-inch thick rounds or wedges. I prefer rounds for a more uniform look, but wedges work great too. Remove any seeds or tough core pieces. Place the slices on a parchment-lined baking sheet and set aside.
- Make the caramel (8-10 minutes): In a medium saucepan over medium heat, melt the butter completely. Once melted, add the packed dark brown sugar and stir constantly with a wooden spoon until the sugar dissolves into the butter—about 2 minutes. The mixture will look grainy at first, but keep stirring. Slowly pour in the heavy cream while stirring continuously. The mixture will bubble up, so be careful. Reduce the heat to low and let it simmer gently for 3-4 minutes, stirring occasionally, until the caramel thickens slightly and turns a deep amber color. It should coat the back of a spoon.
- Finish the caramel (1 minute): Remove the saucepan from the heat. Stir in the vanilla extract and sea salt. The caramel will continue to thicken as it cools. Taste it—yes, I always do—and adjust the salt if needed. If it seems too thick, add a splash more cream. Too thin? Let it simmer for another minute.
- Dip the apple slices (5 minutes): Working quickly while the caramel is still warm, dip each apple slice into the caramel, letting the excess drip back into the pan. Use a fork or tongs to help coat the slices evenly. Place the dipped slices back on the parchment-lined baking sheet. Don’t worry if they look a little messy—the toffee bits will cover any imperfections.
- Add the toffee bits (2 minutes): While the caramel is still tacky, sprinkle the toffee bits generously over each slice. Press them in gently with your fingers so they stick. If the caramel starts to set before you’ve added all the toffee bits, pop the baking sheet in the fridge for 2 minutes to firm up the caramel slightly, then continue.
- Set and serve (10 minutes): Let the caramel-dipped slices sit at room temperature for about 10 minutes to set. If you’re in a hurry, you can pop them in the refrigerator for 5 minutes. The caramel should be firm but still slightly soft when you bite into it. Serve immediately or store as directed below.
Cooking Tips & Techniques
After making this recipe about a dozen times (and messing it up at least twice), I’ve learned a few things that make a real difference. First, don’t rush the caramel. I know it’s tempting to crank up the heat, but medium heat is your friend. High heat can cause the sugar to burn before the butter melts, leaving you with a bitter, grainy mess. I learned this the hard way when I tried to speed things up for a party and ended up scraping burnt sugar off my pan for an hour.
Another tip: use room-temperature cream. Cold cream can cause the caramel to seize up and become grainy. If you forgot to take the cream out of the fridge, microwave it for 15 seconds before adding it to the pan. And speaking of temperature, let the caramel cool for just a minute before dipping your apples. If it’s too hot, it’ll run right off the slices. Too cold, and it’ll be too thick to coat evenly. You want it warm enough to flow but thick enough to cling.
Timing is everything with this recipe. I like to prep the apples and have the toffee bits ready in a bowl before I start the caramel. That way, I’m not scrambling to find things while the caramel is cooling. And here’s a pro tip: if your caramel starts to set before you’re done dipping, just add a tablespoon of warm water and stir it over low heat. It’ll loosen right up without ruining the texture.
One more thing—don’t skip the salt. I know it sounds weird in a sweet dessert, but that pinch of sea salt is what makes the caramel taste like something from a fancy bakery. It balances the sweetness and makes the toffee bits pop. I’ve served these to people who swore they didn’t like caramel, and they went back for seconds. The salt is the secret.
Variations & Adaptations
One of the best things about this recipe is how easy it is to adapt. Here are some variations I’ve tried and loved:
- Dairy-Free Version: Swap the butter for vegan butter (I like Miyoko’s) and use full-fat coconut cream instead of heavy cream. The caramel will have a slight coconut flavor, but it’s actually delicious with the apples and toffee.
- Spiced Caramel: Add ½ teaspoon of cinnamon and ¼ teaspoon of nutmeg to the caramel while it simmers. This gives it a warm, chai-like flavor that’s perfect for fall. I made this version for Thanksgiving last year, and my aunt asked for the recipe three times.
- Chocolate Drizzle: After adding the toffee bits, drizzle melted dark chocolate over the slices. Let it set in the fridge for 10 minutes. The combination of caramel, toffee, and chocolate is absolutely decadent—like a candy bar in apple form.
- Nutty Crunch: Replace half the toffee bits with chopped pecans or walnuts. Toast the nuts first for extra flavor. This adds a lovely crunch and makes the slices feel even more indulgent.
- Savory-Sweet Twist: Add a pinch of cayenne pepper or smoked paprika to the caramel. The heat pairs beautifully with the sweet apples and toffee. It sounds weird, but trust me—it works.
For a different cooking method, you can also make these in a slow cooker. Just melt the butter, brown sugar, and cream together on low for 30 minutes, then dip the apples as directed. The caramel won’t be quite as thick, but it’s a great hands-off option for parties.
Serving & Storage Suggestions
These caramel apple slices are best served at room temperature or slightly warm. The caramel is soft and gooey, and the apples are crisp and refreshing. I like to arrange them on a wooden board with a sprinkle of extra sea salt and a few extra toffee bits scattered around for looks. They’re perfect for Halloween parties, Thanksgiving dessert tables, or just a cozy night in with a good movie.
For drinks, these pair beautifully with hot apple cider, a warm chai latte, or even a glass of cold milk. If you’re serving adults, a crisp hard cider or a bourbon cocktail complements the caramel beautifully. I once served these at a fall brunch with mimosas, and they disappeared in minutes.
Storage is simple. Place any leftovers in an airtight container, separating layers with parchment paper so they don’t stick together. They’ll keep in the refrigerator for up to 3 days. The apples will soften slightly over time, but the caramel stays delicious. To reheat, pop them in the microwave for 10-15 seconds, or let them sit at room temperature for 15 minutes. I don’t recommend freezing these—the apples get mushy when thawed, and the caramel can become grainy.
One thing I love about this recipe is that the flavors actually get better after a few hours in the fridge. The caramel absorbs into the apple slices slightly, creating this incredible flavor fusion. So if you’re making these ahead for a party, you can prep them the night before and just let them come to room temperature before serving.
Nutritional Information & Benefits
Let’s be real—this is a treat, not a health food. But that doesn’t mean it’s without its merits. Apples are packed with fiber and vitamin C, and the dark brown sugar provides a small amount of minerals like calcium and potassium compared to refined white sugar. The toffee bits add a little calcium and iron too.
Here’s the approximate nutritional breakdown per serving (based on 4 servings):
- Calories: 320
- Fat: 18g
- Carbohydrates: 42g
- Fiber: 4g
- Sugar: 34g
- Protein: 2g
For dietary considerations, this recipe is naturally vegetarian and can be made gluten-free by using certified gluten-free toffee bits. It contains dairy and nuts (if you add them), so keep that in mind for allergies. I personally love that this dessert feels indulgent without being overly heavy—it’s the kind of treat that satisfies your sweet tooth without leaving you feeling stuffed.
Conclusion
These Perfect Caramel Dipped Apple Slices with Toffee Bits started as a kitchen accident, but they’ve become one of my most-requested recipes. They’re simple enough for a weeknight treat but special enough for a holiday party. The combination of crisp apple, silky caramel, and crunchy toffee is honestly unbeatable—and it all comes together in less than 20 minutes.
I love this recipe because it reminds me that perfection isn’t always the goal. Sometimes the best dishes come from a little chaos, a wrong turn, or a missing pie dish. So go ahead and make these your own—add extra salt, swap in different apples, or drizzle on some chocolate. However you make them, I promise they’ll be a hit.
I’d love to hear how yours turn out! Drop a comment below and let me know what variations you tried, or share a photo of your caramel apple slices on Pinterest. And if you have a kitchen disaster that turned into something amazing, I want to hear about that too. Happy cooking, friends!
Frequently Asked Questions
Can I use store-bought caramel sauce instead of making my own?
You can, but I don’t recommend it. Store-bought caramel sauce is usually thinner and sweeter than homemade, so it won’t coat the apples as well and might run off. The stovetop method is quick and gives you a thicker, more flavorful caramel that clings to the slices beautifully.
How do I prevent the apple slices from browning?
If you’re prepping the apples ahead of time, toss them in a bowl with a tablespoon of lemon juice or apple cider vinegar. This slows down oxidation and keeps them looking fresh. Just pat them dry before dipping in the caramel.
Can I make this recipe vegan?
Absolutely! Use vegan butter and full-fat coconut cream instead of dairy butter and heavy cream. The caramel will have a slight coconut flavor, but it pairs wonderfully with the apples and toffee. Just make sure your toffee bits are vegan-friendly too.
Why did my caramel turn out grainy?
Grainy caramel usually happens when the sugar isn’t fully dissolved or when cold cream is added to hot sugar. Make sure you stir the butter and brown sugar together until the sugar is completely dissolved before adding the cream. And always use room-temperature cream to prevent the caramel from seizing.
How long do these stay fresh?
These are best enjoyed within 24 hours, but they’ll keep in the refrigerator for up to 3 days in an airtight container. The apples will soften over time, and the caramel may become a bit firmer, but they’re still delicious. Let them sit at room temperature for 15 minutes before serving to soften the caramel.
Pin This Recipe!

Perfect Caramel Dipped Apple Slices with Toffee Bits

These caramel apple slices are a quick and easy fall treat, made with crisp apples, a silky stovetop caramel, and crunchy toffee bits. They come together in under 20 minutes and are perfect for parties or cozy nights in.
- Prep Time: 15 minutes
- Cook Time: 10 minutes
- Total Time: 25 minutes
- Yield: 4 servings 1x
- Category: Dessert
- Cuisine: American
Ingredients
- 3–4 medium apples (Honeycrisp or Granny Smith recommended)
- 4 tablespoons unsalted butter, cubed
- ½ cup packed dark brown sugar
- ¼ cup heavy cream
- 1 teaspoon vanilla extract
- ¼ teaspoon sea salt
- ½ cup toffee bits
- Popsicle sticks (optional)
Instructions
- Prep the apples: Wash and dry apples. If using popsicle sticks, insert them into the top of each apple. Slice apples into ½-inch thick rounds or wedges, removing seeds and tough core pieces. Place slices on a parchment-lined baking sheet and set aside.
- Make the caramel: In a medium saucepan over medium heat, melt the butter completely. Add the packed dark brown sugar and stir constantly until the sugar dissolves into the butter, about 2 minutes. Slowly pour in the heavy cream while stirring continuously. Reduce heat to low and let simmer gently for 3-4 minutes, stirring occasionally, until the caramel thickens slightly and turns a deep amber color.
- Finish the caramel: Remove saucepan from heat. Stir in vanilla extract and sea salt. Taste and adjust salt if needed. If too thick, add a splash more cream; if too thin, let simmer another minute.
- Dip the apple slices: Working quickly while caramel is warm, dip each apple slice into the caramel, letting excess drip back into the pan. Use a fork or tongs to coat evenly. Place dipped slices back on the parchment-lined baking sheet.
- Add the toffee bits: While caramel is still tacky, sprinkle toffee bits generously over each slice. Press them in gently with your fingers. If caramel sets before adding all toffee bits, refrigerate baking sheet for 2 minutes to firm up slightly, then continue.
- Set and serve: Let caramel-dipped slices sit at room temperature for about 10 minutes to set, or refrigerate for 5 minutes. Caramel should be firm but still slightly soft. Serve immediately or store as directed.
Notes
Use room-temperature cream to prevent caramel from seizing. Don’t rush the caramel; medium heat is best. Let caramel cool slightly before dipping apples—warm enough to flow but thick enough to cling. If caramel sets before you finish dipping, add a tablespoon of warm water and stir over low heat. Don’t skip the salt; it balances the sweetness.
Nutrition
- Serving Size: 1 serving (about 4-5
- Calories: 320
- Sugar: 34
- Sodium: 180
- Fat: 18
- Saturated Fat: 11
- Carbohydrates: 42
- Fiber: 4
- Protein: 2
Keywords: caramel apple slices, toffee bits, fall dessert, easy caramel apples, quick dessert


