My sister swore she hated mint and chocolate together. For years. Since childhood, she’d turn up her nose at peppermint patties, declare Thin Mints overrated, and push away any dessert that dared combine the two. Then last December, I was testing cookie recipes for a holiday party—six different batches spread across every available surface in my kitchen. I made these Andes mint crinkle cookies “just for myself,” figuring I’d have a secret stash. Around 9 p.m., I caught her standing at the counter, hand frozen mid-reach toward the cooling rack, cookie already half-eaten. “These don’t count,” she mumbled, reaching for another. And honestly? That’s the highest compliment a recipe can get—when it makes someone eat their words and your cookies in the same breath.
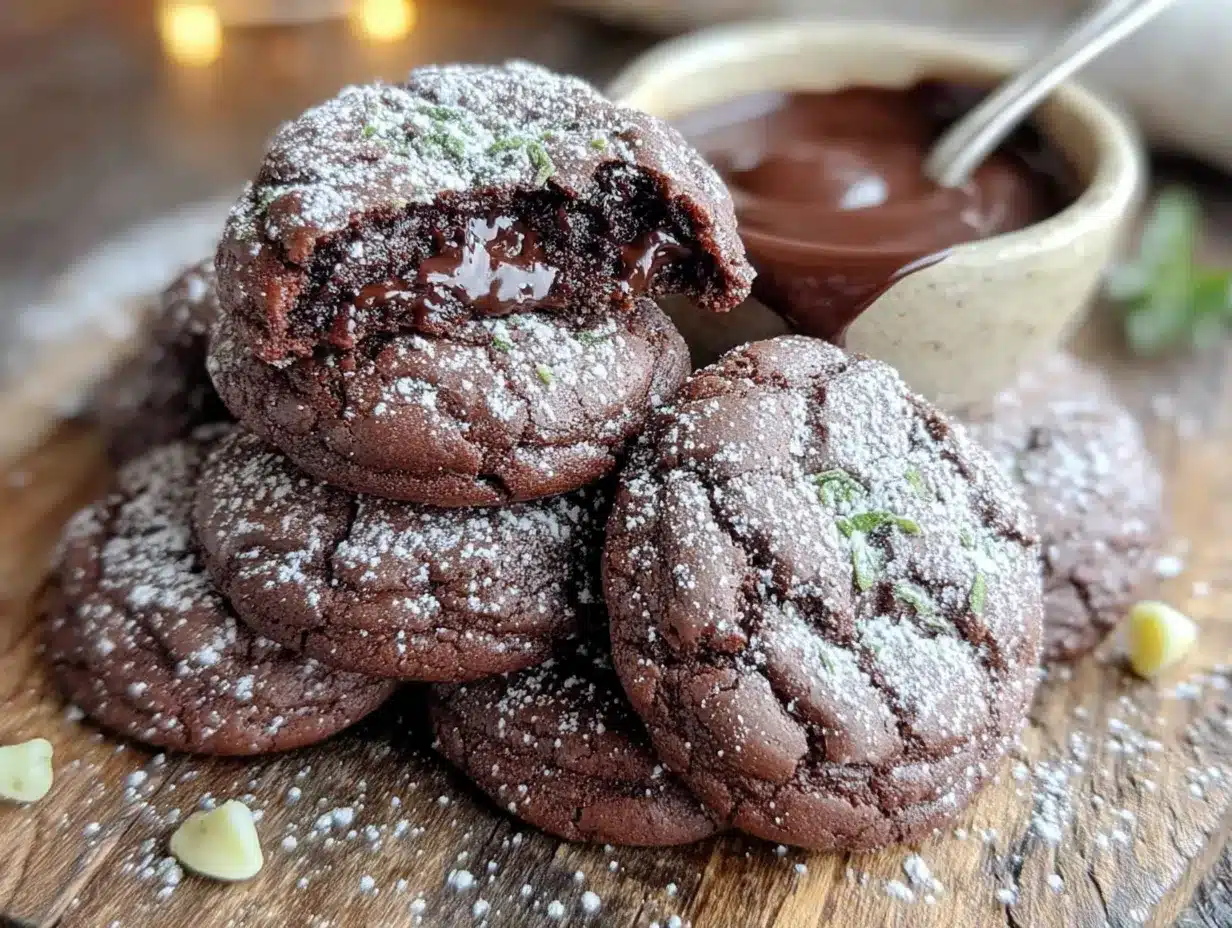
The thing about holiday baking is that everyone has their non-negotiables. For some, it’s sugar cookies with royal icing. For others, it’s grandma’s gingerbread. But let me tell you, these Andes mint chocolate crinkle cookies have a way of sneaking onto everyone’s “must-bake” list after just one batch. The deep chocolate base gets this beautiful crackled top that looks like powdered snow on a winter landscape, and then there’s that pop of cool mint running through every bite. It’s like a Christmas miracle in cookie form.
I’ll be honest—the first time I made these, I forgot to chill the dough. Total rookie move. The cookies spread into sad, flat discs that looked nothing like the gorgeous crinkled domes I’d imagined. But you know what? They still tasted incredible. That’s the beauty of this recipe. Even my failures tasted like something worth sharing. And once I got the technique right? These Andes mint crinkle cookies became the star of every holiday cookie exchange I’ve brought them to. Maybe you’ve been there too—chasing that perfect cookie that looks impressive but doesn’t require a pastry degree to pull off. These are it.
Why You’ll Love This Recipe
After testing this recipe through six batches in one weekend (my neighbors were very happy), I can tell you exactly why these cookies deserve a permanent spot in your holiday rotation. They’re not just good—they’re the kind of cookies people text you about weeks later, asking when you’re making them again.
- Quick & Easy: From start to finish, these come together in about 30 minutes of active time. The dough needs a quick chill, but that’s hands-off time you can use to wrap presents or binge-watch your favorite holiday movie.
- Simple Ingredients: No fancy specialty stores required. You probably have most of these in your pantry right now. The Andes mints are the only special ingredient, and you can find them at any grocery store during the holiday season.
- Perfect for Cookie Exchanges: These cookies look like they came from a bakery window. That crackled top dusted with powdered sugar? Absolutely stunning on any holiday platter. Plus, they travel well, so you can bring them to parties without stress.
- Crowd-Pleaser: I’ve watched kids and adults alike polish off a whole plate in minutes. The mint-chocolate combo is universally loved, and the texture is that perfect balance of fudgy center with slightly crisp edges.
- Unbelievably Delicious: The secret here is letting the Andes mint pieces melt into the warm cookie right after baking. That gooey, minty pocket in the center? Pure magic. It’s next-level comfort food that tastes like the holidays in every single bite.
What makes this recipe different from every other crinkle cookie out there is the double mint treatment. Most recipes just add mint extract to the dough. But here, we’re folding in chopped Andes mints AND adding a mint piece on top right when they come out of the oven. It creates these beautiful green-flecked pockets of mint that stay soft and almost fudgy. I tested this against versions with just extract, and honestly, there’s no comparison. The texture alone will make you never go back.
This recipe isn’t just good—it’s the kind that makes you close your eyes after the first bite. It’s comfort food reimagined for the holidays: familiar enough to feel nostalgic, but special enough to feel like an occasion. Perfect for impressing guests without stress, or turning a simple Tuesday night into something memorable.
What Ingredients You Will Need
This recipe uses simple, wholesome ingredients to deliver that perfect combination of rich chocolate and cool mint. I’ve tested each component carefully, so here’s exactly what you need and why each one matters.
- All-purpose flour, 2 cups (250g) – The backbone of our cookies. I’ve tested this with bread flour too, and it makes them slightly chewier, but all-purpose gives the best crinkle texture. Spoon and level your flour—don’t scoop straight from the bag, or you’ll end up with dry cookies.
- Unsweetened cocoa powder, ½ cup (50g) – This is where the deep chocolate flavor comes from. I recommend Dutch-process cocoa for the richest taste and that beautiful dark color. My personal favorite is Valrhona, but Hershey’s Special Dark works beautifully too.
- Granulated sugar, 1 cup (200g) – Adds sweetness and helps create that signature crackled top. The sugar crystals also contribute to the tender texture.
- Light brown sugar, ½ cup (100g), packed – This is my secret weapon. The molasses in brown sugar adds moisture and a subtle warmth that complements the mint perfectly. Don’t skip it—it makes the centers softer and more fudgy.
- Unsalted butter, ½ cup (113g), melted and cooled – Melted butter gives these cookies a denser, fudgier texture compared to creamed butter. Make sure it’s cooled to room temperature, or it’ll cook the eggs when you mix them in.
- Large eggs, 2, room temperature – Room temperature eggs incorporate more evenly into the melted butter, creating a smoother dough. If you forgot to take them out ahead of time, place them in a bowl of warm water for 5 minutes.
- Vanilla extract, 1 teaspoon – Rounds out the chocolate flavor and adds depth. I use pure vanilla extract, not imitation—the difference is noticeable in baked goods.
- Peppermint extract, 1 teaspoon – The mint flavor comes from this. Use pure peppermint extract, not mint extract, which can taste artificial. Start with 1 teaspoon—you can always add more, but you can’t take it out. Trust me, I learned that the hard way with a batch that tasted like toothpaste.
- Baking powder, 2 teaspoons – This helps the cookies puff up and create those beautiful cracks. Make sure yours isn’t expired—fresh baking powder makes a noticeable difference.
- Salt, ½ teaspoon – Enhances all the flavors and balances the sweetness. Don’t skip it, even if you’re using salted butter. I use fine sea salt for even distribution.
- Andes Creme de Menthe thins, 1 cup (about 20-24 mints), chopped – The star of the show! You’ll chop most of them into small pieces to fold into the dough, and save about 12 whole mints to press on top of the warm cookies. I’ve tried other mint chocolates, but Andes thins have the perfect creamy texture that melts into these little pockets of minty goodness.
- Powdered sugar, ½ cup (60g), for rolling – This creates that iconic crinkle look. The cookies get rolled in powdered sugar just before baking, and as they spread, the sugar cracks to reveal the dark chocolate underneath.
For substitutions, you can use coconut oil instead of butter for a dairy-free version, though the texture will be slightly different. If you can’t find Andes mints, you can substitute with any mint chocolate candy, but the texture won’t be quite as creamy. For a gluten-free option, use a 1:1 gluten-free flour blend—I’ve had good results with King Arthur’s Measure for Measure.
Equipment Needed
You don’t need a fancy kitchen to make these cookies. Here’s what you’ll need, along with a few tips I’ve picked up along the way.
- Mixing bowls – One large bowl for the wet ingredients and one medium bowl for the dry ingredients. I use glass bowls because they don’t retain odors, but any bowl works.
- Whisk – For combining the dry ingredients evenly. A fork works in a pinch, but a whisk does a better job of aerating the flour and cocoa.
- Rubber spatula – For folding in the chopped Andes mints without overmixing. A wooden spoon works too, but a spatula is gentler on the dough.
- Baking sheets – Two rimmed baking sheets are ideal so you can rotate them between batches. I recommend light-colored aluminum sheets—dark ones can cause the bottoms to brown too quickly.
- Parchment paper or silicone baking mats – These prevent sticking and make cleanup a breeze. Silicone mats also help the cookies spread more evenly.
- Cookie scoop (1.5 tablespoon size) – This ensures all your cookies are the same size, so they bake evenly. If you don’t have one, use a regular tablespoon measure.
- Cooling racks – Essential for letting the cookies cool properly. If you leave them on the hot baking sheet, they’ll continue cooking and can become overdone.
- Small bowl for powdered sugar – For rolling the dough balls. A shallow bowl works best so you can easily coat each ball.
- Chef’s knife and cutting board – For chopping the Andes mints. A serrated knife works even better—it cuts through the candy without crushing it.
As for budget-friendly options, I’ve made these cookies with store-brand cocoa and generic peppermint extract, and they still turned out great. The one thing I wouldn’t skimp on is the Andes mints—the generic versions just don’t melt the same way. Also, if you don’t have a cookie scoop, you can use two spoons to portion the dough. It takes a little longer, but it works perfectly fine.
Preparation Method
Let me walk you through this step by step. I’ve included all the little details that make the difference between good cookies and unforgettable ones.
- Preheat your oven to 350°F (175°C). Line two baking sheets with parchment paper or silicone mats. Getting the oven to the right temperature before you start mixing ensures even baking from the first batch.
- In a medium bowl, whisk together the flour, cocoa powder, baking powder, and salt. Whisk for about 20 seconds to make sure everything is evenly distributed. If you see any lumps in the cocoa powder, break them up with your fingers. This dry mixture should look uniform in color—a deep, even brown.
- In a large bowl, whisk together the melted butter, granulated sugar, and brown sugar. Whisk until the mixture looks smooth and glossy, about 1 minute. The sugars should be fully incorporated into the butter with no graininess left. This is where the texture starts to come together.
- Add the eggs, one at a time, whisking well after each addition. Then add the vanilla extract and peppermint extract. Whisk until the mixture is smooth and slightly thickened, about 30 seconds. It should look like a thick, shiny caramel. Take a moment to smell it—that mint-chocolate aroma is incredible.
- Pour the dry ingredients into the wet ingredients. Use a rubber spatula to fold everything together until just combined. Stop mixing when you can no longer see streaks of flour. Overmixing at this stage will make the cookies tough instead of tender. The dough will be thick and slightly sticky.
- Fold in the chopped Andes mints. Reserve about 12 whole mints for later. Use the spatula to gently distribute the mint pieces throughout the dough. Don’t overmix—you want distinct pockets of mint in every cookie, not a uniform green dough.
- Cover the bowl with plastic wrap and refrigerate for at least 30 minutes. This is crucial. Chilled dough spreads less and creates better crinkles. I’ve tested this at 15 minutes, 30 minutes, and 2 hours—30 minutes is the sweet spot. The dough should feel firm but still scoopable. If you’re in a hurry, you can pop it in the freezer for 15 minutes instead.
- Place the powdered sugar in a small shallow bowl. Using a cookie scoop or tablespoon, portion out rounded tablespoons of dough (about 1.5 tablespoons each). Roll each portion into a smooth ball between your palms. The dough will be slightly sticky, so you might want to lightly grease your hands with a drop of oil.
- Roll each dough ball generously in the powdered sugar. Make sure every surface is coated—this is what creates that beautiful crackled look. I like to double-coat them: roll once, let them sit for a minute, then roll again. The extra coating makes the cracks more dramatic.
- Place the coated dough balls on the prepared baking sheets, spacing them about 2 inches apart. These cookies spread, so give them room. I fit about 9 cookies per standard baking sheet. Don’t press them down—they’ll spread on their own in the oven.
- Bake for 10-12 minutes. The cookies should look puffed and cracked, with the edges set but the centers still slightly soft. They’ll look a bit underdone in the middle—that’s exactly what you want. The cookies continue to bake from residual heat after you take them out. For fudgier cookies, bake for 10 minutes. For slightly crispier edges, go for 12.
- Remove from the oven and immediately press a whole Andes mint into the center of each cookie. Work quickly while the cookies are still hot. The mint will start melting right away, creating that gorgeous glossy green center. Let the cookies cool on the baking sheet for 5 minutes—the mint will continue to melt and spread.
- Transfer the cookies to a wire rack to cool completely. After about 10 minutes, the mint will have set into a smooth, shiny pool on top of each cookie. The contrast between the dark chocolate cookie, the snowy powdered sugar, and the green mint center is absolutely stunning.
A few troubleshooting notes: If your cookies didn’t crack, the dough was probably too warm. Pop it back in the fridge for 15 minutes. If they spread too much, your butter was too warm when you mixed it, or your baking powder is old. And if the Andes mint on top doesn’t melt smoothly, your cookies might have cooled too much before you added it—next time, add it right when they come out of the oven.
Cooking Tips & Techniques
After more batches of these cookies than I care to admit, I’ve picked up a few tricks that make the process smoother and the results more consistent. Let me share what I’ve learned the hard way so you don’t have to.
Chill the dough, no shortcuts. I know, I know—you’re busy and impatient. But trust me on this one. That 30-minute chill isn’t optional. The first time I made these, I skipped it because I was in a rush, and the cookies spread into flat, ugly discs with barely any crinkle. The powdered sugar just disappeared into the dough instead of cracking. Chilling solidifies the butter, which means the cookies hold their shape better and the sugar stays on the surface where it can do its magic.
Use a light hand with the mint extract. Peppermint extract is potent stuff. I once got distracted and added a full tablespoon instead of a teaspoon, and those cookies tasted like a mouthful of toothpaste. Start with 1 teaspoon, taste the dough (it’s safe to eat raw since there are no eggs in the traditional sense—well, there are eggs, but a tiny taste won’t hurt), and add another ¼ teaspoon if you want a stronger mint flavor. The Andes mints will also add mintiness as they melt, so the flavor develops further after baking.
Double-coat in powdered sugar for the best crinkle effect. This was a game-changer for me. Roll each dough ball in powdered sugar once, let it sit on the counter for a minute (the sugar will start to dissolve slightly), then roll it again. The second coat creates a thicker layer that cracks more dramatically as the cookie spreads. It also gives you that beautiful snowy look that makes these cookies so photogenic.
Bake one sheet at a time if possible. I know it takes longer, but the results are worth it. When you put two sheets in the oven at once, the heat circulates differently, and the cookies on the bottom rack often brown faster on the bottom. If you need to bake two sheets, rotate them halfway through and switch their positions. I learned this after a batch where the bottom sheet came out with burnt bottoms while the top sheet was perfect.
Let them cool completely before stacking. I made this mistake when I was packing cookies for a party. I stacked them while they were still warm, and the Andes mint tops smeared all over the cookies underneath. They still tasted fine, but they looked like a mess. Give them a full 30 minutes on the cooling rack before you even think about stacking them.
Variations & Adaptations
One of the best things about this recipe is how flexible it is. Here are some variations I’ve tried that turned out wonderfully.
Dark Chocolate Mint Crinkles: Swap the regular cocoa powder for black cocoa powder (the kind used in Oreos). It gives the cookies a darker, more dramatic color and a deeper, almost smoky chocolate flavor. The contrast with the bright green mint center is absolutely stunning. I made these for a Christmas party last year, and they were the first cookies to disappear from the platter.
Gluten-Free Version: Use a 1:1 gluten-free flour blend instead of all-purpose flour. I’ve tested this with King Arthur’s Measure for Measure and Bob’s Red Mill, and both worked beautifully. The texture is slightly more tender, almost like a brownie, but the crinkle effect still works perfectly. Just make sure your blend contains xanthan gum, or add ½ teaspoon separately.
White Chocolate Peppermint Crinkles: Replace the Andes mints with white chocolate chips and add ½ teaspoon of crushed candy canes to the dough. Instead of pressing a whole Andes mint on top, press a piece of white chocolate and a sprinkle of crushed candy cane. This version is more festive-looking with red and white speckles, and the sweetness of the white chocolate balances the mint beautifully.
Vegan Adaptation: Use melted coconut oil instead of butter, flax eggs (1 tablespoon ground flaxseed mixed with 3 tablespoons water per egg) instead of regular eggs, and vegan Andes mints or dark chocolate mint chips. The texture will be slightly different—a bit more cake-like than fudgy—but they’re still delicious. I made these for a vegan friend, and she asked for the recipe before she even finished her first cookie.
Spiced Mint Chocolate Crinkles: Add ½ teaspoon of cinnamon and ¼ teaspoon of cayenne pepper to the dry ingredients. The warmth of the spices plays beautifully with the cool mint, creating a complex flavor that’s unexpected but addicting. This is my personal favorite variation for winter holidays—it feels cozy and sophisticated at the same time.
Serving & Storage Suggestions
These cookies are gorgeous on their own, but here are a few ways to make them even more special.
Serving Temperature: These cookies are best at room temperature, when the Andes mint center has set into a smooth, creamy disc. But honestly, I love them slightly warm too—the mint gets a little gooey, and the chocolate is extra fudgy. If you’re serving them at a party, let them cool completely on a wire rack, then arrange them on a festive platter. The powdered sugar will stay pristine if you don’t stack them.
Presentation Ideas: Arrange the cookies on a white platter to make the dark chocolate and green mint pop. For a holiday touch, dust the platter with a little extra powdered sugar to look like snow. You can also stack them in a clear glass jar tied with a red ribbon for a beautiful homemade gift. I’ve given these as teacher gifts and neighbor gifts, and they’re always a hit.
Complementary Dishes: These cookies pair beautifully with a glass of cold milk, a hot peppermint mocha, or a cup of strong coffee. For a dessert board, serve them alongside fresh berries, dark chocolate truffles, and shortbread cookies. The mint flavor also makes them a great palate cleanser after a heavy holiday meal.
Storage Instructions: Store these cookies in an airtight container at room temperature for up to 5 days. Layer them between sheets of parchment paper to prevent sticking. The powdered sugar might absorb a little moisture over time, but the cookies will still taste amazing. Do not refrigerate them—the fridge dries out baked goods and can make the Andes mint center turn cloudy.
Freezing Instructions: These cookies freeze beautifully. You can freeze the baked cookies for up to 3 months. Place them in a single layer on a baking sheet, freeze until solid (about 1 hour), then transfer to a freezer-safe bag or container. To thaw, let them sit at room temperature for about 30 minutes. You can also freeze the unbaked dough balls—just roll them in powdered sugar right before baking, adding an extra minute or two to the bake time.
Flavor Development: Interestingly, these cookies taste even better the next day. The mint flavor mellows and melds with the chocolate, creating a more balanced taste. If you can resist eating them all on day one, you’ll be rewarded on day two. I’ve noticed the texture also improves—the centers get even fudgier as they sit.
Nutritional Information & Benefits
Let’s be real—these are cookies, not health food. But I believe in enjoying treats mindfully, and knowing what’s in them helps with that.
Estimated Nutritional Values (per cookie, based on 24 cookies):
| Nutrient | Amount |
|---|---|
| Calories | 185 |
| Total Fat | 8g |
| Saturated Fat | 5g |
| Cholesterol | 30mg |
| Sodium | 95mg |
| Total Carbohydrates | 27g |
| Dietary Fiber | 1g |
| Sugars | 19g |
| Protein | 2g |
Health Benefits of Key Ingredients: Cocoa powder is rich in antioxidants called flavonoids, which can help reduce inflammation and improve heart health. The Andes mints contain a small amount of peppermint oil, which has been shown to aid digestion—perfect after a heavy holiday meal. And while sugar isn’t exactly a health food, the small amount of brown sugar adds trace minerals like calcium and potassium.
Dietary Considerations: These cookies are vegetarian and can be made gluten-free and vegan with the substitutions mentioned above. They contain dairy (butter) and eggs, so they’re not suitable for those with dairy or egg allergies. The Andes mints are also gluten-free, so the recipe is naturally gluten-free if you use certified gluten-free flour.
Potential Allergens: This recipe contains wheat (gluten), dairy, and eggs. The Andes mints are produced in a facility that also processes peanuts and tree nuts, so if you have severe nut allergies, check the packaging or use an alternative mint chocolate.
My Personal Wellness Perspective: I believe in the 80/20 rule—eat nourishing foods 80% of the time, and enjoy treats like these cookies the other 20%. The holidays are meant for celebration, and sharing homemade cookies with loved ones is one of the simplest joys of the season. One cookie won’t derail your health goals, but it might just make your day a little brighter.
Conclusion
These Andes mint chocolate crinkle cookies have become my go-to holiday bake for good reason. They’re stunning on the plate, incredibly satisfying to make, and absolutely delicious to eat. The combination of rich chocolate, cool mint, and that beautiful crackled powdered sugar top is something special—the kind of cookie that makes people stop mid-conversation and say, “Wait, what’s in these?”
What I love most about this recipe is how forgiving it is. Even if your first batch doesn’t crack perfectly or your Andes mint centers aren’t picture-perfect, they’ll still taste amazing. And honestly, the imperfect ones are often the most charming. Baking should be fun, not stressful, and this recipe delivers on both flavor and ease.
I’d love to hear how these turn out for you! Did you try any of the variations? Did your family fight over the last cookie? Drop a comment below and let me know—I read every single one, and your stories make my day. And if you’re looking for more holiday baking inspiration, be sure to check out my other cookie recipes for the season. Happy baking, friends!
Frequently Asked Questions
Can I use mint chocolate chips instead of Andes mints?
Yes, you can! Mint chocolate chips work well in the dough, but they won’t create that same smooth, creamy center when pressed on top. If you use chips, I recommend pressing a few extra into the top of each cookie right after baking for a similar effect.
Why didn’t my cookies crackle?
The most common reason is that the dough wasn’t chilled enough. The powdered sugar needs a cold dough surface to cling to and crack as the cookie spreads. Make sure you chill the dough for at least 30 minutes, and roll the dough balls generously in powdered sugar right before baking.
Can I make the dough ahead of time?
Absolutely! You can refrigerate the dough for up to 3 days before baking. Just let it sit at room temperature for about 10 minutes to soften slightly before scooping and rolling in powdered sugar. You can also freeze the dough balls for up to 3 months—bake directly from frozen, adding 1-2 minutes to the bake time.
How do I prevent the Andes mint from melting too much on top?
The mint is supposed to melt slightly, but if it’s pooling too much, your cookies might be too hot when you add it. Let the cookies cool on the baking sheet for 2-3 minutes before pressing the mint on top. Also, make sure you’re using whole Andes mints, not chopped pieces—whole mints melt more evenly.
Can I double this recipe?
Yes, this recipe doubles beautifully! Just make sure you have enough oven space to bake in batches, and keep the unbaked dough chilled while the first batch is baking. I often make a double batch for holiday parties and cookie exchanges—they go fast.
Pin This Recipe!

Perfect Andes Mint Chocolate Crinkle Cookies for the Holidays

These Andes mint chocolate crinkle cookies feature a deep chocolate base with a beautiful crackled top dusted with powdered sugar and a gooey mint center. They are quick, easy, and perfect for holiday cookie exchanges.
- Prep Time: 30 minutes
- Cook Time: 12 minutes
- Total Time: 1 hour 12 minutes (includes 30 minutes chilling)
- Yield: 24 cookies 1x
- Category: Dessert
- Cuisine: American
Ingredients
- 2 cups (250g) all-purpose flour
- ½ cup (50g) unsweetened cocoa powder (Dutch-process recommended)
- 2 teaspoons baking powder
- ½ teaspoon salt
- ½ cup (113g) unsalted butter, melted and cooled
- 1 cup (200g) granulated sugar
- ½ cup (100g) light brown sugar, packed
- 2 large eggs, room temperature
- 1 teaspoon vanilla extract
- 1 teaspoon peppermint extract
- 1 cup (about 20-24) Andes Creme de Menthe thins, chopped (reserve 12 whole for topping)
- ½ cup (60g) powdered sugar, for rolling
Instructions
- Preheat oven to 350°F (175°C). Line two baking sheets with parchment paper or silicone mats.
- In a medium bowl, whisk together flour, cocoa powder, baking powder, and salt for about 20 seconds.
- In a large bowl, whisk together melted butter, granulated sugar, and brown sugar until smooth and glossy, about 1 minute.
- Add eggs one at a time, whisking well after each. Add vanilla and peppermint extracts; whisk until smooth and slightly thickened, about 30 seconds.
- Pour dry ingredients into wet ingredients; fold with a rubber spatula until just combined. Do not overmix.
- Fold in chopped Andes mints (reserve 12 whole mints for topping).
- Cover bowl with plastic wrap and refrigerate for at least 30 minutes (or 15 minutes in the freezer).
- Place powdered sugar in a small shallow bowl. Scoop rounded tablespoons of dough (about 1.5 tablespoons each) and roll into smooth balls.
- Roll each dough ball generously in powdered sugar, double-coating for best crinkle effect.
- Place coated dough balls on prepared baking sheets, spacing 2 inches apart. Do not press down.
- Bake for 10-12 minutes, until puffed and cracked with edges set but centers still soft.
- Remove from oven and immediately press a whole Andes mint into the center of each cookie. Let cool on baking sheet for 5 minutes.
- Transfer to a wire rack to cool completely (about 30 minutes) before stacking.
Notes
Chill dough for at least 30 minutes to ensure proper crinkle. Double-coat dough balls in powdered sugar for dramatic cracks. Add Andes mint immediately after baking for gooey center. Cookies taste even better the next day.
Nutrition
- Serving Size: 1 cookie
- Calories: 185
- Sugar: 19
- Sodium: 95
- Fat: 8
- Saturated Fat: 5
- Carbohydrates: 27
- Fiber: 1
- Protein: 2
Keywords: Andes mint cookies, chocolate crinkle cookies, holiday cookies, mint chocolate cookies, Christmas cookies


