The school fundraiser was in six hours and I’d completely forgotten. Every other parent was probably dropping off gourmet cupcakes from that fancy bakery downtown, or those Pinterest-perfect veggie platters shaped like turkeys. I was staring into my fridge, panic rising, with a half-used butternut squash, a block of cheddar, and a box of elbow macaroni. My kids were watching cartoons, completely oblivious to my impending social failure.
Honestly, I almost just ordered pizza. But then I remembered this one-pot mac and cheese I’d been tinkering with, the one where you sneak the squash in and nobody notices. I figured, what did I have to lose? I mean, I was already going to show up empty-handed if I didn’t try something. So I grabbed the pot, started sautéing, and threw the whole thing together in a frantic, slightly messy haze. I didn’t even have time to clean up the flour dust on the counter before I ran out the door.
The moment I set the pot down on the buffet table, a little girl asked her mom for “the orange mac and cheese.” Then another kid. Then a dad. The pot was scraped clean in twenty minutes. People were asking me for the recipe, and I had to sheepishly admit I’d just made it up under pressure. That’s the thing about this one-pot kid-approved butternut squash mac and cheese. It’s not fancy, it’s not pretentious, and it’s born from a moment of sheer panic. But it works. It’s the recipe that made me look like a hero when I felt like a total mess, and I’ve been making it ever since. Maybe you’ve been there, staring into your own fridge, hoping for a miracle. This is that miracle.
Why You’ll Love This Recipe
Let’s be real—getting kids to eat a vegetable that isn’t shaped like a dinosaur or drowned in ketchup can feel like a full-time job. This one-pot butternut squash mac and cheese is my secret weapon. It’s not just another mac and cheese recipe; it’s the one that makes you feel like you’ve pulled off a magic trick. The squash blends in so completely that even the pickiest eaters just taste creamy, cheesy goodness.
- One Pot, Less Mess: From start to finish, everything happens in a single pot. No draining, no extra dishes, and way less cleanup. Perfect for those busy weeknights when you’re already running behind.
- Sneaky Veggie Power: The butternut squash adds a gorgeous golden color and a silky texture, but the flavor is completely hidden by the cheese. Your kids will get a serving of vitamin A and fiber without a single complaint.
- Budget-Friendly: This recipe uses simple, affordable ingredients you likely already have on hand. A single squash goes a long way, making this a super economical family meal.
- Crowd-Pleaser: I’ve brought this to potlucks, playdates, and even a grown-up dinner party. It disappears every single time. Adults love the subtle sweetness, and kids just love the cheese.
- Unbelievably Creamy: The secret is simmering the squash right in the milk and broth, then mashing it directly into the sauce. It creates a velvety, luxurious texture that boxed mac and cheese can only dream of.
This isn’t just another mac and cheese. It’s comfort food that actually does something good for your family. It’s the kind of meal that makes you close your eyes after the first bite, not because it’s complicated, but because it’s so perfectly satisfying. You get the soul-soothing feeling of a classic, but with a little extra heart and a whole lot less stress. It’s perfect for impressing the in-laws or just getting dinner on the table without a fight.
What Ingredients You Will Need
This recipe relies on a short list of pantry-friendly ingredients that work together to create something truly special. The butternut squash is the star, but it’s the combination of a few key items that makes the sauce so incredibly creamy and flavorful.
- For the Sauce:
- 1 medium butternut squash (about 2-3 lbs / 900g-1.4kg), peeled, seeded, and cubed into 1-inch pieces: This is the base of our “cheese” sauce. Look for a squash that feels heavy for its size with a firm, unblemished skin. Pre-cut squash from the store works in a pinch, but it’s often more expensive.
- 2 tablespoons unsalted butter: Adds richness and helps sauté the aromatics. You can use salted butter, just reduce the added salt later.
- 1 small yellow onion, finely diced: This adds a savory depth that balances the squash’s sweetness. Dice it small so it melts into the sauce.
- 2 cloves garlic, minced: A must-have for savory flavor. Fresh is best, but jarred minced garlic works in a hurry.
- 2 cups (480ml) low-sodium chicken or vegetable broth: This is the cooking liquid for the pasta and squash. Low-sodium is key so you can control the final saltiness.
- 1 cup (240ml) whole milk: For the creamiest result, use whole milk. You can substitute 2% or a dairy-free milk like oat milk, but the sauce will be slightly less rich.
- 8 ounces (225g) sharp cheddar cheese, freshly shredded: Pre-shredded cheese has anti-caking agents that prevent it from melting smoothly. Buy a block and shred it yourself—it makes a huge difference in texture.
- 1/2 cup (50g) grated Parmesan cheese: Adds a salty, nutty kick that takes the sauce to the next level.
- 1/2 teaspoon salt, plus more to taste: Start with less and adjust at the end.
- 1/4 teaspoon black pepper: A little goes a long way to enhance the other flavors.
- 1/4 teaspoon ground nutmeg (optional but recommended): This is my secret ingredient. A tiny pinch of nutmeg does something magical with the squash and cheese—it’s not spicy, just warm and cozy.
- For the Pasta:
- 8 ounces (225g) elbow macaroni or any small pasta shape: Elbows are classic, but shells, rotini, or even ditalini work great. The small shapes hold onto the sauce beautifully.
- For the Topping (Optional but Highly Recommended):
- 1/4 cup (30g) panko breadcrumbs: For a little crunch on top.
- 1 tablespoon melted butter: To toss with the breadcrumbs before baking (if you choose to bake it).
- 2 tablespoons fresh parsley, chopped: For a pop of color and freshness.
Equipment Needed
You don’t need a fancy kitchen to pull this off. The beauty of a one-pot recipe is its simplicity. Here’s what you’ll need:
- A Large Dutch Oven or Heavy-Bottomed Pot (5-6 quart capacity): This is the only pot you’ll use. A Dutch oven is ideal because it distributes heat evenly, but any large, heavy pot will work. Avoid thin, lightweight pots as the milk-based sauce can scorch easily.
- A Sharp Chef’s Knife: For safely and efficiently peeling and cubing the butternut squash. A good knife makes this job so much less intimidating.
- A Vegetable Peeler: A Y-peeler is my favorite for tough squash skin—it’s faster and gives you more control.
- A Wooden Spoon or Silicone Spatula: For stirring the sauce and pasta. A wooden spoon is great for scraping up any bits from the bottom of the pot.
- A Box Grater or Microplane: For shredding your own cheese. It takes an extra minute, but it’s a game-changer for the sauce’s texture.
- A Potato Masher or Fork: For mashing the cooked squash right in the pot. A potato masher is faster, but a fork works just fine.
If you don’t have a Dutch oven, a large, deep skillet with a lid will also work. Just make sure it’s big enough to hold the pasta and all the liquid without boiling over.
Preparation Method
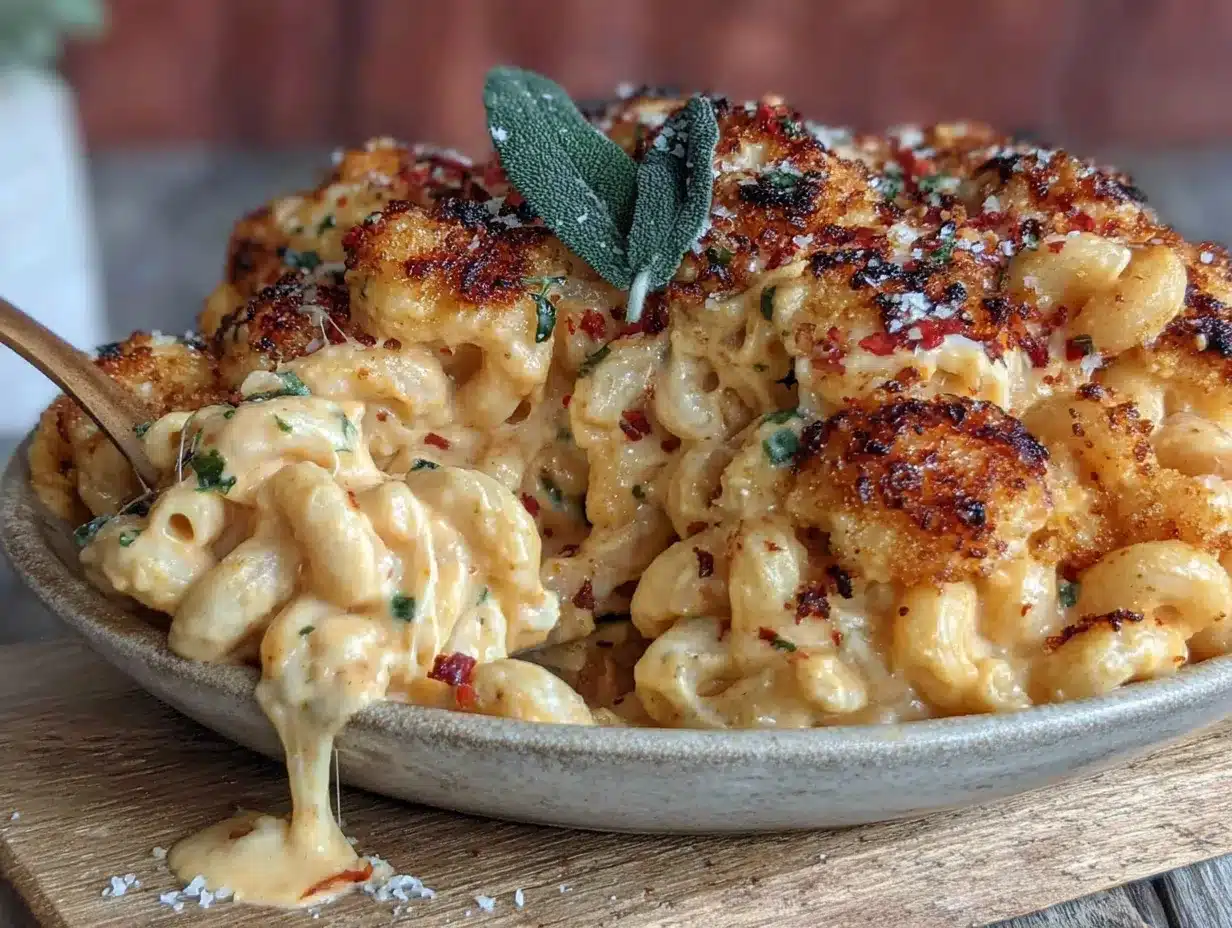
Alright, let’s get cooking! This whole process takes about 30-35 minutes from start to finish. The key is to not be scared of the squash—it’s going to get soft and blend right in.
- Prep the Squash (5 minutes): First things first, tackle that butternut squash. Using a sharp vegetable peeler, remove the tough outer skin. Then, cut the squash in half lengthwise and scoop out the seeds and stringy bits with a spoon. Cut the flesh into 1-inch cubes. Don’t worry about them being perfectly uniform, just roughly the same size so they cook evenly. (Safety tip: a sharp knife is safer than a dull one! Take your time.)
- Sauté the Aromatics (3 minutes): Place your large pot over medium heat and add the 2 tablespoons of butter. Once it’s melted and shimmering, add the finely diced onion. Cook for about 2-3 minutes, stirring occasionally, until the onion becomes soft and translucent. It shouldn’t brown—just get fragrant. Then, add the minced garlic and cook for another 30 seconds until you can smell it.
- Simmer the Squash (10 minutes): Add the cubed butternut squash to the pot, along with the 2 cups of broth and 1 cup of milk. Stir everything together. Increase the heat to high and bring the mixture to a boil. Once it’s boiling, reduce the heat to low, cover the pot, and let it simmer for about 10-12 minutes. You’ll know the squash is ready when you can easily pierce a cube with a fork. It should be very tender.
- Mash the Squash (2 minutes): Turn off the heat. Using a potato masher or a large fork, mash the squash right in the pot until it’s mostly smooth. A few small lumps are totally fine—they add a little rustic texture. The mixture will look a bit thin and soupy at this point; that’s exactly what we want.
- Cook the Pasta (8-10 minutes): Turn the heat back to medium-high. Add the 8 ounces of elbow macaroni and the 1/2 teaspoon of salt and 1/4 teaspoon of black pepper to the pot. Stir well to combine. Bring it back to a gentle boil, then reduce the heat to medium-low to maintain a simmer. Cook the pasta uncovered, stirring occasionally, for about 8-10 minutes, or until the pasta is tender. The liquid will be mostly absorbed by the pasta and the squash mixture will thicken into a sauce. If it looks too thick before the pasta is done, add a splash more milk or broth.
- Cheese It Up (2 minutes): Once the pasta is cooked, remove the pot from the heat entirely. This is crucial—adding cheese over direct heat can make it grainy. Add the freshly shredded cheddar, the grated Parmesan, and the optional nutmeg. Stir vigorously until the cheese is completely melted and the sauce is smooth and glossy. Taste it and add more salt or pepper if needed. (This is where you can sneak a taste—just make sure no one is watching!)
- Optional: Make it Crispy (5 minutes): If you want that golden, crunchy topping, preheat your oven’s broiler. In a small bowl, toss the panko breadcrumbs with the 1 tablespoon of melted butter. Sprinkle the breadcrumb mixture evenly over the mac and cheese. Place the pot (if it’s oven-safe) under the broiler for 2-3 minutes, watching it closely, until the breadcrumbs are golden brown. Garnish with fresh parsley before serving.
Cooking Tips & Techniques
I’ve made this recipe more times than I can count, and I’ve definitely had my share of small disasters. Here are the lessons I learned the hard way so you don’t have to.
- Don’t Overcook the Squash: The squash needs to be fork-tender, but not falling apart into mush. If you overcook it, it can become watery and make the final sauce thinner. Stick to the 10-12 minute simmer time.
- Shred Your Own Cheese: I know it’s tempting to buy the bag, but I promise you, this is the single most important tip for a smooth, creamy sauce. Pre-shredded cheese is coated in cellulose and starches to prevent clumping, which also prevents it from melting properly. You’ll end up with a gritty, clumpy sauce. A block of cheddar takes 2 minutes to shred—totally worth it.
- Low and Slow for the Cheese: When you add the cheese, the pot is off the heat. The residual heat from the pasta and sauce is more than enough to melt it perfectly. If you try to melt it over direct heat, the proteins can seize up and you’ll get a greasy, separated mess. Patience is your friend here.
- Adjust the Liquid as You Go: Different pastas absorb liquid at different rates. If your sauce looks too thick before the pasta is done, just add a splash of broth or milk. If it looks too thin after the pasta is cooked, let it sit for a minute or two off the heat—it will thicken as it cools.
- Timing is Everything: This whole dish comes together in about 30 minutes. I like to start prepping the squash and shredding the cheese while the onion is sautéing. This way, I’m not scrambling at the end.
Variations & Adaptations
This recipe is a fantastic base for all kinds of tweaks. Don’t be afraid to make it your own!
- Add Protein: To make it a heartier meal, stir in 1-2 cups of cooked, shredded rotisserie chicken, crumbled cooked bacon, or even some leftover Italian sausage right after you add the cheese. My family loves it with crispy bacon bits on top.
- Go Green: Stir in a handful of fresh spinach or some steamed broccoli florets right at the end, just before serving. The heat from the mac and cheese will wilt the spinach perfectly. It’s an easy way to add another veggie.
- Make it Gluten-Free: Simply swap the elbow macaroni for your favorite gluten-free pasta. Be sure to check the cooking time on the package, as gluten-free pastas can vary. You may also need a touch more liquid.
- Dairy-Free Version: Use a high-quality dairy-free butter, unsweetened oat milk or cashew milk for the liquid, and your favorite vegan cheddar and Parmesan shreds. The texture will be slightly different, but it’s still deliciously creamy.
- Spice It Up: Add a pinch of cayenne pepper or a dash of smoked paprika along with the nutmeg for a little warmth and depth. A tiny pinch of red pepper flakes is also great for grown-up palates.
Serving & Storage Suggestions
This mac and cheese is best served hot, straight from the pot. It’s the ultimate comfort food, so don’t overthink the presentation.
- Serving: Spoon it into bowls and top with the crispy breadcrumbs and a sprinkle of fresh parsley if you used them. It’s fantastic on its own, but also pairs beautifully with a simple green salad dressed with a tangy vinaigrette to cut through the richness. A side of roasted broccoli or green beans is also a perfect match.
- Storage: Leftovers are a gift. Let the mac and cheese cool completely, then transfer it to an airtight container. It will keep in the refrigerator for up to 4 days. The sauce will thicken significantly as it sits, but that’s normal.
- Reheating: The best way to reheat it is on the stovetop. Add a splash of milk or broth to the pot and warm it over medium-low heat, stirring frequently, until it’s hot and creamy again. You can also microwave individual portions in 30-second intervals, stirring in between, adding a little milk each time. The flavors actually get even better on the second day as they meld together.
- Freezing: This mac and cheese freezes well! Place the cooled mac and cheese in a freezer-safe container or bag. It will keep for up to 3 months. Thaw it overnight in the refrigerator before reheating on the stovetop with a splash of milk.
Nutritional Information & Benefits
This recipe is a fantastic way to get a healthy dose of vegetables into a family favorite. The nutritional values below are estimates for one serving (about 1/6th of the recipe).
| Nutrient | Approximate Value Per Serving |
|---|---|
| Calories | 420-480 kcal |
| Total Fat | 18-22g |
| Saturated Fat | 10-12g |
| Cholesterol | 50-60mg |
| Sodium | 600-750mg |
| Total Carbohydrates | 45-50g |
| Dietary Fiber | 5-7g |
| Sugars | 6-8g |
| Protein | 18-22g |
| Vitamin A | High (from butternut squash) |
| Vitamin C | Good source |
| Calcium | Good source (from dairy) |
Pin This Recipe!
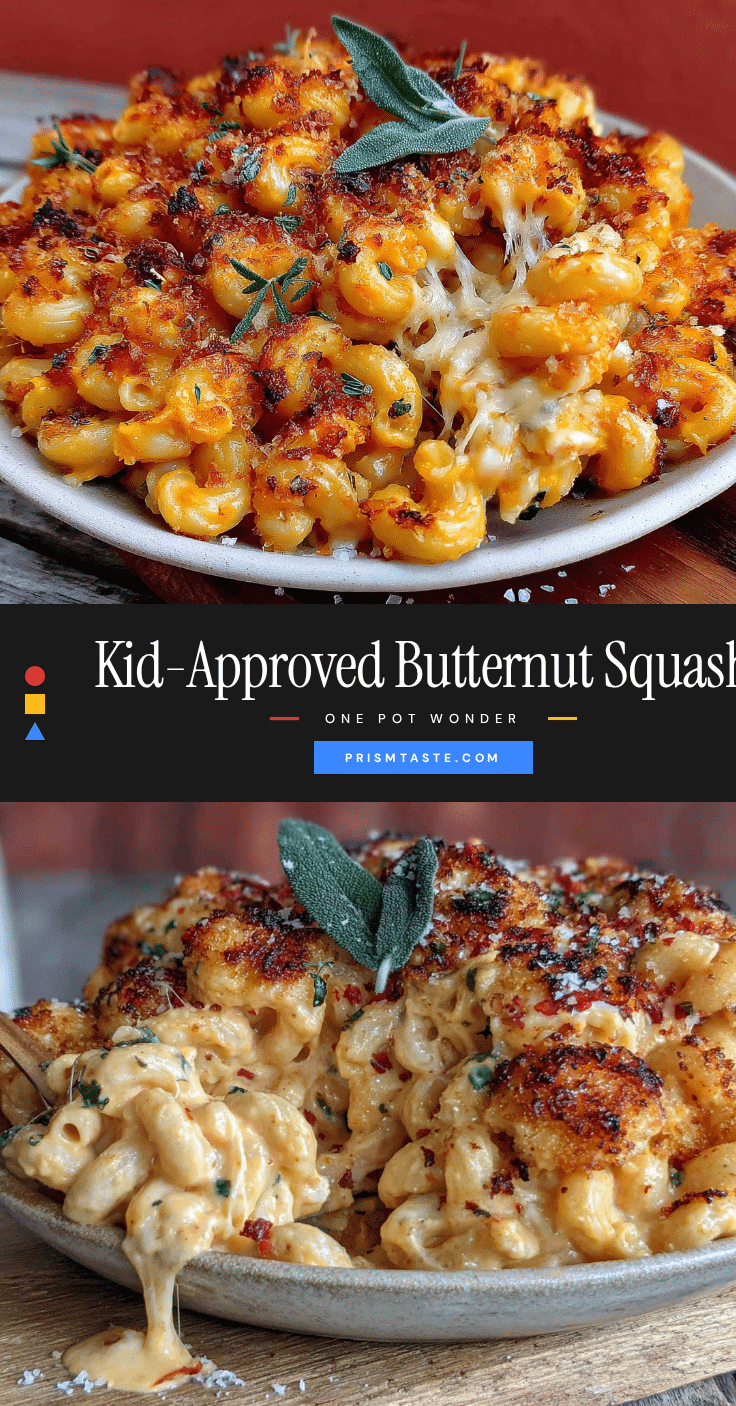
One-Pot Kid-Approved Butternut Squash Mac and Cheese

This one-pot butternut squash mac and cheese is a creamy, cheesy, and secretly healthy comfort food that even picky eaters will love. It’s made in a single pot for easy cleanup and is perfect for busy weeknights.
- Prep Time: 15 minutes
- Cook Time: 20 minutes
- Total Time: 35 minutes
- Yield: 6 servings 1x
- Category: Main Course
- Cuisine: American
Ingredients
- 1 medium butternut squash (about 2–3 lbs / 900g-1.4kg), peeled, seeded, and cubed into 1-inch pieces
- 2 tablespoons unsalted butter
- 1 small yellow onion, finely diced
- 2 cloves garlic, minced
- 2 cups (480ml) low-sodium chicken or vegetable broth
- 1 cup (240ml) whole milk
- 8 ounces (225g) sharp cheddar cheese, freshly shredded
- 1/2 cup (50g) grated Parmesan cheese
- 1/2 teaspoon salt, plus more to taste
- 1/4 teaspoon black pepper
- 1/4 teaspoon ground nutmeg (optional but recommended)
- 8 ounces (225g) elbow macaroni or any small pasta shape
- 1/4 cup (30g) panko breadcrumbs (optional)
- 1 tablespoon melted butter (optional)
- 2 tablespoons fresh parsley, chopped (optional)
Instructions
- Prep the Squash: Using a sharp vegetable peeler, remove the tough outer skin from the butternut squash. Cut the squash in half lengthwise and scoop out the seeds and stringy bits. Cut the flesh into 1-inch cubes.
- Sauté the Aromatics: Place a large pot over medium heat and add 2 tablespoons of butter. Once melted, add the finely diced onion and cook for 2-3 minutes until soft and translucent. Add the minced garlic and cook for 30 seconds until fragrant.
- Simmer the Squash: Add the cubed butternut squash, 2 cups of broth, and 1 cup of milk to the pot. Stir to combine. Increase heat to high and bring to a boil. Reduce heat to low, cover, and simmer for 10-12 minutes until the squash is fork-tender.
- Mash the Squash: Turn off the heat. Using a potato masher or fork, mash the squash in the pot until mostly smooth. The mixture will be thin and soupy.
- Cook the Pasta: Turn the heat back to medium-high. Add the elbow macaroni, 1/2 teaspoon salt, and 1/4 teaspoon black pepper. Stir well. Bring to a gentle boil, then reduce heat to medium-low and simmer uncovered for 8-10 minutes, stirring occasionally, until the pasta is tender. If the sauce becomes too thick, add a splash more milk or broth.
- Cheese It Up: Remove the pot from the heat. Add the shredded cheddar, grated Parmesan, and optional nutmeg. Stir vigorously until the cheese is completely melted and the sauce is smooth. Taste and adjust salt and pepper as needed.
- Optional Crispy Topping: If desired, preheat the oven’s broiler. In a small bowl, toss the panko breadcrumbs with 1 tablespoon of melted butter. Sprinkle over the mac and cheese. Place the pot under the broiler for 2-3 minutes until golden brown. Garnish with fresh parsley before serving.
Notes
For the creamiest sauce, always shred your own cheese from a block. Pre-shredded cheese contains anti-caking agents that prevent smooth melting. The nutmeg is optional but adds a warm, cozy flavor that complements the squash and cheese. If the sauce becomes too thick after cooking, stir in a splash of milk or broth. Leftovers can be stored in the refrigerator for up to 4 days and reheated on the stovetop with a splash of milk.
Nutrition
- Serving Size: 1/6 of recipe
- Calories: 450
- Sugar: 7
- Sodium: 675
- Fat: 20
- Saturated Fat: 11
- Carbohydrates: 47
- Fiber: 6
- Protein: 20
Keywords: butternut squash mac and cheese, one-pot mac and cheese, kid-friendly mac and cheese, healthy mac and cheese, easy mac and cheese, vegetarian mac and cheese


