My sister-in-law, Claire, swore she hated one-pan meals. For years. She called them “the culinary equivalent of wearing sweatpants to a wedding.” Then last Tuesday, I was making this garlic butter chicken and rice in my tiny kitchen, and she showed up unannounced (as she does) to borrow my stand mixer. I didn’t even offer her any—I was too focused on not burning the garlic, honestly. But she stood there, arms crossed, watching the rice soak up all that buttery, golden goodness. Then she asked for a fork. And then a bowl. And then she sat at my counter and ate two servings while complaining about her boss. I didn’t say a word. I just smiled into my own plate.
That’s the thing about this recipe. It doesn’t try to impress you. It just quietly does its job—turning simple, affordable ingredients into something that makes people forget they had a position on the matter. The chicken stays juicy, the rice comes out perfectly fluffy, and the whole thing comes together in one pan. One pan. No fancy techniques, no separate pots, no sink full of dishes. Maybe you’ve been there—staring at a pile of dirty cookware after a long day, wondering why dinner always has to be such a production.
This recipe fixes that. It’s the kind of meal you make when you want everyone at the table to actually eat without complaint, and you want to be sitting down with them in under an hour. The kind that uses pantry staples and a few chicken thighs, and somehow tastes like you spent way more effort than you did. I keep making it because it works. Every single time. And honestly? Watching Claire eat her words—and her second helping—was just a bonus.
Why You’ll Love This Recipe
This isn’t just another chicken and rice recipe. I’ve tested this version more times than I care to admit, tweaking the liquid ratio, the garlic amount, the cooking time, until it landed exactly right. Here is why this particular one-pan wonder deserves a permanent spot in your weekly rotation.
- One-Pan Wonder : Everything cooks in a single skillet or Dutch oven. That means less time washing dishes and more time actually enjoying your meal. For busy weeknights, this is a game-changer.
- Budget-Friendly Ingredients : Chicken thighs, rice, garlic, butter, and a few pantry seasonings. That is it. No expensive specialty items, no trips to three different stores. This is smart cooking that respects your grocery budget.
- Family-Approved Flavor : The garlic butter sauce coats every grain of rice and keeps the chicken incredibly moist. My kids gobble this up, and my husband always asks for seconds. It is that rare dish that pleases picky eaters and food lovers alike.
- Simple Technique, Big Results : You don’t need any fancy cooking skills here. Just some basic browning and simmering. The rice absorbs all the savory goodness as it cooks, creating a deeply flavorful side dish that practically cooks itself.
- Leftovers That Reheat Beautifully : This is not one of those recipes that turns into a sad, dry mess the next day. The rice stays tender, and the chicken remains juicy. Perfect for lunch the next day or a quick reheat dinner.
- Customizable Without Compromise : You can add vegetables, swap the protein, or adjust the seasoning, and the recipe still works. It is forgiving and adaptable, which is exactly what a busy home cook needs.
This recipe is the kind you will find yourself making again and again. Not because it is fancy, but because it is reliable. It delivers comfort and satisfaction with minimal effort, and that is a beautiful thing.
What Ingredients You Will Need
This recipe relies on a handful of simple, accessible ingredients that work together to create something truly satisfying. Most of these are probably already in your kitchen, which is exactly the point.
- Chicken thighs (bone-in, skin-on preferred, about 1.5 to 2 pounds): Bone-in thighs stay juicier during cooking and the skin gets beautifully crispy. If you prefer, boneless skinless thighs work too, just reduce the cooking time slightly. I usually buy a pack of 4 to 6 thighs from my local grocery store.
- Butter (unsalted, 4 tablespoons): This is the foundation of the garlic butter flavor. Unsalted gives you control over the salt level. If you only have salted butter, just reduce the added salt in the recipe.
- Garlic (6 to 8 cloves, minced): Fresh garlic is non-negotiable here. Pre-minced jarred garlic just doesn’t deliver the same punch. Take the extra minute to mince it yourself—you will taste the difference.
- Long-grain white rice (1 cup): I recommend basmati or jasmine rice for their distinct grains and fluffy texture. Avoid short-grain rice, which can become too sticky. Rinse the rice in a fine-mesh sieve until the water runs clear to remove excess starch.
- Chicken broth (2 cups, low-sodium): The broth is what the rice cooks in, so use a good quality one. Low-sodium lets you control the salt. Homemade broth is lovely, but a good store-bought brand like Swanson or Kitchen Basics works perfectly.
- Onion (1 medium, finely diced): A yellow or sweet onion adds a savory backbone to the dish. Dice it small so it melts into the rice as it cooks.
- Dried thyme (1 teaspoon): This herb pairs beautifully with chicken and garlic. If you have fresh thyme, use about 1 tablespoon of leaves. Oregano or rosemary also work well here.
- Paprika (1 teaspoon): Adds a subtle warmth and a lovely color to the chicken skin. Smoked paprika would be a wonderful substitute for a deeper flavor.
- Salt and black pepper (to taste): Season generously. The rice needs salt to taste good, so don’t be shy.
- Fresh parsley (a handful, chopped, for garnish): Optional, but it adds a pop of color and freshness that balances the richness of the dish. Flat-leaf parsley is best.
- Optional vegetables (1 cup, such as frozen peas, diced carrots, or green beans): If you want to add vegetables, stir them in during the last 10 minutes of cooking. This turns the dish into a complete one-pan meal.
That is the complete list. Simple, right? The beauty of this recipe is that it doesn’t require a long shopping list. You probably have most of these ingredients on hand already.
Equipment Needed
One of the best things about this recipe is how little equipment it requires. Here is what you will need:
- Large skillet or Dutch oven (12-inch with a tight-fitting lid): This is the most important piece. You need a pan that can hold the chicken and rice comfortably and has a lid that seals well. A heavy-bottomed skillet or Dutch oven distributes heat evenly and prevents burning. I use my trusty 12-inch cast iron skillet, but a stainless steel or non-stick pan works great too.
- Cutting board and sharp knife : For mincing garlic and dicing the onion. A sharp knife makes this job quick and safe.
- Fine-mesh sieve : For rinsing the rice. This step is crucial for removing excess starch and preventing gummy rice.
- Measuring cups and spoons : Accurate measurements matter, especially for the rice and liquid ratio. Use dry measuring cups for the rice and liquid measuring cups for the broth.
- Tongs : For flipping the chicken and handling it safely. Tongs give you better control than a fork.
- Wooden spoon or spatula : For stirring the rice and scraping up any browned bits from the bottom of the pan. Those bits are pure flavor.
If you don’t have a lid that fits your skillet, you can use a piece of aluminum foil tightly crimped around the edges. It works in a pinch. And honestly, I’ve done that more times than I’d like to admit.
Preparation Method
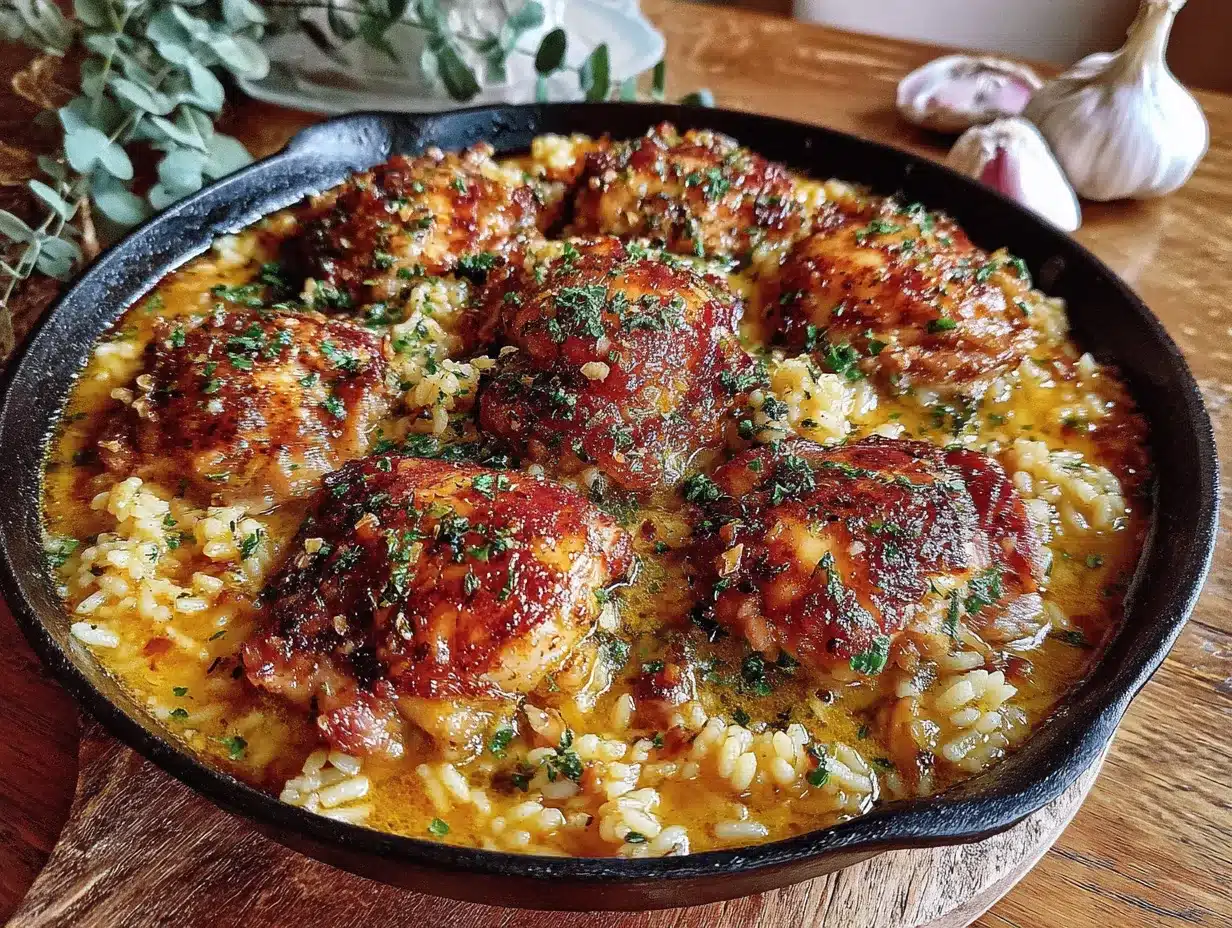
Let me walk you through this step by step. Trust me, it is simpler than it looks, and I have included all the little details that make the difference between good chicken and rice and unforgettable chicken and rice.
- Prep your ingredients first. Mince the garlic, dice the onion, rinse the rice in a fine-mesh sieve until the water runs clear, and pat the chicken thighs dry with paper towels. Drying the chicken is important—it helps the skin get crispy. Season the chicken generously on both sides with salt, pepper, and the paprika. Let it sit while you heat the pan.
- Heat your skillet over medium-high heat. Add 2 tablespoons of the butter. Once it is melted and sizzling, place the chicken thighs skin-side down in a single layer. Do not crowd the pan—cook in batches if necessary. Let them cook undisturbed for 5 to 7 minutes, until the skin is deep golden brown and crispy. Flip and cook for another 3 to 4 minutes on the other side. The chicken does not need to be fully cooked through at this point. Transfer the chicken to a plate and set aside.
- Reduce the heat to medium. Add the remaining 2 tablespoons of butter to the pan. Once melted, add the diced onion. Cook, stirring occasionally, for 3 to 4 minutes, until the onion is softened and translucent. Scrape up any browned bits from the bottom of the pan—that is where the flavor lives.
- Add the minced garlic and cook for 30 seconds, stirring constantly. Garlic burns quickly, so keep it moving. Your kitchen will smell incredible at this point.
- Add the rinsed rice to the pan. Stir it around for about a minute, coating it in the butter, onion, and garlic mixture. This toasting step adds a nutty flavor to the rice and helps it stay separate during cooking.
- Pour in the chicken broth and add the dried thyme. Stir everything together. Bring the liquid to a gentle boil. Taste the broth at this point and adjust the salt if needed. Remember, the rice will absorb this liquid, so it should be well-seasoned.
- Nestle the chicken thighs back into the pan, skin-side up. They should be sitting on top of the rice, not submerged in it. This keeps the skin crispy while the rice cooks underneath.
- Reduce the heat to low, cover the pan with a tight-fitting lid, and let it simmer gently for 18 to 20 minutes. Do not lift the lid during this time. The steam is what cooks the rice perfectly. If you peek, you release the steam and risk undercooked rice.
- After 18 minutes, remove the pan from the heat. Let it sit, still covered, for another 5 minutes. This resting period allows the rice to finish absorbing any remaining liquid and the flavors to meld together.
- Remove the lid carefully (steam is hot!). Fluff the rice with a fork. Check the chicken for doneness—it should register 165°F (74°C) at the thickest part. If you added optional vegetables like peas, stir them in now. The residual heat will warm them through perfectly.
- Garnish with fresh parsley and serve directly from the pan. That is the beauty of a one-pan meal—minimal cleanup and maximum presentation.
Cooking Tips & Techniques
I have made this recipe more times than I can count, and I have learned a few things along the way. Some of these came from mistakes, and I am sharing them so you don’t have to make the same ones.
- Don’t skip rinsing the rice. I know it is an extra step, but it makes a huge difference. Unrinsed rice has excess starch that turns the dish gummy. Rinse until the water runs clear, and you will get fluffy, separate grains every time.
- Pat the chicken dry. This is non-negotiable for crispy skin. Wet chicken steams instead of sears, and you will end up with pale, rubbery skin. Take the extra 30 seconds.
- Let the chicken come to room temperature. Take it out of the fridge 15 to 20 minutes before cooking. Cold chicken lowers the pan temperature and prevents proper browning. Room temperature chicken sears beautifully.
- Use a heavy-bottomed pan. Thin pans create hot spots that burn the rice before it is cooked through. A cast iron skillet or a heavy stainless steel pan distributes heat evenly, giving you perfectly cooked rice from edge to edge.
- Resist the urge to lift the lid. I know it is tempting to check on the rice, but every time you lift that lid, you let steam escape. That steam is what cooks the rice. Trust the process and keep it covered for the full 18 to 20 minutes.
- If the rice is undercooked at the end, add a splash more broth (about 2 to 3 tablespoons), cover, and cook on low for another 5 minutes. This has saved me more than once when I misjudged the heat level.
- For extra flavor, deglaze the pan with a splash of white wine or lemon juice after cooking the chicken. Scrape up those browned bits before adding the rice. It adds a brightness that cuts through the richness of the butter.
Variations & Adaptations
This recipe is wonderfully adaptable. Here are some ways to make it your own, based on what I have tried and tested.
- Vegetable-Packed Version : Add 1 cup of frozen peas and diced carrots during the last 10 minutes of cooking. I also love stirring in a handful of fresh spinach at the end—it wilts into the rice beautifully and adds a boost of nutrients. My kids don’t even notice the spinach.
- Creamy Garlic Butter Chicken : For an even richer version, stir in 1/4 cup of heavy cream or full-fat coconut milk after the rice is cooked. It turns the dish into a creamy, decadent comfort meal. Perfect for a cold winter night.
- Spicy Kick : Add 1/2 teaspoon of red pepper flakes along with the garlic, or use a pinch of cayenne pepper in the seasoning. The heat balances the butter beautifully. My husband loves this version.
- Herb and Lemon Variation : Replace the dried thyme with a teaspoon of dried oregano and add the zest of one lemon along with the garlic. Serve with lemon wedges for squeezing over the top. It brightens the whole dish and feels fresher for spring.
- Chicken Thigh Swap : You can use boneless, skinless chicken thighs or even chicken breasts. If using breasts, reduce the initial searing time and check for doneness earlier, as they cook faster. I prefer thighs for their moisture and flavor.
- Brown Rice Option : If you want to use brown rice, increase the broth to 2 1/2 cups and extend the cooking time to 40 to 45 minutes. The method stays the same, but the timing changes significantly.
Serving & Storage Suggestions
This dish is incredibly versatile when it comes to serving. Here is how I like to enjoy it and how to handle leftovers.
Serving : Serve the chicken and rice directly from the pan for a casual, family-style meal. Garnish with fresh parsley and a squeeze of lemon juice for brightness. I love pairing it with a simple green salad dressed with a lemon vinaigrette or steamed green beans on the side. The rice is so flavorful that it really doesn’t need much else. For a heartier meal, serve with roasted vegetables or a crusty piece of bread to soak up any extra garlic butter sauce.
Storage : Let any leftovers cool completely to room temperature. Transfer to an airtight container and refrigerate for up to 4 days. The flavors actually deepen overnight, making the leftovers even more delicious.
Reheating : The best way to reheat is in a skillet over medium-low heat with a splash of chicken broth or water. Add the liquid, cover, and warm for 5 to 7 minutes, stirring occasionally. This prevents the rice from drying out. You can also use the microwave, but add a tablespoon of water and cover the bowl to create steam. Reheat in 30-second intervals until hot.
Freezing : This dish freezes well. Portion it into freezer-safe containers, leaving a little room for expansion. Freeze for up to 3 months. Thaw overnight in the refrigerator before reheating. The rice might be slightly softer after freezing, but the flavor will still be fantastic.
Nutritional Information & Benefits
This recipe provides a balanced meal with protein, carbohydrates, and healthy fats. Here is an approximate breakdown per serving (based on 4 servings):
| Nutrient | Amount per Serving |
|---|---|
| Calories | 520 |
| Protein | 32g |
| Carbohydrates | 42g |
| Fat | 24g |
| Saturated Fat | 10g |
| Fiber | 1g |
| Sodium | 680mg |
Chicken thighs are an excellent source of protein, iron, and B vitamins, which support energy metabolism. Garlic is known for its immune-boosting properties and adds significant flavor without extra sodium. Butter provides fat-soluble vitamins A, D, and E, and when used in moderation, it contributes to a satisfying meal. Using brown rice instead of white rice increases the fiber content and adds more magnesium and selenium.
This recipe is naturally gluten-free. For a dairy-free version, substitute the butter with a high-quality olive oil or a plant-based butter alternative. For a lower-sodium version, use unsalted butter and low-sodium chicken broth, and season lightly with salt at the end.
Conclusion
This easy one-pan garlic butter chicken and rice is the kind of recipe that becomes a staple for good reason. It is simple enough for a Tuesday night, yet impressive enough to serve to guests. The ingredients are affordable and accessible, the technique is forgiving, and the results are consistently delicious. Every time I make it, I am reminded that good food doesn’t have to be complicated. Sometimes the best meals come from the simplest combinations—chicken, butter, garlic, and rice, cooked with a little patience and love.
I hope you give this recipe a try and make it your own. Maybe you will add extra vegetables, or a pinch of spice, or serve it with a side of roasted broccoli. Whatever you do, I would love to hear about it. Leave a comment below and let me know how it turned out for you. Did your family love it? Did you discover a new favorite variation? Share your experience—I read every comment and I love hearing from you.
Until next time, happy cooking, and remember: the best meals are the ones shared with the people you love.
Frequently Asked Questions
Can I use chicken breasts instead of thighs?
Yes, you can. Boneless, skinless chicken breasts work, but they cook faster and can dry out more easily. Reduce the initial searing time to 3 to 4 minutes per side and check for doneness after the rice has cooked for about 15 minutes. Use an instant-read thermometer to ensure the thickest part reaches 165°F (74°C).
Why is my rice mushy?
Mushy rice usually means too much liquid or too much stirring. Make sure you rinse the rice thoroughly before cooking to remove excess starch. Also, avoid stirring the rice after you add the broth and bring it to a boil. Stirring releases starch and creates a gummy texture. Use the exact ratio of 1 cup rice to 2 cups broth.
Can I make this recipe in a slow cooker or Instant Pot?
This recipe is designed for the stovetop, but you can adapt it. For an Instant Pot, use the sauté function to brown the chicken and cook the aromatics, then add the rice and broth. Pressure cook on high for 6 minutes with a natural release. For a slow cooker, brown the chicken first, then add everything except the rice. Cook on low for 4 to 6 hours, then stir in cooked rice before serving. The texture will be different, but the flavor will still be great.
How do I prevent the rice from burning on the bottom?
Use a heavy-bottomed pan and keep the heat on low once you add the rice and broth. If your stovetop runs hot, use a heat diffuser or place the pan on a smaller burner. Do not lift the lid during cooking, and make sure your lid fits tightly to trap steam.
Can I add vegetables to this dish?
Absolutely. Frozen peas, diced carrots, green beans, or bell peppers all work well. Add them during the last 10 minutes of cooking so they warm through without becoming mushy. Fresh spinach can be stirred in right at the end—it wilts in the residual heat.
Pin This Recipe!
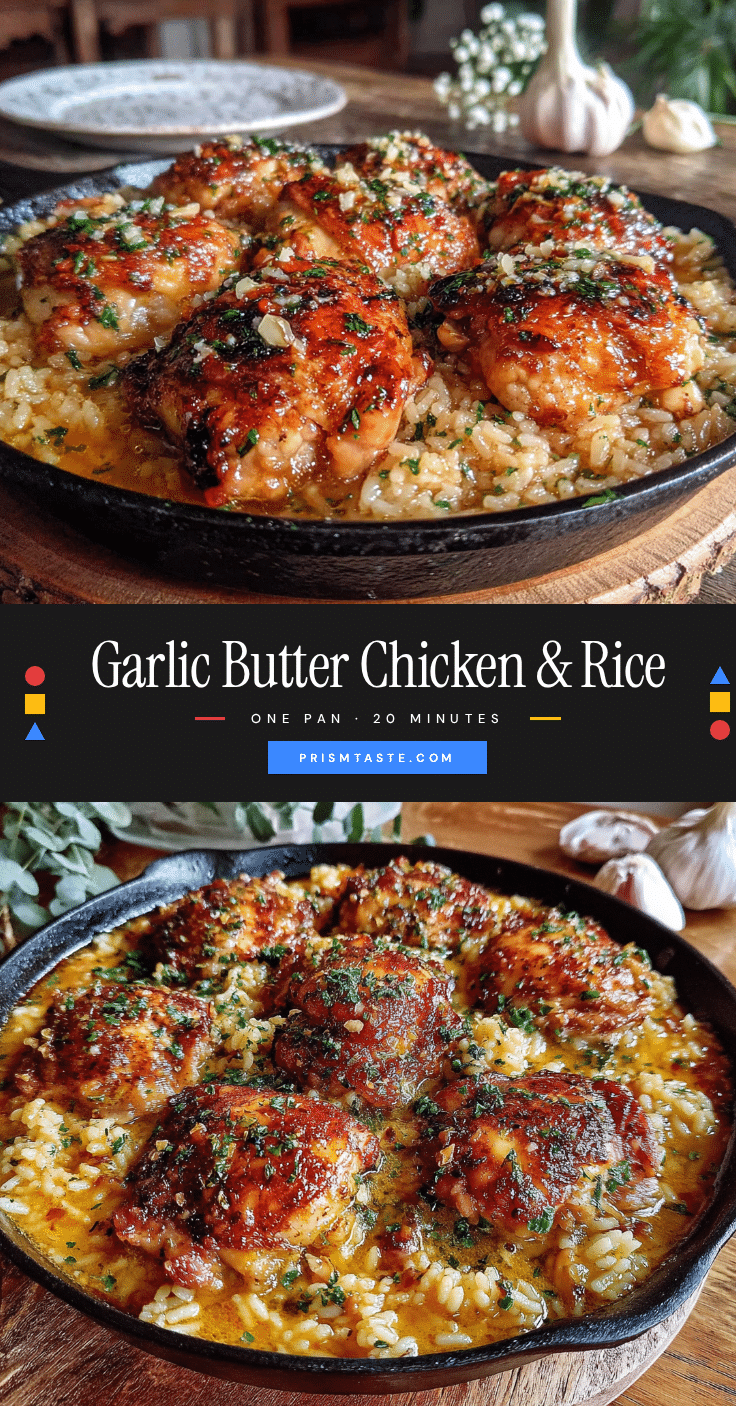
Easy One-Pan Garlic Butter Chicken and Rice

Juicy chicken thighs and perfectly fluffy rice cook together in one pan with a rich garlic butter sauce. This simple, budget-friendly meal delivers big flavor with minimal cleanup, making it a perfect weeknight dinner the whole family will love.
- Prep Time: 15 minutes
- Cook Time: 30 minutes
- Total Time: 45 minutes
- Yield: 4 servings 1x
- Category: Main Course
- Cuisine: American
Ingredients
- 1.5 to 2 pounds bone-in, skin-on chicken thighs (4 to 6 thighs)
- 4 tablespoons unsalted butter, divided
- 6 to 8 cloves garlic, minced
- 1 cup long-grain white rice (such as basmati or jasmine), rinsed
- 2 cups low-sodium chicken broth
- 1 medium yellow or sweet onion, finely diced
- 1 teaspoon dried thyme
- 1 teaspoon paprika
- Salt and black pepper, to taste
- A handful fresh parsley, chopped (for garnish)
- 1 cup optional vegetables (frozen peas, diced carrots, or green beans)
Instructions
- Prep your ingredients: Mince the garlic, dice the onion, rinse the rice in a fine-mesh sieve until the water runs clear, and pat the chicken thighs dry with paper towels. Season the chicken generously on both sides with salt, pepper, and paprika. Let it sit while you heat the pan.
- Heat a large 12-inch skillet or Dutch oven over medium-high heat. Add 2 tablespoons of butter. Once melted and sizzling, place the chicken thighs skin-side down in a single layer (cook in batches if needed). Cook undisturbed for 5 to 7 minutes until the skin is deep golden brown and crispy. Flip and cook for another 3 to 4 minutes. Transfer chicken to a plate and set aside.
- Reduce heat to medium. Add the remaining 2 tablespoons of butter to the pan. Once melted, add the diced onion. Cook, stirring occasionally, for 3 to 4 minutes until softened and translucent. Scrape up any browned bits from the bottom of the pan.
- Add the minced garlic and cook for 30 seconds, stirring constantly.
- Add the rinsed rice to the pan. Stir for about 1 minute to coat it in the butter, onion, and garlic mixture.
- Pour in the chicken broth and add the dried thyme. Stir everything together. Bring the liquid to a gentle boil. Taste and adjust salt if needed.
- Nestle the chicken thighs back into the pan, skin-side up, on top of the rice.
- Reduce heat to low, cover the pan with a tight-fitting lid, and let it simmer gently for 18 to 20 minutes. Do not lift the lid during this time.
- After 18 minutes, remove the pan from the heat. Let it sit, still covered, for another 5 minutes.
- Remove the lid carefully. Fluff the rice with a fork. Check the chicken for doneness (165°F / 74°C at the thickest part). If using optional vegetables, stir them in now.
- Garnish with fresh parsley and serve directly from the pan.
Notes
Don’t skip rinsing the rice—it removes excess starch for fluffy grains. Pat the chicken dry for crispy skin. Let the chicken come to room temperature for 15-20 minutes before cooking for better browning. Use a heavy-bottomed pan to prevent burning. Resist lifting the lid during cooking to keep steam in. If rice is undercooked, add a splash of broth, cover, and cook 5 more minutes. For extra flavor, deglaze the pan with a splash of white wine or lemon juice after browning the chicken.
Nutrition
- Serving Size: 1 serving (about 1 c
- Calories: 520
- Sugar: 2
- Sodium: 680
- Fat: 24
- Saturated Fat: 10
- Carbohydrates: 42
- Fiber: 1
- Protein: 32
Keywords: one-pan chicken and rice, garlic butter chicken, easy weeknight dinner, one skillet meal, chicken thighs and rice, budget-friendly dinner, family dinner recipe


