The woman at the community garden plot next to mine watched me wrestling with a bag of overripe bananas on a Tuesday afternoon. She didn’t say anything at first, just kept her hands in the soil, patting it down around some tomato starts. Then she stood up, brushed off her knees, and said, “You know, those are too far gone for eating. But they’re perfect for bread.” Her name was Rosa, and she had this way of stating things that made you feel like she was letting you in on a secret the rest of the world hadn’t figured out yet.
I’d been standing there, honestly, feeling a little annoyed with myself. I’d bought a big bunch of bananas at the start of the week with every intention of making smoothies, and now they were practically liquid inside their skins. It was a Tuesday, I was tired from work, and the last thing I wanted was to pull out my stand mixer and dirty a whole army of bowls just to salvage some fruit. Rosa must have seen the look on my face. She walked over to her own little shed and came back with a handwritten index card, the edges soft and worn. “One bowl,” she said, tapping the card. “No mixer. I’ve been making this for thirty years.”
I took the card home, and I’m not going to pretend I didn’t make a mess of my kitchen that first time. I forgot to grease the pan properly and ended up with a banana bread that stuck like glue. But the flavor—that deep, caramelized banana sweetness with a tender, almost buttery crumb—was something else entirely. It was the kind of bread that makes you close your eyes after the first bite, you know? That feeling when something simple and good reminds you why you bother cooking at all.
What stayed with me wasn’t just the recipe, though. It was the way Rosa shared it—not as a formal lesson, but as a natural part of a conversation about soil and weather and what you do with what you’ve got. That’s the spirit I’ve tried to keep alive in my own kitchen. This easy one-bowl banana bread is my adaptation of her original, streamlined for those of us who are short on time but still want something that tastes like it took hours. Maybe you’ve been there—standing over a pile of spotty bananas, wondering if you have the energy for a baking project. Trust me, this one’s different.
Why You’ll Love This Recipe
Let me be real with you for a second. I’ve tested a lot of banana bread recipes over the years. Some were too dry, some were too dense, and some required so much equipment I felt like I was prepping for surgery. This one? It’s the Goldilocks of banana breads, and it’s built for real life.
- Quick & Easy: From start to oven in under 15 minutes. No mixer, no sifting, no complicated steps. Just a bowl, a fork, and a little bit of patience while it bakes.
- Simple Ingredients: You likely have everything in your pantry right now. Butter, sugar, eggs, flour, baking soda, salt, and those sad bananas sitting on your counter. No fancy extracts or specialty flours required.
- Perfect for Weeknights: This isn’t a weekend project. It’s a Tuesday-night-save-the-bananas kind of recipe. The kind you can throw together while dinner is in the oven and have ready for breakfast the next day.
- Crowd-Pleaser: I’ve brought this to potlucks, bake sales, and family gatherings. It disappears every single time. Kids love it, adults love it, and people always ask for the recipe.
- Unbelievably Delicious: The texture is what gets everyone. It’s moist without being gummy, tender without being crumbly, and the banana flavor is pure and intense. No weird aftertaste, no chemical shortcuts.
What makes this version different from the dozens of other banana bread recipes out there? It’s the technique. By mashing the bananas with the sugar first, you create a natural syrup that caramelizes as it bakes. That little extra step—which takes about 30 seconds—makes all the difference. Plus, using melted butter instead of creaming cold butter means you skip the mixer entirely. It’s not just another banana bread; it’s the easiest, most forgiving version you’ll ever make.
This recipe is for those nights when you want to bake something but don’t want to clean up a disaster zone. It’s for the mornings when you want a slice of something homemade with your coffee but didn’t plan ahead. It’s comfort food, simplified. And honestly? It’s the kind of recipe that makes you feel like a good cook, even on your tiredest days.
What Ingredients You Will Need
This recipe relies on simple, humble ingredients that work together to create something greater than the sum of their parts. Most of these are pantry staples, which is exactly the point. Here’s what you’ll need and why each one matters.
- 3 large ripe bananas (about 1 ½ cups mashed): The riper, the better. You want bananas that are heavily spotted or even completely brown. Those are the ones with the most sugar and the strongest banana flavor. If your bananas aren’t quite there yet, you can roast them in a 300°F oven for 15-20 minutes until the skins darken.
- ½ cup unsalted butter, melted and slightly cooled: Melted butter is the secret to the one-bowl method. It incorporates easily without needing a mixer. I prefer unsalted so I can control the salt level, but salted butter works fine—just reduce the added salt to ¼ teaspoon.
- ¾ cup granulated sugar: Regular white sugar gives the bread a clean sweetness and helps create that golden-brown crust. You can substitute up to half with brown sugar for a deeper, more caramel-like flavor.
- 1 large egg, at room temperature: The egg binds everything together and adds richness. If you forget to take it out of the fridge, place it in a bowl of warm water for 5 minutes to bring it to temperature quickly.
- 1 teaspoon vanilla extract: Pure vanilla extract is worth the splurge here. It rounds out the banana flavor and adds warmth. Imitation vanilla works in a pinch, but the flavor won’t be as complex.
- 1 ½ cups all-purpose flour: All-purpose flour gives the bread structure without making it tough. Spoon and level your flour—don’t scoop directly from the bag, or you might end up with too much and a dry loaf.
- 1 teaspoon baking soda: This is the only leavening agent you need. Baking soda reacts with the acidity in the bananas to create lift. Make sure yours is fresh—if it doesn’t fizz when mixed with vinegar, it’s time to buy a new box.
- ½ teaspoon salt: Salt enhances all the other flavors and balances the sweetness. Don’t skip it, even if you’re using salted butter.
Optional Add-Ins: This is where you can make the recipe your own. I’ve listed a few favorites below, but feel free to experiment.
- ½ cup chopped walnuts or pecans: Adds a lovely crunch and nutty flavor. Toast them lightly in a dry pan first for extra depth.
- ½ cup chocolate chips: Semi-sweet or dark chocolate chips pair beautifully with banana. Milk chocolate works too, but it can make the bread quite sweet.
- 1 teaspoon cinnamon or pumpkin pie spice: A warm spice adds another layer of coziness. I love cinnamon in the fall and winter months.
Substitution Guidance: Need to adapt? Here are a few swaps that work well. Use melted coconut oil instead of butter for a dairy-free version. Swap the all-purpose flour with a 1:1 gluten-free baking blend—just make sure it contains xanthan gum. For a lower-sugar option, use ½ cup maple syrup or honey, but reduce the melted butter to ⅓ cup since liquid sweeteners add moisture.
Equipment Needed
The beauty of this recipe is that it doesn’t demand much from you or your kitchen. Here’s what you’ll need.
- One large mixing bowl: Any bowl will do, but a wide, shallow one makes mashing the bananas easier. I use a ceramic bowl that belonged to my grandmother, but a glass or stainless steel one works just as well.
- A fork or potato masher: A fork is perfectly fine for mashing bananas, but a potato masher speeds things up. I’ve used both, and honestly, the fork gives me more control over the texture.
- A 9×5-inch loaf pan: This is the standard size for banana bread. If you use an 8×4-inch pan, your bread will be taller and may need an extra 5-10 minutes of baking time.
- Parchment paper or non-stick spray: Parchment paper with overhanging edges makes lifting the bread out of the pan effortless. Non-stick spray works, but I’ve had occasional sticking issues with the corners.
- A rubber spatula: For scraping down the sides of the bowl and getting every last bit of batter into the pan. A silicone spatula is heat-safe and easy to clean.
- A wire cooling rack: Cooling the bread on a rack prevents the bottom from getting soggy. If you don’t have one, you can use the inverted loaf pan or just let it cool in the pan for 15 minutes before turning out.
That’s it. No stand mixer, no hand mixer, no sifter, no multiple bowls. I’ve made this recipe in a tiny apartment kitchen with a cracked mixing bowl and a bent fork, and it turned out perfect. Trust me, if you have these basics, you’re good to go.
Preparation Method
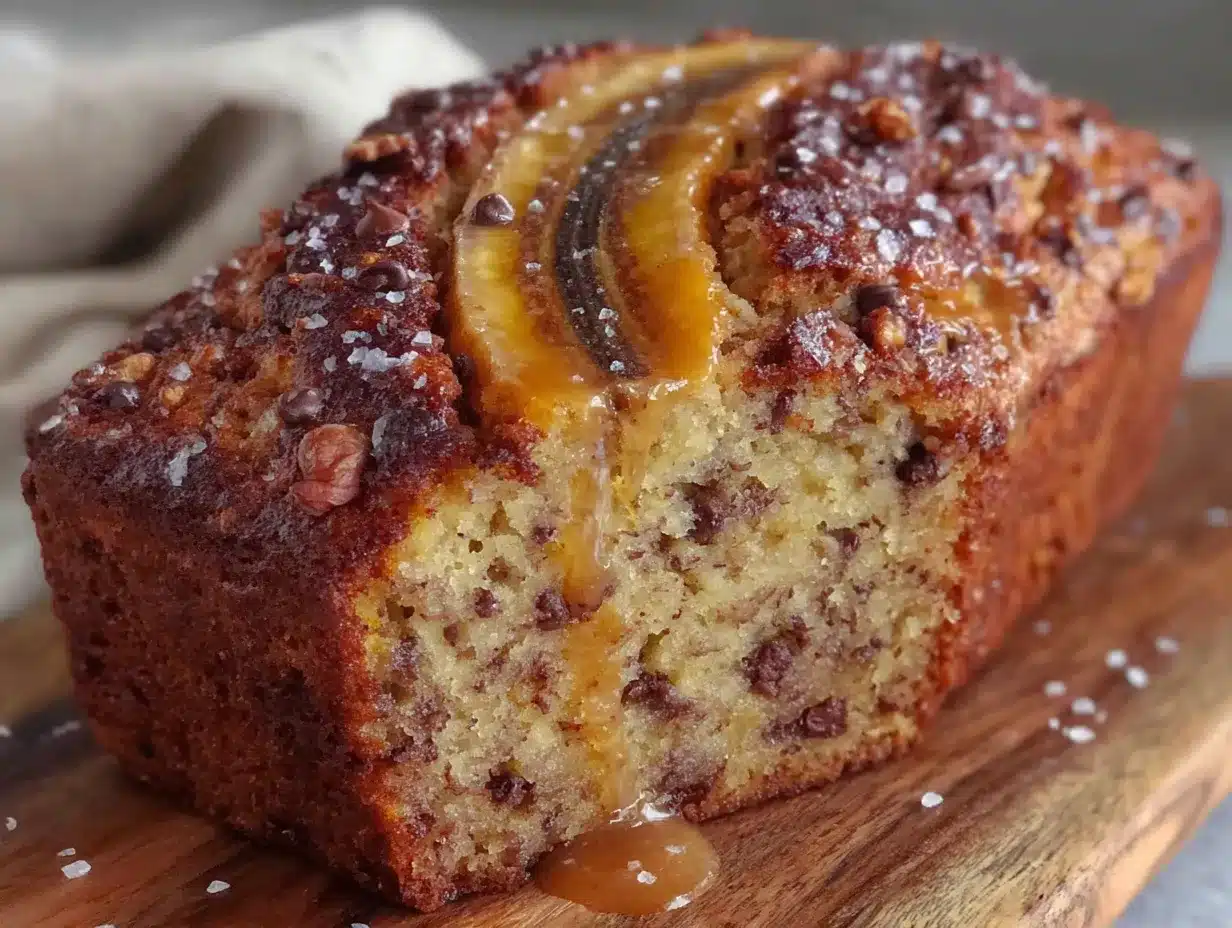
Let’s get to it. This whole process takes about 10 minutes of active time, plus 50-60 minutes of baking. Set a timer and follow these steps, and you’ll have a beautiful loaf of banana bread before you know it.
- Preheat your oven to 350°F (175°C). Position the rack in the center of the oven. While it’s heating, grease your 9×5-inch loaf pan with non-stick spray or line it with parchment paper, leaving a couple inches of overhang on the long sides. This makes lifting the bread out later a total breeze.
- Mash the bananas in your large mixing bowl. Peel the bananas and add them to the bowl. Use a fork or potato masher to mash them until they’re mostly smooth with a few small lumps remaining. You want some texture, not a complete puree. This should take about a minute. The smell alone will make you hungry.
- Add the melted butter and sugar. Pour in the melted butter and the granulated sugar. Stir with a fork or spatula until everything is well combined. The mixture will look a little grainy at this point, and that’s exactly right. Let it sit for a minute while you gather the rest of your ingredients—this gives the sugar time to start dissolving.
- Mix in the egg and vanilla. Crack the egg into the bowl and add the vanilla extract. Stir vigorously until the egg is fully incorporated and the batter looks smooth and glossy. About 30 seconds of mixing should do it. Don’t overmix at this stage, but make sure there are no streaks of egg white.
- Add the dry ingredients. Sprinkle the flour, baking soda, and salt over the wet mixture. Use a spatula to fold everything together gently. Stir just until you no longer see streaks of flour—about 15-20 strokes. A few small lumps are fine. Overmixing at this point will make the bread tough, so stop as soon as it comes together.
- Fold in any add-ins. If you’re using nuts, chocolate chips, or spices, add them now. Fold them in with a few gentle strokes until they’re evenly distributed. The batter will be thick and slightly lumpy—that’s the texture you want.
- Pour the batter into the prepared pan. Use your spatula to scrape every bit of batter into the loaf pan. Spread it into an even layer, gently pushing it into the corners. Tap the pan on the counter a couple times to release any air bubbles.
- Bake for 50-60 minutes. Place the pan in the preheated oven and bake until the top is golden brown and a toothpick inserted into the center comes out clean or with just a few moist crumbs. Start checking at the 50-minute mark. If the top is browning too quickly, tent it loosely with aluminum foil for the last 10-15 minutes.
- Cool in the pan for 10 minutes. Remove the pan from the oven and set it on a wire rack. Let the bread cool in the pan for exactly 10 minutes. This allows it to set enough to hold its shape when you remove it.
- Transfer to a wire rack to cool completely. Run a knife around the edges if needed, then lift the bread out using the parchment paper overhang. Place it on the wire rack to cool completely before slicing. I know it’s tempting to cut into it warm, but it will be much easier to slice cleanly once it’s fully cooled.
Sensory Cues: During baking, your kitchen will fill with the most incredible banana-butter-vanilla aroma. The bread will rise into a domed top with a crack down the center—that’s a good sign. When you tap the top gently, it should feel firm and spring back slightly. The color should be a deep golden brown, darker around the edges.
Cooking Tips & Techniques
After making this banana bread more times than I can count, I’ve picked up a few tricks that make a real difference. Here are the ones I wish I’d known from the start.
Don’t overmix the batter. This is the number one mistake I see people make. Once you add the flour, mix only until it disappears. Overmixing develops the gluten in the flour, which can make your banana bread tough and dense instead of tender and soft. A few lumps are your friend here.
Measure your bananas by volume, not by count. Bananas come in all sizes. Three small bananas might only give you 1 cup of mash, while three large ones could give you 2 cups. I recommend mashing your bananas first, then measuring out 1 ½ cups. If you have extra, it’s delicious on oatmeal or yogurt. If you’re short, add a quarter cup of applesauce to make up the difference.
Use room temperature ingredients. This is one of those things that sounds fussy but actually matters. A cold egg can seize the melted butter, causing the batter to become lumpy. If you forget to set your egg out, place it in a bowl of warm water for 5 minutes. The butter should be melted and then cooled for a couple minutes so it’s warm but not hot.
Let the bread cool completely before slicing. I know, I know. The smell is intoxicating and you want a slice immediately. But cutting into warm banana bread is a recipe for crumbs and a gummy texture. The bread continues to set as it cools, and the moisture redistributes evenly. Give it at least an hour on the wire rack. Your patience will be rewarded.
Check for doneness with a thermometer. If you have an instant-read thermometer, the internal temperature of a fully baked banana bread should be around 200-205°F (93-96°C). This is more reliable than the toothpick test, especially if you’ve added chocolate chips that can melt and make the toothpick look wet.
One mistake I made early on: I used a glass loaf pan without adjusting the temperature. Glass heats up faster and retains heat longer than metal, so your bread can burn on the bottom before the center is done. If you’re using glass, reduce the oven temperature by 25°F and check the bread 5-10 minutes earlier than the recipe suggests.
Variations & Adaptations
This recipe is incredibly forgiving and adaptable. Here are some of my favorite variations, all tested in my own kitchen.
Chocolate Chip Banana Bread: Fold in ½ cup of semi-sweet chocolate chips along with the dry ingredients. For an extra indulgent version, swirl in 2 tablespoons of chocolate hazelnut spread before baking. My kids beg for this version every single time.
Vegan Banana Bread: Replace the butter with ½ cup melted coconut oil or vegan butter. Use a flax egg (1 tablespoon ground flaxseed mixed with 3 tablespoons water, let sit for 5 minutes) instead of the regular egg. The texture will be slightly denser but still delicious. I’ve made this for vegan friends and they’ve asked for the recipe.
Gluten-Free Banana Bread: Swap the all-purpose flour with a 1:1 gluten-free baking blend that contains xanthan gum. I like Bob’s Red Mill for this. Add an extra tablespoon of flour since gluten-free blends tend to absorb more liquid. The bread will be a bit more crumbly but still moist and flavorful.
Spiced Banana Bread: Add 1 teaspoon of cinnamon, ½ teaspoon of nutmeg, and ¼ teaspoon of ground ginger to the flour mixture. This gives the bread a warm, chai-like flavor that’s perfect for fall and winter mornings.
Streusel Topped Banana Bread: Mix together ¼ cup all-purpose flour, ¼ cup brown sugar, 2 tablespoons cold butter, and ½ teaspoon cinnamon until crumbly. Sprinkle this over the batter before baking. It creates a crunchy, buttery topping that contrasts beautifully with the soft bread underneath.
Muffin Version: This batter makes about 12 standard muffins. Grease a muffin tin or line with paper liners. Bake at 350°F for 18-22 minutes, until a toothpick comes out clean. Muffins are great for grab-and-go breakfasts, and they freeze beautifully.
Serving & Storage Suggestions
Banana bread is one of those rare things that’s delicious at any temperature, but here’s how I like to serve it for maximum enjoyment.
Serving Temperature: I prefer banana bread at room temperature or slightly warm. If you’ve stored it in the fridge, let slices sit out for 10 minutes before serving, or pop them in a 300°F oven for 5 minutes. A warm slice with a pat of butter melting into it is pure comfort food.
Presentation Ideas: Slice the bread into 1-inch thick pieces and arrange them on a wooden board or a simple white plate. Dust with powdered sugar for a prettier presentation. For brunch, I like to serve it alongside fresh fruit and a drizzle of honey or maple syrup.
Complementary Dishes: This banana bread pairs beautifully with a hot cup of coffee or tea. For a more substantial breakfast, serve it with scrambled eggs and fresh berries. It also makes a lovely dessert with a scoop of vanilla ice cream or a dollop of whipped cream.
Storage Instructions: Store banana bread in an airtight container at room temperature for up to 3 days. I wrap it in plastic wrap first, then place it in a zip-top bag or container. The bread actually gets more moist and flavorful on the second day as the flavors meld together.
Freezer Instructions: Banana bread freezes like a dream. Wrap the fully cooled loaf tightly in plastic wrap, then in a layer of aluminum foil. Freeze for up to 3 months. To thaw, let it sit at room temperature for 2-3 hours, still wrapped. You can also freeze individual slices for quick grab-and-go breakfasts—just wrap each slice in plastic wrap and store in a freezer bag.
Reheating: For a just-baked experience, reheat slices in a toaster oven or regular oven at 350°F for 5-7 minutes. The microwave works in a pinch (15-20 seconds per slice), but the texture will be softer and less crispy on the edges.
Nutritional Information & Benefits
While banana bread is definitely a treat, it does have some redeeming qualities. Here’s a quick look at the nutritional profile and benefits.
Estimated Nutritional Values (per slice, based on 10 slices):
- Calories: 245
- Fat: 11g
- Saturated Fat: 6g
- Carbohydrates: 34g
- Fiber: 2g
- Sugar: 18g
- Protein: 4g
Health Benefits of Key Ingredients: Bananas are a great source of potassium, which supports heart health and muscle function. They also contain vitamin B6 and vitamin C. The fiber in bananas and flour helps with digestion and keeps you feeling full longer. If you use whole wheat flour instead of all-purpose, you’ll add even more fiber and nutrients.
Dietary Considerations: This recipe can be adapted for various dietary needs. As mentioned above, it works as a vegan or gluten-free option with simple substitutions. It’s naturally nut-free if you skip the add-ins, making it safe for school lunches. For a lower-sugar version, reduce the sugar to ½ cup or use a sugar substitute like monk fruit sweetener.
Potential Allergens: This recipe contains wheat (gluten), dairy (butter), and eggs. If you’re serving someone with allergies, be sure to check all your ingredient labels and make appropriate substitutions.
My Personal Take: I don’t pretend banana bread is health food, but I love that it uses real, whole ingredients. There’s no weird preservatives or artificial flavors. It’s a homemade treat that I feel good about sharing with my family. Everything in moderation, right?
Conclusion
This easy one-bowl banana bread has become a staple in my kitchen for good reason. It’s forgiving, it’s fast, and it turns those sad, overripe bananas into something genuinely special. The first time I made it, following Rosa’s worn index card, I didn’t expect it to become a regular part of my rotation. But here we are, years later, and I still get excited when I see those spotty bananas on my counter.
What I love most about this recipe is that it meets you where you are. Whether you’re a seasoned baker or someone who’s never made bread from scratch, it works. It doesn’t demand precision or fancy equipment. It just asks for a little time and a few simple ingredients, and in return, it gives you a loaf of something warm and wonderful.
I’d love to hear how your banana bread turns out. Did you add chocolate chips or walnuts? Did you try the streusel topping or the vegan version? Drop a comment below and let me know. And if you share a photo on Pinterest or Instagram, tag me—I love seeing your creations. This recipe is meant to be shared, adapted, and made your own. So go ahead, mash those bananas, and enjoy every single bite.
Frequently Asked Questions
Can I use frozen bananas for this recipe?
Absolutely! Thaw frozen bananas completely, then drain off any excess liquid before mashing. They’ll be very soft and may require less mashing. The flavor is actually more concentrated in frozen bananas, so your bread will be extra banana-y.
Why did my banana bread sink in the middle?
A sunken middle usually means the bread was underbaked or the oven temperature was too low. Make sure your oven is fully preheated to 350°F and check the bread with a toothpick before removing it. Also, opening the oven door too early can cause the bread to collapse.
Can I make this recipe without eggs?
Yes! Use a flax egg (1 tablespoon ground flaxseed mixed with 3 tablespoons water, let sit for 5 minutes) or a commercial egg replacer. The texture will be slightly denser, but the flavor will still be fantastic.
How do I know when my banana bread is done?
Insert a toothpick or cake tester into the center of the bread. If it comes out clean or with just a few moist crumbs, it’s done. You can also use an instant-read thermometer—the internal temperature should be 200-205°F.
Can I double this recipe?
Yes, you can easily double the ingredients to make two loaves. Use two separate loaf pans and bake them at the same time. You may need to rotate the pans halfway through baking and add a few extra minutes to the total baking time.
Pin This Recipe!
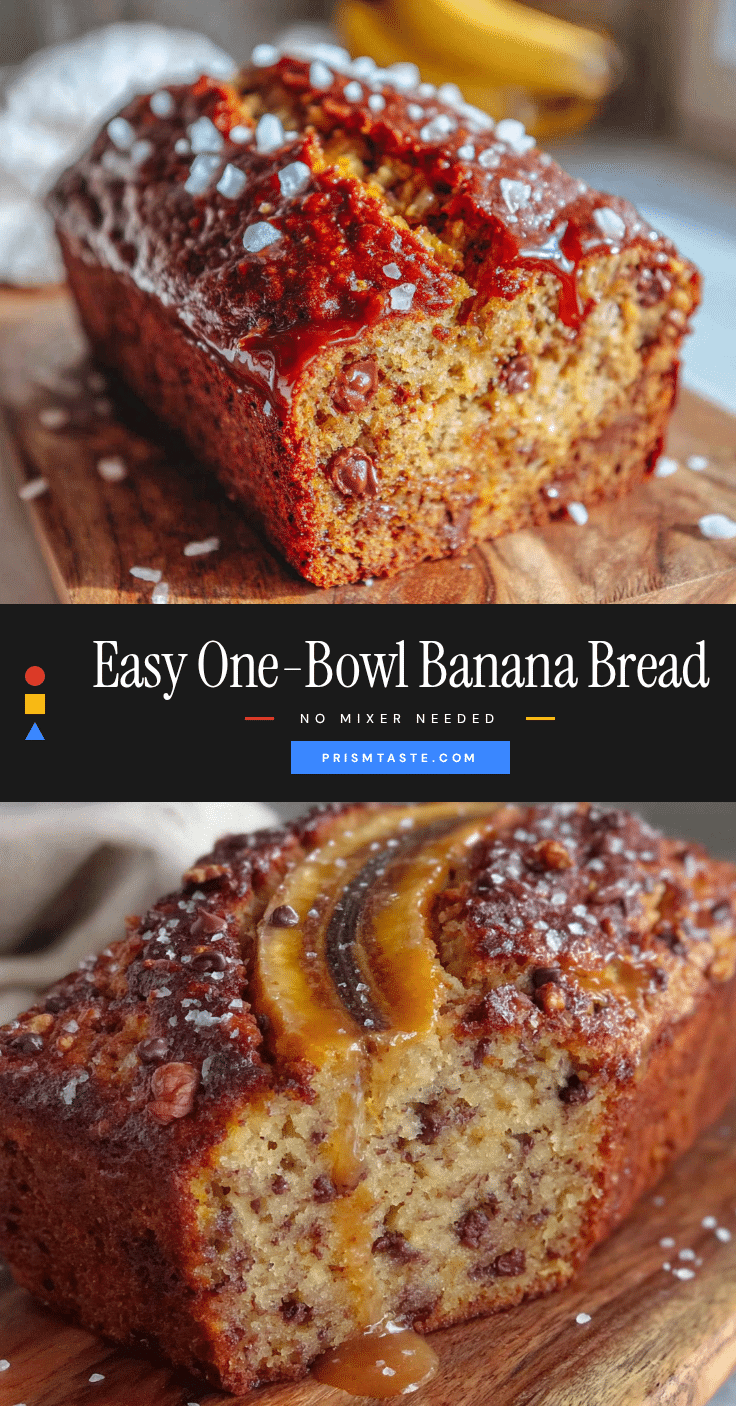
Easy One-Bowl Banana Bread Recipe (No Mixer!)
This easy one-bowl banana bread is moist, tender, and packed with intense banana flavor. Made without a mixer, it comes together in under 15 minutes and is perfect for using up overripe bananas.
- Prep Time: 15 minutes
- Cook Time: 55 minutes
- Total Time: 1 hour 10 minutes
- Yield: 10 servings 1x
- Category: Dessert
- Cuisine: American
Ingredients
- 3 large ripe bananas (about 1 ½ cups mashed)
- ½ cup unsalted butter, melted and slightly cooled
- ¾ cup granulated sugar
- 1 large egg, at room temperature
- 1 teaspoon vanilla extract
- 1 ½ cups all-purpose flour
- 1 teaspoon baking soda
- ½ teaspoon salt
- Optional: ½ cup chopped walnuts or pecans
- Optional: ½ cup chocolate chips
- Optional: 1 teaspoon cinnamon or pumpkin pie spice
Instructions
- Preheat your oven to 350°F (175°C). Grease a 9×5-inch loaf pan with non-stick spray or line with parchment paper, leaving overhang on the long sides.
- Mash the bananas in a large mixing bowl with a fork or potato masher until mostly smooth with a few small lumps.
- Add the melted butter and granulated sugar. Stir until well combined. Let sit for a minute.
- Mix in the egg and vanilla extract until smooth and glossy, about 30 seconds.
- Sprinkle the flour, baking soda, and salt over the wet mixture. Fold gently with a spatula until just combined (15-20 strokes). Do not overmix.
- Fold in any optional add-ins (nuts, chocolate chips, or spices) with a few gentle strokes.
- Pour the batter into the prepared pan and spread evenly. Tap the pan on the counter to release air bubbles.
- Bake for 50-60 minutes, until golden brown and a toothpick inserted in the center comes out clean or with a few moist crumbs. Tent with foil if browning too quickly.
- Cool in the pan for 10 minutes, then transfer to a wire rack to cool completely before slicing.
Notes
For best results, use very ripe bananas with brown spots. Measure mashed bananas by volume (1 ½ cups). Let the bread cool completely before slicing for clean cuts. Store at room temperature for up to 3 days or freeze for up to 3 months.
Nutrition
- Serving Size: 1 slice
- Calories: 245
- Sugar: 18
- Sodium: 200
- Fat: 11
- Saturated Fat: 6
- Carbohydrates: 34
- Fiber: 2
- Protein: 4
Keywords: banana bread, easy banana bread, one bowl banana bread, no mixer banana bread, moist banana bread, quick banana bread


