That crackly sugar crust giving way to the softest, most buttery crumb—the kind that makes you close your eyes for just a second before the next bite. It was a Tuesday afternoon, and I was staring at three sad, overripe bananas on my counter. You know the ones. Spotty, soft, practically begging to be turned into something good. I had a hungry toddler tugging at my pants, a sink full of dishes, and absolutely zero energy for pulling out the stand mixer or whisking by hand until my arm gave out.
So I just… didn’t. I grabbed one bowl, a fork, and decided to see if I could make this work the lazy way. Honestly, I was skeptical. Banana bread without creaming butter and sugar? Without beating eggs until fluffy? It felt like cheating. But that first loaf came out so tender and perfectly domed that I actually laughed out loud in my kitchen. The texture was spot-on—moist, dense in the best way, with that signature crack running right down the middle.
This easy one-bowl banana bread has become my go-to for using up those spotty bananas, and I think it might become yours too. No mixer, no fuss, no special equipment. Just a fork, a bowl, and about ten minutes of hands-on time before your kitchen starts smelling like heaven. It’s the kind of recipe you make on a whim and then wonder why you ever did it the hard way.
Why You’ll Love This Recipe
Let me tell you why this one-bowl banana bread has earned a permanent spot in my weekly rotation. I’ve tested it about a dozen times to get the proportions just right, and I can say with confidence—it works every single time.
- No Mixer Required: You literally need one bowl and a fork or spatula. No stand mixer, no hand mixer, no whisking until your wrist hurts. Just mash, stir, and pour.
- Quick & Easy: From start to oven in under 10 minutes. Perfect for those moments when you need a homemade treat but don’t have the energy for a full baking project.
- Simple Ingredients: Everything is probably in your kitchen right now. Butter, sugar, eggs, flour, baking soda, salt, and those sad bananas you’ve been avoiding.
- Perfect for Busy Mornings or Afternoon Snacks: Slice it up for breakfast with coffee, pack it in lunchboxes, or serve it warm with a pat of butter for dessert. It’s endlessly versatile.
- Crowd-Pleaser: I’ve brought this to potlucks and playdates, and it disappears faster than anything else on the table. Kids love it, adults sneak seconds, and nobody believes it came together in one bowl.
What makes this recipe different from all the other banana breads out there? It’s the technique—or lack thereof. By not overmixing and using melted butter instead of creamed, you get a loaf that’s incredibly tender without being gummy. The bananas do all the heavy lifting for moisture and sweetness, so you don’t need any fancy ingredients or complicated steps. It’s banana bread stripped down to its purest, most delicious form.
This isn’t just good banana bread. It’s the kind that makes you feel like a baking genius even when you barely tried. And honestly? That’s my favorite kind of recipe.
What Ingredients You Will Need
This recipe relies on a handful of basic pantry staples to create something truly special. Each ingredient plays a specific role, and I’ll walk you through exactly what to look for and why it matters.
- 3 large ripe bananas (about 1 ½ cups mashed): The riper the better. You want them heavily speckled with brown spots—almost looking past their prime. That’s when they’re sweetest and easiest to mash. If your bananas aren’t quite there yet, you can roast them in the oven at 300°F for 15-20 minutes to speed things up.
- ½ cup unsalted butter, melted (1 stick): Melted butter gives this bread its tender crumb without needing to cream anything. I prefer unsalted so I can control the salt level, but salted butter works too—just reduce the added salt to ¼ teaspoon. Let the butter cool slightly before mixing so it doesn’t cook the eggs.
- ¾ cup granulated sugar: Regular white sugar keeps the bread light and sweet. You can reduce this to ½ cup if your bananas are very ripe and sweet, but I find ¾ cup gives the perfect balance. Brown sugar works too for a deeper flavor, but the texture will be slightly denser.
- 1 large egg, room temperature: The egg binds everything together and adds structure. If you forget to take it out of the fridge, place it in a bowl of warm water for 5 minutes to bring it to room temperature quickly.
- 1 teaspoon vanilla extract: Pure vanilla adds warmth and depth. Imitation vanilla works in a pinch, but the real stuff makes a noticeable difference here.
- 1 ½ cups all-purpose flour: Spoon and level your flour—don’t scoop directly from the bag or you’ll end up with too much and a dry loaf. For a whole wheat version, swap half the flour for whole wheat pastry flour.
- 1 teaspoon baking soda: This is your leavening agent. Make sure it’s fresh—test it by dropping a bit into vinegar; it should fizz immediately. Old baking soda won’t give you that beautiful dome.
- ½ teaspoon salt: Salt enhances all the flavors and balances the sweetness. Don’t skip it, even if you’re using salted butter.
- Optional mix-ins: ½ cup chocolate chips, chopped walnuts, or blueberries. I’m partial to dark chocolate chips—they melt into little pockets of richness throughout the loaf.
That’s it. Eight core ingredients and one optional addition. No buttermilk, no sour cream, no yogurt. Just simple, honest baking at its finest.
Equipment Needed
One of the best things about this recipe is how little equipment you need. Here’s what I use every single time:
- One large mixing bowl: Any bowl will do, but I prefer a wide, shallow one for easy mashing and stirring. Glass or ceramic works great.
- A fork or potato masher: For mashing the bananas. A fork gives you more control over the texture—I like leaving a few small chunks for extra banana flavor in every bite.
- A rubber spatula or wooden spoon: For folding everything together. A spatula helps scrape the sides and bottom of the bowl so nothing gets left behind.
- A 9×5-inch loaf pan: Standard size works perfectly. If you only have an 8×4-inch pan, increase the baking time by 5-10 minutes. Glass pans bake faster than metal, so keep an eye on it.
- Parchment paper: Not strictly necessary, but it makes lifting the bread out of the pan so much easier. I leave an overhang on two sides for handles.
- Measuring cups and spoons: For accuracy. I know some bakers eyeball it, but for consistent results, measure carefully—especially the flour and baking soda.
If you don’t have a loaf pan, you can bake this in an 8×8-inch square pan for about 25-30 minutes, or even as muffins (bake at 350°F for 18-22 minutes). No special equipment required, and that’s the whole point.
Preparation Method
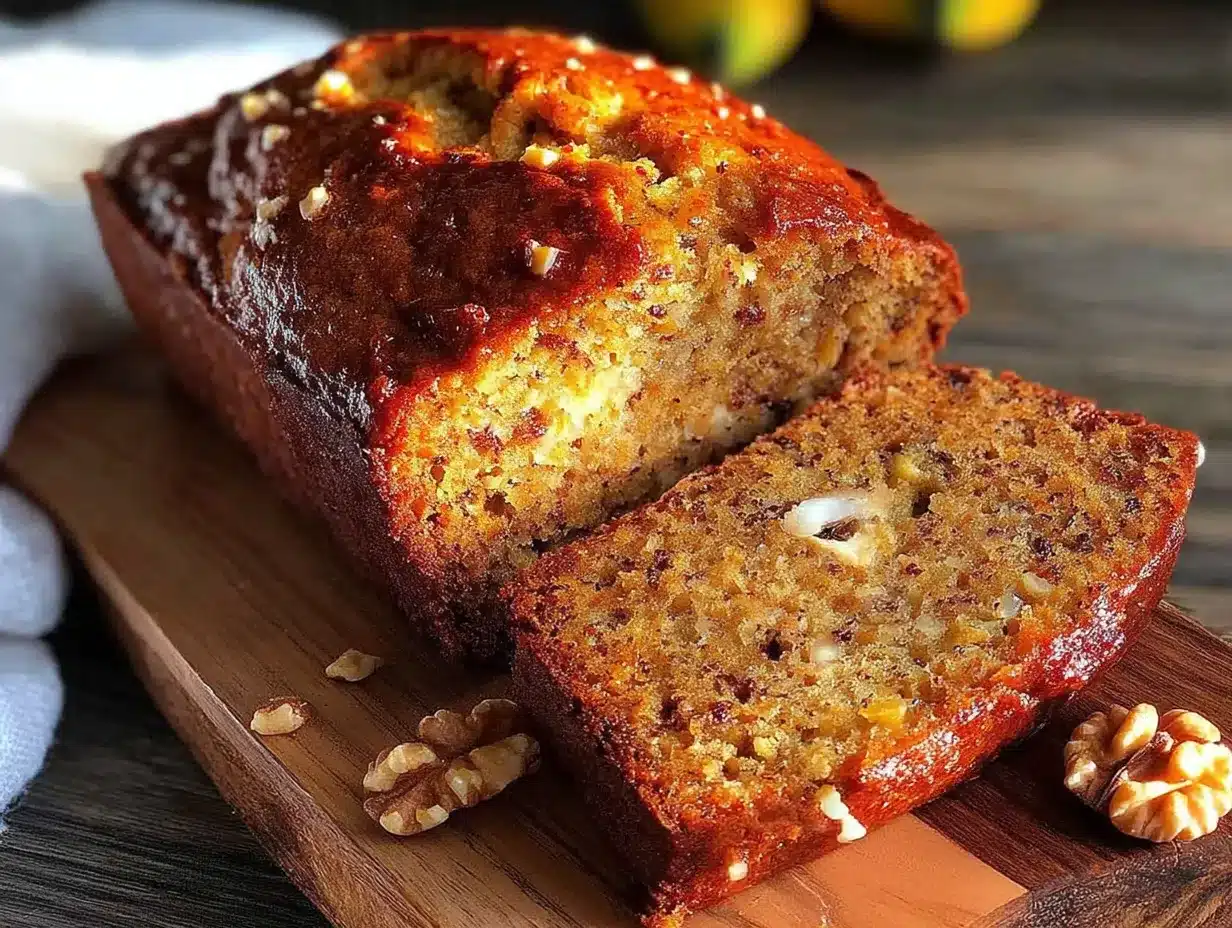
Alright, let’s get baking. This is the easiest banana bread you’ll ever make, I promise.
- Preheat your oven to 350°F (175°C). Position the rack in the center of the oven. While it’s heating, line your loaf pan with parchment paper or grease it well with butter or non-stick spray.
- Mash the bananas. Peel those spotty bananas and drop them into your large mixing bowl. Use a fork to mash them until they’re mostly smooth with a few small lumps remaining. You want about 1 ½ cups of mashed banana. Don’t over-mash—small chunks add nice texture to the finished bread.
- Add the melted butter. Pour the slightly cooled melted butter over the mashed bananas and stir until combined. The mixture will look a bit separated at first—that’s totally normal. Just keep stirring until it comes together.
- Mix in the sugar, egg, and vanilla. Add the granulated sugar and stir vigorously for about 30 seconds until the sugar starts to dissolve and the mixture looks glossy. Crack in the room-temperature egg and add the vanilla extract. Stir until everything is well incorporated and smooth.
- Add the dry ingredients. Sprinkle the all-purpose flour, baking soda, and salt evenly over the wet mixture. Use a gentle hand here—stir with your spatula or spoon just until no streaks of flour remain. A few small lumps are okay. Overmixing will develop gluten and make your bread tough, so stop as soon as it comes together. If you’re adding chocolate chips or nuts, fold them in now with a few gentle strokes.
- Pour the batter into the prepared pan. Scrape every last bit of batter into your lined loaf pan. Use the spatula to spread it evenly. Tap the pan gently on the counter a couple of times to release any air bubbles.
- Bake for 50-60 minutes. Place the pan in the preheated oven and bake until the top is golden brown and a toothpick inserted into the center comes out clean or with just a few moist crumbs. The bread should feel springy when you gently press the center. Start checking at 50 minutes—every oven runs a little differently.
- Cool in the pan for 10 minutes. Set the pan on a wire rack and let it cool for about 10 minutes. Then use the parchment overhang to lift the bread out and transfer it to the rack to cool completely. If you slice it while it’s still warm, it will crumble. Trust me, I’ve learned this the hard way.
Your kitchen is going to smell absolutely incredible right about now. The hardest part is waiting for it to cool enough to eat.
Cooking Tips & Techniques
Over the many loaves I’ve baked, I’ve picked up a few tricks that make a real difference. Here are my best tips for perfect banana bread every time:
- Don’t overmix the batter. This is the number one mistake I see. Stir just until the flour disappears. Overmixing develops gluten, which leads to a dense, tough loaf instead of that tender, melt-in-your-mouth texture we’re after.
- Use really ripe bananas. I cannot stress this enough. Green or barely yellow bananas won’t give you enough sweetness or moisture. Wait until they’re covered in brown spots and practically begging to be used. If you have extra ripe bananas, throw them in the freezer—they’ll turn brown and mushy when thawed, which is perfect for baking.
- Check for doneness with a toothpick. Insert it into the center of the loaf. If it comes out clean or with just a few moist crumbs, it’s done. If it’s wet with batter, give it another 5 minutes and check again. The top should also be golden brown and cracked.
- Let it cool completely before slicing. I know it’s tempting to cut into that warm, fragrant loaf right away, but patience pays off. Cooling allows the structure to set so you get clean slices instead of a crumbly mess. If you absolutely must have it warm, wait at least 20 minutes.
- Room temperature ingredients matter. Cold eggs can seize the melted butter and create a lumpy batter. Take your egg out of the fridge 30 minutes before you start, or warm it in a bowl of hot water for 5 minutes.
I once forgot the baking soda entirely and ended up with a dense, flat disk that tasted fine but looked… sad. So double-check your ingredients before you start mixing. It’s a simple step that saves a lot of disappointment.
Variations & Adaptations
This basic recipe is a fantastic canvas for all kinds of delicious variations. Here are a few of my favorites:
- Chocolate Chip Banana Bread: Fold in ½ cup of semi-sweet or dark chocolate chips right before pouring the batter into the pan. The chocolate melts into gooey pockets that pair beautifully with the banana flavor. This is my most-made version, hands down.
- Nutty Banana Bread: Add ½ cup of chopped walnuts or pecans for a satisfying crunch. Toast the nuts lightly in a dry pan first to deepen their flavor—it makes a noticeable difference.
- Vegan Banana Bread: Substitute the butter with melted coconut oil or vegan butter, and use a flax egg (1 tablespoon ground flaxseed mixed with 3 tablespoons water, let sit for 5 minutes). The texture will be slightly denser but still delicious.
- Gluten-Free Banana Bread: Swap the all-purpose flour for a 1:1 gluten-free baking blend. I’ve had good results with brands like Bob’s Red Mill or King Arthur. Add an extra tablespoon of flour if the batter seems too thin.
- Spiced Banana Bread: Add 1 teaspoon of cinnamon, ½ teaspoon of nutmeg, and ¼ teaspoon of ground ginger to the dry ingredients. It gives the bread a warm, cozy flavor that’s perfect for fall mornings.
I once tried a version with shredded coconut and dried mango mixed in—it was tropical and unexpected, and my kids devoured it. Don’t be afraid to experiment. This recipe is forgiving enough to handle creative additions.
Serving & Storage Suggestions
This banana bread is wonderful in so many ways. Here’s how I like to serve and store mine:
- Serving: Slice it thick and serve at room temperature or lightly toasted. A pat of salted butter melting into a warm slice is pure comfort. For a special treat, spread a little cream cheese or peanut butter on top. It’s also fantastic with a cup of coffee or a glass of cold milk.
- Storage: Keep the bread wrapped tightly in plastic wrap or aluminum foil at room temperature for up to 4 days. The moisture from the bananas actually helps it stay soft and delicious. Don’t refrigerate it—that will dry it out faster.
- Freezing: This bread freezes beautifully. Wrap the cooled loaf (or individual slices) tightly in plastic wrap, then place in a freezer-safe bag. It will keep for up to 3 months. Thaw at room temperature or pop a frozen slice in the toaster for a quick breakfast.
- Flavor development: Honestly, this banana bread tastes even better the next day. The flavors meld together and the texture becomes even more moist. So if you can resist eating it all on day one, you’re in for a real treat on day two.
I often bake two loaves at once—one for now and one for the freezer. It’s my secret weapon for busy mornings when I need something homemade but don’t have time to bake. If you’re looking for other make-ahead breakfast ideas, these creamy peanut butter banana overnight oats are another favorite in my house.
Nutritional Information & Benefits
Here’s a rough estimate of the nutritional content per slice (based on 10 slices):
- Calories: Approximately 220
- Fat: 10g
- Carbohydrates: 32g
- Fiber: 1.5g
- Sugar: 16g
- Protein: 3.5g
While this is definitely a treat, there are some redeeming qualities. Bananas are a great source of potassium, vitamin B6, and vitamin C. They also provide natural sweetness, which allows us to use less refined sugar than many traditional recipes. The butter adds richness, but you could easily swap it for coconut oil or applesauce to reduce the fat content.
This recipe is nut-free as written, making it a safe option for school lunchboxes or gatherings where allergies might be a concern. Just skip any nut-based mix-ins if you need to keep it completely nut-free. For a protein-packed snack option, these easy high-protein turkey pinwheel wraps are another great choice for busy days.
I believe in balance—enjoying homemade treats like this banana bread alongside nourishing meals. It’s not about deprivation; it’s about savoring the good stuff when you have it.
Conclusion
This easy one-bowl banana bread has become a staple in my kitchen for all the right reasons. It’s simple, forgiving, and produces a loaf that tastes like you spent hours perfecting it. The best part? You probably already have everything you need to make it right now. No special trip to the store, no complicated techniques, no fancy equipment. Just honest, delicious banana bread that comes together in one bowl.
I’d love for you to try it and make it your own. Add chocolate chips if that’s your thing. Throw in some walnuts for crunch. Sprinkle a little cinnamon sugar on top before baking for an extra-special crust. This recipe is yours now—adapt it, experiment with it, and enjoy every single slice.
When you do make it, come back and let me know how it turned out. Did you add any fun mix-ins? Did your family love it as much as mine does? Drop a comment below or tag me in your photos—I genuinely love seeing your creations. And if you’re looking for another quick and satisfying treat, these easy no-bake peanut butter oat energy balls are perfect for when you need something sweet in a hurry.
Happy baking, friends. Your kitchen is about to smell amazing.
Frequently Asked Questions
Can I use frozen bananas for this recipe?
Absolutely! Frozen bananas work great. Thaw them completely, then drain off any excess liquid before mashing. They’ll be very soft and almost liquidy, which makes them even easier to mash into the batter.
Why did my banana bread sink in the middle?
A sunken center usually means the bread was underbaked or the oven temperature was too low. Make sure your oven is fully preheated to 350°F and check for doneness with a toothpick before taking it out. Also, avoid opening the oven door during the first 30 minutes of baking.
Can I make this recipe into muffins instead?
Yes! This batter makes about 12 standard muffins. Bake them at 350°F for 18-22 minutes, or until a toothpick inserted into the center comes out clean. Muffins bake faster than a loaf, so start checking at the 18-minute mark.
How do I make this banana bread dairy-free?
Simply substitute the butter with melted coconut oil or a dairy-free butter alternative. The texture will be slightly different—coconut oil gives a lighter crumb—but it’s still delicious. Use a dairy-free chocolate if you’re adding chips.
Can I reduce the sugar in this recipe?
You can reduce the sugar to ½ cup without major issues, especially if your bananas are very ripe and sweet. The bread will be slightly less tender and the top may not brown as deeply, but it will still be tasty. I wouldn’t recommend going below ½ cup, though, as sugar contributes to both sweetness and structure.
Pin This Recipe!
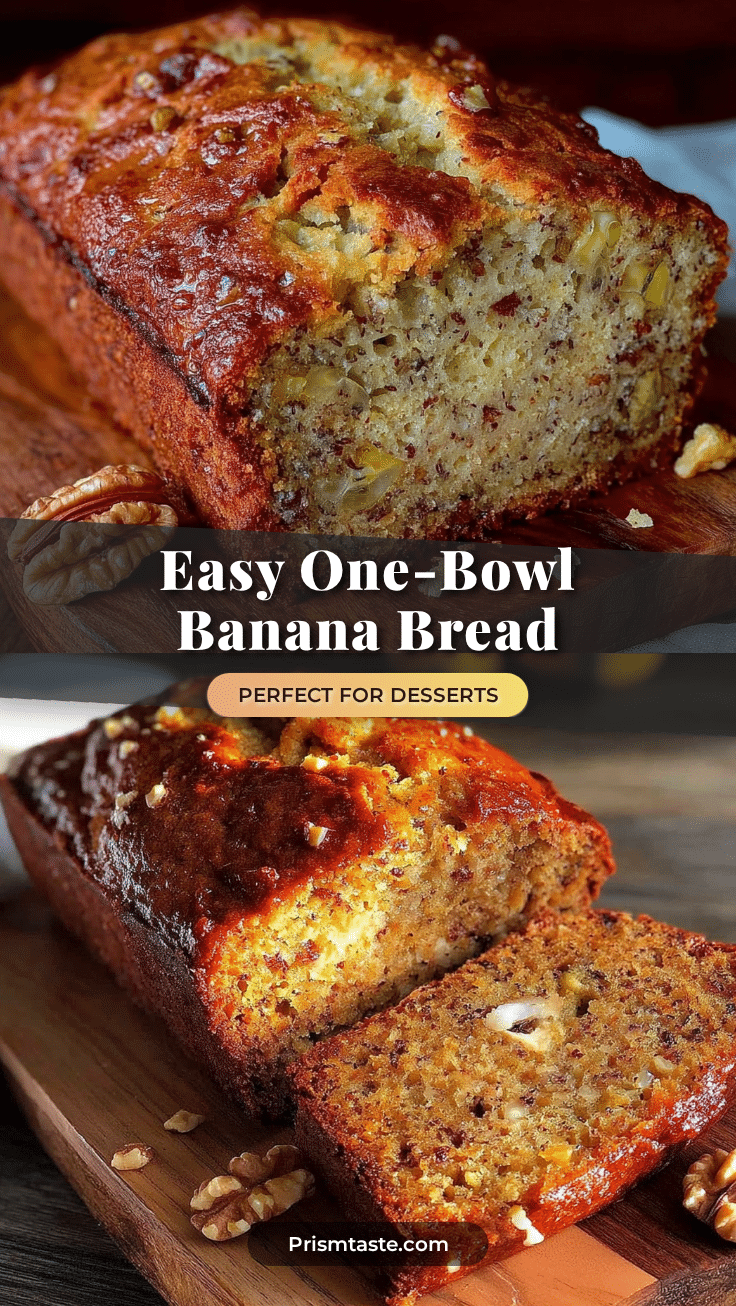
Easy One-Bowl Banana Bread: Best No-Mixer Recipe
This easy one-bowl banana bread requires no mixer and comes together in under 10 minutes. It produces a tender, perfectly domed loaf with a crackly sugar crust and moist crumb, using simple pantry ingredients and ripe bananas.
- Prep Time: 10 minutes
- Cook Time: 50-60 minutes
- Total Time: 1 hour 10 minutes
- Yield: 10 servings 1x
- Category: Dessert
- Cuisine: American
Ingredients
- 3 large ripe bananas (about 1 ½ cups mashed)
- ½ cup unsalted butter, melted (1 stick)
- ¾ cup granulated sugar
- 1 large egg, room temperature
- 1 teaspoon vanilla extract
- 1 ½ cups all-purpose flour
- 1 teaspoon baking soda
- ½ teaspoon salt
- Optional mix-ins: ½ cup chocolate chips, chopped walnuts, or blueberries
Instructions
- Preheat your oven to 350°F (175°C). Position the rack in the center of the oven. Line your loaf pan with parchment paper or grease it well with butter or non-stick spray.
- Mash the bananas. Peel the spotty bananas and drop them into your large mixing bowl. Use a fork to mash them until they’re mostly smooth with a few small lumps remaining. You want about 1 ½ cups of mashed banana.
- Add the melted butter. Pour the slightly cooled melted butter over the mashed bananas and stir until combined.
- Mix in the sugar, egg, and vanilla. Add the granulated sugar and stir vigorously for about 30 seconds until the sugar starts to dissolve and the mixture looks glossy. Crack in the room-temperature egg and add the vanilla extract. Stir until everything is well incorporated and smooth.
- Add the dry ingredients. Sprinkle the all-purpose flour, baking soda, and salt evenly over the wet mixture. Stir with your spatula or spoon just until no streaks of flour remain. A few small lumps are okay. If you’re adding chocolate chips or nuts, fold them in now with a few gentle strokes.
- Pour the batter into the prepared pan. Scrape every last bit of batter into your lined loaf pan. Use the spatula to spread it evenly. Tap the pan gently on the counter a couple of times to release any air bubbles.
- Bake for 50-60 minutes. Place the pan in the preheated oven and bake until the top is golden brown and a toothpick inserted into the center comes out clean or with just a few moist crumbs. The bread should feel springy when you gently press the center. Start checking at 50 minutes.
- Cool in the pan for 10 minutes. Set the pan on a wire rack and let it cool for about 10 minutes. Then use the parchment overhang to lift the bread out and transfer it to the rack to cool completely.
Notes
Don’t overmix the batter—stir just until the flour disappears. Use really ripe bananas (heavily speckled with brown spots). Let the bread cool completely before slicing for clean cuts. Room temperature ingredients matter—take your egg out of the fridge 30 minutes before starting. This bread tastes even better the next day as flavors meld together.
Nutrition
- Serving Size: 1 slice
- Calories: 220
- Sugar: 16
- Sodium: 200
- Fat: 10
- Saturated Fat: 6
- Carbohydrates: 32
- Fiber: 1.5
- Protein: 3.5
Keywords: banana bread, one-bowl banana bread, easy banana bread, no-mixer banana bread, quick banana bread, moist banana bread, simple banana bread


