The way it folds over itself, thick and slow, like satin ribbon curling into a pile — that’s the moment I knew this no-churn salted caramel ice cream was going to work. Not the taste test (though that came later, obviously). Not the first scoop. That single, lazy ribbon of caramel folding into the cream mixture, refusing to disappear completely, that’s when I stopped worrying. Everything else was just waiting.
I got the idea on a Tuesday, which is the most honest thing I can tell you. Not a grand summer afternoon or a nostalgic childhood memory. Just a Tuesday, staring at a can of sweetened condensed milk in my pantry and thinking, “I bet that could do something impressive if I stopped overthinking it.” I’d been burned by ice cream recipes before — the ones that require a machine, a thermometer, and the patience of someone who doesn’t have two kids asking for snacks every twelve minutes. So I wanted something that felt like cheating but tasted like you tried.
This easy no-churn salted caramel ice cream does exactly that. It’s the kind of recipe you make on impulse, because the only hard part is waiting for it to freeze. The caramel comes together in one saucepan, no candy thermometer required. The cream whips up in minutes. And the salt? That’s the part that makes people close their eyes mid-bite. I’ve made this four times in two weeks — once as a test, once to prove the first test wasn’t luck, once for a dinner party where nobody believed it was homemade, and once just because it was Thursday and I wanted to.
You don’t need a story to make this. You just need a freezer and a little faith in condensed milk.
Why You’ll Love This Recipe
Let me tell you what sold me on this approach — and what will sell you too. I’ve tested enough ice cream recipes to know that most of them require either expensive equipment or a level of precision that feels more like chemistry than cooking. This one asks for neither. You whisk, you fold, you freeze. That’s it.
- No Ice Cream Machine Required: Not even a little one. No freezing the bowl overnight, no churning, no guessing when it’s done. Your freezer does all the heavy lifting.
- 4 Main Ingredients: Heavy cream, sweetened condensed milk, salted caramel sauce (which is just sugar, butter, cream, and salt), and flaky sea salt. You probably have most of these right now.
- Ready in Under 6 Hours: Most of that time is hands-off freezing. Actual prep takes about 15 minutes. I’ve made this during naptime and served it after dinner.
- Perfect Texture Without Additives: The sweetened condensed milk does something magical here — it keeps the ice cream scoopable straight from the freezer. No rock-hard blocks that require a chisel. No ice crystals ruining the creaminess.
- Customizable From the Start: Once you understand the base formula, you can riff endlessly. I’ve made chocolate swirl versions, added crushed cookies, and even folded in leftover caramelized grilled peach crisp crumble for a summer special.
- That Salted Caramel Balance: The salt doesn’t just sit on top — it gets woven throughout. Each bite has that sweet-salty contrast that keeps you going back for “just one more spoonful.”
This isn’t just another no-churn recipe. It’s the one I keep coming back to because it works every single time. The caramel is deep and buttery, not cloyingly sweet. The texture is smooth and dense, like premium store-bought gelato. And honestly? It makes you look like you know what you’re doing in the kitchen, even if you’re just following directions like the rest of us.
What Ingredients You Will Need
This recipe uses simple, everyday ingredients to create something that tastes far more complicated than it is. The magic is in how they work together — the fat from the cream, the sweetness from the condensed milk, and the complexity from the homemade caramel.
- Heavy Cream (2 cups / 480 ml): Cold, straight from the fridge. You want heavy cream with at least 36% milk fat for the best volume when whipping. I’ve tested this with whipping cream (35%) and it works, but the texture is slightly less luxurious. Look for cream that doesn’t have added stabilizers — the simpler the ingredient list, the better.
- Sweetened Condensed Milk (1 can / 14 oz / 397 g): This is non-negotiable for the no-churn method. Don’t confuse it with evaporated milk — they are not the same thing. The condensed milk adds sweetness, body, and prevents ice crystals from forming. I use Eagle Brand or Borden, but any brand works as long as it’s full-fat. (Light versions contain less sugar and will affect the texture.)
- Granulated Sugar (1 cup / 200 g): For the salted caramel sauce. Regular white sugar is best here — brown sugar adds molasses notes that can overpower the caramel. If you only have organic cane sugar, it works fine.
- Unsalted Butter (6 tablespoons / 85 g): Cut into pieces, at room temperature. Using unsalted butter lets you control the salt level precisely. If you only have salted butter, reduce the added flaky salt by half.
- Heavy Cream (for caramel) (1/2 cup / 120 ml): Warm it slightly before adding to the hot sugar — cold cream can cause the caramel to seize or splatter. I microwave mine for about 20 seconds.
- Flaky Sea Salt (1 1/2 teaspoons, plus more for topping): This is the star. Use Maldon or another flaky sea salt — the large, irregular crystals provide those little bursts of saltiness that make each bite interesting. Fine table salt will dissolve too quickly and won’t give you the same effect.
- Vanilla Extract (1 teaspoon): Pure vanilla, not imitation. It rounds out the caramel flavor and adds depth. I’ve made it without in a pinch, and it’s still good — but the vanilla makes it taste more like “real” ice cream.
Ingredient Tips From My Kitchen: The quality of your caramel really matters here. I’ve made this with store-bought caramel sauce in a hurry, and honestly? It’s not the same. The homemade version has a deeper, more complex flavor because you control the caramelization. If you’re short on time, you can use a high-quality jarred caramel (like Trader Joe’s or Stonewall Kitchen), but reduce the sugar in the caramel by a tablespoon since jarred versions are often sweeter.
For the cream, I’ve found that organic heavy cream tends to whip up slightly firmer, which gives the ice cream a bit more structure. But regular grocery store cream works perfectly fine. Just make sure it’s cold — warm cream won’t whip properly.
Equipment Needed
You don’t need much for this recipe, which is honestly my favorite part about it. Here’s what you’ll need:
- Medium Saucepan: For making the caramel. A light-colored pan (stainless steel or enameled) is ideal because you can see the color change as the sugar caramelizes. Dark nonstick pans make it harder to judge doneness.
- Large Mixing Bowl: For whipping the cream. Make sure it’s completely clean — any grease residue will prevent the cream from whipping properly.
- Electric Hand Mixer or Stand Mixer: You can whip cream by hand with a whisk, but it takes about 8-10 minutes of vigorous work. I use my hand mixer on medium-high speed and it takes about 3 minutes. A stand mixer with the whisk attachment works beautifully too.
- Rubber Spatula: For folding the cream into the condensed milk mixture. A flexible spatula lets you incorporate everything without deflating the cream.
- 8×4 or 9×5 Loaf Pan: For freezing. A standard loaf pan gives you the perfect shape for scooping. If you use a wider dish, the ice cream will freeze faster but might be harder to scoop in nice portions.
- Parchment Paper or Plastic Wrap: To line the pan for easy removal. I prefer parchment because it creates a cleaner look.
- Candy Thermometer (Optional): I don’t use one for this caramel — the visual cues (color, smell) are reliable enough. But if you’re nervous about caramel-making, a thermometer set to 340°F (170°C) for the sugar gives you peace of mind.
My Honest Take on Equipment: I’ve made this ice cream with a $15 hand mixer from Target and a $5 loaf pan from IKEA. It turned out just as good as when I used my fancy KitchenAid. The only thing I’d splurge on is a good rubber spatula — the one-piece silicone kind that doesn’t have a separate head. They last forever and make folding so much easier.
If you don’t have a loaf pan, use a 6-cup freezer-safe container with a lid. A round quart container works great too — just press a piece of parchment on top before sealing to prevent ice crystals from forming on the surface.
Preparation Method
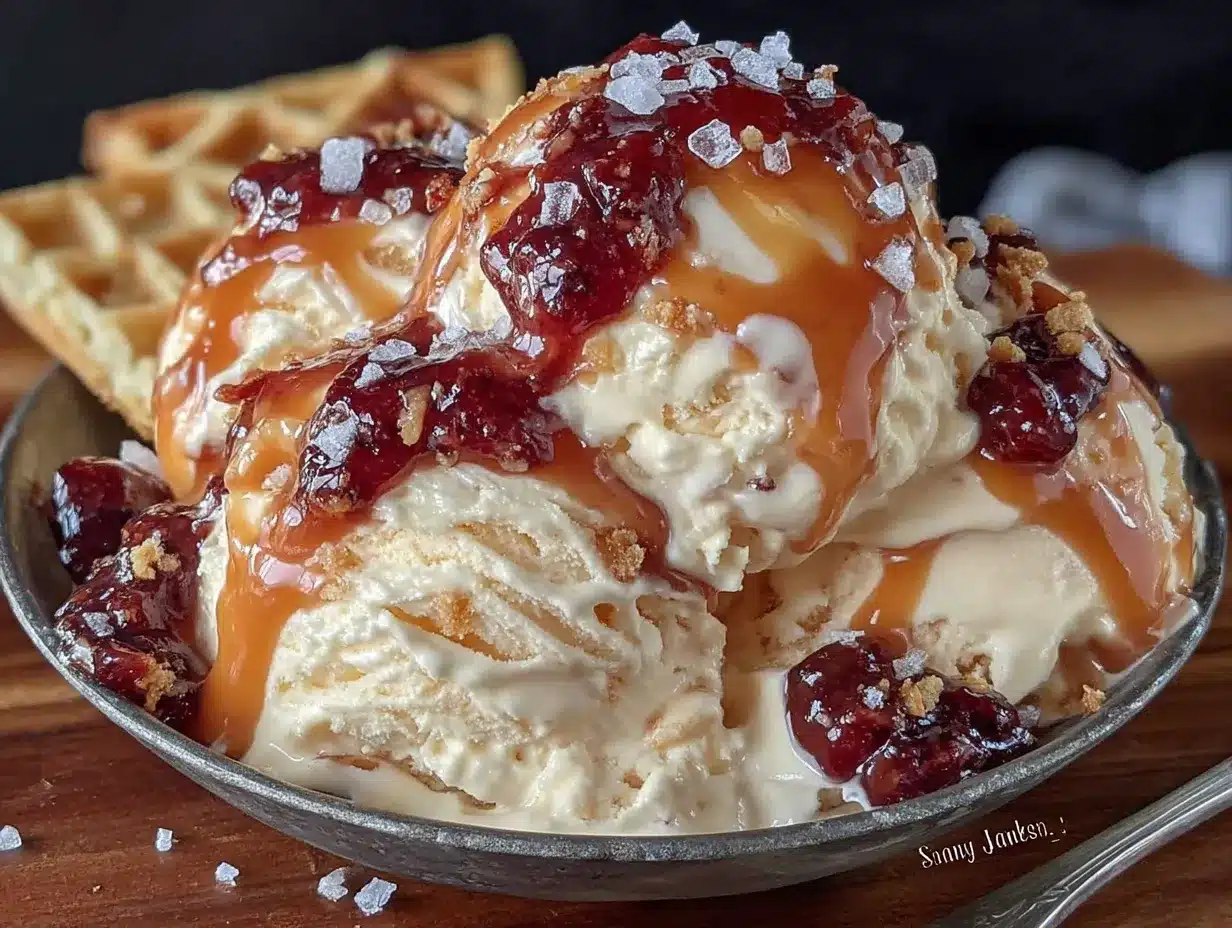
Let’s walk through this step by step. I’ve included all the little details that make the difference between good ice cream and “I can’t believe I made this” ice cream.
Step 1: Make the Salted Caramel Sauce
Place a medium saucepan over medium heat and add the granulated sugar in an even layer. Don’t stir it yet — just let it sit. After about 3-4 minutes, you’ll notice the edges starting to melt and turn amber. Now you can gently swirl the pan (don’t use a spoon) to encourage even melting. If you see clumps forming, don’t panic — they’ll melt as the sugar continues to heat.
Once the sugar is completely melted and reaches a deep amber color (think the color of a copper penny), remove the pan from heat immediately. Carefully pour in the warm heavy cream — it will bubble up violently, so stand back. Whisk until smooth. The mixture will be thin and glossy at this point.
Add the butter pieces one at a time, whisking after each addition until completely incorporated. The sauce will thicken slightly. Stir in 1 teaspoon of flaky sea salt and the vanilla extract. Let the caramel cool for about 20 minutes at room temperature, then transfer to a heat-safe bowl and refrigerate until completely cool — about 1 hour. It should be thick but still pourable.
Step 2: Whip the Cream
Pour the cold heavy cream into a large mixing bowl. Using an electric hand mixer or stand mixer with the whisk attachment, beat on medium-high speed until stiff peaks form. This takes about 3-4 minutes with a mixer. You’re looking for cream that holds its shape when you lift the beaters — not so stiff that it looks curdled, but firm enough that it doesn’t slide off a spoon.
Pro tip from my kitchen: If you accidentally overwhip the cream (it starts to look grainy and separates), don’t toss it. Add a tablespoon of cold cream and gently fold it in — this often brings it back to a smooth state. I’ve saved many batches this way.
Step 3: Combine the Base
In a separate large bowl, whisk the entire can of sweetened condensed milk until smooth. It should be thick and sticky. Gently fold in about one-third of the whipped cream using a rubber spatula — this lightens the condensed milk and makes it easier to incorporate the rest without deflating everything.
Add the remaining whipped cream and fold gently until just combined. You want a uniform mixture with no white streaks of cream visible. Don’t overmix — you’ll lose volume and the ice cream will be denser.
Step 4: Layer and Swirl
Line your loaf pan with parchment paper, leaving some overhang on the long sides for easy lifting later. Spread about one-third of the cream mixture in an even layer. Drizzle about one-third of the cooled caramel sauce over the top — use about 3 tablespoons per layer. Sprinkle with a pinch of flaky sea salt.
Repeat the layers: another third of the cream mixture, another third of the caramel, another pinch of salt. Finish with the remaining cream mixture, then drizzle the last of the caramel on top. Use a butter knife or skewer to gently swirl the caramel into the top layer — don’t over-swirl or you’ll lose the distinct ribbons. Sprinkle one final pinch of flaky salt over the top.
Step 5: Freeze
Cover the pan tightly with plastic wrap, pressing it directly onto the surface of the ice cream to prevent ice crystals from forming. Freeze for at least 6 hours, but preferably overnight. The longer it freezes, the firmer and more scoopable it becomes.
Step 6: Serve
Remove the pan from the freezer about 5 minutes before scooping. Use the parchment overhang to lift the ice cream out, then slice into thick slices or scoop into bowls. If the ice cream is too hard to scoop easily, let it sit at room temperature for 10 minutes. Drizzle with extra caramel sauce and a final sprinkle of flaky salt if you’re feeling fancy.
Cooking Tips & Techniques
I’ve made this recipe enough times to learn what works and what doesn’t. Here are the things I wish someone had told me before my first attempt.
Don’t Rush the Caramel: This is the one part of the recipe where patience actually matters. If you take the sugar off the heat too early, your caramel will be pale and lack depth. If you wait too long, it will taste burnt. The sweet spot is when the sugar turns a deep amber — think the color of an old penny. Trust your eyes more than your timer.
Cold Cream is Non-Negotiable: I once tried to whip cream that had been sitting on the counter for 20 minutes. It took forever and never really got stiff. Keep your cream in the fridge until the moment you’re ready to whip it. If your kitchen is warm, set the mixing bowl in a larger bowl of ice water while you whip.
Fold, Don’t Stir: When combining the whipped cream with the condensed milk, use a gentle folding motion — cut through the center, scrape along the bottom, and bring the mixture up and over. Stirring vigorously will deflate the air bubbles you worked so hard to create. The finished mixture should be light and airy, not dense and flat.
Temperature Matters for Swirling: If your caramel is too warm when you layer it, it will sink to the bottom of the pan instead of forming beautiful ribbons. If it’s too cold, it won’t swirl at all. The ideal temperature is just slightly thicker than room temperature honey — pourable but not runny.
My Biggest Failure: The first time I made this, I used warm caramel straight from the saucepan. It melted right through the cream mixture and pooled at the bottom of the pan. The ice cream still tasted good, but the texture was uneven — some bites were pure caramel, others were plain vanilla. Learn from my impatience. Let that caramel cool completely.
Freezer Placement Matters: Store your ice cream toward the back of the freezer where the temperature is most consistent. The door shelf experiences temperature fluctuations every time you open it, which can lead to ice crystals forming on the surface. If you’re planning to keep this for more than a few days, press a piece of parchment paper directly onto the surface before sealing the container.
Variations & Adaptations
Once you’ve mastered the basic recipe, the possibilities are endless. Here are a few variations I’ve tested and loved:
Chocolate Salted Caramel: Add 1/4 cup of unsweetened cocoa powder to the sweetened condensed milk before folding in the cream. Whisk until completely smooth — no lumps allowed. The chocolate adds a richness that pairs beautifully with the salted caramel. I’ve made this for chocolate-loving friends and it disappears fast.
Cookies and Cream Salted Caramel: Crush about 10 chocolate sandwich cookies (Oreos work great) into coarse crumbs. Fold half into the cream mixture before layering, then sprinkle the remaining crumbs between the caramel layers. The crunch adds a wonderful contrast to the creamy ice cream.
Vegan Version: Substitute the heavy cream with two cans of full-fat coconut cream (chilled overnight, then scoop out the solid part). Use a vegan sweetened condensed milk (Nature’s Charm makes a good one) and vegan butter for the caramel. The texture is slightly different — a bit icier — but the flavor is still fantastic. I’ve tested this for a dairy-free friend and she couldn’t stop eating it.
Boozy Salted Caramel: Add 2 tablespoons of bourbon or dark rum to the caramel sauce after removing it from the heat. The alcohol keeps the ice cream slightly softer in the freezer and adds a warm, complex note. This is my go-to for adult dinner parties.
Seasonal Swirl-In: In summer, I sometimes fold in fresh peach ginger freezer jam between the layers instead of extra caramel. The fruity acidity cuts through the richness beautifully. In fall, try swirling in apple butter or pumpkin butter.
Low-Sugar Option: Use a sugar-free sweetened condensed milk (like the one from Lakanto) and reduce the sugar in the caramel to 3/4 cup. The texture won’t be quite as creamy, but it’s a decent option for those watching their sugar intake. I’d recommend adding an extra tablespoon of butter to the caramel to help with texture.
Serving & Storage Suggestions
This ice cream is best served slightly softened — about 5-10 minutes out of the freezer. The texture becomes silky and scoopable, and the caramel ribbons soften just enough to stretch with each bite.
Serving Ideas:
- In a bowl with a drizzle of extra caramel and a sprinkle of flaky salt
- Alongside a warm brownie or chocolate zucchini muffin for a hot-cold contrast
- Scooped over grilled peaches or a slice of warm pie
- In a cone on a hot day (the no-churn texture holds up well in cones)
- As a float with root beer or cream soda — trust me on this one
Storage: Transfer any leftover ice cream to an airtight container with a tight-fitting lid. Press a piece of parchment paper or plastic wrap directly onto the surface before sealing — this prevents freezer burn and ice crystals. Properly stored, this ice cream will keep for up to 3 weeks. After that, the texture starts to degrade slightly, though it’s still perfectly edible.
Flavor Development: Here’s something interesting — the flavor actually improves after 24-48 hours in the freezer. The caramel flavor mellows and deepens, and the salt distributes more evenly throughout. I’ve found that day-two ice cream tastes noticeably better than day-one. So if you can resist digging in immediately, you’ll be rewarded.
Re-Freezing Note: If the ice cream melts completely (say, you left it on the counter too long), don’t re-freeze it. The texture will be icy and grainy. Instead, use the melted mixture as a milkshake base — blend it with some milk and you’ve got a salted caramel milkshake.
Nutritional Information & Benefits
Let’s be honest — this is a treat, not a health food. But knowing what’s in it can help you enjoy it mindfully.
Estimated Nutrition Per Serving (1/2 cup / 120 ml):
- Calories: 380
- Total Fat: 24g
- Saturated Fat: 15g
- Cholesterol: 85mg
- Sodium: 280mg
- Total Carbohydrates: 38g
- Sugars: 35g
- Protein: 4g
What’s Actually Good About It: The heavy cream provides calcium and vitamin A. The butter in the caramel contains butyrate, a short-chain fatty acid that supports gut health in small amounts. And the sea salt provides trace minerals like magnesium and potassium — but honestly, you’d need to eat a lot of ice cream to get a meaningful amount.
Dietary Considerations: This recipe contains dairy and gluten-free (as written). It’s suitable for vegetarians but not vegans (see the variation section for a vegan option). The sugar content is high, so this isn’t ideal for low-sugar or keto diets — though you could experiment with the low-sugar variation mentioned above.
My Personal Take: I believe in enjoying real food in reasonable portions. A scoop of this ice cream after a long week is one of life’s simple pleasures. I don’t stress about the numbers — I just savor each bite and move on. Life’s too short for mediocre desserts.
Conclusion
This easy no-churn salted caramel ice cream has become my go-to for so many reasons. It’s the recipe I make when I want to impress without stress. It’s the dessert I bring to parties when I’m asked to “bring something.” It’s the treat I make for myself on a random Tuesday, just because I can.
The beauty of this recipe is that it doesn’t require any special skills or equipment. If you can whip cream and stir sugar in a pan, you can make this. The caramel will deepen with practice, the swirls will get prettier, but even your first attempt will be delicious. I promise you that.
I’d love to hear how yours turns out. Did you try a variation? Did you add something unexpected that worked? Drop a comment below and let me know — I’m always looking for new ideas to test in my kitchen. And if you share a photo on social media, tag me so I can see your beautiful creation. There’s something deeply satisfying about knowing someone else is enjoying a recipe that started in my kitchen.
Go make some ice cream. You deserve it.
Frequently Asked Questions
Can I use store-bought caramel sauce instead of making my own?
Yes, but the flavor won’t be as deep or complex. If you’re short on time, look for a high-quality jarred caramel sauce — avoid the squeeze bottles with artificial flavors. You’ll need about 1 cup of sauce total. Reduce the added salt slightly since store-bought caramel is often saltier than homemade.
Why did my ice cream turn out icy instead of creamy?
This usually happens for one of three reasons: the cream wasn’t whipped to stiff peaks, the mixture wasn’t folded gently enough (deflating the air), or the ice cream wasn’t covered properly during freezing. Make sure your cream is very cold before whipping, fold gently, and press plastic wrap directly onto the surface before freezing.
Can I make this without an electric mixer?
Absolutely. You can whip the cream by hand with a whisk — it takes about 8-10 minutes of steady work. Chill the bowl and whisk beforehand to speed things up. It’s a good arm workout, honestly. The caramel can be made entirely by hand with a whisk.
How long does this ice cream keep in the freezer?
Properly stored (in an airtight container with parchment pressed onto the surface), it stays creamy and delicious for up to 3 weeks. After that, the texture may become slightly icy, though it’s still safe to eat. I’ve never had a batch last longer than 2 weeks in my house, so I can’t personally vouch for beyond that.
Can I double this recipe?
Yes, but don’t try to whip double the cream in one bowl — it won’t incorporate enough air. Whip it in two batches or use a larger stand mixer. For the caramel, you can easily double it in the same saucepan — just use a larger pan to prevent boiling over when you add the cream.
Pin This Recipe!
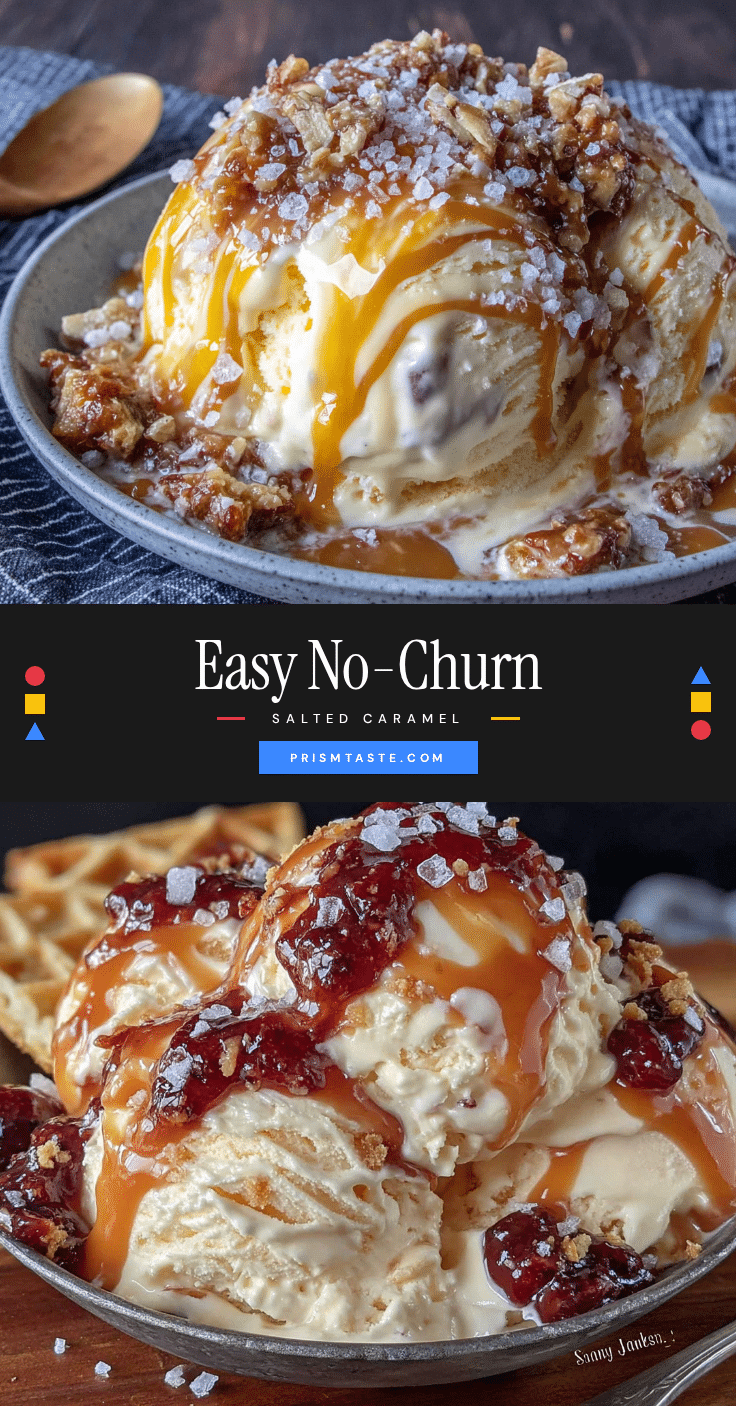
Easy No-Churn Salted Caramel Ice Cream (Best Homemade Recipe)
This easy no-churn salted caramel ice cream requires no ice cream machine and just 4 main ingredients. It’s creamy, scoopable, and features a deep, buttery caramel with bursts of flaky sea salt in every bite.
- Prep Time: 15 minutes
- Cook Time: 15 minutes
- Total Time: 6 hours 30 minutes (includes cooling and freezing)
- Yield: 8 servings 1x
- Category: Dessert
- Cuisine: American
Ingredients
- 2 cups (480 ml) heavy cream, cold
- 1 can (14 oz / 397 g) sweetened condensed milk
- 1 cup (200 g) granulated sugar
- 6 tablespoons (85 g) unsalted butter, cut into pieces, at room temperature
- 1/2 cup (120 ml) heavy cream (for caramel), warmed
- 1 1/2 teaspoons flaky sea salt, plus more for topping
- 1 teaspoon vanilla extract
Instructions
- Make the Salted Caramel Sauce: Place a medium saucepan over medium heat and add the granulated sugar in an even layer. Let it sit without stirring for 3-4 minutes until the edges start to melt and turn amber. Gently swirl the pan to encourage even melting. Once the sugar is completely melted and reaches a deep amber color (copper penny color), remove from heat immediately. Carefully pour in the warm heavy cream (it will bubble up), then whisk until smooth. Add the butter pieces one at a time, wh…
- Whip the Cream: Pour the cold heavy cream into a large mixing bowl. Using an electric hand mixer or stand mixer with whisk attachment, beat on medium-high speed until stiff peaks form (about 3-4 minutes).
- Combine the Base: In a separate large bowl, whisk the entire can of sweetened condensed milk until smooth. Gently fold in about one-third of the whipped cream using a rubber spatula to lighten the mixture. Add the remaining whipped cream and fold gently until just combined and no white streaks remain.
- Layer and Swirl: Line a loaf pan (8×4 or 9×5) with parchment paper, leaving overhang on the long sides. Spread about one-third of the cream mixture in an even layer. Drizzle about one-third of the cooled caramel sauce (about 3 tablespoons) over the top and sprinkle with a pinch of flaky sea salt. Repeat layers: another third of cream mixture, another third of caramel, another pinch of salt. Finish with the remaining cream mixture, then drizzle the last of the caramel on top. Use a butter knife o…
- Freeze: Cover the pan tightly with plastic wrap, pressing it directly onto the surface of the ice cream. Freeze for at least 6 hours, preferably overnight.
- Serve: Remove the pan from the freezer about 5 minutes before scooping. Use the parchment overhang to lift the ice cream out, then slice or scoop. If too hard, let sit at room temperature for 10 minutes. Drizzle with extra caramel sauce and a final sprinkle of flaky salt if desired.
Notes
Don’t rush the caramel; let it reach a deep amber color. Keep cream cold for whipping. Fold gently to retain air. Let caramel cool completely before layering to prevent sinking. Store ice cream in the back of the freezer for consistent temperature. Flavor improves after 24-48 hours.
Nutrition
- Serving Size: 1/2 cup (120 ml)
- Calories: 380
- Sugar: 35
- Sodium: 280
- Fat: 24
- Saturated Fat: 15
- Carbohydrates: 38
- Protein: 4
Keywords: no-churn ice cream, salted caramel ice cream, homemade ice cream, easy ice cream, no machine ice cream


