It was 11:47 PM on a rainy Wednesday in October, and I had a very specific craving—not for food, but for that feeling of Halloween magic. You know the one I mean. The kind where the lights are dim, the punch bowl is bubbling mysteriously, and everyone gasps when they walk into the room. I didn’t have a party planned, honestly. I had a half-empty fridge, a bag of limes that were starting to soften, and a bottle of sparkling water that was about to go flat. But something about the rain tapping against the window and the faint smell of a neighbor’s wood-burning fireplace just got me in the mood to create something spooky.
I started digging through my cabinets like a woman possessed. No creepy gelatin brains, no dry ice delivery scheduled—just me, a tired mom who should have been in bed, determined to make a green punch that didn’t look like radioactive sludge. I mean, let’s be real—most Halloween punches are terrifying for all the wrong reasons. They’re neon green, loaded with sugar, and leave you with a headache before the first werewolf movie even starts. So I challenged myself right there at midnight: make a witches’ brew that looks legitimately haunted but won’t make anyone regret drinking it.
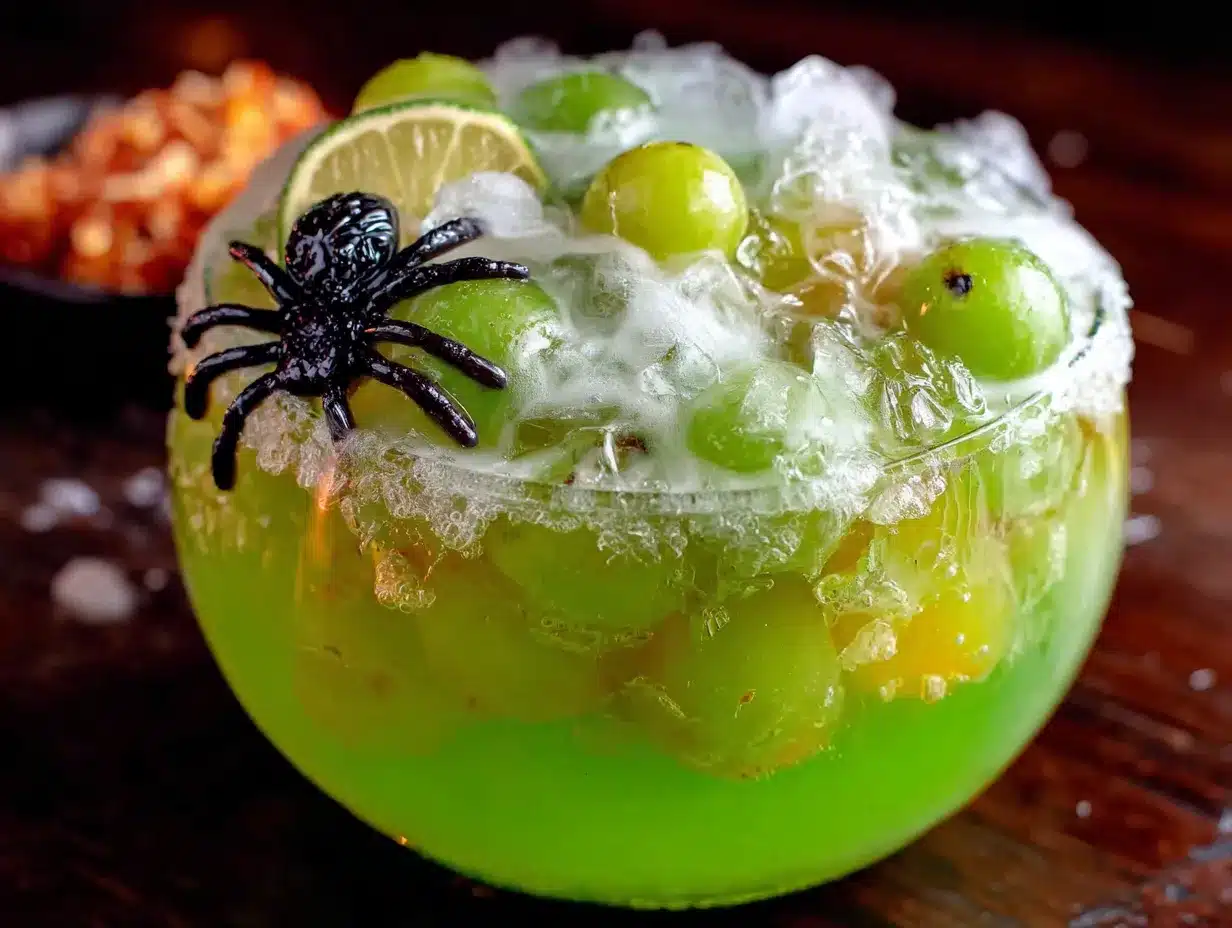
The result was this Lighter Witches’ Brew Green Punch with Dry Ice Effect, and honestly, it might be my proudest late-night kitchen victory. It’s got that perfect eerie green glow from natural ingredients, a citrusy fizz that feels festive without being cloying, and the dry ice effect that makes it look like a cauldron straight out of a witch’s cottage. I’ve made it for three Halloweens now, and every time someone asks, “Wait, you actually made this yourself?” I just smile and think about that rainy Wednesday when I couldn’t sleep and created something magical with what I had.
Why You’ll Love This Recipe
This isn’t your average Halloween punch that leaves you regretting your life choices. I’ve tested this recipe at four different parties—including one where I forgot to chill the ingredients beforehand (whoops)—and it still came out perfect. Here’s why this one is different:
- Quick & Easy: From fridge to table in under 10 minutes. Seriously, you can whip this up while the kids are still arguing over costumes.
- Simple Ingredients: No neon food coloring, no high-fructose corn syrup, no weird powdered mixes that taste like chemicals. Everything is stuff you can find at any grocery store.
- Perfect for Halloween: Whether it’s a classroom party, a backyard gathering, or a spooky movie night, this punch steals the show every single time.
- Crowd-Pleaser: Kids love the bubbling cauldron effect, and adults love that it’s not disgustingly sweet. I’ve seen people go back for thirds.
- Unbelievably Delicious: The combination of lime, pineapple, and ginger ale creates this refreshing citrusy flavor that’s way more sophisticated than it has any right to be.
What makes this recipe different from every other green punch on Pinterest is the balance. I spent three batches getting the color just right—not too pale, not that fake radioactive green that stains your teeth. The secret is using a blend of lime juice and kiwi-infused simple syrup (trust me, it’s easier than it sounds) to get that natural, forest-witch green. Plus, the dry ice effect isn’t just for show—it actually chills the punch without diluting it, which is a game-changer for parties.
This is the kind of recipe that makes you close your eyes after the first sip. It’s Halloween comfort in a cup—spooky enough for Instagram, light enough that you won’t feel guilty going back for more. Perfect for impressing guests without spending hours in the kitchen, or turning a simple Friday night into something memorable.
What Ingredients You Will Need
This recipe uses simple, wholesome ingredients to deliver that eerie green glow and refreshing flavor without any artificial nonsense. Most of these are probably already in your kitchen—I know I had everything except the kiwi when I first made it at midnight.
For the Punch Base
- 4 cups pineapple juice (unsweetened, not from concentrate if possible—it makes a difference in clarity)
- 2 cups lime juice (fresh squeezed from about 8-10 limes, or use bottled for convenience)
- 4 cups ginger ale (I prefer Canada Dry for its crisp bite, but any brand works)
- 2 cups sparkling water (plain or lime-flavored—adds that extra fizz)
- 1 cup kiwi simple syrup (recipe below)
For the Kiwi Simple Syrup
- 4 ripe kiwis (peeled and mashed—the greener the better for color)
- 1 cup water
- 1/2 cup honey (or maple syrup for vegan option—adds a subtle earthiness)
For the Dry Ice Effect
- 1-2 pounds dry ice (available at most grocery stores—call ahead to check)
- Heatproof bowl or cauldron (glass or ceramic, not plastic for dry ice)
- Tongs (never touch dry ice with bare hands!)
Optional Garnishes
- Green apple slices (float them on top for a creepy swamp effect)
- Frozen gummy worms (looks like creepy crawlies in the punch)
- Lime wheels (for that classic witchy rim)
- Edible glitter (for a magical shimmer—totally optional but so fun)
For the kiwi simple syrup, look for kiwis that give slightly when pressed—they should be ripe but not mushy. I’ve found that the greener the kiwi flesh, the more vibrant your punch color will be. If you’re in a pinch, you can substitute with green food coloring (just a few drops), but honestly, the natural version tastes so much better. For a lower-sugar option, replace the honey with stevia or monk fruit sweetener—just adjust to taste since they’re sweeter than honey.
Equipment Needed
You don’t need a witch’s cauldron for this, though it certainly helps with the aesthetic. Here’s what you’ll actually need:
- Large punch bowl or drink dispenser (at least 2-gallon capacity—I use a glass cauldron I found at a thrift store for $8)
- Small saucepan (for making the kiwi simple syrup)
- Fine-mesh strainer (to remove kiwi seeds—trust me, you don’t want those floating around)
- Mason jar or heatproof container (for holding dry ice—never put it directly in plastic)
- Tongs (for handling dry ice safely—this is non-negotiable)
- Measuring cups and spoons
- Sharp knife and cutting board
- Wooden spoon (for stirring—metal can react with the citrus)
If you don’t have a fancy punch bowl, a clean plastic cauldron from a party store works just fine—just make sure it’s food-safe. For the dry ice, I recommend wearing gloves when handling it. I learned this the hard way after a minor frostnip incident that taught me to respect the frozen stuff. Also, a small fan placed near the punch bowl helps the dry ice fog drift across the table for that extra spooky effect—totally optional but highly recommended.
Preparation Method
Alright, let’s get brewing! This comes together faster than you’d think—most of the time is just waiting for the syrup to cool.
- Make the kiwi simple syrup (15 minutes + cooling time): Peel and mash the kiwis in a bowl using a fork. In a small saucepan, combine the mashed kiwis, water, and honey. Bring to a gentle boil over medium heat, stirring occasionally. Reduce heat and simmer for 8-10 minutes until the liquid turns a deep green and the kiwi pieces have broken down. Remove from heat and let steep for 10 minutes. Strain through a fine-mesh strainer into a jar, pressing on the solids to extract all that gorgeous green liquid. Discard the solids and refrigerate the syrup until completely cool—about 30 minutes.
- Chill your ingredients (2 hours before serving): This is the step I always forget, and then I’m rushing around like a maniac. Put the pineapple juice, ginger ale, and sparkling water in the fridge at least 2 hours before you plan to serve. Cold ingredients mean less dry ice is needed for the effect, and the punch stays colder longer.
- Mix the punch base (5 minutes): In your punch bowl, combine the chilled pineapple juice, lime juice, and cooled kiwi simple syrup. Stir gently with a wooden spoon until everything is well incorporated. The color should be a natural, murky green—think swamp water but in the best way possible.
- Add the fizz (right before serving): Gently pour in the ginger ale and sparkling water. Stir once or twice—don’t overmix or you’ll lose the carbonation. At this point, taste it and adjust. Need more lime? Add another squeeze. Too sweet? A splash more sparkling water balances it out.
- Prepare the dry ice (immediately before serving): Using tongs, carefully place small chunks of dry ice (about the size of a golf ball each) into a heatproof container or directly into the punch bowl. Warning: Never put dry ice in a sealed container—the pressure can cause an explosion. Always leave it open to the air. The dry ice will start bubbling and creating that spooky fog effect almost immediately.
- Add garnishes and serve: Float lime wheels, green apple slices, or frozen gummy worms on top for that extra creepy touch. The dry ice will continue to fog for about 15-20 minutes, so add more pieces as needed. Serve immediately in cups—but make sure no dry ice pieces end up in anyone’s cup. Use a ladle and avoid scooping from the bottom where the dry ice settles.
Pro tip: If you want the fog to be extra dramatic, add a small piece of dry ice to each individual cup right before serving. Just make sure your guests know not to drink it—dry ice is for show, not for sipping!
Cooking Tips & Techniques
I’ve made this punch enough times to have a few battle scars—and some hard-won wisdom. Here’s what I wish someone had told me:
Don’t skip the chilling step. I made the mistake once of using room-temperature ingredients, and the dry ice fog was weak and dissipated within minutes. Cold liquid traps the carbon dioxide better, creating that thick, low-lying fog that looks like a real witch’s brew. Trust me on this one.
The kiwi syrup is your secret weapon. I tried using just lime juice for color the first time, and the punch came out looking like pale green dishwater. The kiwi adds that deep, almost black-light green that photographs beautifully. Plus, it adds a subtle sweetness that rounds out the tartness of the lime. If you’re in a rush, you can use green food coloring, but you’ll miss that natural fruit flavor.
Dry ice safety is no joke. I once got a small burn on my finger because I was being careless with the tongs. Always use tongs or thick gloves. Never, ever seal dry ice in a container. And make sure kids can’t reach the dry ice pieces—they’re curious little creatures and will try to touch the “smoking” things.
Timing is everything. The dry ice effect lasts about 15-20 minutes per piece, so I like to have a few pieces ready to add throughout the party. I keep the extra dry ice in a cooler (not the fridge—too cold can crack the glass) wrapped in newspaper to slow down sublimation. Add a fresh piece every 20 minutes, and your punch will look like a bubbling cauldron all night long.
One more thing: If you’re serving this to a crowd, make a double batch. I once thought a single batch would be plenty for 10 people, and it was gone in 30 minutes. People go crazy for this stuff. Better to have leftovers than a sad, empty punch bowl halfway through the party.
Variations & Adaptations
This recipe is surprisingly flexible—I’ve tweaked it for different occasions and dietary needs over the years.
Non-Alcoholic Version (as written): This is the default recipe, and honestly, it’s perfect as-is. Kids love it, designated drivers appreciate it, and nobody misses the booze because the flavor is so good on its own.
Spiked Witches’ Brew: For adult parties, add 1-2 cups of vodka or white rum to the punch base before adding the carbonated ingredients. I’ve also tried it with coconut rum, and that tropical twist is absolutely killer. Just keep in mind that alcohol will make the dry ice sublimate faster—so you might need to add more pieces throughout the night.
Keto-Friendly Version: Replace the pineapple juice with unsweetened green tea and use a sugar-free ginger ale. Swap the honey in the kiwi syrup for monk fruit sweetener or stevia. The color will be slightly less vibrant, but the flavor is still fantastic. I made this for a friend who’s keto, and she went back for four servings.
Blood Orange Variation: For a different creepy color, swap the lime juice for blood orange juice and the kiwi syrup for pomegranate syrup. The result is a deep, blood-red punch that looks like something from a vampire’s kitchen. Same dry ice effect, completely different vibe.
Sparkling Cider Base: In the fall, I sometimes replace the ginger ale with sparkling apple cider for a more seasonal flavor. The apple and lime combination is surprisingly good—like a green apple Jolly Rancher but way more sophisticated.
My personal favorite variation is the coconut rum version for adult Halloween parties. There’s something about the tropical-meets-spooky vibe that just works. Plus, the coconut flavor pairs beautifully with the pineapple and lime—it’s like a haunted tiki party in a cup.
Serving & Storage Suggestions
This punch is best served ice cold—the colder, the better for that dramatic fog effect. I like to serve it in clear glass cups so everyone can see the eerie green color and the fog swirling inside. If you’re using plastic cups, go for clear ones—the colored ones hide all the hard work you put into getting that perfect shade of green.
Presentation ideas: Place the punch bowl on a table with a black tablecloth and surround it with fake spiders, cobwebs, or battery-operated candles. I once set up a small fan pointing at the punch bowl, and the fog drifted across the table like real mist—my guests were genuinely spooked. For an extra touch, freeze small plastic spiders or gummy worms into ice cubes and float them in the punch.
What to serve alongside: This punch pairs beautifully with salty snacks like pretzels, popcorn, or roasted nuts—the salt balances the sweetness. For a full Halloween spread, serve it with spooky pumpkin soup or mummy hot dogs for a complete themed meal. The citrusy fizz also cuts through rich, creamy dips like spinach artichoke or buffalo chicken dip.
Storage: The punch base (without carbonated ingredients and dry ice) can be made up to 24 hours in advance and stored in the fridge. Just add the ginger ale, sparkling water, and dry ice right before serving. Leftover punch (without dry ice) will keep in the fridge for 2-3 days—the flavor actually gets better as the kiwi and lime meld together. Just give it a good stir before serving again.
Reheating: This is a cold punch, so no reheating needed! If you’re serving it the next day, just pour it over ice and add fresh sparkling water to revive the fizz. The color might darken slightly overnight, but it’s still delicious.
Flavor development: I actually prefer this punch the day after making it. The kiwi and lime flavors deepen and become more complex overnight. If you’re planning a party, make the base the night before—your future self will thank you.
Nutritional Information & Benefits
This lighter version of witches’ brew clocks in at roughly 85 calories per 8-ounce serving—a fraction of what most Halloween punches contain. Here’s the breakdown per serving:
- Calories: 85-100
- Carbohydrates: 22g
- Sugar: 18g (naturally occurring from fruit)
- Vitamin C: 45% of daily value (thanks to the lime and kiwi)
- Potassium: 8% of daily value
The key ingredients bring some surprising health benefits to the party. Limes are packed with antioxidants and vitamin C, which supports immune function—perfect for cold and flu season. Kiwis are one of the most nutrient-dense fruits out there, containing more vitamin C than oranges and more potassium than bananas. Pineapple juice contains bromelain, an enzyme that aids digestion. Even the ginger ale contributes—ginger is known for its anti-inflammatory properties and can help settle stomachs after too much candy.
This recipe is naturally gluten-free, dairy-free, and vegan (if you use maple syrup instead of honey). It’s also nut-free, making it safe for school parties where allergies are a concern. The only potential allergen is the kiwi itself—some people have mild oral allergy syndrome with kiwi, so if you’re serving a crowd, you might want to label it or have a backup option.
From a wellness perspective, I love that this punch lets you enjoy Halloween festivities without the sugar crash. It’s sweet enough to feel like a treat, but light enough that you don’t feel like you need a nap afterward. Balance, right?
Conclusion
This Lighter Witches’ Brew Green Punch with Dry Ice Effect is proof that you don’t need artificial ingredients or complicated techniques to create something truly magical for Halloween. It started as a late-night experiment in my kitchen, fueled by a craving for spooky vibes and a fridge full of limes, and it’s become the one recipe my friends and family request every single October.
What I love most about this punch is how it brings people together. There’s something about watching that fog roll over the edge of the punch bowl that makes everyone stop and smile. It’s not just a drink—it’s a moment. And knowing that it’s made with real, wholesome ingredients makes it even better.
I’d love to hear how yours turns out! Did you add your own twist? Did the kids love it? Did the dry ice effect scare anyone? Drop a comment below and share your Halloween creations—I read every single one and love seeing your photos. And if you’re looking for more spooky-but-healthy recipes, check out my baked pumpkin donuts or spider web dip for your next party.
Now go forth and brew something magical. Your cauldron awaits! 🧙♀️
Frequently Asked Questions
Is dry ice safe to use in a punch?
Yes, as long as you follow safety guidelines. Never touch dry ice with bare skin—always use tongs or thick gloves. Never seal dry ice in a closed container, as the pressure can cause an explosion. And most importantly, make sure no pieces of dry ice end up in anyone’s cup. The fog is safe to consume, but the solid dry ice itself can cause internal burns if swallowed.
Can I make this punch ahead of time?
Absolutely! The punch base (without the carbonated ingredients and dry ice) can be made up to 24 hours in advance and stored in the fridge. Just add the ginger ale, sparkling water, and dry ice right before serving for the best fizz and fog effect. The kiwi simple syrup can be made up to a week ahead and stored in a sealed jar in the refrigerator.
Where can I buy dry ice?
Most major grocery stores carry dry ice—just call ahead to check availability. You can also find it at some warehouse clubs like Costco or specialty ice suppliers. A 1-pound block usually costs around $1-2 and is enough for a 2-hour party. Store it in a cooler wrapped in newspaper—never in your freezer, as the extreme cold can damage the appliance.
How do I get the punch to be a darker green color?
For a deeper, more sinister green, add more kiwi syrup or mash an extra kiwi into the punch base before straining. You can also add a drop of green food coloring if the natural color isn’t intense enough. Avoid using too much lime juice, as it can make the punch too tart—balance is key. If you want that almost-black green that looks like swamp water, add a tiny drop of blue food coloring along with the green.
Can I make this punch without dry ice?
Yes! For a non-dry ice version, simply serve the punch over ice cubes. To still get a spooky effect, freeze gummy worms or plastic spiders into ice cube trays and float them in the punch. You can also add a few drops of green food coloring to the ice cubes themselves for a creepy green glow as they melt. It won’t have the fog effect, but it’ll still look and taste amazing.
Pin This Recipe!
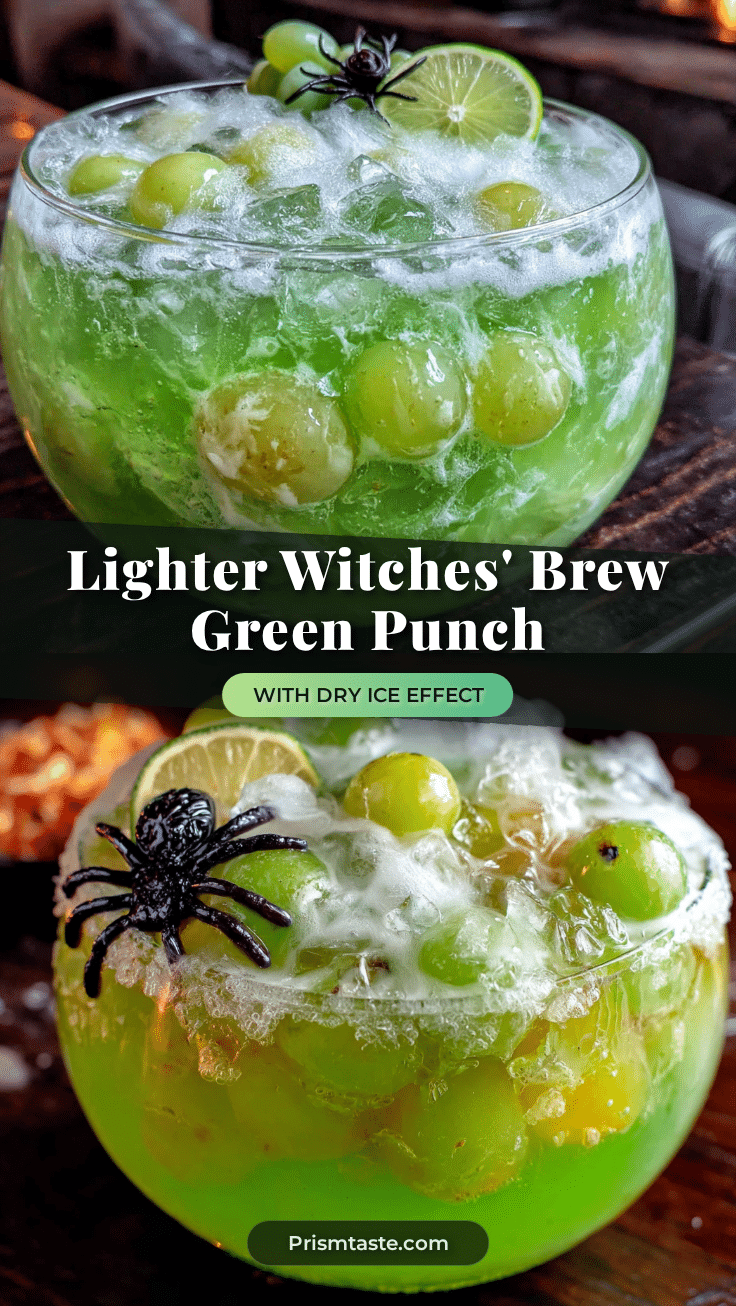
Easiest Lighter Witches Brew Green Punch with Dry Ice
A naturally eerie green Halloween punch with a citrusy fizz and a dramatic dry ice fog effect. Made with real fruit and simple ingredients, this spooky brew is quick to prepare and perfect for parties.
- Prep Time: 10 minutes
- Cook Time: 15 minutes
- Total Time: 25 minutes (plus 2 hours chilling and 30 minutes cooling syrup)
- Yield: 12 servings 1x
- Category: Beverage
- Cuisine: American
Ingredients
- 4 cups pineapple juice (unsweetened)
- 2 cups lime juice (fresh squeezed from about 8–10 limes)
- 4 cups ginger ale (preferably Canada Dry)
- 2 cups sparkling water (plain or lime-flavored)
- 1 cup kiwi simple syrup (see below)
- 4 ripe kiwis (peeled and mashed)
- 1 cup water
- 1/2 cup honey (or maple syrup for vegan)
- 1–2 pounds dry ice
- Green apple slices (optional garnish)
- Frozen gummy worms (optional garnish)
- Lime wheels (optional garnish)
- Edible glitter (optional garnish)
Instructions
- Make the kiwi simple syrup: Peel and mash the kiwis in a bowl using a fork. In a small saucepan, combine the mashed kiwis, water, and honey. Bring to a gentle boil over medium heat, stirring occasionally. Reduce heat and simmer for 8-10 minutes until the liquid turns a deep green and the kiwi pieces have broken down. Remove from heat and let steep for 10 minutes. Strain through a fine-mesh strainer into a jar, pressing on the solids to extract all the green liquid. Discard the solids and refrige…
- Chill your ingredients: Put the pineapple juice, ginger ale, and sparkling water in the fridge at least 2 hours before serving.
- Mix the punch base: In your punch bowl, combine the chilled pineapple juice, lime juice, and cooled kiwi simple syrup. Stir gently with a wooden spoon until well incorporated.
- Add the fizz: Gently pour in the ginger ale and sparkling water. Stir once or twice—don’t overmix or you’ll lose the carbonation. Taste and adjust if needed.
- Prepare the dry ice: Using tongs, carefully place small chunks of dry ice (about the size of a golf ball each) into a heatproof container or directly into the punch bowl. Never put dry ice in a sealed container.
- Add garnishes and serve: Float lime wheels, green apple slices, or frozen gummy worms on top. The dry ice will fog for about 15-20 minutes—add more pieces as needed. Serve immediately in cups, ensuring no dry ice pieces end up in anyone’s cup.
Notes
Never touch dry ice with bare hands—always use tongs or thick gloves. Never seal dry ice in a closed container. Make sure no dry ice pieces end up in anyone’s cup. The punch base (without carbonated ingredients and dry ice) can be made up to 24 hours in advance. The kiwi simple syrup can be made up to a week ahead. For a spiked version, add 1-2 cups of vodka or white rum. For a keto-friendly version, replace pineapple juice with unsweetened green tea and use sugar-free ginger ale and monk fruit sweetener.
Nutrition
- Serving Size: 8 ounces
- Calories: 85100
- Sugar: 18
- Sodium: 10
- Carbohydrates: 22
Keywords: Halloween punch, green punch, witches brew, dry ice punch, spooky drink, party punch, non-alcoholic punch, Halloween drink


