That first crackle of the air fryer—the sound that promises something good without the mess of hot oil splattering everywhere—still makes me grin. I remember the Sunday evening I finally cracked the code on these crispy air fryer chicken thigh meal prep bowls. I’d had one of those weeks where lunch was whatever I could grab from the break room vending machine, and I swore things had to change.
I wanted something that actually tasted like a real meal, not sad leftovers. Chicken thighs were the obvious choice—they’re forgiving, affordable, and packed with flavor. But I’d ruined them before, ending up with rubbery skin or dry meat that no amount of sauce could fix. That night, I played with the temperature, the timing, the spacing in the basket. When I pulled those thighs out, the skin was shatteringly crisp, the meat juicy, and I knew I’d found my meal prep hero.
These bowls have been a non-negotiable in my fridge ever since. They’re the kind of thing you look forward to eating all morning, and honestly, they make adulting feel a little easier. This recipe isn’t about perfection—it’s about having a genuinely good meal ready when you are.
Why You’ll Love This Recipe
Let’s be real—most meal prep recipes are boring. You eat the same dry chicken and sad rice for three days and wonder why you bothered. These crispy air fryer chicken thigh meal prep bowls are different. They’re built to stay delicious, and I’ve tested this more times than I’ll admit to get it right.
- Quick & Easy: From fridge to table in about 30 minutes. No marinating overnight, no complicated steps—just simple cooking that works.
- Simple Ingredients: You probably have everything in your kitchen right now. No trips to specialty stores for obscure spices.
- Perfect for Busy Weeks: Make a batch on Sunday, and you’ve got lunches or dinners sorted for days. It’s the kind of setup that makes Monday morning feel manageable.
- Crowd-Pleaser: Even picky eaters go back for seconds. The crispy skin is universally loved, and the juicy meat speaks for itself.
- Unbelievably Delicious: The texture is next-level. That air fryer magic gives you crispy skin without the grease, and the meat stays tender no matter how many days you’ve stored it.
What makes this recipe different? It’s the technique. I spent weeks tweaking the dry brine, the temperature, and the basket arrangement to get skin that stays crisp even after reheating. This isn’t just another chicken recipe—it’s your best version. It’s the kind of meal that makes you close your eyes after the first bite, honestly. Comfort food reimagined—healthier, faster, but with the same soul-soothing satisfaction.
What Ingredients You Will Need
This recipe uses simple, wholesome ingredients to deliver bold flavor and satisfying texture without the fuss. Most of these are pantry staples, so you can whip these bowls up anytime.
- Boneless, skin-on chicken thighs (4-6 thighs, about 1.5 lbs total) – The skin is key for that crispy texture. I prefer boneless for easier eating in bowls, but bone-in works too (just add 5-7 minutes to cook time). Look for thighs with even thickness so they cook uniformly.
- Olive oil (1 tablespoon) – Helps the seasoning stick and encourages browning. Avocado oil works great too, with a higher smoke point if you have it.
- Salt (1 teaspoon kosher salt) – I use Diamond Crystal; it’s less salty by volume than table salt, so adjust if you’re using fine salt. This is non-negotiable for that crispy skin.
- Garlic powder (1 teaspoon) – Adds savory depth without burning in the air fryer. Fresh garlic can scorch, so stick with powder here.
- Paprika (1 teaspoon) – Smoked paprika adds a lovely warmth; regular works too. It also gives the skin that gorgeous golden color.
- Onion powder (½ teaspoon) – Rounds out the flavor profile. Subtle but important.
- Black pepper (½ teaspoon, freshly ground) – A little bite to balance the richness.
- Dried thyme or oregano (½ teaspoon) – Optional but lovely. I use thyme most often; it complements chicken beautifully.
- Cooked rice or quinoa (for serving) – About 1 cup per bowl. I prefer jasmine rice for its fragrance, but brown rice or quinoa work well for extra fiber.
- Roasted vegetables (broccoli, bell peppers, or zucchini) – About 1 cup per bowl. They add color, nutrition, and texture. I often roast a big tray alongside the chicken.
- Optional garnishes: Fresh parsley, lemon wedges, or a drizzle of hot sauce. These brighten everything up and make each bowl feel fresh.
I recommend using a good-quality kosher salt for the dry brine—it makes a real difference in texture. For the vegetables, whatever you have on hand works. In summer, I swap in fresh corn and cherry tomatoes; in winter, roasted sweet potatoes and Brussels sprouts are my go-to.
Equipment Needed
You don’t need a fancy kitchen to nail these crispy air fryer chicken thigh meal prep bowls. Here’s what you’ll need:
- Air fryer (any size works, but a 5.8-quart or larger lets you cook 4-6 thighs without overcrowding). I use a Cosori Pro II and love the even cooking.
- Tongs – For flipping the chicken safely. Silicone-tipped ones won’t scratch your basket.
- Cutting board – For prepping the chicken and veggies. Wood or plastic, just keep it clean.
- Sharp knife – For trimming excess fat or skin if needed. A chef’s knife works perfectly.
- Mixing bowl – For tossing the chicken with oil and seasonings. A medium glass or stainless steel bowl is fine.
- Meat thermometer – This is crucial. Chicken thighs need to hit 165°F (74°C) for safety, and a thermometer prevents overcooking. I use an instant-read digital one.
- Meal prep containers – Glass or BPA-free plastic with tight lids. I prefer glass for easy reheating and no staining.
If you don’t have an air fryer, you can use a convection oven at 400°F (200°C) on a wire rack set over a baking sheet—the skin won’t be quite as crispy, but it’ll still be good. For budget-friendly options, smaller air fryers work fine; just cook in batches to avoid overcrowding.
Preparation Method
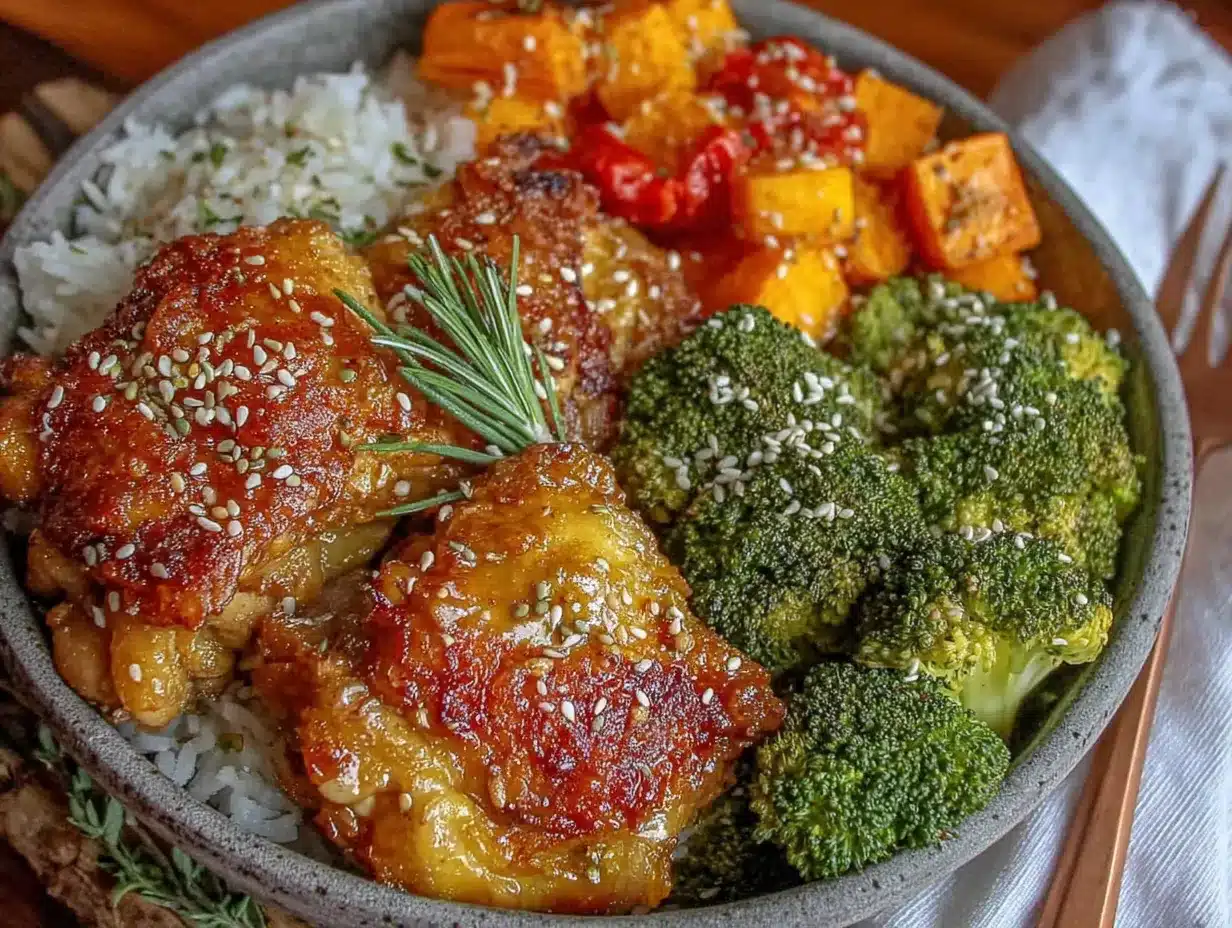
Let’s get cooking. This method gives you consistently crispy, juicy chicken every time.
- Dry brine the chicken (at least 30 minutes, or up to 24 hours ahead). Pat the chicken thighs dry with paper towels—this is critical for crispy skin. Sprinkle both sides with salt and place them on a wire rack over a baking sheet. Leave them uncovered in the fridge. This draws out moisture and seasons the meat deeply. I often do this in the morning before work.
- Preheat your air fryer to 380°F (193°C) for 3-5 minutes. A hot start ensures the skin begins crisping immediately.
- Season the chicken. In a mixing bowl, combine the olive oil, garlic powder, paprika, onion powder, black pepper, and dried thyme (if using). Add the dry-brined thighs and toss gently to coat evenly. Don’t skip the oil—it helps the spices stick and promotes browning.
- Arrange in the basket. Place the thighs skin-side down in a single layer. Leave a little space between each piece—crowding traps steam and prevents crisping. If your air fryer is small, cook in two batches. Trust me, it’s worth the extra few minutes.
- Cook for 12 minutes at 380°F (193°C). The skin should be golden and starting to pull away from the edges. Don’t open the basket during this time; let the hot air do its job.
- Flip and finish. Using tongs, carefully flip the thighs skin-side up. Cook for another 8-12 minutes, depending on thickness. The internal temperature should reach 165°F (74°C) when tested with a meat thermometer. The skin should be deep golden and shatteringly crisp. If it needs more time, cook in 2-minute increments.
- Rest the chicken. Remove from the air fryer and let it rest on a cutting board for 5 minutes. This redistributes the juices so every bite is moist. Don’t skip this step—rushing leads to dry chicken.
- While the chicken rests, prepare your bowls. Divide your cooked rice or quinoa among 4-6 meal prep containers. Add a generous portion of roasted vegetables. Slice the chicken thighs (or leave them whole) and place on top. Garnish with fresh parsley and a lemon wedge if desired.
- Cool completely before sealing. This prevents condensation that makes the skin soggy. Let the bowls sit uncovered on the counter for 15-20 minutes, then pop the lids on and refrigerate.
A quick note: If you’re roasting vegetables at the same time, cut them into uniform pieces and toss with olive oil, salt, and pepper. Roast at 400°F (200°C) for 15-20 minutes, or until tender and slightly charred. I often do a big tray of broccoli and bell peppers while the chicken cooks.
Cooking Tips & Techniques
I’ve made every mistake you can imagine with air fryer chicken—rubbery skin, dry meat, uneven cooking. Here’s what I learned so you don’t have to.
Dry brining is non-negotiable. I used to skip this step, thinking a quick rub of salt was enough. But dry brining draws out moisture, then the salt reabsorbs into the meat, seasoning it deeply. The drier the skin, the crispier it gets. Even 30 minutes makes a difference, but overnight is magical.
Don’t overcrowd the basket. This was my biggest mistake early on. Air fryers work by circulating hot air around food. If you pile the thighs in, they steam instead of crisp. Leave at least half an inch between pieces. If you need to cook more, do it in batches—it’s worth the extra time.
Patience with the temperature. I’ve tried higher temperatures hoping for faster crisping, but 380°F (193°C) is the sweet spot. High heat can burn the spices before the chicken cooks through. Low heat dries out the meat. This temperature gives you golden, crispy skin and juicy meat every time.
Let it rest. I know it’s tempting to slice into that chicken immediately, but resting is crucial. The juices need time to redistribute. Cut too soon, and they run out onto the cutting board, leaving dry meat behind. Five minutes is all it takes.
Reheating for crispiness. Meal prep chicken often gets soggy in the microwave. To revive that crispy skin, reheat in the air fryer at 350°F (175°C) for 3-4 minutes. The microwave works in a pinch, but the air fryer brings back that crunch.
Variations & Adaptations
Once you’ve mastered the basic recipe, the possibilities are endless. Here are a few of my favorite twists.
- Spicy Buffalo: Toss the cooked chicken in buffalo sauce (I use Frank’s RedHot mixed with a little melted butter). Serve with blue cheese or ranch dressing and celery sticks on the side. It’s a game-day favorite in my house.
- Honey Garlic: Whisk together 2 tablespoons honey, 1 tablespoon soy sauce, and 2 minced garlic cloves. Brush over the chicken during the last 5 minutes of cooking. The glaze caramelizes beautifully without burning.
- Lemon Herb: Add the zest of one lemon and 1 tablespoon fresh chopped rosemary to the seasoning mix. Squeeze fresh lemon juice over the finished bowls. Bright, fresh, and perfect for spring.
- Asian-Inspired: Swap the paprika for 1 teaspoon ground ginger and 1 tablespoon sesame oil. Serve over jasmine rice with steamed bok choy and a drizzle of soy sauce. A sprinkle of sesame seeds and sliced green onions finishes it off.
- Low-Carb/Keto: Skip the rice and load up on roasted vegetables like cauliflower, broccoli, and zucchini. Add a dollop of guacamole or a side salad for extra healthy fats.
- Different Cooking Methods: No air fryer? Bake the thighs on a wire rack over a baking sheet at 425°F (218°C) for 25-30 minutes, flipping halfway. The skin won’t be as crispy, but it’s still delicious. For grilling, cook over medium-high heat for 6-8 minutes per side.
I once tried a maple Dijon variation by whisking together maple syrup, Dijon mustard, and a splash of apple cider vinegar. I brushed it on during the last 5 minutes of cooking—the sweetness paired with the crispy skin was incredible. It reminded me of a cozy fall dinner I’d had years ago.
Serving & Storage Suggestions
These bowls are designed for meal prep, but they’re also great for an easy dinner. Here’s how to serve and store them.
Serving: Serve the chicken warm, straight from the air fryer or reheated. I like to arrange the sliced chicken over the rice and vegetables, then add a fresh element—a squeeze of lemon, a sprinkle of parsley, or a drizzle of hot sauce. The contrast of warm, crispy chicken and cool, fresh garnish is wonderful. For a complete meal, pair with a simple side salad or a bowl of creamy tomato tortellini soup on the side.
Storage: Store the bowls in airtight containers in the refrigerator for up to 4 days. I recommend keeping the chicken separate from the vegetables if you want to maintain texture, but I often layer everything together with no issues. The flavors actually meld beautifully overnight.
Freezing: You can freeze the cooked chicken for up to 3 months. Let it cool completely, then wrap individually in plastic wrap and place in a freezer bag. Thaw overnight in the refrigerator before reheating. The vegetables don’t freeze well, so I recommend freezing only the chicken and making fresh veggies when you’re ready to eat.
Reheating: For best results, reheat the chicken in the air fryer at 350°F (175°C) for 3-4 minutes. The microwave works in a pinch—heat on high for 1-2 minutes—but the skin won’t be as crispy. The rice and vegetables reheat well in the microwave for 1-2 minutes. If you’re packing lunch for work, reheat the chicken separately if possible.
Flavor Development: The chicken actually tastes better on day two or three. The spices meld with the meat, and the flavors deepen. I’ve found that the crispy skin softens slightly in the fridge, but reheating in the air fryer brings it right back.
Nutritional Information & Benefits
These bowls aren’t just delicious—they’re packed with nutrition. Here’s the breakdown per serving (one bowl with chicken, rice, and vegetables).
| Nutrient | Amount per Serving |
|---|---|
| Calories | ~450-500 |
| Protein | 35-40g |
| Carbohydrates | 35-40g |
| Fat | 15-20g |
| Fiber | 5-7g |
| Iron | 15% DV |
Chicken thighs are a fantastic source of protein, B vitamins, and selenium, which supports immune function. The skin provides healthy fats that keep you full and satisfied. Pairing the chicken with vegetables adds fiber, vitamins, and antioxidants—broccoli is rich in vitamin C and K, while bell peppers offer a hefty dose of vitamin A.
Dietary Considerations: This recipe is naturally gluten-free and dairy-free. For a low-carb version, swap the rice for extra vegetables. It’s also suitable for keto diets with minor adjustments. The only potential allergen is the chicken itself, so it’s a safe choice for most dietary needs.
I love that these bowls feel indulgent but are actually balanced. The protein keeps me satisfied for hours, and the vegetables make me feel good about what I’m eating. It’s comfort food that works with your wellness goals, not against them.
Conclusion
These crispy air fryer chicken thigh meal prep bowls have genuinely changed how I approach weekly cooking. They’re proof that meal prep doesn’t have to be boring or bland. With a little technique—dry brining, proper spacing, the right temperature—you can have restaurant-quality chicken ready whenever you need it.
I hope you’ll try this recipe and make it your own. Swap the spices, change up the vegetables, or try one of the variations I shared. Cooking should be flexible and fun, not rigid. The best meals are the ones that fit your life, and these bowls are designed to do exactly that.
I’d love to hear how yours turn out. Drop a comment below and let me know what variations you tried, or tag me on social media with your creations. If you loved this recipe, share it with a friend who needs better meal prep in their life. Happy cooking, friend—you’ve got this!
Frequently Asked Questions
Can I use chicken breasts instead of thighs?
Yes, but the results will be different. Chicken breasts are leaner and can dry out more easily. Reduce the cooking time to 10-12 minutes per side at 380°F (193°C), and check for an internal temperature of 165°F (74°C). The skin may not get as crispy because there’s less fat, but it’ll still be good.
How do I keep the skin crispy in meal prep containers?
The key is cooling completely before sealing. Let the bowls sit uncovered on the counter for 15-20 minutes so steam escapes. When reheating, use the air fryer at 350°F (175°C) for 3-4 minutes to revive the crispiness. Avoid microwaving if you want that crunch.
Can I freeze the entire meal prep bowl?
I recommend freezing only the chicken. Vegetables and rice don’t freeze well—they become mushy when thawed. Cook fresh veggies and rice when you’re ready to eat, and just reheat the frozen chicken. It’s a little extra work, but the texture is so much better.
What’s the best way to reheat these bowls at work?
If you have access to an air fryer at work, use it! Otherwise, reheat the chicken separately in the microwave for 1-2 minutes, then add it to the reheated rice and vegetables. The skin won’t be as crispy, but the flavor will still be there. Pack a lemon wedge to squeeze over everything for freshness.
How long do these bowls last in the fridge?
They stay fresh for up to 4 days in an airtight container. The chicken will be at its best on days 1-3, but day 4 is still delicious. If you notice any off smells or sliminess, discard it. Trust your nose—it knows when something’s past its prime.
Pin This Recipe!

Crispy Air Fryer Chicken Thigh Meal Prep Bowls – Best Easy Recipe

These crispy air fryer chicken thigh meal prep bowls are a game-changer for busy weeks. With shatteringly crispy skin and juicy meat, they’re proof that meal prep can be delicious and satisfying.
- Prep Time: 15 minutes
- Cook Time: 20 minutes
- Total Time: 35 minutes (plus optional dry brine time)
- Yield: 4-6 servings 1x
- Category: Main Course
- Cuisine: American
Ingredients
- 4–6 boneless, skin-on chicken thighs (about 1.5 lbs total)
- 1 tablespoon olive oil
- 1 teaspoon kosher salt (Diamond Crystal recommended)
- 1 teaspoon garlic powder
- 1 teaspoon paprika (smoked or regular)
- ½ teaspoon onion powder
- ½ teaspoon freshly ground black pepper
- ½ teaspoon dried thyme or oregano (optional)
- Cooked rice or quinoa (about 1 cup per bowl)
- Roasted vegetables (broccoli, bell peppers, or zucchini; about 1 cup per bowl)
- Optional garnishes: fresh parsley, lemon wedges, hot sauce
Instructions
- Dry brine the chicken: Pat chicken thighs dry with paper towels. Sprinkle both sides with salt and place on a wire rack over a baking sheet. Refrigerate uncovered for at least 30 minutes, up to 24 hours.
- Preheat air fryer to 380°F (193°C) for 3-5 minutes.
- In a mixing bowl, combine olive oil, garlic powder, paprika, onion powder, black pepper, and dried thyme (if using). Add dry-brined thighs and toss to coat evenly.
- Arrange thighs skin-side down in a single layer in the air fryer basket, leaving space between pieces. Cook in batches if needed.
- Cook at 380°F (193°C) for 12 minutes without opening the basket.
- Flip thighs skin-side up using tongs. Cook for another 8-12 minutes until internal temperature reaches 165°F (74°C).
- Remove chicken and let rest on a cutting board for 5 minutes.
- While chicken rests, prepare bowls: Divide cooked rice or quinoa among 4-6 meal prep containers. Add roasted vegetables. Slice chicken or leave whole and place on top. Garnish with parsley and lemon wedge if desired.
- Cool bowls completely (15-20 minutes uncovered) before sealing and refrigerating.
Notes
Dry brining is key for crispy skin. Don’t overcrowd the air fryer basket. Let chicken rest before slicing. For best reheating, use air fryer at 350°F (175°C) for 3-4 minutes.
Nutrition
- Serving Size: 1 bowl (with chicken
- Calories: 450500
- Sugar: 35
- Sodium: 600800
- Fat: 1520
- Saturated Fat: 46
- Carbohydrates: 3540
- Fiber: 57
- Protein: 3540
Keywords: air fryer chicken thighs, meal prep bowls, crispy chicken, easy meal prep, healthy chicken recipe


