“Wait — so you just stir it up and put it in the fridge? That’s it?” My sister-in-law was peering into my fridge, spoon in hand, looking at a jar of what I’d described as “breakfast.” She’d come over to borrow a cake pan for her kid’s birthday and somehow ended up interrogating my meal prep.
I shrugged. “Yeah, that’s literally it.”
She took a bite straight from the jar — no bowl, no ceremony — and I watched her eyebrows go up. “This is actually really good. Like, I’d eat this on purpose.” High praise from someone whose idea of breakfast is usually a granola bar eaten over the sink while packing lunches.
That jar was my first real success with creamy high-fiber overnight chia pudding with berries. I’d been on a mission to find a breakfast that didn’t leave me starving by 10 a.m., something I could grab without thinking, something that actually tasted like a treat and not a punishment. I’d tried the grainy, gluey chia puddings that taste like nothing and have the texture of frog eggs. I’d tried the ones that separate into a watery mess. I’d almost given up entirely.
But this one — this one worked. It’s creamy, not slimy. It’s sweet enough to feel indulgent but not loaded with sugar. And the fiber? Let’s just say my digestive system has never been happier. Honestly, this creamy high-fiber overnight chia pudding with berries has become my non-negotiable weekday breakfast. I make a batch on Sunday night and I’m set until Thursday. No thinking, no fussing, no 10 a.m. hangry spiral.
So when my sister-in-law asked for the recipe before she even finished the jar, I knew I had something worth sharing.
Why You’ll Love This Recipe
This isn’t just another chia pudding recipe that sounds good on paper but disappoints in real life. I’ve tested this thing about a dozen times to get the texture just right — not too thick, not too thin, with a creaminess that actually feels satisfying. Here’s why it works:
- Quick & Easy : Five minutes of active prep time, and the fridge does the rest. I’m talking stir, pour, walk away. Perfect for those nights when you’re already exhausted just thinking about tomorrow morning.
- Simple Ingredients : You probably have most of this in your kitchen right now. No weird health food store finds, no expensive superfood powders. Just real food that works.
- Perfect for Busy Mornings : Grab a jar, add your toppings, and go. I’ve eaten this in the car, at my desk, and once while wrangling a toddler who didn’t want to wear shoes. It works everywhere.
- Crowd-Pleaser : My kids eat this without complaint. My husband eats this without complaint. Even my picky mother-in-law asked for the recipe. If that’s not a win, I don’t know what is.
- Unbelievably Creamy : The secret is in the ratio and the technique. No chalky texture, no weird separation — just smooth, rich, pudding-like goodness that actually feels like dessert for breakfast.
What makes this version different from all the others? It’s the combination of full-fat coconut milk (or whole milk, your call) with a tiny pinch of salt and just the right amount of sweetener. Most recipes skimp on the fat or overdo the chia seeds, leaving you with something that tastes like flavored glue. Not this one. This one has been tested by a real person in a real kitchen who got tired of wasting chia seeds on failed experiments.
Plus, it’s packed with fiber — about 10 grams per serving — which means you stay full until lunch without that desperate, snack-cabinet-raiding feeling. It’s the kind of breakfast that makes you feel like you’ve got your life together, even if the rest of your day is chaos.
What Ingredients You Will Need
This recipe uses simple, wholesome ingredients that come together to create something genuinely delicious. No trips to specialty stores required — just your regular grocery run will cover everything.
For the Base Pudding
- Chia seeds (¼ cup / 40g) — White or black, both work fine. I usually go with white chia seeds because they blend in visually, but there’s no difference in texture or nutrition. Make sure they’re fresh — stale chia seeds don’t gel as well.
- Unsweetened almond milk (1 cup / 240ml) — Or any milk you like. Whole milk makes it extra creamy, oat milk adds natural sweetness, and coconut milk gives it a tropical vibe. I’ve used all three and they all work beautifully.
- Full-fat coconut milk (½ cup / 120ml) — This is the secret to the creaminess. The fat content prevents that weird, gel-like texture that makes some people hate chia pudding. If you’re not a coconut fan, use whole milk or half-and-half instead.
- Maple syrup (2 tablespoons / 30ml) — Pure maple syrup, not pancake syrup. Honey works too, but maple gives a warmer, more caramel-like sweetness that plays nicely with the berries. Adjust to your taste — I like mine on the less-sweet side.
- Vanilla extract (1 teaspoon) — Real vanilla, please. The imitation stuff has its place, but not here. It makes everything taste more rounded and dessert-like.
- Pinch of sea salt — This is non-negotiable. Salt doesn’t make it salty — it makes everything else taste more like itself. Trust me on this one.
For the Berry Layer
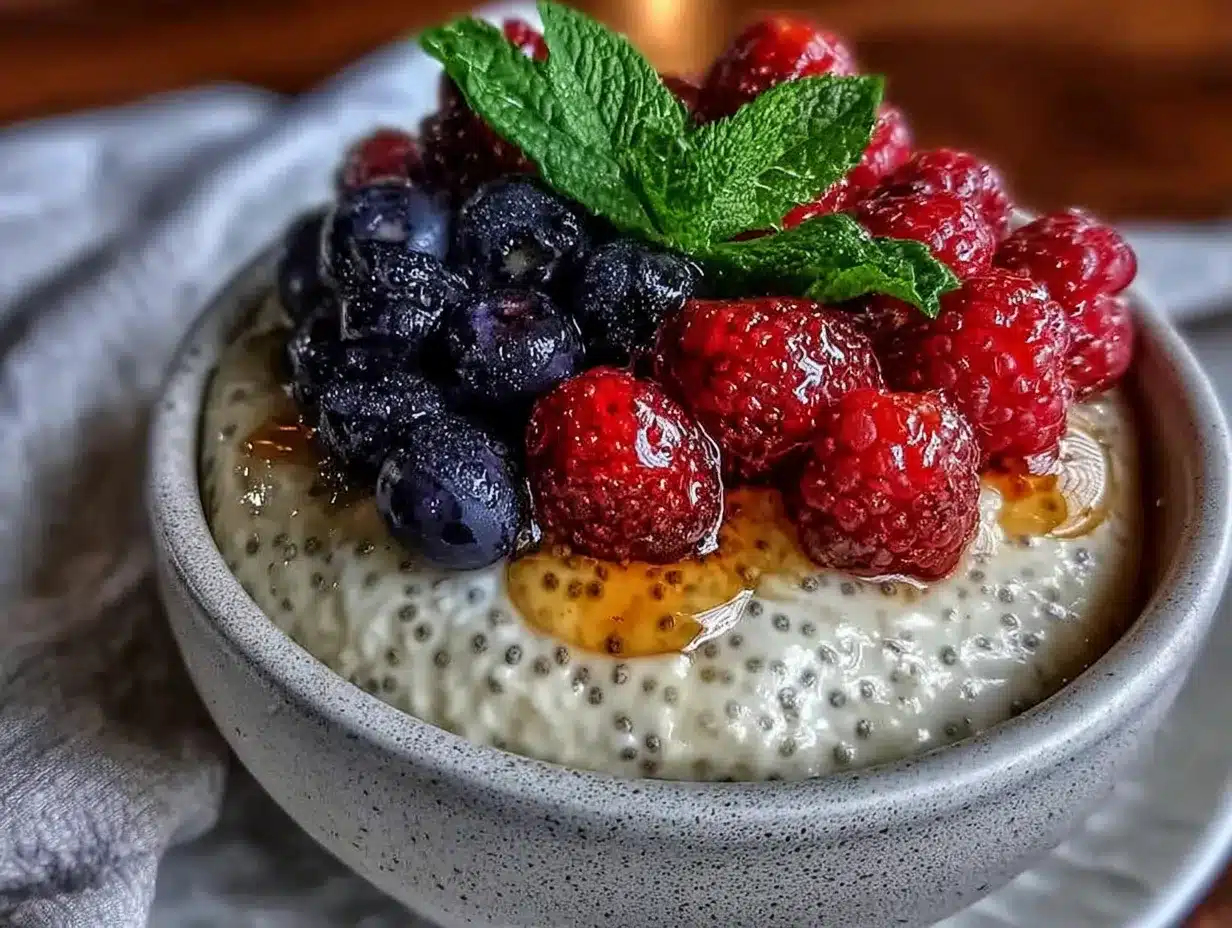
- Mixed berries (1 cup / 150g, fresh or frozen) — I use a mix of blueberries, raspberries, and sliced strawberries. Frozen berries work perfectly and actually break down slightly as they thaw, creating a natural syrup. If using frozen, don’t thaw them first — just add them straight to the jar.
- Chia seeds (1 tablespoon / 10g) — These help thicken the berry layer into a jammy consistency. Optional, but highly recommended for texture contrast.
- Maple syrup (1 tablespoon / 15ml, optional) — Only if your berries are tart. In summer, when berries are at their peak, I skip this entirely. In winter, I add a tiny bit to balance the acidity.
- Lemon juice (½ teaspoon) — A tiny squeeze brightens everything up and keeps the berries tasting fresh. Don’t skip it — it makes a surprising difference.
Optional Toppings
- Toasted almonds or walnuts (chopped) — Adds crunch and healthy fats. I toast mine in a dry pan for about 3 minutes until they smell amazing.
- Coconut flakes (unsweetened, toasted) — Because everything is better with coconut.
- Hemp seeds or flax seeds — For an extra fiber and omega-3 boost. I add these when I know I’m going to have a long day.
Ingredient Tip : I’ve found that Bob’s Red Mill chia seeds consistently give the best texture — they’re fresh and gel evenly. If you’re using a different brand and your pudding turns out runny, try adding an extra tablespoon of chia seeds and letting it sit longer.
Equipment Needed
You don’t need much for this recipe, which is honestly my favorite part. Here’s what you’ll need:
- Mason jars or any glass containers (4 8-ounce jars or 2 16-ounce jars) — I use wide-mouth pint jars because they’re easy to eat from and clean. Any glass container with a lid works — even repurposed pasta sauce jars, as long as they’re clean.
- Small mixing bowl — For combining the chia pudding base. A medium bowl works too.
- Whisk — Essential for breaking up clumps. A fork works in a pinch but you’ll get better results with a whisk.
- Spatula — For scraping every last bit of pudding into the jars. Waste not, want not.
- Measuring cups and spoons — Chia pudding is forgiving, but the ratios matter for the right texture. I learned this the hard way.
- Cutting board and knife — For prepping fresh berries if you’re using them.
Budget-Friendly Tip : Don’t go out and buy special jars for this. I’ve used everything from repurposed peanut butter jars to old jam jars. As long as it has a tight-fitting lid, it works. I actually prefer using a mix of jar sizes — small ones for grab-and-go breakfasts and larger ones for when I want a more substantial meal.
Preparation Method
This is the easy part. I promise you can do this with your eyes half-closed on a Sunday evening while listening to a podcast.
Step 1: Make the Berry Compote (Optional but Recommended)
If you want that jammy berry layer that makes this pudding feel fancy, here’s what to do. In a small saucepan, combine 1 cup of mixed berries (fresh or frozen), 1 tablespoon of chia seeds, 1 tablespoon of maple syrup (if using), and ½ teaspoon of lemon juice. Cook over medium heat for about 5 minutes, stirring occasionally, until the berries break down and the mixture thickens slightly. It should look like loose jam — it will thicken more as it cools. Remove from heat and let it cool while you make the pudding base.
Shortcut : If you’re in a hurry, skip this step entirely and just layer fresh berries directly into the jars. The pudding will still be delicious — just less jammy.
Step 2: Make the Chia Pudding Base
In your mixing bowl, combine ¼ cup of chia seeds, 1 cup of unsweetened almond milk, ½ cup of full-fat coconut milk, 2 tablespoons of maple syrup, 1 teaspoon of vanilla extract, and a pinch of sea salt. Whisk vigorously for about 30 seconds — you want to break up any clumps of chia seeds that are sticking together. Let it sit for 5 minutes, then whisk again. This second whisking is crucial because it redistributes the seeds that have started to sink, ensuring an even gel throughout.
What to look for : After the second whisk, the mixture should look slightly thickened already, with seeds evenly suspended in the liquid. If you see clumps, keep whisking. If it looks too thin, don’t worry — it will thicken significantly in the fridge.
Step 3: Layer the Jars
Now comes the fun part. Grab your jars and start layering. If you made the berry compote, spoon about 2 tablespoons into the bottom of each jar. If you’re using fresh berries, scatter a handful into the bottom. Then pour the chia pudding mixture on top, filling each jar about three-quarters full. Leave some room for toppings and expansion — chia seeds absorb liquid and the pudding will puff up slightly.
Pro tip : If you want those Instagram-worthy layers, pour the pudding slowly over the back of a spoon. This prevents the berry layer from mixing into the pudding. But honestly? I’ve made this dozens of times and sometimes I just dump everything in and stir. It still tastes amazing.
Step 4: Refrigerate
Screw the lids on tight and place the jars in the refrigerator. Let them sit for at least 4 hours, but overnight is best — 8 to 12 hours gives the chia seeds time to fully hydrate and develop that creamy, pudding-like texture. If you’re in a rush, 2 hours will work in a pinch, but the texture won’t be as smooth.
Important note : Give the jars a shake or stir after about 30 minutes in the fridge. This prevents the chia seeds from settling at the bottom and ensures an even consistency throughout. I usually set a timer on my phone so I don’t forget.
Step 5: Add Toppings and Serve
In the morning, pull a jar out of the fridge. Give it a stir — it should be thick and creamy, like a proper pudding. If it’s too thick for your liking, stir in a splash of milk to loosen it up. Top with fresh berries, a sprinkle of toasted nuts or coconut flakes, and maybe a drizzle of extra maple syrup if you’re feeling indulgent. Eat it cold, straight from the jar, or transfer it to a bowl if you’re feeling fancy.
Sensory cue : The pudding should be thick enough to hold its shape when you scoop it, but still soft and spoonable. It should smell faintly of vanilla and coconut, with the berries adding a bright, fruity note. The texture should be smooth, not gritty — if it feels sandy, the chia seeds weren’t fully hydrated and need more time.
Cooking Tips & Techniques
After making this recipe more times than I care to count, I’ve picked up a few tricks that make a real difference. Here’s what I wish someone had told me when I started making chia pudding:
The ratio matters more than you think. Too many chia seeds and you get a solid, jelly-like block. Too few and you get a watery mess. The ¼ cup chia to 1½ cups liquid ratio is my sweet spot — it gives you a pudding that’s thick enough to feel substantial but still creamy and scoopable. If you prefer a thinner consistency, add an extra ¼ cup of milk. If you like it extra thick, add an extra tablespoon of chia seeds.
Temperature affects gelling time. Chia seeds gel faster at room temperature than in the fridge. If you’re in a hurry, you can let the pudding sit at room temperature for about an hour before refrigerating. Just make sure it goes in the fridge eventually — chia pudding left at room temperature for too long can develop an off texture and, honestly, it’s not worth the risk.
Don’t skip the salt. I know it seems weird to add salt to a sweet breakfast dish, but it’s the difference between a pudding that tastes flat and one that tastes vibrant. Salt enhances the sweetness of the maple syrup and the natural flavor of the berries. A tiny pinch is all you need.
Shake or stir after 30 minutes. This is the step everyone forgets, and it’s the step that makes the biggest difference. Chia seeds are heavy and sink to the bottom of the jar within minutes. If you don’t redistribute them, you’ll end up with a layer of gel at the bottom and watery liquid on top. A quick shake or stir after 30 minutes ensures an even, creamy texture throughout.
Use full-fat milk for the best texture. I’ve tried this with skim milk, almond milk, oat milk, and coconut milk. The full-fat versions — whether dairy or coconut — consistently produce the creamiest, most satisfying texture. The fat coats the chia seeds and prevents them from forming that rubbery gel that puts some people off. If you’re watching calories, you can use lighter milk, just know the texture won’t be as luxurious.
My biggest failure : The first time I made chia pudding, I used ½ cup of chia seeds to 1 cup of milk because I thought “more seeds = more fiber = better.” I ended up with a solid, jelly-like block that I had to eat with a fork. It was not good. Learn from my mistakes — stick to the ratio.
Variations & Adaptations
This recipe is incredibly flexible, which is one of the reasons I love it. Here are some variations I’ve tried and loved:
Chocolate Version
Add 1 tablespoon of unsweetened cocoa powder to the pudding base along with an extra tablespoon of maple syrup. Stir well to combine before refrigerating. The cocoa adds a rich, almost brownie-like depth that pairs beautifully with raspberries or sliced bananas. My kids beg for this version.
Tropical Twist
Swap the mixed berries for diced mango and pineapple. Use coconut milk as the base liquid (instead of mixing almond and coconut) and add a tablespoon of shredded coconut to the pudding. Top with toasted coconut flakes and macadamia nuts. It tastes like a vacation in a jar — perfect for when winter has gone on too long.
Peanut Butter & Jelly
Swirl 1 tablespoon of peanut butter (or any nut butter) into each jar before adding the pudding. Use strawberry or raspberry compote for the “jelly” layer. The combination of creamy peanut butter, sweet berries, and vanilla pudding is ridiculously good. I’ve also tried this with almond butter and it’s equally delicious.
Low-Sugar Version
Skip the maple syrup entirely and rely on the natural sweetness of very ripe berries. Add a few drops of stevia or monk fruit sweetener if you need extra sweetness. The chia seeds and milk provide plenty of flavor on their own — you might be surprised how little sweetener you actually need once you get used to it.
Vegan & Dairy-Free
This recipe is already vegan if you use plant-based milk and maple syrup. For an extra protein boost, add a scoop of your favorite vegan protein powder to the pudding base. Just be aware that some protein powders can make the texture slightly grainy — I’ve found that pea protein works better than brown rice protein for this purpose.
Serving & Storage Suggestions
This pudding is designed for meal prep, so storage is part of the plan. Here’s how to make the most of it:
Serving : Eat it cold, straight from the fridge. The texture is best when it’s chilled — it’s thick, creamy, and refreshing. If you’re not a fan of cold breakfasts, let it sit at room temperature for 10-15 minutes before eating. I’ve also microwaved it for about 20 seconds on a cold morning, and while the texture changes slightly (it gets a bit looser), it’s still delicious.
Storage : Keep the jars sealed in the refrigerator for up to 5 days. The pudding actually improves after a day or two as the flavors meld together. I usually make a batch on Sunday and eat one jar each morning through Thursday. By day 5, the texture is still good — just give it a good stir before eating.
Freezing : You can freeze chia pudding, but the texture will change. The chia seeds release water when thawed, making the pudding watery. If you must freeze it, do so without any toppings and give it a vigorous stir after thawing. I don’t recommend freezing for more than a month. Honestly, since it keeps for 5 days in the fridge, I’ve never found a reason to freeze it.
Reheating : I don’t recommend reheating this pudding. The heat breaks down the gel structure and you end up with a thin, unappetizing mess. If you want a warm breakfast, make my healthy high-protein overnight oats with Greek yogurt and chia seeds instead — that one reheats beautifully.
Flavor development : The berry layer gets more intense and jammy over time as the berries release their juices. By day 3, the flavors are fully developed and the pudding is at its peak. I’ve found that the vanilla flavor also becomes more pronounced after a day or two, so don’t be alarmed if it tastes subtle on day one.
Nutritional Information & Benefits
This isn’t just a tasty breakfast — it’s genuinely good for you. Here’s what you’re getting in each serving (based on 4 servings per batch):
Estimated per serving : Calories: 290, Fat: 14g, Carbohydrates: 34g, Fiber: 10g, Protein: 7g, Sugar: 16g (naturally occurring from berries and maple syrup).
Fiber powerhouse : Chia seeds are one of the best sources of soluble fiber, which helps regulate digestion, stabilize blood sugar, and keep you feeling full for hours. One serving provides about 40% of your daily fiber needs. Your gut will thank you.
Omega-3 fatty acids : Chia seeds are rich in ALA omega-3s, which support heart health and reduce inflammation. Two tablespoons of chia seeds contain more omega-3s than a serving of salmon — not bad for a tiny seed.
Antioxidants : Berries are loaded with antioxidants that protect your cells from damage and support overall health. The combination of different berries gives you a wider range of beneficial compounds.
Dietary considerations : This recipe is naturally gluten-free, dairy-free (if using plant milk), and vegan. It’s also low in added sugar compared to most store-bought breakfast options. If you need it to be nut-free, use oat milk or hemp milk instead of almond milk.
My perspective : I’m not a nutritionist, just someone who pays attention to how food makes me feel. This breakfast keeps me full and focused until lunch without the mid-morning crash I used to get from sugary cereal or pastries. That alone is worth the five minutes it takes to stir everything together.
FAQs
Can I use black chia seeds instead of white?
Absolutely. There’s no difference in taste or texture between black and white chia seeds. White seeds are slightly milder in flavor and blend in better visually, but black seeds work just as well. Use whatever you have on hand.
Why is my chia pudding runny?
This usually happens for one of three reasons: not enough chia seeds, not enough time in the fridge, or the milk-to-seed ratio is off. Make sure you’re using ¼ cup of chia seeds to 1½ cups of liquid, and let it sit for at least 4 hours (overnight is better). If it’s still runny after that, stir in an extra tablespoon of chia seeds and let it sit for another hour.
Can I make this without coconut milk?
Yes, absolutely. Substitute the coconut milk with an equal amount of whole milk, oat milk, or extra almond milk. The texture will be slightly less creamy but still delicious. If using oat milk, you might want to reduce the maple syrup slightly since oat milk is naturally sweeter.
How long does this keep in the fridge?
Up to 5 days in a sealed container. The texture is best between days 2 and 4. After day 5, the chia seeds can start to break down and the pudding may become slightly watery. If that happens, just give it a good stir — it’s still safe to eat.
Can I use frozen berries straight from the bag?
Yes, and I actually prefer it that way. Frozen berries break down slightly as they thaw, creating a natural syrup that flavors the pudding. Just add them directly to the jar without thawing first. If you’re making the cooked compote, you can cook frozen berries directly from frozen — just add an extra minute or two to the cooking time.
Conclusion
This creamy high-fiber overnight chia pudding with berries has genuinely changed my mornings. It’s the kind of recipe that makes you feel like you’ve got your act together, even when the rest of your day is chaos. Five minutes of prep, a night in the fridge, and you’ve got a week’s worth of breakfasts that are actually good for you and actually taste good.
I love that this recipe is flexible enough to work with whatever you have in your kitchen. Out of berries? Use sliced bananas or diced apples. Don’t like coconut milk? Use whatever milk you have. Want it sweeter? Add more maple syrup. This is a template, not a rulebook — make it your own.
If you try this recipe, I’d love to hear how it goes. Leave a comment below and let me know what variations you tried, what toppings you used, or if you have any questions. And if you’re looking for another easy breakfast option, check out my easy mini muffin tin egg bites — they’re perfect for busy mornings when you need something savory instead of sweet.
Here’s to good breakfasts, easy mornings, and never being hangry again. You’ve got this.
Pin This Recipe!
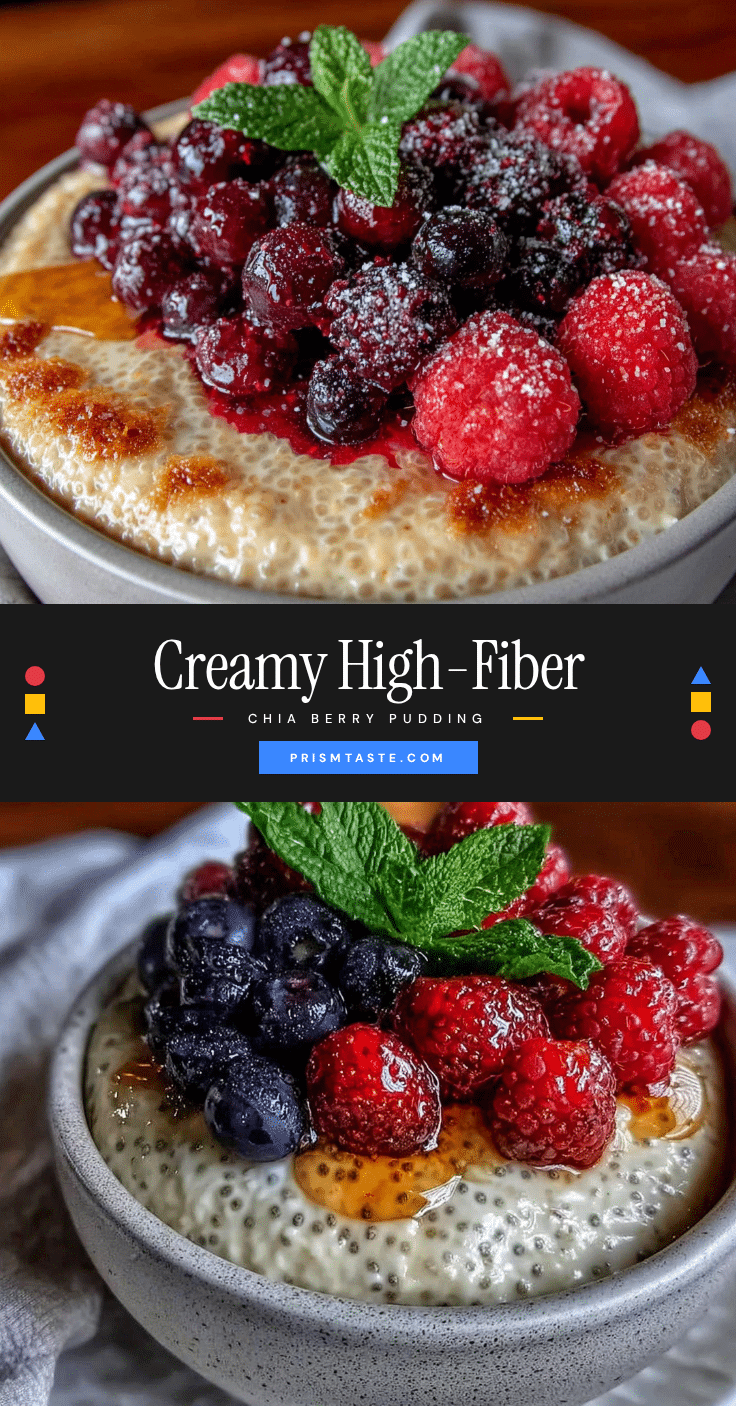
Creamy High-Fiber Overnight Chia Pudding with Berries
A creamy, fiber-packed overnight chia pudding with a jammy berry layer that’s perfect for busy mornings. Ready in 5 minutes of prep, this make-ahead breakfast keeps you full and satisfied until lunch.
- Prep Time: 5 minutes
- Cook Time: 5 minutes
- Total Time: 4 hours 10 minutes (includes refrigeration)
- Yield: 4 servings 1x
- Category: Breakfast
- Cuisine: American
Ingredients
- ¼ cup (40g) chia seeds
- 1 cup (240ml) unsweetened almond milk
- ½ cup (120ml) full-fat coconut milk
- 2 tablespoons (30ml) pure maple syrup
- 1 teaspoon vanilla extract
- Pinch of sea salt
- 1 cup (150g) mixed berries (fresh or frozen)
- 1 tablespoon (10g) chia seeds (for berry layer)
- 1 tablespoon (15ml) maple syrup (optional, for berry layer)
- ½ teaspoon lemon juice
- Optional toppings: toasted almonds or walnuts, coconut flakes, hemp seeds or flax seeds
Instructions
- Make the berry compote (optional): In a small saucepan, combine 1 cup mixed berries, 1 tablespoon chia seeds, 1 tablespoon maple syrup (if using), and ½ teaspoon lemon juice. Cook over medium heat for about 5 minutes, stirring occasionally, until berries break down and mixture thickens slightly. Remove from heat and let cool.
- Make the chia pudding base: In a mixing bowl, combine ¼ cup chia seeds, 1 cup almond milk, ½ cup coconut milk, 2 tablespoons maple syrup, 1 teaspoon vanilla extract, and a pinch of sea salt. Whisk vigorously for 30 seconds. Let sit for 5 minutes, then whisk again.
- Layer the jars: Spoon about 2 tablespoons of berry compote (or fresh berries) into the bottom of each jar. Pour chia pudding mixture on top, filling each jar about three-quarters full.
- Refrigerate: Screw lids on tight and refrigerate for at least 4 hours, preferably overnight (8-12 hours). After 30 minutes, shake or stir the jars to redistribute chia seeds.
- Add toppings and serve: In the morning, stir the pudding. If too thick, add a splash of milk. Top with fresh berries, nuts, coconut flakes, or extra maple syrup. Serve cold.
Notes
For best texture, use full-fat milk (coconut or dairy). Don’t skip the salt—it enhances sweetness. Shake or stir after 30 minutes to prevent chia seeds from settling. Pudding keeps up to 5 days in the fridge. For a chocolate version, add 1 tablespoon cocoa powder and extra maple syrup.
Nutrition
- Serving Size: 1 jar (about 1 cup)
- Calories: 290
- Sugar: 16
- Sodium: 150
- Fat: 14
- Saturated Fat: 6
- Carbohydrates: 34
- Fiber: 10
- Protein: 7
Keywords: overnight chia pudding, high fiber breakfast, healthy breakfast, meal prep, chia seeds, berry pudding, vegan breakfast, gluten-free breakfast


