Introduction
It was 10:47 PM on a drizzly Thursday in early October, and I had this sudden, undeniable urge to make something spooky. Not scary, you know? Just spooky-cute. The kind of thing that makes you giggle while you’re shaping dough into gnarled, bony fingers. I didn’t have a proper Halloween party to prep for, and honestly, I wasn’t about to start a complicated cake or a batch of elaborate cookies at that hour. But I had a bag of pretzel rods from a movie night two weeks ago, some almond slivers that were dangerously close to their best-by date, and a half-melted bag of candy melts I’d forgotten about since last Easter. And then it hit me—witch fingers. Pretzel rods as the finger bones, almonds as the fingernails. It was one of those weird, late-night ideas that feels absolutely genius at 11 PM and, thankfully, still holds up the next morning.
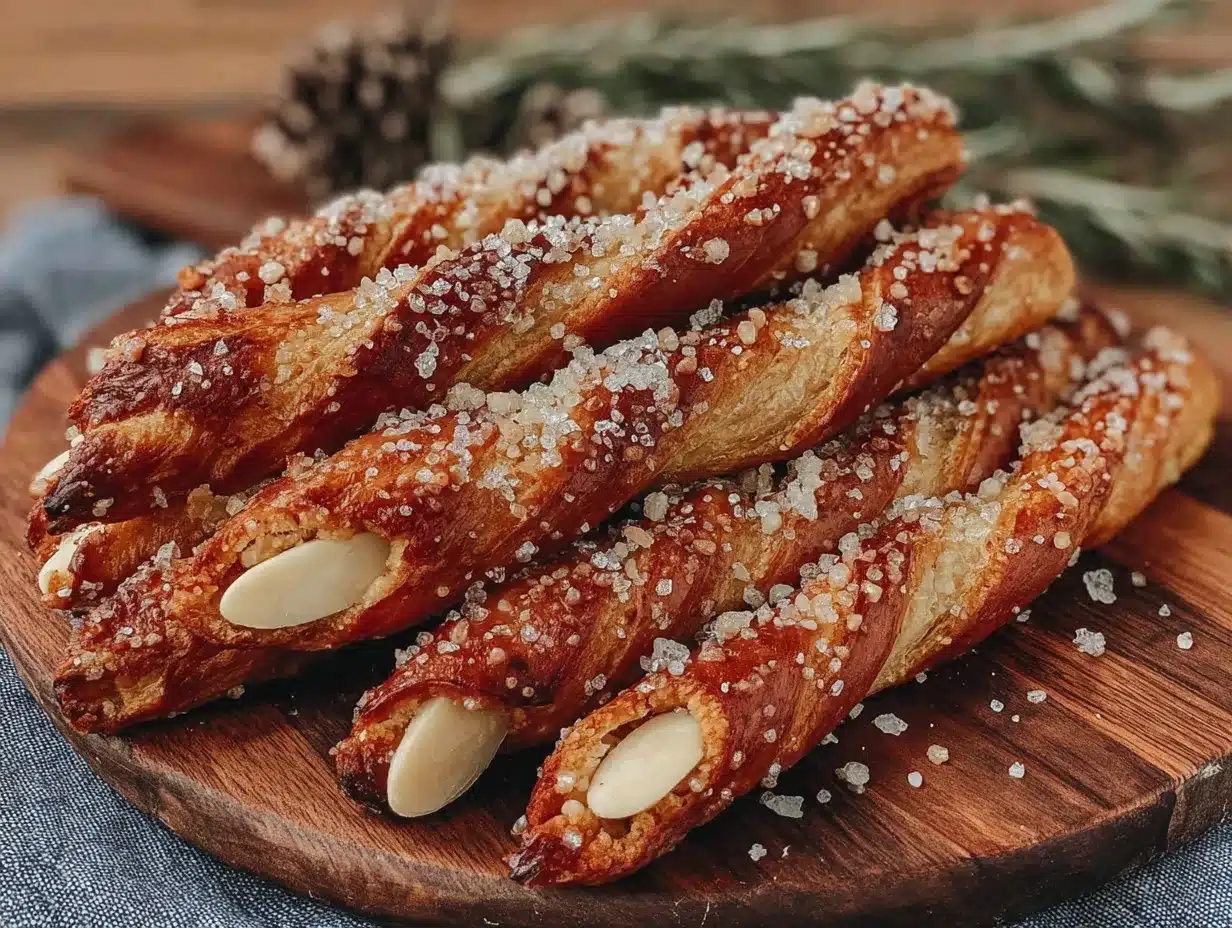
I remember standing there in my pajamas, the kitchen light casting this warm glow, and just laughing at myself. I mean, here I was, a grown adult, meticulously gluing almond slices onto pretzel rods with melted chocolate at nearly midnight. My dog gave me this look from his bed—the kind that says, “Are you seriously doing this right now?” But there’s something about that late-night quiet that loosens the rules. You stop overthinking. You just make the thing. And when I pulled that first batch of Cozy Witch Finger Pretzel Rods with Almond Nails out of the fridge, I honestly felt like I’d unlocked a secret level of Halloween fun. They looked delightfully creepy, wonderfully cozy, and absolutely perfect for sharing. Maybe you’ve been there—that moment when a silly, spontaneous kitchen idea turns into your new favorite tradition.
Why You’ll Love This Recipe
Let me tell you why these little guys are going to steal the show at your Halloween gathering. First off, they are ridiculously easy. I’m talking no oven required, no complicated dough to knead, and zero baking skills needed. If you can dip a pretzel in melted chocolate and stick an almond on it, you have mastered this recipe. It’s that simple.
- Quick & Easy: From start to finish, these come together in under 20 minutes of active time. The hardest part is waiting for the chocolate to set in the fridge.
- Simple Ingredients: You probably already have pretzel rods in your pantry. The almonds and candy melts are easy to find at any grocery store. No fancy trips to a specialty baking shop required.
- Perfect for Halloween Parties: Whether you’re hosting a spooky soiree, sending treats to a school classroom, or just want something fun to munch on while watching “Hocus Pocus” for the hundredth time, these fit the bill perfectly.
- Crowd-Pleaser: I’ve seen kids and adults alike get a kick out of these. There’s something universally delightful about edible witch fingers. They always get a laugh and a double-take.
- Unbelievably Delicious: The salty crunch of the pretzel, the creamy sweetness of the chocolate or candy coating, and the nutty bite of the almond—it’s a texture and flavor combo that’s just next-level comfort food in a spooky disguise.
What makes this recipe different from all the other Halloween treats out there? It’s the cozy factor. This isn’t about being gross or gory. It’s about capturing that warm, nostalgic feeling of a cozy autumn evening, but with a playful, witchy twist. They’re comforting, familiar, and just a little bit mischievous. It’s the kind of treat that makes you close your eyes after the first bite and smile. Honestly, it’s comfort food reimagined for the Halloween season—faster, simpler, but with the same soul-soothing satisfaction. Perfect for impressing guests without any of the stress.
What Ingredients You Will Need
This recipe uses simple, everyday ingredients to deliver big on both flavor and Halloween fun. You likely have most of these in your kitchen already, which makes this a perfect last-minute treat idea.
- Pretzel Rods (12-15 rods): These are the “fingers.” Look for thick, sturdy pretzel rods that won’t break easily when you dip them. I personally prefer the Snyder’s of Hanover brand for their consistent size and satisfying crunch. (The saltier the pretzel, the better the sweet-and-salty contrast!)
- Almond Slices or Slivers (about ¼ cup): These become the fingernails. You want slices that are relatively flat and wide, not the tiny slivered kind. Look for “blanched almond slices” if you can find them—they have a smoother, more nail-like surface. (Toasting them lightly in a dry pan for 2-3 minutes adds a lovely nutty depth, but it’s optional.)
- Candy Melts or Melting Wafers (1 cup, about 6 oz): This is your “skin” coating. I love using green candy melts for a classic witchy look, but you can use white, purple, or even orange. I recommend the Wilton brand for reliable melting. (Add 1 teaspoon of coconut oil or shortening per cup of melts for a smoother, more fluid consistency.)
- Semi-Sweet or Dark Chocolate Chips (½ cup): Used to “glue” the almond nails onto the pretzel and to add a rich, decadent layer of flavor. You can substitute this with a second color of candy melts if you prefer.
- Red Gel Food Coloring: For painting a tiny bit of “blood” or “cuticle” detail around the almond nail. It’s optional, but it adds that extra creepy-cute factor that makes people do a double-take. A toothpick is all you need for application.
- Optional Decorations: Edible glitter (for a “magic” touch), small candy eyes (to make little monsters instead of fingers), or a dusting of powdered sugar (to look like “bone dust”).
Substitution Guidance: If you’re avoiding nuts, you can use a small candy corn or a white chocolate chip placed tip-down to mimic a fingernail. For a dairy-free version, use dairy-free dark chocolate chips and ensure your candy melts are vegan-friendly (most are). If you can’t find pretzel rods, thick, straight pretzel sticks will work, but they are more fragile.
Equipment Needed
You don’t need a fancy kitchen setup for this one. A few basic tools will get the job done beautifully.
- Microwave-Safe Bowls (2 small): One for melting your candy coating, one for the chocolate “glue.”
- Baking Sheet or Large Plate: Lined with parchment paper or a silicone baking mat. This is where your finished fingers will set.
- Small Offset Spatula or Butter Knife: For spreading the chocolate and coating. A spoon works too, but the spatula gives you more control.
- Toothpicks: Essential for the fine detail work—painting on the red gel food coloring or adjusting the position of the almond nails.
- Tweezers (Optional but Helpful): For placing those tiny almond slices with precision. I have shaky hands, so tweezers are my best friend for this step.
- Piping Bag or Small Ziploc Bag: For drizzling the chocolate “glue” onto the pretzel. Just snip a tiny corner off the bag.
Honestly, the most important piece of equipment is a little bit of patience while the chocolate sets. Don’t skip the fridge step!
Preparation Method
- Prepare Your Workspace (5 minutes): Line your baking sheet or large plate with parchment paper. This will prevent your finished witch fingers from sticking. Arrange your pretzel rods, almond slices, and candy melts within easy reach. Trust me, you don’t want to be fumbling for an almond while your chocolate is hardening.
- Melt the Chocolate “Glue” (2 minutes): In a microwave-safe bowl, melt ½ cup of semi-sweet chocolate chips. Microwave in 20-second intervals, stirring well after each, until completely smooth. Be careful not to overheat it, or the chocolate will seize up and become grainy. (If it does seize, a teaspoon of coconut oil can sometimes save it.)
- Attach the Almond Nails (10 minutes): This is the most finicky step, but it’s also the most fun. Using a toothpick or the tip of a small spoon, dab a tiny amount of melted chocolate onto the end of a pretzel rod. This is the “nail bed.” Immediately press an almond slice onto the chocolate, pointed end facing outward, so it looks like a long, witchy fingernail. Hold it in place for a few seconds until the chocolate sets enough to hold it. Repeat for all pretzel rods. Place them on the parchment-lined sheet. Pop the sheet into the fridge for 5 minutes to fully harden the chocolate.
- Melt the Candy Coating (2 minutes): While the “glue” sets, melt your green (or chosen color) candy melts in a separate microwave-safe bowl. Same method—20-second intervals, stirring in between. You want a smooth, pourable consistency. If it’s too thick, stir in ½ teaspoon of coconut oil or shortening.
- Dip the Fingers (10 minutes): Remove the pretzel rods from the fridge. Holding a pretzel by the bare end (the “wrist” end), carefully dip the coated end (the “finger” end) into the melted candy coating. You can dip it about two-thirds of the way up the pretzel, leaving the bottom third bare to look like a hand or wrist. Gently lift it out and let the excess coating drip back into the bowl. You can give it a very gentle shake or tap the side of the bowl.
- Create the “Knuckle” Lines (5 minutes): Before the coating sets, use a toothpick to gently drag three or four horizontal lines across the coating to simulate knuckle wrinkles. Don’t press too hard—you just want to create a slight indentation in the coating. This is the detail that makes them look truly finger-like!
- Add the “Cuticle” Detail (5 minutes): Using a clean toothpick, dip it into the red gel food coloring. Gently paint a tiny, thin line around the base of the almond nail, where it meets the coating. This creates a slightly bloody, witchy cuticle effect. A little goes a long way. (I usually mess up the first one, and it looks even more realistic, honestly.)
- Set and Serve (30 minutes): Place the finished witch fingers back on the parchment-lined sheet. Refrigerate for at least 20-30 minutes, or until the candy coating is completely hard and set. They should snap cleanly when you bite into them. Once set, they are ready to serve!
Cooking Tips & Techniques
Let me share some hard-won wisdom from my late-night pretzel adventures. First, the biggest mistake you can make is not letting the chocolate “glue” set properly before dipping. If you dip the pretzel while the chocolate is still wet, the almond will slide right off into the candy coating. I learned this the hard way, fishing almonds out of a bowl of green goo. It’s not a good look. Give that glue 5 solid minutes in the fridge.
Another tip: work in small batches. Don’t try to dip all 15 pretzels at once. The candy coating will start to thicken and harden as it sits. Melt half the coating, dip 6-7 pretzels, then reheat the coating if needed before doing the rest.
For the knuckle lines, don’t overthink it. They don’t need to be perfect. In fact, irregular, slightly wonky lines look more like real knuckles. I’ve found that dragging the toothpick from left to right in one smooth motion gives the best result, rather than trying to “draw” the line.
If you’re making these with kids, let them handle the “fun” parts—dabbing the glue, placing the almonds, and painting the red cuticles. You handle the hot melted chocolate. It makes for a great Halloween afternoon activity.
Variations & Adaptations
One of the best things about this recipe is how easy it is to adapt. Here are a few twists I’ve tried and loved.
- Monster Fingers: Instead of green coating, use purple or orange candy melts. Add a small candy eye to the “knuckle” area for a cute little monster face. My niece went absolutely bonkers over these.
- Witchy Chocolate Version: Skip the candy melts entirely and use dark or milk chocolate for the entire coating. Roll the dipped pretzel in crushed graham crackers or Oreo crumbs for a “dirt” effect. It’s less colorful but incredibly decadent.
- Vegan & Gluten-Free Option: Use gluten-free pretzel rods (they exist! I found some at a health food store), dairy-free dark chocolate chips, and vegan candy melts. The process is exactly the same, and they taste just as good.
- Spiced Witch Fingers: Add a pinch of cinnamon or pumpkin pie spice to your melted candy coating. It gives the pretzels a warm, autumnal flavor that pairs beautifully with the saltiness. I tried this last year on a whim, and it’s now my go-to version.
Serving & Storage Suggestions
These witch fingers are best served at room temperature or slightly chilled. I like to arrange them on a black or dark purple platter, fanning them out like a hand reaching up from the underworld. It makes for a fantastic centerpiece at any Halloween party.
They pair wonderfully with a warm mug of spiced apple cider or a creamy pumpkin latte. For a sweet snack board, serve them alongside popcorn balls, caramel apples, and ghost-shaped marshmallows.
Storage: Store any leftovers in an airtight container in the refrigerator. They will keep for up to 2 weeks, though the pretzel may lose a little bit of its initial crunch over time. I honestly think they taste even better after a day—the flavors meld together perfectly.
Freezing: You can freeze these for up to 3 months. Place them in a single layer on a baking sheet to flash-freeze, then transfer to a freezer-safe bag or container. Thaw in the refrigerator overnight before serving.
Nutritional Information & Benefits
While these are definitely a treat, not a health food, there are a few bright spots worth mentioning. Almonds are a great source of healthy fats, vitamin E, and magnesium. Dark chocolate (if you use it) is packed with antioxidants. And pretzels, well, they’re a quick source of energy! Here are approximate values per serving (1 witch finger):
| Nutrient | Amount Per Serving |
|---|---|
| Calories | 120-150 kcal |
| Fat | 6-8 g |
| Carbohydrates | 15-18 g |
| Sugar | 8-10 g |
| Protein | 2-3 g |
Dietary Considerations: This recipe can easily be made gluten-free and vegan with the right substitutions. It contains nuts (almonds) and dairy (chocolate), so be mindful of allergies. For a lower-sugar option, use sugar-free dark chocolate chips.
Conclusion
So there you have it—my late-night, slightly unhinged, utterly delightful recipe for Cozy Witch Finger Pretzel Rods with Almond Nails. They’re silly, they’re spooky-cute, and they taste absolutely fantastic. I love making them because they remind me that cooking doesn’t always have to be serious. Sometimes the best recipes come from a quiet kitchen, a random craving, and a willingness to just play with your food.
I encourage you to make these your own. Use different colors, try different candies, get creative with the decorations. And when you do, I’d love to hear about it. Drop a comment below and tell me how your witch fingers turned out. Did you add a magical twist? Did your kids love them? Share a photo on social media and tag me—I want to see your spooky creations!
Now go on, get a little witchy in your kitchen. You deserve a treat that’s just as fun to make as it is to eat. Happy Halloween, friends!
Frequently Asked Questions
Can I make these witch finger pretzels ahead of time?
Absolutely! They are perfect for making 1-2 days in advance. Store them in an airtight container in the refrigerator, and they’ll be ready to serve whenever you are.
My candy melts are too thick. What do I do?
Stir in a teaspoon of coconut oil or vegetable shortening. This will thin out the coating and make it much easier to dip the pretzels. Avoid adding water or milk, as that will cause the candy melts to seize.
Can I use white chocolate instead of candy melts?
Yes, but white chocolate is more finicky to melt and can burn easily. Use high-quality white chocolate and melt it slowly. You may need to add a bit of oil to get the right consistency for dipping.
How do I get the almond nails to stick better?
Make sure the chocolate “glue” is thick enough to hold the almond in place. If it’s too thin, the almond will slide off. Also, let the glue set in the fridge for at least 5 minutes before dipping the pretzel in the coating.
My kids have nut allergies. What can I use instead of almonds?
You can use a candy corn (pointed end down), a white chocolate chip, or even a small piece of dried apricot to mimic a fingernail. The look will be slightly different, but just as fun!
Pin This Recipe!

Cozy Witch Finger Pretzel Rods with Almond Nails: Easy Halloween Treat

These spooky-cute witch finger pretzel rods are made with pretzel rods, almond slivers, and candy melts for a fun and easy Halloween treat. They’re quick to make, require no baking, and are perfect for parties or a cozy night in.
- Prep Time: 20 minutes
- Cook Time: 0 minutes
- Total Time: 50 minutes (including chilling)
- Yield: 12-15 servings 1x
- Category: Dessert
- Cuisine: American
Ingredients
- 12–15 pretzel rods
- ¼ cup almond slices or slivers
- 1 cup (about 6 oz) green candy melts or melting wafers
- ½ cup semi-sweet or dark chocolate chips
- Red gel food coloring
- Optional: edible glitter, small candy eyes, powdered sugar
Instructions
- Line a baking sheet or large plate with parchment paper. Arrange pretzel rods, almond slices, and candy melts within easy reach.
- In a microwave-safe bowl, melt ½ cup semi-sweet chocolate chips in 20-second intervals, stirring well after each, until smooth.
- Using a toothpick or small spoon, dab a tiny amount of melted chocolate onto the end of a pretzel rod. Press an almond slice onto the chocolate, pointed end outward, to look like a fingernail. Hold for a few seconds until set. Repeat for all pretzel rods. Refrigerate for 5 minutes to harden.
- In a separate microwave-safe bowl, melt green candy melts in 20-second intervals, stirring in between, until smooth. If too thick, stir in ½ teaspoon coconut oil or shortening.
- Remove pretzel rods from fridge. Holding by the bare end, dip the coated end into the melted candy coating about two-thirds of the way up. Let excess drip off.
- Before the coating sets, use a toothpick to gently drag 3-4 horizontal lines across the coating to create knuckle wrinkles.
- Using a clean toothpick dipped in red gel food coloring, paint a thin line around the base of the almond nail for a cuticle effect.
- Place finished witch fingers on the parchment-lined sheet. Refrigerate for 20-30 minutes until the coating is completely hard. Serve at room temperature or slightly chilled.
Notes
Let the chocolate ‘glue’ set fully before dipping to prevent almonds from sliding off. Work in small batches to keep candy coating from thickening. For kids, let them handle dabbing glue, placing almonds, and painting cuticles while you handle hot melted chocolate.
Nutrition
- Serving Size: 1 witch finger
- Calories: 120150
- Sugar: 810
- Sodium: 200250
- Fat: 68
- Saturated Fat: 34
- Carbohydrates: 1518
- Fiber: 1
- Protein: 23
Keywords: Halloween treats, witch fingers, pretzel rods, easy Halloween recipe, spooky snacks, no-bake dessert


