I had claimed to hate breakfast for almost a decade. Not the idea of it, you understand, but the actual act of eating it. The texture of oatmeal made me shudder, eggs felt like a chore, and cereal was just a sugar delivery system I couldn’t get behind before 10 a.m. Then last October, my neighbor Claire showed up at my door at 7:30 on a Saturday morning holding a basket of these little golden muffin-like things, still warm, and I found myself eating three of them standing over my kitchen sink before I could even form a proper thank you. The smell alone—cinnamon, nutmeg, that unmistakable pumpkin warmth—had pulled me in before my brain could put up its usual breakfast defenses.
I mean, honestly, I was annoyed at how good they were. I had built an entire identity around being a non-breakfast person, and here I was, reaching for a fourth one while pretending I was just “tasting” them. Claire laughed at me, and I didn’t even care. The texture was nothing like the sad, gluey oatmeal I remembered from childhood. These were sturdy but tender, sweet but not cloying, and somehow they made a Wednesday morning in late October feel like a holiday. The week before, I had been that person rolling my eyes at the first pumpkin spice latte of the season. Now I was hoarding a recipe for pumpkin baked oatmeal cups like they were contraband.
Maybe you’ve been there—stuck in a breakfast rut, or convinced that a certain food category just isn’t for you. Let me tell you, these little cups changed my mind completely. They’re the kind of recipe that makes you wonder why you waited so long to try something, and then you spend the rest of fall making up for lost time. I’ve made them four times since that morning, and every batch disappears faster than the last. If you’re ready to have your breakfast opinions gently but firmly corrected, keep reading.
Why You’ll Love This Recipe
These cozy pumpkin baked oatmeal cups are the kind of breakfast that feels like a warm hug on a chilly morning. I’ve tested this recipe at least seven times across two different ovens (my gas one at home and my sister’s electric one, which runs hot), and I can tell you with confidence that this version works every single time.
- Quick & Easy: From mixing bowl to table in under 30 minutes. That’s faster than waiting in line at the coffee shop, and honestly, it smells a whole lot better than whatever they’re brewing in there.
- Simple Ingredients: No weird health food store finds or expensive specialty flours. You probably have most of this in your pantry right now, especially if you’re the kind of person who buys canned pumpkin “just in case” when September rolls around.
- Perfect for Fall Mornings: These were designed for those crisp, golden mornings when the leaves are turning and you need something warm in your hands before you face the day. They’re great for busy weekday breakfasts, lazy weekend brunches, or even as an after-school snack.
- Crowd-Pleaser: I brought a batch to my book club last week and three people asked for the recipe before I even sat down. My kids, who usually pick at breakfast, ate theirs before I could get the coffee poured.
- Unbelievably Delicious: The secret is in the texture—these aren’t dense or heavy like some baked oatmeal recipes. They’re light, tender, and just the right amount of moist, with a subtle sweetness that comes from the pumpkin itself, not a ton of added sugar.
What makes these different from every other baked oatmeal recipe out there? It’s the technique. Instead of just mixing everything together and hoping for the best, I’ve found that letting the oats soak in the pumpkin mixture for just five minutes before baking makes all the difference. That little step gives the oats time to absorb the liquid, so they bake up soft and creamy instead of chewy and dry. It’s a small thing, but it’s the kind of detail that turns a good recipe into one you’ll make again and again.
These pumpkin baked oatmeal cups are the kind of breakfast that makes you close your eyes after the first bite. It’s comfort food reimagined—healthier than a muffin, faster than traditional oatmeal, but with the same soul-soothing satisfaction that only fall flavors can deliver.
What Ingredients You Will Need
This recipe uses simple, wholesome ingredients to deliver bold fall flavor and satisfying texture without any fuss. Most of these are pantry staples, especially if you’ve already stocked up for pumpkin season.
- Rolled oats, 2 cups (use old-fashioned rolled oats, not instant or steel-cut—they hold their shape better and give the cups a nice, chewy texture)
- Canned pumpkin puree, 1 cup (not pumpkin pie filling—make sure you grab the 100% pure pumpkin. I prefer Libby’s for its consistent texture, but any brand works fine)
- Milk, 1 cup (whole milk gives the richest texture, but 2% or oat milk work beautifully too. I’ve tested this with unsweetened almond milk and it was fine, just slightly less creamy)
- Large eggs, 2 (room temperature if you remember to take them out ahead of time, but honestly, I’ve used them straight from the fridge and it still turned out fine)
- Maple syrup, 1/3 cup (pure maple syrup, not pancake syrup—the real stuff makes a difference here. If you’re out, honey works as a substitute, but the flavor will be slightly different)
- Pumpkin pie spice, 2 teaspoons (store-bought is totally fine, or you can make your own with 1 teaspoon cinnamon, 1/2 teaspoon ginger, 1/2 teaspoon nutmeg, and a pinch of cloves)
- Cinnamon, 1 teaspoon (I add extra cinnamon even if the pumpkin pie spice already has some—you can never have too much cinnamon in fall recipes)
- Baking powder, 1 teaspoon (this helps the cups rise just a little and keeps them from being too dense)
- Salt, 1/4 teaspoon (don’t skip this—it balances the sweetness and makes the pumpkin flavor pop)
- Vanilla extract, 1 teaspoon (pure vanilla extract if you have it, but imitation works in a pinch)
- Mix-ins of your choice, 1/2 cup total (chocolate chips, chopped pecans, dried cranberries, or a combination—I usually do half chocolate chips and half pecans because that’s what I always have on hand)
For the topping (optional but highly recommended):
- Pepitas, 2 tablespoons (pumpkin seeds—they add a nice crunch and make the cups look pretty)
- Turbinado sugar, 1 tablespoon (also called raw sugar—it gives the tops a nice sparkly crunch. Regular granulated sugar works too, but it won’t be as crunchy)
A few notes from my testing: If you’re using a gluten-free oat brand, check the label carefully—some oats are processed in facilities that also handle wheat. For a dairy-free version, swap the milk for your favorite plant-based milk and use dairy-free chocolate chips if you’re adding those. The pumpkin puree should be smooth and not watery—if you open the can and it looks separated, give it a good stir before measuring.
Equipment Needed
You don’t need anything fancy for these pumpkin baked oatmeal cups, which is one of the reasons I love this recipe so much. Here’s what you’ll need:
- Muffin tin (standard 12-cup size—I use a non-stick one, but any metal or silicone pan works. If you’re using a dark non-stick pan, keep an eye on the baking time since those tend to brown things faster)
- Mixing bowls (one large, one medium—I use my grandmother’s old ceramic mixing bowls, but any bowls will do)
- Whisk (for combining the wet ingredients—a fork works in a pinch, but a whisk makes it much easier)
- Rubber spatula (for scraping every last bit of batter into the muffin cups—I’m a big fan of the one-sided spatulas for this)
- Measuring cups and spoons (I’ve learned the hard way that eyeballing the pumpkin puree leads to inconsistent results)
- Ice cream scoop or large spoon (for portioning the batter evenly—a 1/4-cup scoop works perfectly)
- Cooling rack (optional but helpful—if you don’t have one, you can just let them cool in the pan for a few minutes before transferring to a plate)
If you don’t have a muffin tin, you can bake this in a greased 8×8 baking dish and serve it like a bar. Just add about 5-7 minutes to the baking time and check for doneness with a toothpick. I’ve done this when my muffin tin was in the dishwasher, and it worked perfectly—you just lose the individual serving size and the cute factor.
Preparation Method
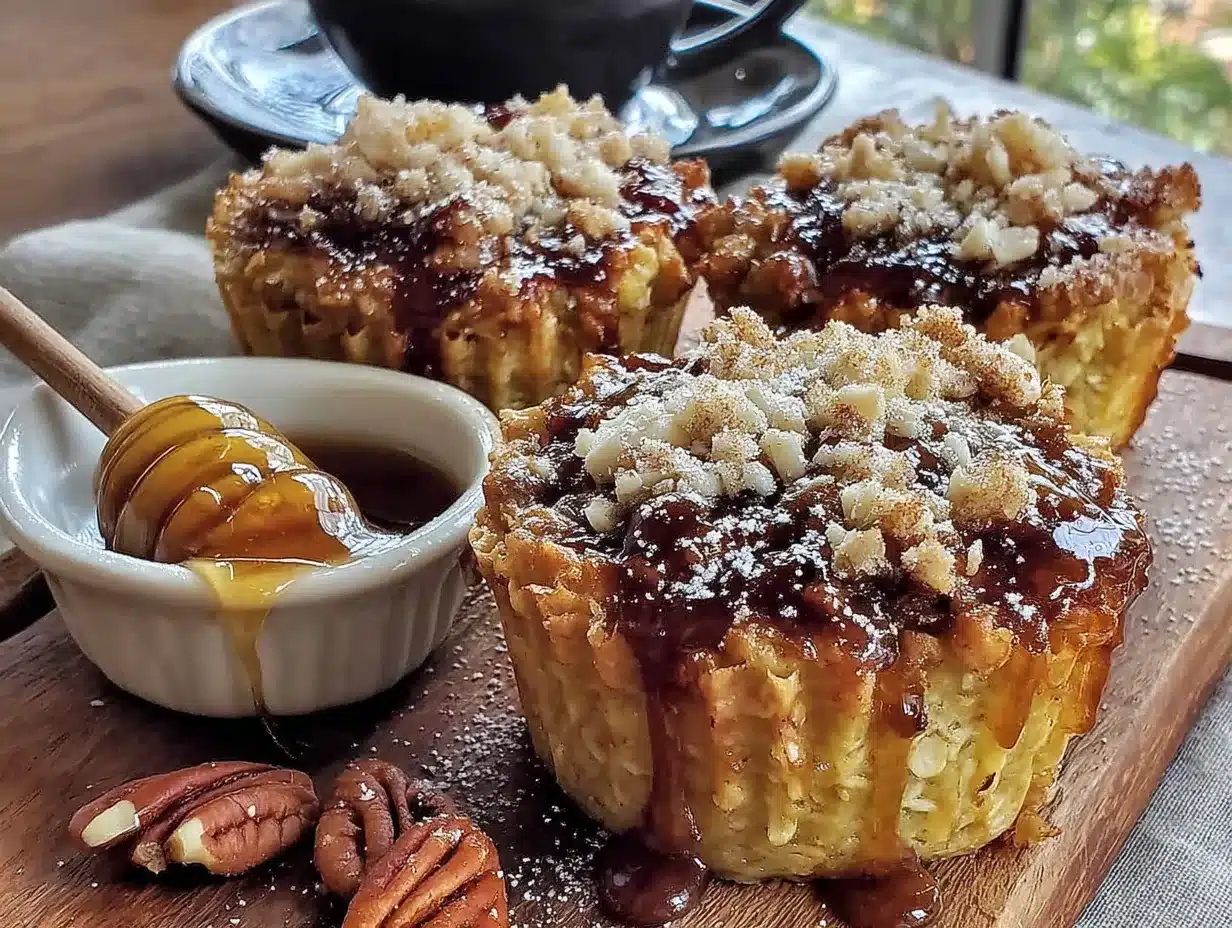
Preheat your oven to 375°F (190°C). While it’s heating up, grease your muffin tin well with butter or non-stick spray. I use butter because I like the flavor it adds to the edges, but spray is faster and works just as well.
Step 1: Mix the dry ingredients. In a large bowl, whisk together the rolled oats, pumpkin pie spice, cinnamon, baking powder, and salt. Make sure everything is evenly distributed—I like to use my fingers to break up any clumps of spice that might have formed. This takes about 30 seconds and saves you from biting into a pocket of pure nutmeg later.
Step 2: Combine the wet ingredients. In a medium bowl, whisk together the pumpkin puree, milk, eggs, maple syrup, and vanilla extract. Whisk until the mixture is smooth and fully combined. The pumpkin can be a little stubborn about mixing in completely, so take an extra 10 seconds to make sure there are no streaks of puree left. The mixture should look like a thick, creamy orange liquid at this point.
Step 3: Let the oats soak. Pour the wet ingredients into the dry ingredients and stir until just combined. Here’s the important part: let the mixture sit for 5 minutes before portioning it into the muffin tin. I set a timer on my phone because I always think I’ll remember and then I get distracted by something shiny. During this time, the oats are absorbing the liquid, which means they’ll bake up soft and tender instead of dry and chewy. You’ll notice the mixture getting thicker as it sits—that’s exactly what you want.
Step 4: Add your mix-ins. After the 5-minute rest, fold in your chocolate chips, pecans, dried cranberries, or whatever combination you’ve chosen. Stir gently—you want them distributed evenly, not smashed into the oats.
Step 5: Fill the muffin cups. Use your ice cream scoop or a large spoon to divide the mixture evenly among the 12 muffin cups. They should be filled almost to the top—these don’t rise much, so you don’t need to worry about overflow. If you’re using the pepitas and turbinado sugar topping, sprinkle them over the tops now. Press them in gently so they stick.
Step 6: Bake. Place the muffin tin in the preheated oven and bake for 18-22 minutes, or until the tops are set and the edges are golden brown. The centers should spring back when lightly touched, and a toothpick inserted into the center of a cup should come out mostly clean (a few moist crumbs are fine—you don’t want them overbaked). My oven runs a little cool, so I usually check at 18 minutes and go from there.
Step 7: Cool and serve. Let the cups cool in the pan for 5 minutes, then carefully run a knife around the edges and transfer them to a cooling rack. If you try to take them out too soon, they might fall apart—trust me, I learned this the hard way with my first batch. After they’ve cooled for another 5-10 minutes, they’re ready to eat. Serve warm, with a drizzle of extra maple syrup if you’re feeling indulgent.
Cooking Tips & Techniques
After making these pumpkin baked oatmeal cups more times than I care to count, I’ve picked up a few tricks that make the process smoother and the results more consistent.
Don’t skip the soak. I know I mentioned this already, but it’s worth repeating. That five-minute rest is the difference between tender, creamy oatmeal cups and dry, crumbly ones. I once skipped it because I was in a rush, and the cups came out noticeably less moist. Never again.
Use room temperature ingredients. If you have time, let your eggs and milk sit on the counter for 15-20 minutes before starting. Cold ingredients can make the coconut oil or butter (if you’re using it to grease the pan) seize up slightly, and they don’t incorporate as smoothly. That said, I’ve made this recipe with fridge-cold ingredients and it still worked—just not quite as well.
Watch your baking time. Every oven is different, and muffin tins vary too. Dark metal pans absorb more heat and can over-brown the bottoms, so check your cups a few minutes early if you’re using one. The cups are done when the tops are set and a toothpick comes out with just a few moist crumbs. Overbaked oatmeal cups get dry fast, so err on the side of under rather than over.
Let them cool properly. I know it’s tempting to dig in right away, but giving them that 5-minute rest in the pan is crucial for structure. They’re delicate when hot, and they need a few minutes to firm up. I once tried to flip one out after 2 minutes and ended up with a sad pile of oatmeal crumbs. Patience pays off here.
Double the batch. These freeze beautifully, so I always make a double batch when I have the time. I bake one batch right away and freeze the other for busy mornings. More on that in the storage section below.
Variations & Adaptations
One of the best things about these pumpkin baked oatmeal cups is how easy they are to customize. Here are some variations I’ve tried and loved:
- Chocolate Chip Pumpkin: Add 1/2 cup of dark chocolate chips and skip the nuts. My kids’ favorite version, and honestly, mine too when I need a little extra comfort.
- Apple Pumpkin: Fold in 1/2 cup of finely diced apple (I use Honeycrisp or Granny Smith) along with the mix-ins. The apple adds little bursts of sweetness and a slightly different texture. I like to add an extra 1/4 teaspoon of cinnamon when I do this version.
- Vegan Version: Replace the eggs with two flax eggs (2 tablespoons ground flaxseed mixed with 6 tablespoons water, let sit for 5 minutes) and use a plant-based milk. The texture will be slightly denser, but still delicious. I’ve tested this with oat milk and flax eggs, and my non-vegan friends didn’t notice the difference.
- Protein-Packed: Add 2 scoops of vanilla or unflavored protein powder and increase the milk by 1/4 cup. You might need to add an extra minute or two to the baking time. This is my go-to for post-workout mornings.
- Lower Sugar: Reduce the maple syrup to 1/4 cup and add an extra 1/4 cup of mashed banana or unsweetened applesauce. The cups will be slightly less sweet but still flavorful from the pumpkin and spices.
I’ve also tried baking these in a mini muffin tin for bite-sized versions—just reduce the baking time to 10-12 minutes. They’re perfect for little hands or for packing in lunchboxes.
Serving & Storage Suggestions
These pumpkin baked oatmeal cups are best served warm, straight from the oven, with a pat of butter melting on top or a drizzle of maple syrup. They’re wonderful on their own, but they also pair beautifully with a hot cup of coffee, a chai latte, or a glass of cold milk.
For a fall brunch spread, I like to serve them alongside a simple yogurt parfait, some fresh fruit, and maybe a few slices of bacon for balance. They’re also great for meal prep—I make a batch on Sunday and grab one or two on my way out the door during the week.
Storage: Keep leftover cups in an airtight container in the refrigerator for up to 5 days. They’ll firm up a bit when cold, but they soften right back up when reheated. To reheat, microwave one cup for 20-30 seconds, or pop them in a 350°F oven for 5-7 minutes. I prefer the oven method because it crisps up the edges slightly, but the microwave is faster for busy mornings.
Freezing: These freeze like a dream. Let the cups cool completely, then place them in a single layer on a baking sheet and freeze for 1-2 hours until solid. Transfer to a freezer-safe bag or container, and they’ll keep for up to 3 months. To reheat from frozen, microwave for 45-60 seconds or bake at 350°F for 10-12 minutes. I always keep a stash in my freezer for those mornings when I need breakfast to be ready in under 2 minutes.
One thing I’ve noticed: the flavors actually get better after a day or two in the fridge. The pumpkin and spices meld together, and the texture becomes even more tender. So don’t worry if you have leftovers—they might taste even better the next day.
Nutritional Information & Benefits
Each pumpkin baked oatmeal cup (based on 12 servings, without optional toppings) contains approximately:
- Calories: 185
- Fat: 6g
- Carbohydrates: 28g
- Fiber: 4g
- Sugar: 11g
- Protein: 6g
These numbers will vary slightly depending on your mix-ins and milk choice. The chocolate chip version adds about 30 calories per cup, while the pecan version adds about 25 calories and 2g of healthy fat.
Pumpkin is packed with vitamin A (over 200% of your daily needs in just one cup), which supports eye health and immune function. It’s also a good source of fiber, which helps keep you full and satisfied through the morning. The oats provide complex carbohydrates for steady energy, and the eggs add high-quality protein. Compared to a typical bakery muffin (which can have 400+ calories and 30g of sugar), these are a much better way to start your day—without sacrificing any of the comfort-food satisfaction.
If you’re watching your sugar intake, the lower-sugar variation brings each cup down to about 7g of sugar, most of which comes from the pumpkin and oats themselves.
Conclusion
These cozy pumpkin baked oatmeal cups have officially converted me from a breakfast-skipper to someone who actually looks forward to the first meal of the day. They’re warm, spiced, and just sweet enough to feel like a treat without tipping into dessert territory. The best part? They come together in under 30 minutes, use ingredients you probably already have, and make your whole kitchen smell like fall heaven.
Whether you’re making them for a busy school morning, a lazy weekend brunch, or just because you need a little extra comfort in your life, these cups deliver every single time. I love how customizable they are—you can switch up the mix-ins based on what you have on hand or what you’re craving, and they always turn out perfectly.
I’d love to hear how yours turn out! Drop a comment below and let me know what mix-ins you used, or tag me in your photos if you share them on social media. And if you’re looking for more cozy fall breakfast ideas, you might also enjoy my cinnamon apple baked oatmeal or these pumpkin protein muffins for another grab-and-go option. Happy baking, friends—here’s to making every fall morning a little warmer and a lot more delicious!
Frequently Asked Questions
Can I use quick oats instead of rolled oats?
You can, but the texture will be different. Quick oats are more finely chopped, so they absorb liquid faster and bake up softer with less chew. If you use quick oats, reduce the soaking time to 2-3 minutes and check for doneness a few minutes early. The cups will be more like a soft muffin than a chewy oatmeal cup.
Can I make these gluten-free?
Absolutely! Just use certified gluten-free rolled oats. Many brands are labeled gluten-free, but make sure to check the packaging if you have celiac disease or a serious sensitivity. Everything else in the recipe is naturally gluten-free, so it’s an easy swap.
Why did my oatmeal cups turn out dry?
This usually happens for one of two reasons: overbaking or not letting the oats soak long enough. Check your oven temperature with an oven thermometer (mine was 25 degrees off for years before I figured it out), and make sure you’re giving the mixture that full 5-minute rest before baking. Also, if you’re using a dark non-stick pan, reduce the baking time by 2-3 minutes.
Can I use fresh pumpkin instead of canned?
You can, but you’ll need to prep it first. Roast a small sugar pumpkin (not a carving pumpkin—those are too watery) until tender, then puree the flesh in a food processor. Fresh pumpkin puree has more water than canned, so you might need to drain it in a cheesecloth-lined strainer for 30 minutes before using. I’ve done this and it works, but honestly, canned pumpkin is more consistent and saves a lot of time.
How do I keep the cups from sticking to the pan?
Grease your muffin tin generously, paying special attention to the corners and edges. I like to use butter and then dust the cups lightly with oats or flour. Silicone muffin liners work great too—I use them when I’m making a batch for a friend, because they make the cups look so pretty and they slide right out. Paper liners can stick a bit, so I don’t recommend those for this recipe.
Pin This Recipe!
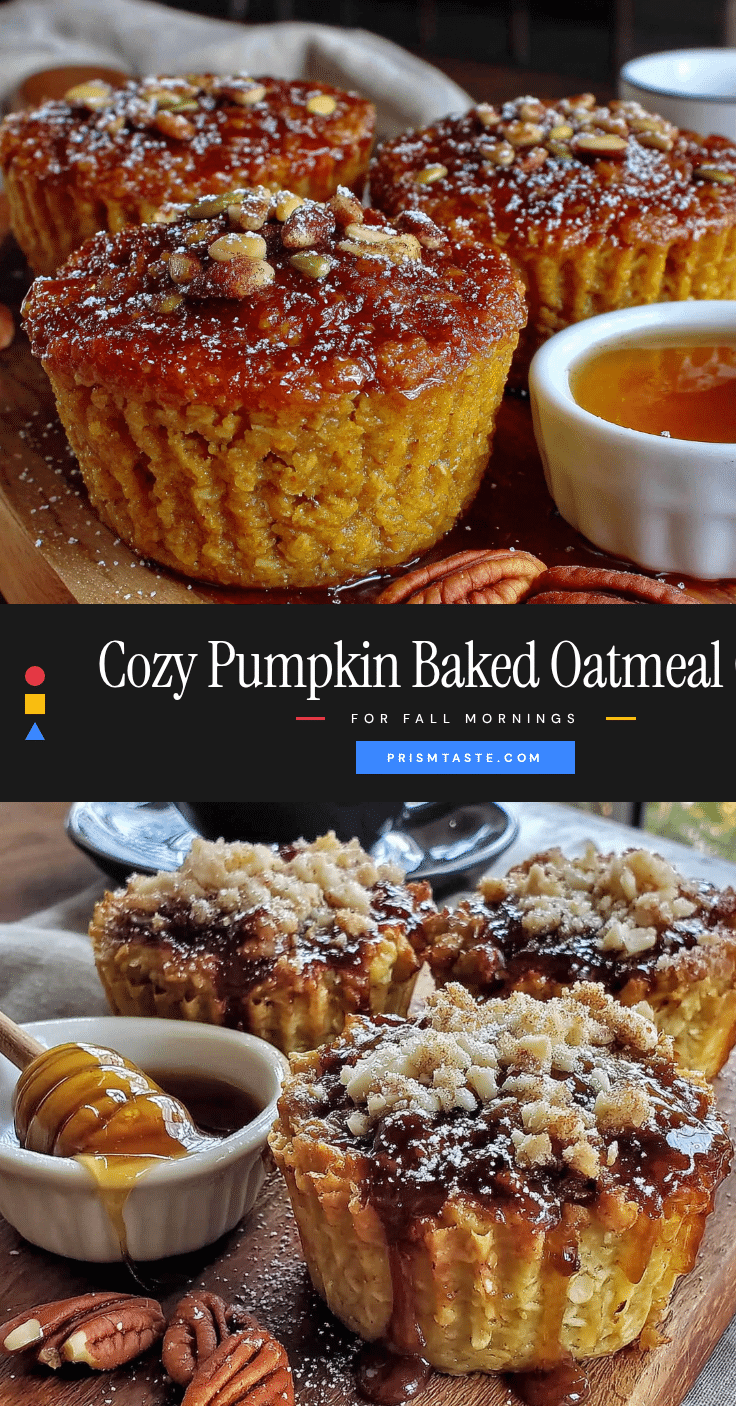
Cozy Pumpkin Baked Oatmeal Cups: Easy Fall Breakfast

These cozy pumpkin baked oatmeal cups are the kind of breakfast that feels like a warm hug on a chilly morning. They’re quick, easy, and made with simple ingredients for a perfect fall breakfast.
- Prep Time: 10 minutes
- Cook Time: 20 minutes
- Total Time: 30 minutes
- Yield: 12 servings 1x
- Category: Breakfast
- Cuisine: American
Ingredients
- 2 cups rolled oats
- 1 cup canned pumpkin puree
- 1 cup milk
- 2 large eggs
- 1/3 cup maple syrup
- 2 teaspoons pumpkin pie spice
- 1 teaspoon cinnamon
- 1 teaspoon baking powder
- 1/4 teaspoon salt
- 1 teaspoon vanilla extract
- 1/2 cup mix-ins (chocolate chips, chopped pecans, dried cranberries, or combination)
- 2 tablespoons pepitas (optional topping)
- 1 tablespoon turbinado sugar (optional topping)
Instructions
- Preheat oven to 375°F (190°C). Grease a 12-cup muffin tin with butter or non-stick spray.
- In a large bowl, whisk together rolled oats, pumpkin pie spice, cinnamon, baking powder, and salt.
- In a medium bowl, whisk together pumpkin puree, milk, eggs, maple syrup, and vanilla extract until smooth.
- Pour wet ingredients into dry ingredients and stir until just combined. Let the mixture sit for 5 minutes to allow oats to absorb liquid.
- Fold in your chosen mix-ins (chocolate chips, pecans, dried cranberries, etc.).
- Divide the mixture evenly among the 12 muffin cups, filling almost to the top. Sprinkle with pepitas and turbinado sugar if desired.
- Bake for 18-22 minutes, until tops are set and edges are golden brown. A toothpick inserted in the center should come out mostly clean.
- Let cool in the pan for 5 minutes, then run a knife around the edges and transfer to a cooling rack. Serve warm.
Notes
Let the oats soak for 5 minutes before baking for a tender texture. Use room temperature ingredients if possible. Dark metal pans may brown faster, so check a few minutes early. These freeze well for up to 3 months.
Nutrition
- Serving Size: 1 oatmeal cup
- Calories: 185
- Sugar: 11
- Sodium: 180
- Fat: 6
- Saturated Fat: 1.5
- Carbohydrates: 28
- Fiber: 4
- Protein: 6
Keywords: pumpkin baked oatmeal cups, fall breakfast, easy oatmeal cups, pumpkin oatmeal, healthy breakfast


