I wasn’t expecting baking advice from a man named Gus who repairs antique typewriters for a living, but there I was, standing in his dusty workshop last October, listening to him describe exactly how to make ghost meringue cookies. He had this old Royal sitting on his workbench, half-disassembled, and somehow between explaining the escapement mechanism and the ribbon vibrator, he mentioned that his late wife used to make these little meringue ghosts every Halloween. He said they were the only thing she ever baked—she was a terrible cook otherwise, his words, not mine—but these came out perfect every single time. I mean, honestly, you never know where good recipes are hiding. They’re just out there, waiting in the most unexpected places.
Gus told me the recipe was scribbled on a napkin from a diner that closed in 1987. He kept it in his wallet for thirty years. When he showed it to me, the ink was almost gone, but I could still make out the three ingredients. That’s it. Just three. He said the secret wasn’t in the ingredients—it was in the patience. “You can’t rush a ghost,” he told me, and I thought that was the most ridiculous thing I’d ever heard until I tried making them myself. The first batch collapsed because I opened the oven door too early. The second batch looked like sad, deflated clouds. But the third batch? Those little ghosts came out perfect, floating off the baking sheet like they were about to haunt someone in the most adorable way possible.
Maybe you’ve been there, standing in your kitchen with a mixer in one hand and a piping bag in the other, wondering why something so simple feels so complicated. These cozy ghost meringue cookies are for those moments. They’re for the evenings when you want to make something magical without spending hours shopping for obscure ingredients. They’re for the times when you need a little whimsy in your life—something light and sweet and just a little bit spooky. Gus’s wife made them for Halloween parties, for church bake sales, for no reason at all except that she loved watching people smile when they bit into one. That’s the energy I’m bringing to this recipe, and I think you’ll love it too.
Why You’ll Love This Recipe
Let me tell you why these cozy ghost meringue cookies are going to become your new favorite fall treat. I’ve tested this recipe more times than I care to admit, tweaking temperatures and timing until I got it just right. The result is something that looks impressive but requires almost no effort—my favorite kind of baking project.
- Only 3 Ingredients: Egg whites, sugar, and vanilla extract. That’s it. No cream of tartar, no cornstarch, no special extracts. You probably have everything in your kitchen right now.
- Naturally Gluten-Free and Low-Fat: These cookies are perfect for anyone avoiding gluten or watching their fat intake. They’re mostly air and sugar—honestly, what’s not to love?
- Perfect for Halloween: They look like little ghosts! You can make them for Halloween parties, classroom treats, or just to get into the spooky spirit without all the artificial colors and preservatives.
- Kid-Friendly Activity: My niece helped me pipe the ghosts last weekend, and while some of them looked more like blobs than ghosts, she had the best time. The imperfections make them charming.
- Keeps for Weeks: Unlike most cookies that go stale in a few days, these meringue ghosts stay crisp in an airtight container for up to two weeks. Perfect for making ahead.
What sets this recipe apart from other meringue cookies is the technique. I spent three batches figuring out why my meringues kept cracking or turning brown. The answer was simpler than I expected—low and slow baking with the oven door slightly ajar. That little trick ensures your ghosts stay perfectly white and develop that crisp, melt-in-your-mouth texture without any discoloration. It’s the kind of tip that makes you wonder why every recipe doesn’t mention it.
These cookies aren’t just good—they’re the kind that makes you close your eyes after the first bite. The outside shatters with the lightest pressure, and the inside dissolves into sweetness. It’s comfort food in its purest form, reimagined for cozy fall evenings. Perfect for impressing guests without stress, or turning a simple Tuesday night into something memorable.
What Ingredients You Will Need
This recipe uses three simple ingredients to create something truly magical. Each one plays a specific role, and understanding that will help you get perfect results every time. I’ve tested different brands and types, so I’ll share what works best.
- 3 large egg whites (about 90 grams or ⅓ cup): Room temperature egg whites whip up much better than cold ones. Separate your eggs when they’re cold, then let the whites sit on the counter for 30 minutes before you start. I’ve tried using carton egg whites, and honestly, they don’t work as well—fresh eggs give you a much more stable meringue. If you want the best texture, use fresh eggs from a trusted brand like Eggland’s Best or your local farmer’s market.
- ¾ cup (150 grams) granulated white sugar: Regular granulated sugar is perfect here. Don’t use powdered sugar or superfine sugar—they dissolve differently and can affect the texture. I’ve made this with organic cane sugar, and it works fine, though the color comes out slightly warmer. For the whitest ghosts, stick with standard white sugar. Pro tip: give your sugar a quick spin in the food processor for about 10 seconds to make it slightly finer—it dissolves faster and gives you a smoother meringue.
- ½ teaspoon vanilla extract: Pure vanilla extract adds warmth and depth. I’ve tried imitation vanilla, and while it works in a pinch, the flavor isn’t as rich. For something special, try vanilla bean paste—you’ll see tiny specks of vanilla in your white ghosts, which looks beautiful. My personal favorite is Nielsen-Massey pure vanilla extract. It’s pricier, but the flavor is worth it.
- Optional: Mini chocolate chips for eyes: If you want your ghosts to have faces, add mini chocolate chips. About ¼ cup should be enough for a batch. Place them on after piping, before baking. I’ve also used black sanding sugar for a different look.
- Pinch of salt (optional): A tiny pinch of salt helps stabilize the egg whites and balances the sweetness. I add it every time, but it’s not strictly necessary.
For the best results, make sure your bowl and whisk attachment are completely clean and free of any grease. Even a tiny bit of oil can prevent your egg whites from whipping properly. I wipe my bowl with a little lemon juice or white vinegar before starting—it removes any trace of grease and ensures maximum volume.
Equipment Needed
You don’t need fancy equipment for these ghost meringue cookies, but having the right tools makes the process much smoother. Here’s what I use:
- Electric mixer: A stand mixer with the whisk attachment is ideal, but a hand mixer works perfectly too. I’ve made these with both, and the hand mixer actually gives me more control over the mixing. My KitchenAid stand mixer is my go-to for big batches, but for a single batch, I reach for my Cuisinart hand mixer.
- Large mixing bowl: Glass or metal is best—plastic bowls can retain grease even after washing. I use a stainless steel bowl that I keep specifically for meringues.
- Piping bag with round tip: A piping bag makes shaping the ghosts easy. I use a Wilton #12 round tip, but you can also use a ziplock bag with the corner snipped off. The ghosts won’t be as defined, but they’ll still taste amazing.
- Baking sheets: Two large baking sheets lined with parchment paper. Don’t use wax paper or foil—the meringues will stick. Parchment paper is non-negotiable here.
- Oven thermometer: This is optional but highly recommended. Oven temperatures vary wildly, and meringues are sensitive to heat. An oven thermometer ensures your oven is at the right temperature. I use a simple Taylor oven thermometer that cost me eight dollars.
Preparation Method
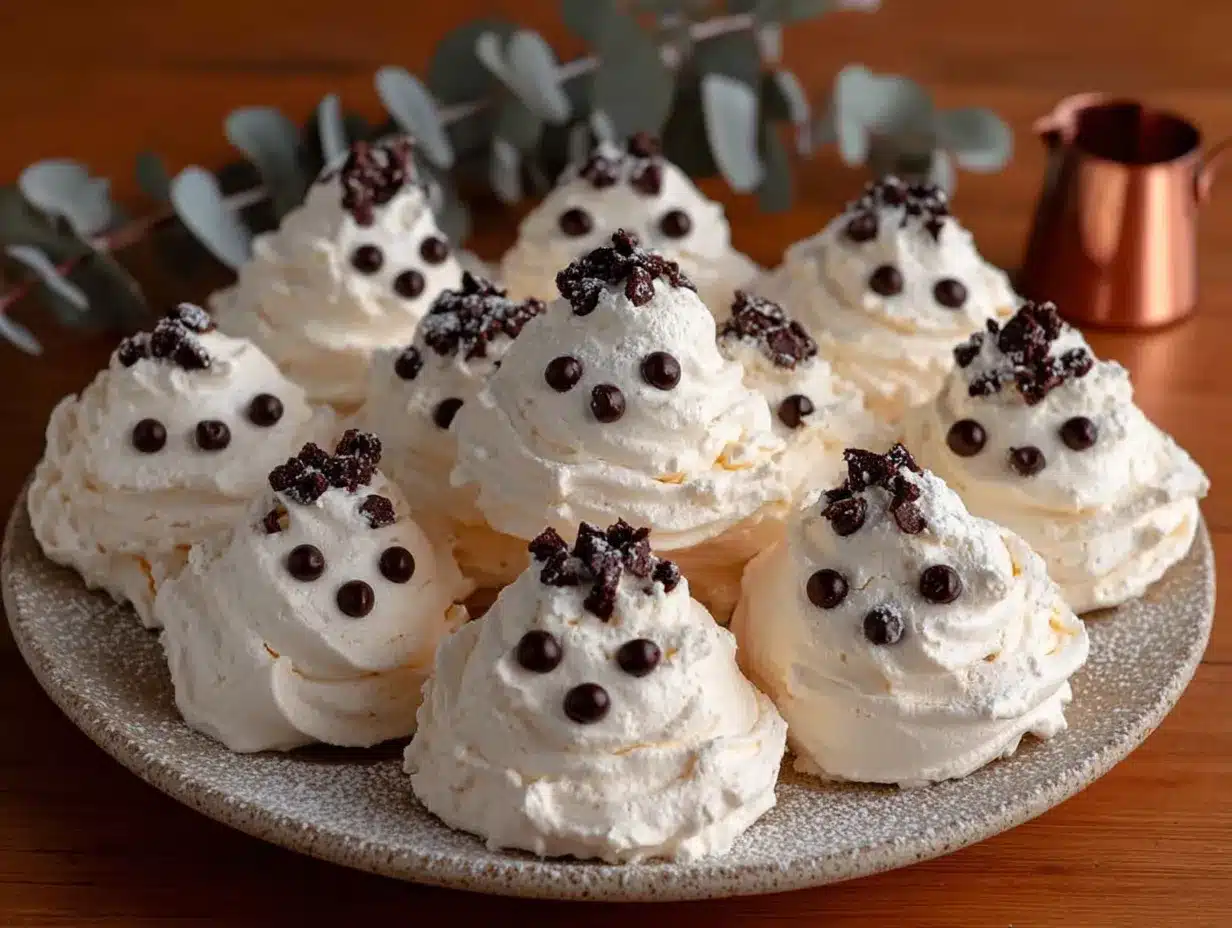
Making these ghost meringue cookies requires patience, but the process itself is straightforward. Follow these steps carefully, and you’ll have perfect little ghosts floating off your baking sheet.
- Preheat your oven to 200°F (93°C). This is crucial—meringues need low, slow heat to dry out properly without browning. Place your oven rack in the center position. Line two baking sheets with parchment paper and set them aside.
- Prepare your egg whites. Separate three large eggs while they’re still cold. Place the whites in your clean mixing bowl and let them sit at room temperature for 30 minutes. This step isn’t optional—cold egg whites take forever to whip and never reach their full volume. I learned this the hard way after standing over my mixer for twenty minutes with no results.
- Start whipping. Attach your whisk attachment and begin whipping the egg whites on medium speed. After about 30 seconds, they’ll become frothy and bubbly. If you’re using salt, add it now. Continue whipping until soft peaks form—the whites should hold a gentle shape that flops over when you lift the whisk. This usually takes 2 to 3 minutes with a stand mixer or 4 to 5 minutes with a hand mixer.
- Add the sugar gradually. With the mixer running on medium-low speed, add the sugar one tablespoon at a time. I know it’s tempting to dump it all in at once, but don’t. Adding it slowly allows the sugar to dissolve completely, which gives you a smoother, more stable meringue. This step takes about 3 minutes. Scrape down the sides of the bowl halfway through.
- Whip to stiff peaks. Once all the sugar is added, increase the speed to medium-high and whip until the meringue is glossy and stiff. You’ll know it’s ready when you lift the whisk and the meringue forms a sharp peak that doesn’t droop. The mixture should also feel smooth when you rub a little between your fingers—if it feels gritty, the sugar hasn’t dissolved yet, so keep whipping. This usually takes 5 to 7 more minutes. Add the vanilla extract during the last 30 seconds of whipping.
- Prepare your piping bag. Fit your piping bag with a round tip and fold the top edge down over your hand. Use a spatula to fill the bag with meringue, being careful not to overfill. Twist the top of the bag to seal it. If you don’t have a piping bag, transfer the meringue to a large ziplock bag and snip off one corner.
- Pipe the ghosts. Hold the piping bag perpendicular to the baking sheet, about ½ inch above the parchment. Squeeze gently to form a round base, about 1½ inches in diameter. Release pressure slightly and lift the bag straight up to create a tall peak—this forms the ghost’s head. For a more traditional ghost shape, you can pipe a second smaller peak on top. Leave about 1 inch between each ghost. If you’re adding chocolate chip eyes, place them on now before the meringue starts to set.
- Bake low and slow. Place the baking sheets in the preheated oven and bake for 60 to 75 minutes. The meringues should be dry to the touch and easily lift off the parchment paper. They shouldn’t be brown at all—if they start turning golden, your oven is too hot. After 45 minutes, I like to prop the oven door open slightly with the handle of a wooden spoon. This lets moisture escape and keeps the meringues perfectly white.
- Cool completely in the oven. Turn off the oven and leave the meringues inside with the door closed for at least 1 hour. This gradual cooling prevents cracking. I usually leave them overnight—they’re always perfectly dry and crisp in the morning.
- Remove and store. Once completely cool, gently lift the meringues off the parchment paper. They should release easily. If they stick, they need more drying time—pop them back in the oven at 200°F (93°C) for another 15 minutes.
Cooking Tips & Techniques
I’ve made these ghost meringue cookies at least a dozen times, and I’ve messed up more batches than I’d like to admit. Here’s what I’ve learned so you don’t have to make the same mistakes.
The biggest mistake is rushing the sugar. I know it’s tedious adding sugar one tablespoon at a time, but if you dump it all in at once, your meringue will be grainy and unstable. The first time I made these, I was in a hurry and just poured the sugar in. The meringue never reached stiff peaks, and the cookies spread into flat, sticky puddles. Not cute. Take the extra three minutes—it makes all the difference.
Humidity is your enemy. Meringues are basically sugar and air, so they absorb moisture from the environment. If it’s a rainy or humid day, your meringues might end up sticky and chewy instead of crisp. I only make these on dry days, or I run my air conditioner and dehumidifier for a few hours beforehand. If you live in a humid climate, try baking them a little longer—up to 90 minutes—and store them immediately in an airtight container.
Don’t open the oven door too early. I know it’s tempting to peek, but opening the oven door during the first 45 minutes can cause your meringues to collapse from the sudden temperature change. Trust the process. If you really need to check, use the oven light. I propped my oven door open too early once, and my ghosts looked like deflated balloons. Not the look I was going for.
Room temperature eggs are non-negotiable. I mentioned this before, but it’s worth repeating. Cold egg whites don’t whip well, and they won’t reach their full volume. Set your eggs out 30 minutes before you start, or if you’re in a hurry, place them in a bowl of warm water for 5 minutes. Just don’t microwave them—I tried that once and ended up with partially cooked egg whites. Disaster.
Variations & Adaptations
One of the best things about this recipe is how easy it is to customize. Here are some variations I’ve tried and loved:
- Chocolate Ghosts: Replace 2 tablespoons of the sugar with unsweetened cocoa powder. Sift it into the meringue during the last minute of whipping. You’ll get beautiful chocolate ghosts that taste like chocolate meringue cookies. My nephew called them “chocolate ghosts from a haunted chocolate factory.”
- Peppermint Ghosts: Replace the vanilla extract with ½ teaspoon of peppermint extract. These are perfect for Christmas—you can pipe them into snowman shapes instead of ghosts. Add a tiny dot of red frosting for a scarf. I made these for a holiday cookie exchange, and they disappeared in minutes.
- Lemon Ghosts: Add 1 teaspoon of lemon zest along with the vanilla extract. The citrus brightness cuts through the sweetness beautifully. These are great for spring or summer gatherings. I served them at a baby shower, and everyone thought they were adorable.
- Vegan Version: Replace the egg whites with aquafaba—the liquid from a can of chickpeas. Use 3 tablespoons of aquafaba per egg white. The texture is slightly different—less crisp, more chewy—but they still taste great. I’ve made these for vegan friends, and they were a hit. Just make sure to whip the aquafaba a little longer than you would egg whites.
- Colored Ghosts: Add a few drops of gel food coloring after the stiff peaks form. Gel coloring is better than liquid because it doesn’t add extra moisture. I’ve made pink ghosts for Valentine’s Day and green ghosts for St. Patrick’s Day. Just be gentle when folding in the color—overmixing will deflate your meringue.
Serving & Storage Suggestions
These ghost meringue cookies are best served at room temperature, straight from the baking sheet if you can’t wait. They have a delicate, airy texture that practically melts in your mouth. Here’s how to serve and store them:
Serving ideas: Arrange them on a platter for Halloween parties—they look adorable next to pumpkin-shaped cookies or caramel apples. For a cozy night in, serve them with a cup of hot cocoa or a warm mug of chai tea. The sweetness of the meringue pairs beautifully with the bitterness of dark chocolate or the spice of cinnamon. You can also crumble them over ice cream for a crunchy topping—my favorite is vanilla bean ice cream with crushed meringue ghosts on top.
Storage instructions: Store your meringues in an airtight container at room temperature for up to 2 weeks. Don’t refrigerate them—the moisture in the fridge will make them sticky. If you live in a humid area, add a silica gel packet or a piece of dry rice wrapped in cheesecloth to the container to absorb excess moisture. I’ve also frozen them successfully—place them in a single layer in a freezer-safe container with parchment paper between layers. They’ll keep for up to 3 months. Thaw at room temperature for 10 minutes before serving.
How flavors develop: These meringues actually taste better after a day or two. The flavors mellow and blend together, and the texture becomes even more crisp. If you can resist eating them all on day one, you’ll be rewarded with even better cookies on day three.
Nutritional Information & Benefits
I’m not a nutritionist, but I’ve done my research on these ingredients. Here’s what you need to know:
Per serving (1 ghost meringue cookie, based on 24 cookies per batch):
- Calories: approximately 25
- Fat: 0g
- Carbohydrates: 6g
- Sugar: 6g
- Protein: 0.5g
- Sodium: 10mg
Health benefits: Egg whites are a good source of protein and contain zero fat or cholesterol. They’re also rich in selenium, which supports thyroid function and acts as an antioxidant. Sugar provides quick energy, though I’ll be honest—these are a treat, not a health food. The portion size is naturally small, so it’s easy to enjoy them without overindulging.
Dietary considerations: These cookies are naturally gluten-free, dairy-free, and nut-free. They’re also low in fat and calories compared to most cookies. The main allergen is eggs, so if you have an egg allergy, try the vegan version using aquafaba. The sugar content is relatively high, so they’re not suitable for low-sugar or keto diets without modifications.
Conclusion
These cozy ghost meringue cookies are proof that the best recipes don’t need to be complicated. Three ingredients, a little patience, and you’ve got something that looks like it came from a fancy bakery. I’ve made them for Halloween parties, for my niece’s classroom, and for no reason at all except that I wanted something sweet and whimsical. Every time, they disappear faster than I expect.
What I love most about this recipe is how forgiving it is once you know the tricks. The first batch might not be perfect—mine certainly wasn’t—but with a little practice, you’ll be piping ghosts like a pro. And honestly, even the imperfect ones taste amazing. There’s something special about biting into a cookie that’s mostly air and sugar, feeling it dissolve on your tongue, and knowing you made it with your own two hands.
I’d love to hear how your ghosts turn out. Did you add chocolate chip eyes? Try the peppermint version? Leave a comment below and let me know—I read every single one. And if you’re looking for more cozy fall treats, check out my pumpkin spice latte cookies or these apple cider donut muffins—they’re perfect for those crisp autumn afternoons. Happy haunting, friends!
Frequently Asked Questions
Can I make these ghost meringue cookies without a piping bag?
Absolutely! If you don’t have a piping bag, use a sturdy ziplock bag with one corner snipped off. The ghosts won’t have as defined a shape, but they’ll taste just as good. You can also use a small spoon to drop spoonfuls of meringue onto the baking sheet—they’ll look more like clouds than ghosts, but they’re still delicious.
Why did my meringue cookies crack?
Cracking usually happens from sudden temperature changes. Make sure you’re baking at a low temperature (200°F/93°C) and letting them cool slowly in the oven with the door closed. If they crack, they’re still perfectly edible—they just won’t look as pretty. I’ve eaten many cracked ghosts, and they taste exactly the same.
Can I double this recipe?
Yes, you can easily double or triple this recipe. Just make sure your mixer bowl is large enough to accommodate the increased volume—meringue expands a lot as it whips. If you’re using a hand mixer, you might need to work in batches. Also, you’ll need more baking sheets or bake in multiple batches.
How do I know when the meringue is whipped enough?
You’re looking for stiff, glossy peaks that hold their shape when you lift the whisk. The meringue should also feel smooth when you rub a tiny bit between your fingers—if it feels gritty, the sugar hasn’t dissolved yet. Keep whipping for another minute or two and check again. Underwhipped meringue will result in flat, sticky cookies.
Can I use liquid egg whites from a carton?
I don’t recommend it. Carton egg whites often contain stabilizers that prevent them from whipping to their full volume. Fresh egg whites give you a much more stable meringue with better texture. If you must use carton egg whites, look for ones without added stabilizers, and expect them to take longer to whip.
Pin This Recipe!
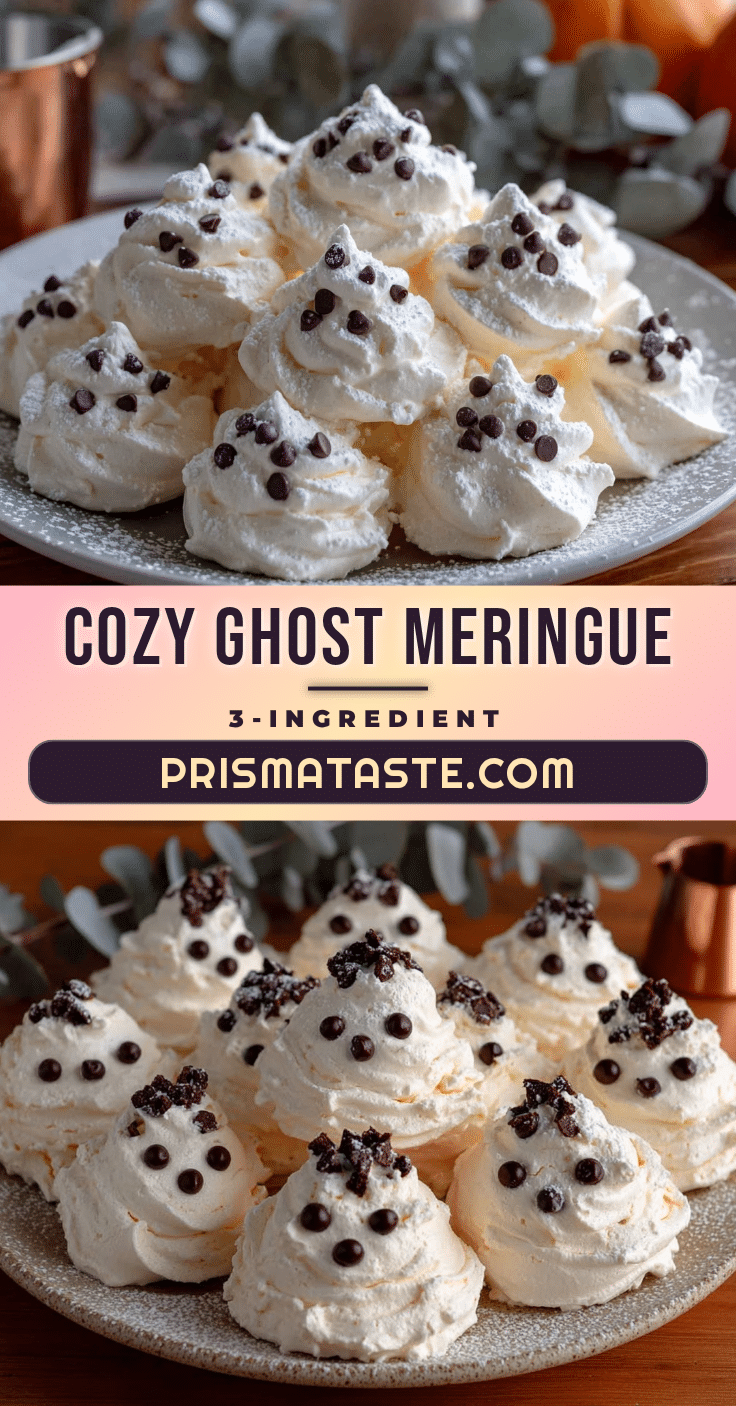
Cozy Ghost Meringue Cookies: 3-Ingredient Easy Recipe
These adorable ghost meringue cookies are made with just three ingredients and are naturally gluten-free and low-fat. Perfect for Halloween or any time you want a light, whimsical treat that melts in your mouth.
- Prep Time: 15 minutes
- Cook Time: 60-75 minutes
- Total Time: 1 hour 45 minutes (plus cooling time)
- Yield: 24 cookies 1x
- Category: Dessert
- Cuisine: American
Ingredients
- 3 large egg whites (about 90 grams or 1/3 cup), room temperature
- 3/4 cup (150 grams) granulated white sugar
- 1/2 teaspoon vanilla extract
- Optional: 1/4 cup mini chocolate chips for eyes
- Optional: Pinch of salt
Instructions
- Preheat your oven to 200°F (93°C). Place oven rack in the center position. Line two baking sheets with parchment paper.
- Separate three large eggs while cold. Place whites in a clean mixing bowl and let sit at room temperature for 30 minutes.
- Begin whipping egg whites on medium speed until frothy and bubbly (about 30 seconds). If using salt, add it now. Continue whipping until soft peaks form (2-3 minutes with stand mixer, 4-5 minutes with hand mixer).
- With mixer on medium-low speed, add sugar one tablespoon at a time, taking about 3 minutes. Scrape down sides of bowl halfway through.
- Increase speed to medium-high and whip until meringue is glossy and forms stiff peaks (5-7 more minutes). Add vanilla extract during the last 30 seconds. Meringue should feel smooth between fingers.
- Fit a piping bag with a round tip and fill with meringue. Alternatively, use a ziplock bag with corner snipped off.
- Pipe ghosts onto prepared baking sheets: squeeze gently to form a 1.5-inch round base, then release pressure and lift straight up to create a tall peak. Leave 1 inch between ghosts. Add chocolate chip eyes if desired.
- Bake for 60-75 minutes. After 45 minutes, prop oven door open slightly with a wooden spoon handle to let moisture escape. Meringues should be dry to touch and lift easily from parchment.
- Turn off oven and leave meringues inside with door closed for at least 1 hour (or overnight) to cool gradually and prevent cracking.
- Remove from oven and gently lift meringues off parchment. Store in an airtight container at room temperature for up to 2 weeks.
Notes
Do not open the oven door during the first 45 minutes of baking to prevent collapse. Make meringues only on dry days; humidity can cause stickiness. For best results, ensure bowl and whisk are completely grease-free. Meringues taste even better after a day or two.
Nutrition
- Serving Size: 1 ghost meringue coo
- Calories: 25
- Sugar: 6
- Sodium: 10
- Carbohydrates: 6
- Protein: 0.5
Keywords: ghost meringue cookies, Halloween cookies, 3-ingredient recipe, gluten-free cookies, low-fat cookies, meringue cookies, easy Halloween treat


