My neighbor, a retired librarian named Gloria, watched me hauling groceries up the porch stairs. I was juggling a bag of flour, a can of pumpkin, and my keys, and I swear that bag of flour was seconds away from hitting the concrete. She didn’t say anything at first. Then she just walked over, took the bag of flour out of my arms, and said, “You look like you’re about to make a mess. Come inside. I have something better.”
I had been planning to make my usual pumpkin chocolate chip cookies, but Gloria had other ideas. She pulled out a stick of butter, a jar of cinnamon, and a bag of sugar. “You’re going to brown that butter,” she said, like it was the most obvious thing in the world. I stood there, a little skeptical, honestly. I mean, browning butter felt like something a fancy pastry chef would do, not someone trying to get a batch of cookies done before the rain started. But Gloria didn’t give me a choice. She handed me the pan and said, “Trust me.”
So I did. And let me tell you, that was the moment everything changed. The nutty, toasty smell of that butter filled her little kitchen, and I knew I was onto something. She taught me how to swirl the pan, watching for those little brown flecks to appear, and she told me about her grandmother who used to make these cookies every fall. I adapted her recipe a little—added some pumpkin puree, a bit more spice, and a generous roll in cinnamon sugar. These cozy brown butter pumpkin snickerdoodle cookies are the result of that afternoon. They’re the kind of cookie that makes you stop what you’re doing and just enjoy the season.
Why You’ll Love This Recipe
These aren’t just another pumpkin cookie. They are, without exaggeration, the cookie that wins every fall gathering. I’ve tested this recipe about six times now—once with too much pumpkin (soggy disaster), once with not enough spice (boring), and once when I forgot the brown butter entirely (don’t ask). This version? It’s the Goldilocks of pumpkin cookies. Everything is just right.
- Quick & Easy: From start to finish, these come together in about 30 minutes. The dough doesn’t need chilling, which is a game-changer when you’re craving cookies right now.
- Simple Ingredients: You probably have most of these in your pantry already. No weird extracts or hard-to-find flours. Just butter, sugar, pumpkin, and spices.
- Perfect for Fall Baking: These are tailor-made for crisp October afternoons, Thanksgiving dessert tables, or cozy weekend baking sessions when the leaves are turning.
- Crowd-Pleaser: I brought these to a potluck last month, and three people asked for the recipe before I even sat down. Kids love them, adults love them, and they disappear fast.
- Unbelievably Delicious: The brown butter gives these a nutty, almost caramel-like depth that pairs perfectly with the warm pumpkin spice. And that crackly cinnamon sugar coating? Pure magic.
What makes these different from every other pumpkin cookie out there is the technique. Browning the butter isn’t just a fancy step—it’s the secret weapon. It adds a richness that makes you wonder why you haven’t been doing this your whole life. Plus, the texture is spot-on: soft and pillowy in the middle with slightly crisp edges. It’s comfort food reimagined—faster than a pie, more satisfying than a standard sugar cookie, and with all the soul-soothing vibes of autumn.
What Ingredients You Will Need
This recipe uses simple, wholesome ingredients to deliver that bold, cozy flavor without any fuss. Most of these are pantry staples, especially if you’re a regular fall baker. Let me walk you through what you need and why each one matters.
- Unsalted butter, 1 cup (2 sticks): This is non-negotiable for browning. Unsalted lets you control the salt level. I use Kerrygold when I want that extra rich flavor, but any good-quality unsalted butter works.
- Granulated sugar, 1 cup: For sweetness and that classic snickerdoodle texture. You’ll also need 1/4 cup extra for rolling the cookies.
- Light brown sugar, 1/2 cup, packed: Adds moisture and a hint of molasses flavor that plays beautifully with the pumpkin.
- Pumpkin puree, 1/2 cup: Not pumpkin pie filling! Just plain pumpkin puree. I like Libby’s for consistent results. Make sure to blot it with a paper towel to remove excess moisture (trust me on this).
- Large egg, 1: Room temperature is best for even mixing.
- Vanilla extract, 2 teaspoons: Pure vanilla, not imitation. It makes a difference in the depth of flavor.
- All-purpose flour, 2 cups: Spoon and level it—don’t scoop directly from the bag, or you’ll end up with dry cookies.
- Cream of tartar, 1 teaspoon: This is the secret to that classic snickerdoodle tang and chewy texture. Don’t skip it!
- Baking soda, 1/2 teaspoon: Helps the cookies puff up just right.
- Salt, 1/2 teaspoon: Balances the sweetness and enhances all the flavors.
- Pumpkin pie spice, 1 1/2 teaspoons: You can buy it pre-mixed, or make your own with cinnamon, nutmeg, ginger, and cloves.
- Cinnamon, 1 teaspoon (for the dough) + 2 tablespoons (for rolling): Cinnamon is the star of the snickerdoodle show. Use a good quality one like Saigon cinnamon for a bolder flavor.
- Nutmeg, 1/4 teaspoon (freshly grated if you have it): Adds that warm, aromatic note that says “autumn.”
Ingredient Tips: For the best texture, make sure your pumpkin puree isn’t watery. After measuring it, press it between a few paper towels to soak up any extra liquid. This prevents soggy cookies. If you’re out of cream of tartar, you can substitute with 2 teaspoons of lemon juice or white vinegar, but honestly, the texture won’t be quite as perfect. I always keep cream of tartar on hand during baking season.
Equipment Needed
You don’t need a fancy kitchen to make these cookies. Here’s what you’ll actually use:
- Light-colored saucepan or skillet: Essential for browning the butter. A dark pan makes it hard to see the color change, and you might burn it. I use a stainless steel saucepan.
- Mixing bowls: One large for dry ingredients, one medium for wet. Glass or stainless steel works best.
- Whisk and wooden spoon: A whisk for the dry ingredients, a wooden spoon for the wet. A spatula works too.
- Baking sheets: Two standard half-sheet pans. I prefer light-colored aluminum for even baking.
- Parchment paper or silicone baking mats: Prevents sticking and makes cleanup a breeze. I’m team parchment paper all the way.
- Cookie scoop (about 1.5 tablespoons): For uniform cookies. A medium scoop is perfect. If you don’t have one, use two spoons.
- Cooling rack: Lets air circulate so the bottoms don’t get soggy.
Budget-Friendly Alternatives: No cookie scoop? No problem. Just roll the dough into balls with your hands. No cooling rack? A clean wire oven rack works in a pinch. The key is getting them off the hot pan quickly.
Preparation Method
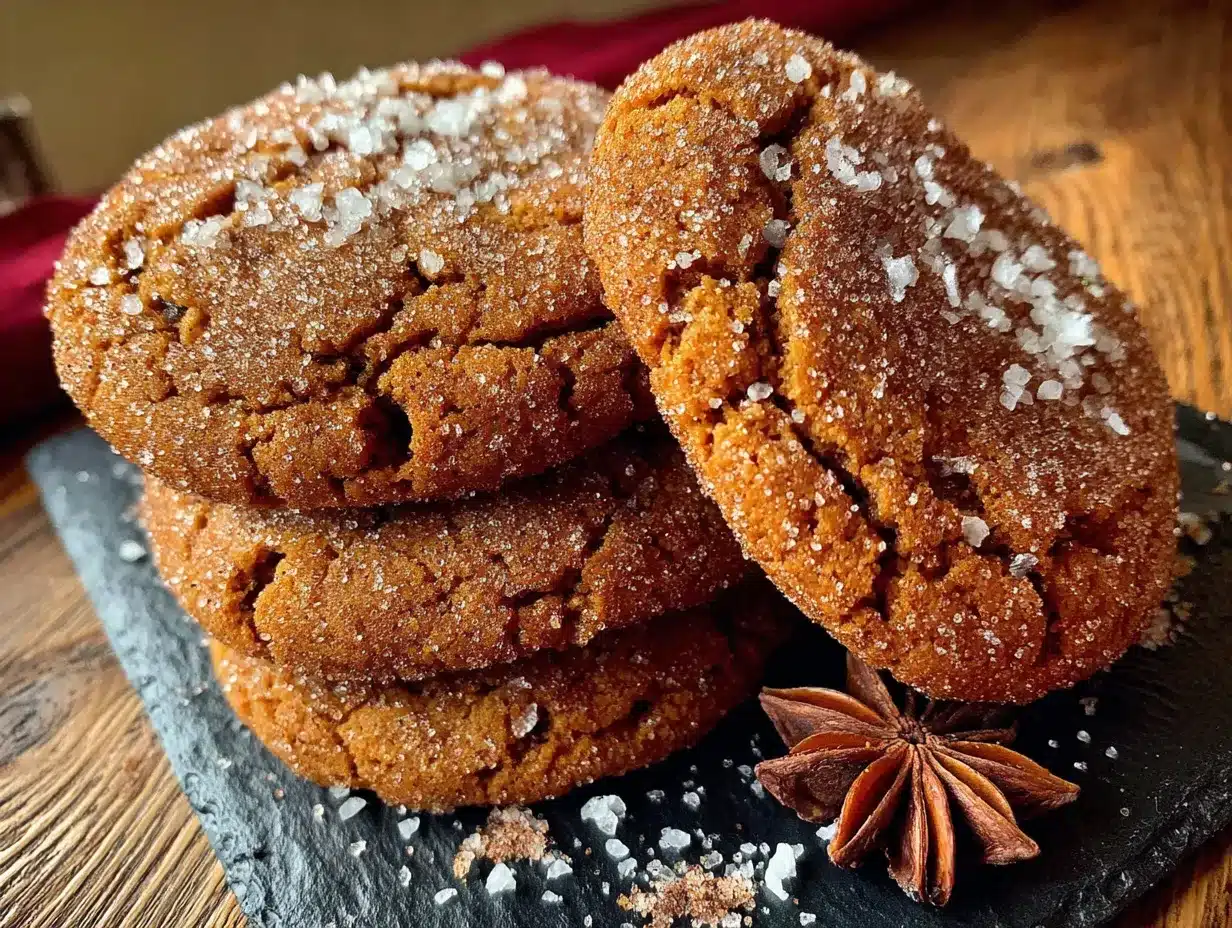
Let’s get baking! The steps are straightforward, but I’ve added some notes from my own trial and error to help you avoid my mistakes.
- Brown the butter: Cut the butter into pieces and add it to your light-colored saucepan. Melt it over medium heat, stirring constantly with a whisk or spatula. It will foam up, then the foam will subside, and you’ll start to see brown specks forming at the bottom. Swirl the pan occasionally. This takes about 5-7 minutes. The moment it smells nutty and looks amber-colored, remove it from the heat. Pour it into a heatproof bowl and let it cool for 10 minutes. Warning: Don’t walk away. Burnt butter is a tragedy.
- Mix the wet ingredients: In a medium bowl, whisk together the cooled brown butter, granulated sugar, and brown sugar until well combined. It will look a bit grainy—that’s okay. Add the egg, vanilla extract, and pumpkin puree (blotted dry!). Whisk until smooth and glossy. The mixture should be thick and smell incredible.
- Combine the dry ingredients: In a large bowl, whisk together the flour, cream of tartar, baking soda, salt, pumpkin pie spice, cinnamon, and nutmeg. This aerates the flour and distributes the spices evenly. No clumps allowed!
- Bring it together: Pour the wet mixture into the dry mixture. Fold gently with a wooden spoon or spatula until just combined. A few streaks of flour are fine—overmixing makes tough cookies. The dough will be soft and slightly sticky, which is exactly what you want.
- Preheat and prep: Preheat your oven to 350°F (175°C). Line two baking sheets with parchment paper. In a small bowl, mix the remaining 2 tablespoons of cinnamon with 1/4 cup of granulated sugar for rolling.
- Shape and coat: Using your cookie scoop or a spoon, portion out rounded tablespoons of dough. Roll each ball between your palms until smooth, then roll generously in the cinnamon sugar mixture. Place them 2 inches apart on the prepared baking sheets. They will spread a little, so give them room.
- Bake: Bake for 10-12 minutes, rotating the pans halfway through. The cookies should look puffed, set around the edges, and slightly soft in the center. They will continue to bake on the hot pan after you pull them out. Sensory cue: The kitchen will smell like a fall festival.
- Cool: Let the cookies rest on the baking sheet for 5 minutes. This is crucial—they’re too fragile to move right away. Then transfer them to a cooling rack. The tops will crack beautifully as they cool.
My Personal Tip: I always bake one test cookie first to check the spread and bake time. If it’s too flat, I chill the dough for 15 minutes. If it’s too puffy, I press the dough balls down slightly before baking. This little trick has saved many batches.
Cooking Tips & Techniques
I’ve made these cookies more times than I can count, and I’ve learned a few things the hard way. Here’s what I wish someone had told me.
Don’t skip blotting the pumpkin. I know it feels wasteful, but that extra moisture is the enemy of a good cookie. I once skipped this step because I was in a hurry, and the cookies came out flat and gummy. Blotting firms up the dough and gives you that perfect pillowy texture.
Watch the butter like a hawk. The line between perfectly browned and burnt is thin. I’ve ruined a batch by getting distracted by my phone. The butter goes from golden to brown to black very quickly. As soon as you see those brown specks and smell that nutty aroma, pull it off the heat. Pour it into a cool bowl immediately to stop the cooking process.
Chill if needed. If your dough feels too soft or sticky after mixing, pop it in the fridge for 20 minutes. This is especially helpful if your kitchen is warm or your butter got a bit too melty. Chilled dough spreads less and gives you thicker cookies.
Use a light hand with measuring flour. Scooping flour directly from the bag packs it down, and you can end up with 25% more flour than you need. Spoon it into your measuring cup, then level it off with a knife. This simple habit makes a huge difference in cookie texture.
Rotate your pans. Ovens have hot spots. Halfway through baking, swap the top pan to the bottom rack and rotate them front to back. This ensures even browning and prevents one batch from burning while the other is underdone.
Variations & Adaptations
One of the best things about this recipe is how flexible it is. Here are some ways I’ve adapted it over the years.
Gluten-Free Version: Swap the all-purpose flour with a 1:1 gluten-free baking flour blend. I’ve tested this with King Arthur Measure for Measure, and it works beautifully. Add an extra tablespoon of flour if the dough seems too wet.
Dairy-Free Version: Use vegan butter sticks for browning. I’ve had good results with Miyoko’s. The flavor is slightly different, but the texture is still fantastic. Just watch it closely—vegan butter can burn faster than dairy butter.
Extra Spicy: If you’re like me and love a punch of warmth, add 1/4 teaspoon of ground ginger and a pinch of cloves to the dough. You can also add a tiny pinch of black pepper—it sounds weird, but it enhances the other spices.
Chocolate Lover’s Twist: Fold in 1/2 cup of white chocolate chips or dark chocolate chunks after mixing the dough. The sweetness of white chocolate pairs perfectly with the brown butter and pumpkin spice. I did this for a holiday party, and they were gone in minutes.
Pumpkin Seed Crunch: Before baking, press a few pepitas (pumpkin seeds) into the top of each dough ball. It adds a nice crunch and makes them look extra pretty for fall gatherings.
Serving & Storage Suggestions
These cookies are best served slightly warm, when the cinnamon sugar coating is still a little crackly and the centers are soft. I like to serve them on a rustic wooden board with a side of hot apple cider or a chai latte. They also pair beautifully with a scoop of vanilla ice cream for a simple dessert.
Storage: Keep them in an airtight container at room temperature for up to 5 days. I layer them between sheets of parchment paper to prevent sticking. They stay soft and chewy for days—if they last that long.
Freezing: You can freeze the baked cookies for up to 3 months. Just wrap them tightly in plastic wrap and place them in a freezer bag. Thaw at room temperature for about 20 minutes, then warm them in a 300°F oven for 5 minutes. They taste almost fresh-baked.
Freezing the Dough: This is my favorite trick. Scoop the dough into balls, roll them in cinnamon sugar, and place them on a parchment-lined baking sheet. Freeze until solid, then transfer to a freezer bag. You can bake them directly from frozen—just add 2-3 minutes to the bake time. Perfect for spontaneous cookie cravings.
Flavor Development: Honestly, these cookies taste even better the next day. The spices meld together, and the texture becomes perfectly soft. If you can resist eating them all on day one, you’re in for a treat.
Nutritional Information & Benefits
Let’s be real—these are cookies, not health food. But they do have some redeeming qualities worth mentioning.
Estimated Per Cookie (makes about 24): 180 calories, 9g fat, 24g carbs, 2g protein, 14g sugar. These numbers are approximate and will vary based on exact ingredients and portion sizes.
Pumpkin Benefits: Pumpkin puree is packed with vitamin A (great for eye health) and fiber. It also adds moisture without needing extra fat, which is a win in my book.
Spice Benefits: Cinnamon and nutmeg are anti-inflammatory and can help regulate blood sugar. Plus, they make your house smell amazing, which has to count for something.
Dietary Considerations: This recipe can be made gluten-free and dairy-free with the substitutions mentioned above. It contains eggs and wheat in its standard form, so keep that in mind for allergies.
My Take: I believe in balance. These cookies are a treat, and they’re meant to be enjoyed without guilt. One cookie with a cup of tea is a beautiful way to slow down and appreciate the season. Life is too short for boring desserts.
Conclusion
These cozy brown butter pumpkin snickerdoodle cookies are everything I love about fall baking. They’re warm, spiced, and full of that nutty richness that only brown butter can bring. Every time I make them, I think of Gloria and that rainy afternoon when she taught me that the best recipes come from unexpected moments.
I hope you give these a try and make them your own. Maybe you’ll add a little extra cinnamon, or swap in white chocolate chips, or bake them for a family gathering. Whatever you do, don’t skip the brown butter—it’s the heart of this recipe. And if you make a mess along the way? That’s part of the fun.
I’d love to hear how they turn out! Leave a comment below and let me know if you tried any variations. Did you add chocolate? Did you double the batch? Did your kitchen smell like heaven? Share your cookie stories—I read every single one. Happy baking, friends!
Frequently Asked Questions
Can I use pumpkin pie filling instead of pumpkin puree?
No, please don’t. Pumpkin pie filling is pre-sweetened and spiced, which will throw off the sugar and spice balance completely. Stick with plain pumpkin puree.
Why did my cookies turn out flat?
This usually happens for one of three reasons: the butter was too warm, the pumpkin wasn’t blotted dry, or the flour was under-measured. Try chilling the dough for 20 minutes next time.
Can I make the dough ahead of time?
Absolutely. You can refrigerate the dough (without rolling in sugar) for up to 2 days. Roll and bake when you’re ready. You might need to add a minute or two to the bake time.
Do I really need cream of tartar?
Yes, for the classic snickerdoodle texture and tang. If you don’t have it, you can substitute with 2 teaspoons of lemon juice, but the cookies won’t be quite as soft and chewy.
How do I know when the butter is properly browned?
Look for three signs: a nutty, toasty aroma, amber color, and tiny brown specks settling at the bottom of the pan. As soon as you see those specks, remove it from the heat immediately.
Pin This Recipe!
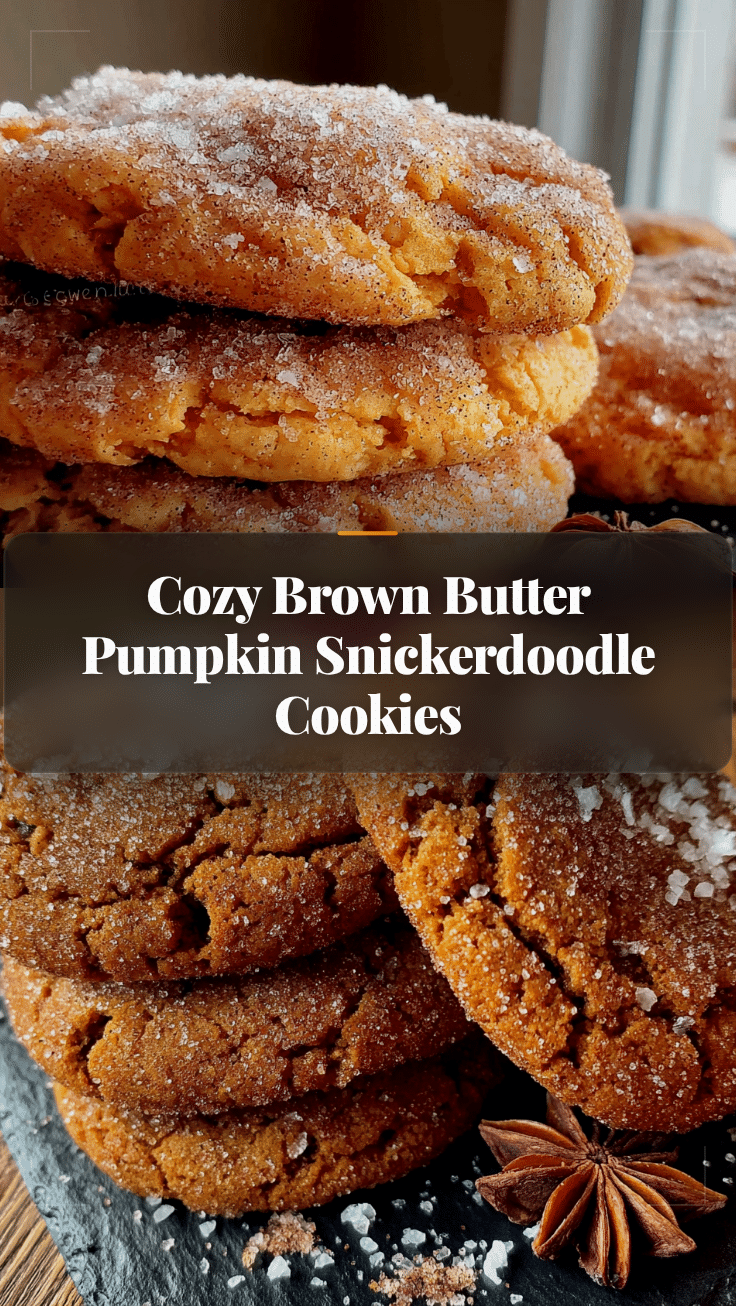
Cozy Brown Butter Pumpkin Snickerdoodle Cookies
These cozy brown butter pumpkin snickerdoodle cookies are soft, pillowy, and full of nutty richness from browned butter, with a crackly cinnamon sugar coating. Perfect for fall baking, they come together in about 30 minutes with simple pantry ingredients.
- Prep Time: 15 minutes
- Cook Time: 12 minutes
- Total Time: 27 minutes
- Yield: 24 servings 1x
- Category: Dessert
- Cuisine: American
Ingredients
- 1 cup (2 sticks) unsalted butter
- 1 cup granulated sugar (plus 1/4 cup for rolling)
- 1/2 cup light brown sugar, packed
- 1/2 cup pumpkin puree (blotted dry)
- 1 large egg, room temperature
- 2 teaspoons pure vanilla extract
- 2 cups all-purpose flour (spooned and leveled)
- 1 teaspoon cream of tartar
- 1/2 teaspoon baking soda
- 1/2 teaspoon salt
- 1 1/2 teaspoons pumpkin pie spice
- 1 teaspoon ground cinnamon (for dough) + 2 tablespoons (for rolling)
- 1/4 teaspoon freshly grated nutmeg
Instructions
- Brown the butter: Cut butter into pieces and melt in a light-colored saucepan over medium heat, stirring constantly. It will foam, then subside, and brown specks will form. When it smells nutty and turns amber (about 5-7 minutes), remove from heat and pour into a heatproof bowl. Cool for 10 minutes.
- Mix wet ingredients: In a medium bowl, whisk together cooled brown butter, 1 cup granulated sugar, and brown sugar until combined. Add egg, vanilla, and blotted pumpkin puree. Whisk until smooth and glossy.
- Combine dry ingredients: In a large bowl, whisk together flour, cream of tartar, baking soda, salt, pumpkin pie spice, 1 teaspoon cinnamon, and nutmeg.
- Bring together: Pour wet mixture into dry mixture. Fold gently with a wooden spoon until just combined (a few streaks of flour are fine). Dough will be soft and slightly sticky.
- Preheat and prep: Preheat oven to 350°F (175°C). Line two baking sheets with parchment paper. In a small bowl, mix remaining 2 tablespoons cinnamon with 1/4 cup granulated sugar for rolling.
- Shape and coat: Using a cookie scoop or spoon, portion rounded tablespoons of dough. Roll into smooth balls, then roll generously in cinnamon sugar mixture. Place 2 inches apart on prepared baking sheets.
- Bake: Bake for 10-12 minutes, rotating pans halfway through. Cookies should look puffed, set at edges, and slightly soft in center.
- Cool: Let cookies rest on baking sheet for 5 minutes, then transfer to a cooling rack. Tops will crack as they cool.
Notes
Blot pumpkin puree with paper towels to remove excess moisture. Watch butter closely to avoid burning. If dough is too soft, chill for 20 minutes. Bake one test cookie first to check spread. Store in airtight container at room temperature for up to 5 days. Freeze baked cookies for up to 3 months or dough balls for up to 3 months.
Nutrition
- Serving Size: 1 cookie
- Calories: 180
- Sugar: 14
- Sodium: 95
- Fat: 9
- Saturated Fat: 5
- Carbohydrates: 24
- Fiber: 1
- Protein: 2
Keywords: pumpkin cookies, snickerdoodle, brown butter, fall baking, pumpkin spice, easy cookie recipe


