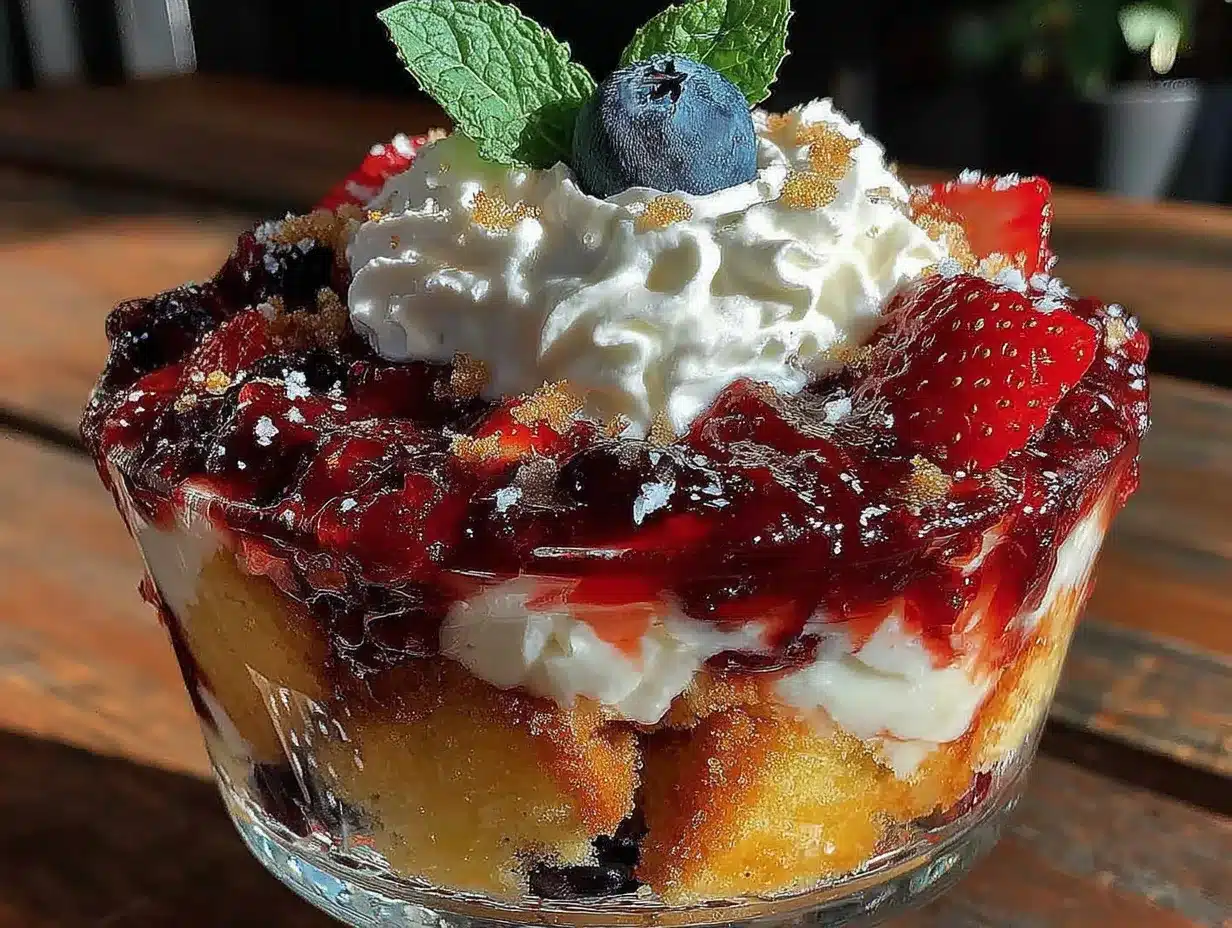
The grill was hot, the cooler was packed, and three different people had texted asking, “Are you bringing dessert?” I’d volunteered for dessert duty without actually having a plan—which, honestly, is a classic move on my part. The fridge had a carton of heavy cream, a basket of strawberries that were almost too ripe, a pint of blueberries, and one sad, forgotten lemon. No time for baking. No desire to turn on the oven in the August humidity. So I started layering things in a glass bowl I found in the back of the cabinet, hoping it would look intentional. And you know what? It looked like a flag. A delicious, creamy, berry-packed flag.
That first Best Red White and Blue Berry Trifle for Labor Day was a happy accident—a combination of what I had on hand and the desperate need to show up with something that didn’t look like I’d thrown it together in five minutes. Spoiler: it was thrown together in five minutes. But when I set that trifle on the picnic table, people actually stopped mid-conversation. Someone asked if I’d spent all morning on it. I just smiled and took the credit. That’s the magic of a good trifle—it looks like you tried really hard when you really, really didn’t.
Since then, this recipe has become my official Labor Day signature. It shows up every year, and every year someone asks for the recipe. It’s the kind of dessert that feels festive without being fussy, and it lets the summer berries do all the heavy lifting. There’s something deeply satisfying about watching those layers come together—the white cream against the red strawberries and deep blueberries—like edible fireworks on a plate. And honestly? That first bite, with the cold cream and the sweet-tart berries and the soft cake… it’s the taste of the last long weekend of summer.
Why You’ll Love This Recipe
Let me tell you why this trifle has earned a permanent spot in my Labor Day rotation. It’s not just about the red, white, and blue color scheme, though that certainly helps when you’re trying to be festive without buying plastic decorations.
- No-Bake and Stress-Free : You won’t turn on the oven once. In the heat of late summer, that alone is a win. This comes together in about 20 minutes of active time, then chills in the fridge until you’re ready to serve.
- Simple Ingredients : The shopping list is short and sweet—store-bought angel food cake or pound cake, fresh berries, heavy cream, cream cheese, and a little powdered sugar. No weird extracts or hard-to-find items.
- Perfect for a Crowd : This recipe makes a generous 12-14 servings. It’s ideal for potlucks, barbecues, and family gatherings where everyone wants a little something sweet after the burgers and corn on the cob.
- Make-Ahead Friendly : You can assemble this trifle the night before. In fact, it gets better as it sits. The flavors meld together, and the cake soaks up just enough berry juice to get perfectly tender without turning to mush.
- Customizable for Any Diet : Swap in dairy-free whipped topping and vegan cream cheese for a dairy-free version. Use a gluten-free cake for those with sensitivities. Nobody will know the difference.
What sets this trifle apart from other berry desserts is the texture. The cream cheese layer adds a subtle tang that balances the sweetness of the berries and the cake. It’s not just a pile of whipped cream and fruit—it’s a layered experience. Every spoonful has a little bit of everything: the fluffy cake, the silky cream, the burst of fresh berries. It’s the kind of dessert that makes you close your eyes after the first bite.
I’ve tested this recipe at least half a dozen times, tweaking the ratios and trying different cake bases. Angel food cake gives you that light, airy texture that practically dissolves on your tongue. Pound cake is richer and holds up better if you’re making it a day ahead. Both work beautifully, so pick your favorite. I’ve also tried it with homemade whipped cream versus stabilized cream cheese whipped cream, and the cream cheese version wins every time—it holds its shape, slices cleanly, and doesn’t weep after a few hours in the fridge.
This isn’t just another berry trifle. It’s the one that will make you the hero of the picnic table.
What Ingredients You Will Need
This recipe uses simple, fresh ingredients that come together to create something that tastes far more complicated than it is. Here’s what you’ll need to gather:
For the Cream Layer
- 2 cups heavy whipping cream , cold (the colder the better—it whips up faster and holds its shape longer)
- 8 ounces cream cheese , softened to room temperature (full-fat is best for richness, but Neufchâtel works too)
- 1/2 cup powdered sugar (adds sweetness without graininess)
- 1 teaspoon vanilla extract (pure vanilla makes a difference, but imitation works in a pinch)
- 1/4 teaspoon almond extract (optional, but it adds a lovely floral note that pairs beautifully with berries)
For the Berry Layers
- 2 cups fresh strawberries , hulled and sliced (look for berries that are deep red all the way through—no white shoulders)
- 2 cups fresh blueberries (wild blueberries are smaller and sweeter, but regular ones work just fine)
- 1 cup fresh raspberries (optional, but they add a lovely tartness and another shade of red)
- 2 tablespoons granulated sugar (to macerate the berries and draw out their juices)
- 1 tablespoon fresh lemon juice (brightens the berry flavor and keeps the colors vibrant)
For the Cake Base
- 1 store-bought angel food cake (about 12 ounces) or 1 pound cake (about 12 ounces), cut into 1-inch cubes (I prefer Sara Lee pound cake or a bakery-style angel food cake for the best texture)
For Garnish
- Fresh mint leaves (optional, for a pop of green)
- Extra berries for the top layer
- White chocolate shavings (optional, but they look gorgeous against the red and blue)
Ingredient Tips: When selecting strawberries, give them a sniff—they should smell sweet and floral, not sour or musty. Blueberries should be firm and dusty-looking (that bloom is natural and keeps them fresh). If you’re using frozen berries, thaw them first and drain off the excess liquid, or your trifle will get watery. I’ve made that mistake, and it turns into berry soup. Not ideal.
For the cream cheese, let it sit on the counter for at least 30 minutes before you start. Cold cream cheese will leave you with lumpy cream, and nobody wants lumpy cream in their trifle. Trust me on this one—I’ve had to re-whip a batch because I got impatient.
If you’re looking for a shortcut, you can use store-bought stabilized whipped cream or Cool Whip. But honestly, the homemade cream cheese whipped cream is so easy and so much better that I don’t recommend skipping it. It takes about 5 minutes with a hand mixer.
Equipment Needed
You don’t need a fancy kitchen to make this trifle, but having the right tools makes the process smoother. Here’s what I use:
- A large trifle dish or glass bowl (at least 4-quart capacity—I love my classic 4.5-quart trifle dish with a pedestal, but a straight-sided glass bowl works just as well)
- Electric hand mixer or stand mixer (for whipping the cream—you can do it by hand with a whisk, but your arm will hate you)
- Large mixing bowl (for the cream mixture)
- Medium mixing bowl (for macerating the berries)
- Sharp knife and cutting board (for hulling and slicing strawberries)
- Rubber spatula (for folding the cream and scraping every last bit out of the bowl)
- Measuring cups and spoons
- Offset spatula (optional, but helpful for spreading even layers)
Budget-Friendly Alternatives: Don’t have a trifle dish? Use a large glass mixing bowl or even a clear plastic punch bowl. The key is to see the layers, so clear glass is non-negotiable. If you don’t have a hand mixer, you can use a stand mixer or even a whisk and a lot of elbow grease. I’ve done it before—it takes about 8 minutes of vigorous whisking, and your triceps will thank you later.
I’ve also made this in individual mason jars for a picnic, and it was adorable. Each jar got its own little layers, and people could grab one and go. If you’re serving a crowd buffet-style, the big dish is easier, but for a more intimate gathering, individual servings are a fun twist.
Preparation Method
This is where the magic happens. Follow these steps, and you’ll have a show-stopping dessert that looks like it came from a bakery.
Step 1: Macerate the Berries (10 minutes active, 15 minutes rest)
In a medium bowl, combine the sliced strawberries, blueberries, and raspberries (if using). Sprinkle with 2 tablespoons of granulated sugar and 1 tablespoon of fresh lemon juice. Gently toss everything together with a spatula until the sugar starts to dissolve. Let the berries sit at room temperature for 15-20 minutes. You’ll notice they start releasing their juices—that’s exactly what you want. The sugar draws out the natural sweetness and creates a light syrup that will soak into the cake layers.
Pro tip: Don’t skip the lemon juice. It keeps the berries from turning brown and adds a bright note that cuts through the richness of the cream. I learned this the hard way when I made a trifle without it, and the strawberries looked sad and faded after a few hours.
Step 2: Make the Cream Cheese Whipped Cream (10 minutes)
In a large mixing bowl, beat the softened cream cheese with an electric mixer on medium speed until it’s smooth and fluffy—about 2 minutes. Scrape down the sides of the bowl with a rubber spatula. Add the powdered sugar, vanilla extract, and almond extract (if using), and beat until combined, about 1 minute.
With the mixer running on low, slowly pour in the cold heavy cream. Once all the cream is added, increase the speed to medium-high and beat until stiff peaks form. This takes about 3-4 minutes. You’ll know it’s ready when you lift the beaters and the cream stands up in firm peaks that don’t droop. Be careful not to over-whip, or you’ll end up with butter. I’ve done that, and it’s a sad day for dessert.
If you’re unsure about the texture, stop the mixer and give it a stir by hand—sometimes the cream at the bottom isn’t fully incorporated. Better to check than to have a lumpy trifle.
Step 3: Cut the Cake (5 minutes)
Cut your angel food cake or pound cake into 1-inch cubes. If using angel food cake, use a serrated knife and a gentle sawing motion—it compresses easily. Pound cake is more forgiving and can be cut with a chef’s knife. Aim for uniform cubes so they layer evenly.
I prefer angel food cake for this trifle because it’s light and absorbs the berry juices beautifully. But if you want a richer, more decadent dessert, pound cake is the way to go. My sister swears by using leftover vanilla cake or even glazed donut pieces. I haven’t tried the donut version yet, but it’s on my list.
Step 4: Assemble the Trifle (10 minutes)
Now the fun part. Start with a single layer of cake cubes at the bottom of your trifle dish—about one-third of the total cake. Spread them evenly. Spoon about one-third of the macerated berries over the cake, including some of the juice. Then spread one-third of the cream cheese whipped cream over the berries. Use an offset spatula or the back of a spoon to smooth it into an even layer.
Repeat the layers: cake, berries, cream. Then a third layer: cake, berries, cream. You should end with cream on top. Reserve a handful of berries for the final garnish.
Don’t press down on the layers—let them settle naturally. The cake will absorb the berry juice as it chills, creating that perfect tender texture. If you press too hard, you’ll end up with a dense, soggy mess.
Step 5: Garnish and Chill (5 minutes + 2 hours minimum)
Top the final cream layer with your reserved berries in a decorative pattern. I like to arrange the strawberries in a ring around the edge, then pile the blueberries and raspberries in the center. Add a few mint leaves for color if you have them. White chocolate shavings are optional but make it look extra fancy.
Cover the trifle loosely with plastic wrap and refrigerate for at least 2 hours, or up to 24 hours. The longer it sits, the better the flavors meld. Just don’t let it go past 24 hours, or the cake might get too soft. If you’re making this for a party, assemble it the morning of and let it chill until serving time.
When you’re ready to serve, scoop deep to get all the layers in every spoonful. That first bite—cold, creamy, fruity, and tender—is pure summer magic.
Cooking Tips & Techniques
Over the years, I’ve learned a few things that make this trifle foolproof. Here are my best tips:
Keep Everything Cold: The cream whips best when it’s straight from the fridge. If your kitchen is warm, chill the mixing bowl and beaters for 10 minutes before you start. It makes a noticeable difference in how fast the cream whips up.
Don’t Over-Whip the Cream: Stiff peaks are the goal, but if you go past that, the cream will turn grainy and eventually separate into butter and buttermilk. Stop the mixer when the cream holds its shape but still looks silky. If you accidentally over-whip, you can fold in a little fresh cream to bring it back, but it’s not a perfect fix.
Layer with Intention: The visual appeal of a trifle is in the layers, so take your time arranging them. Use a spoon to gently place the berries instead of dumping them in. If you’re feeling artistic, press some berries against the sides of the dish so they’re visible through the glass.
Maceration Is Not Optional: I know it’s tempting to skip the sugar-and-lemon step, but don’t. Macerating the berries softens them slightly and creates a syrup that flavors the cake. Without it, the trifle will be dry and the berries will taste flat.
Use a Serrated Knife for Angel Food Cake: A regular knife will squish the delicate cake into a sad, flat mess. A serrated knife with a gentle sawing motion gives you clean cubes that hold their shape.
Make It a Day Ahead: This trifle actually improves overnight. The cake absorbs the berry juices, the flavors meld, and the texture becomes perfectly tender. If you’re serving it the same day, aim for at least 2 hours of chill time.
I once made this trifle for a Fourth of July party and forgot to chill it. I served it right after assembling, and it was fine, but the layers were loose and the cake was dry. The leftovers the next day were infinitely better. Lesson learned: patience pays off.
Variations & Adaptations
This recipe is endlessly adaptable. Here are some of my favorite variations:
Berry Swap
If strawberries and blueberries aren’t your thing (or aren’t in season), swap them out. Blackberries, raspberries, sliced peaches, or even cherries work beautifully. Just stick with the red, white, and blue theme for patriotic holidays, or go wild with whatever looks best at the farmers market. I’ve made a summer berry trifle with peaches, raspberries, and blackberries that was absolutely divine.
Dairy-Free Version
Use full-fat coconut cream (chilled overnight and whipped) or a store-bought dairy-free whipped topping like CocoWhip. For the cream cheese layer, use a plant-based cream cheese alternative. Miyoko’s and Kite Hill both make excellent versions. The texture will be slightly different, but it’s still delicious.
Gluten-Free Version
Use a gluten-free angel food cake or pound cake. Most store-bought options are clearly labeled, or you can make your own. Gluten-free vanilla cake cubes also work well. Just make sure all your other ingredients are certified gluten-free if that’s a concern.
Citrus Twist
Add a tablespoon of lemon or orange zest to the cream cheese mixture. It brightens the flavor and complements the berries beautifully. I’ve also added a splash of limoncello to the berry mixture for an adults-only version. Proceed with caution—it’s dangerously good.
Chocolate Lover’s Version
Swap the vanilla cake for chocolate cake or brownie bites. Add a layer of chocolate shavings between the cream and berries. The combination of chocolate, cream, and berries is a classic for a reason. This version is less patriotic but way more decadent.
Individual Servings
Layer the trifle in small mason jars, wine glasses, or dessert cups for a grab-and-go option. This is perfect for picnics, barbecues, or any situation where you don’t want to deal with a big communal bowl. Each jar gets about 4-5 layers, and they look adorable on a dessert table.
I’ve tried the individual jar version for a Labor Day picnic, and it was a hit. Everyone got their own little flag of dessert, and there was no fighting over the last scoop.
Serving & Storage Suggestions
This trifle is best served cold, straight from the fridge. The contrast between the cold cream and the room-temperature berries is part of what makes it so satisfying. If you’ve chilled it overnight, let it sit on the counter for 10-15 minutes before serving to take the chill off slightly—it lets the flavors open up.
What to Serve With It: This trifle is rich enough to stand alone, but it pairs beautifully with a cup of coffee or iced tea. If you’re serving it after a big Labor Day barbecue, keep it light. I like to serve it alongside crispy air fryer corn on the cob with elote seasoning for a sweet-savory combo that screams summer. Or, if you’re going for a full red, white, and blue spread, pair it with this no-bake red white and blue icebox cake for a double dessert situation that will blow everyone’s mind.
Storage: Cover the trifle tightly with plastic wrap or a lid and store it in the refrigerator for up to 3 days. After the first day, the cake will be very soft, but it’s still delicious—almost like a berry pudding. I actually prefer it on day two. Don’t freeze this dessert; the cream will separate and the berries will turn to mush when thawed.
Reheating: You don’t reheat a trifle. It’s a cold dessert through and through. If you have leftovers that have been sitting out for more than 2 hours, unfortunately, they need to be tossed. Food safety first.
Leftover Ideas: If you have leftover trifle (unlikely, but possible), you can swirl it into yogurt or oatmeal for a fancy breakfast. Or spoon it over vanilla ice cream for an extra-indulgent sundae. I’ve also used leftover trifle as a filling for crepes—it’s amazing.
Nutritional Information & Benefits
While this trifle is definitely a treat, it does have some redeeming qualities. Here’s the estimated nutritional breakdown for one serving (based on 12 servings):
- Calories: 320
- Total Fat: 18g
- Saturated Fat: 11g
- Cholesterol: 65mg
- Sodium: 210mg
- Total Carbohydrates: 36g
- Dietary Fiber: 2g
- Sugars: 24g
- Protein: 4g
Health Benefits: The berries are the real stars here. Strawberries are packed with vitamin C and antioxidants, while blueberries are known for their brain-boosting properties. Both are low in calories and high in fiber, which helps balance out the richness of the cream. The cream cheese adds a small amount of protein and calcium. Is this a health food? No. But it’s a dessert made with real ingredients, and that counts for something.
Dietary Considerations: This recipe contains dairy and gluten (from the cake). For a dairy-free version, use plant-based alternatives. For a gluten-free version, use a gluten-free cake. The recipe is naturally nut-free (unless you add almond extract, which is safe for most nut allergies), egg-free (if using a store-bought cake that doesn’t contain eggs—check labels), and vegetarian.
I’m not a nutritionist, but I believe in balance. This trifle is a celebration dessert, meant to be enjoyed in good company. One serving won’t derail your health goals, and the fresh fruit adds a genuine nutritional boost. Eat it, enjoy it, and don’t overthink it.
Conclusion
This Best Red White and Blue Berry Trifle for Labor Day is more than just a pretty dessert—it’s a celebration of summer’s best flavors in one easy, no-bake dish. The layers of tender cake, tangy cream, and juicy berries come together to create something that feels special without requiring hours in the kitchen. It’s the kind of dessert that makes you look like a hero when all you really did was layer things in a bowl.
I love this recipe because it’s forgiving, flexible, and always delivers. You can customize it based on what’s in season, what’s in your fridge, or what your guests need. It’s a dessert that adapts to you, not the other way around. And honestly? That’s the best kind of recipe to have in your back pocket.
If you make this trifle, I’d love to hear about it. Leave a comment below and tell me how it turned out—did you stick with the classic version, or did you try one of the variations? Share your photos, your tweaks, your happy accidents. That’s what cooking is all about. And if you’re looking for more summer dessert inspiration, check out this fluffy strawberry shortcake recipe—it’s another no-fuss favorite that disappears fast.
Happy Labor Day, friends. Go make something beautiful.
Frequently Asked Questions
Can I use frozen berries instead of fresh?
Yes, but thaw them completely and drain off the excess liquid before macerating. Frozen berries release more water than fresh, which can make the trifle watery. I recommend fresh berries for the best texture and flavor, but frozen work in a pinch.
How far in advance can I make this trifle?
You can assemble it up to 24 hours before serving. In fact, it tastes better after a few hours in the fridge. After 24 hours, the cake starts to get too soft, so aim for the same day or the day before.
Can I use a different type of cake?
Absolutely. Angel food cake, pound cake, vanilla cake, lemon cake, or even brownie bites all work. Just cut them into uniform cubes and adjust the sweetness of the cream if needed. A sweeter cake might need less sugar in the cream.
How do I keep the cream from deflating?
Make sure your cream is very cold, and don’t over-whip it. If you’re worried about stability, you can add a tablespoon of instant vanilla pudding mix to the cream before whipping. It helps stabilize the structure without changing the flavor.
Can I make this trifle dairy-free?
Yes. Use full-fat coconut cream (chilled and whipped) or a dairy-free whipped topping. Use a plant-based cream cheese alternative. The texture will be slightly different, but it’s still delicious. Just make sure all your ingredients are certified dairy-free if that’s a concern.
Pin This Recipe!

Best Red White and Blue Berry Trifle for Labor Day

A no-bake, stress-free dessert featuring layers of tender cake, tangy cream cheese whipped cream, and fresh macerated berries. Perfect for Labor Day celebrations and summer gatherings.
- Prep Time: 20 minutes
- Cook Time: 0 minutes
- Total Time: 2 hours 20 minutes (includes chilling)
- Yield: 12-14 servings 1x
- Category: Dessert
- Cuisine: American
Ingredients
- 2 cups heavy whipping cream, cold
- 8 ounces cream cheese, softened to room temperature
- 1/2 cup powdered sugar
- 1 teaspoon vanilla extract
- 1/4 teaspoon almond extract (optional)
- 2 cups fresh strawberries, hulled and sliced
- 2 cups fresh blueberries
- 1 cup fresh raspberries (optional)
- 2 tablespoons granulated sugar
- 1 tablespoon fresh lemon juice
- 1 store-bought angel food cake (about 12 ounces) or 1 pound cake (about 12 ounces), cut into 1-inch cubes
- Fresh mint leaves (optional, for garnish)
- Extra berries for the top layer
- White chocolate shavings (optional)
Instructions
- In a medium bowl, combine sliced strawberries, blueberries, and raspberries (if using). Sprinkle with 2 tablespoons granulated sugar and 1 tablespoon fresh lemon juice. Gently toss and let sit at room temperature for 15-20 minutes to macerate.
- In a large mixing bowl, beat softened cream cheese with an electric mixer on medium speed until smooth and fluffy, about 2 minutes. Add powdered sugar, vanilla extract, and almond extract (if using); beat until combined, about 1 minute.
- With mixer running on low, slowly pour in cold heavy cream. Increase speed to medium-high and beat until stiff peaks form, about 3-4 minutes. Be careful not to over-whip.
- Cut angel food cake or pound cake into 1-inch cubes.
- In a large trifle dish (at least 4-quart capacity), layer one-third of the cake cubes, then one-third of the macerated berries (with some juice), then one-third of the cream cheese whipped cream. Repeat layers twice more, ending with cream on top. Reserve a handful of berries for garnish.
- Garnish the top with reserved berries, mint leaves, and white chocolate shavings if desired.
- Cover loosely with plastic wrap and refrigerate for at least 2 hours, or up to 24 hours, before serving.
Notes
For best results, use cold cream and chill the bowl and beaters if your kitchen is warm. Macerating the berries is essential for flavor and texture. The trifle improves overnight but should not be chilled for more than 24 hours. For a dairy-free version, use full-fat coconut cream and plant-based cream cheese. For a gluten-free version, use a gluten-free cake.
Nutrition
- Serving Size: 1 serving (based on
- Calories: 320
- Sugar: 24
- Sodium: 210
- Fat: 18
- Saturated Fat: 11
- Carbohydrates: 36
- Fiber: 2
- Protein: 4
Keywords: trifle, berry trifle, red white and blue, Labor Day, no-bake dessert, summer dessert, angel food cake, cream cheese whipped cream


