I burned this ground beef and rice skillet three times before I figured out what I was doing wrong. Not a little burnt, either—I’m talking about that acrid smell that lingers in your kitchen for days, the kind where you have to explain to your family that no, dinner isn’t ruined, but maybe order pizza. The first time, I walked away to check my email and came back to a smoky kitchen. The second time, I thought I could rush it by cranking the heat. The third time, I just had the wrong pan. I almost gave up on the whole idea of a one-pan beef and rice dinner entirely.
But here’s the thing—I kept coming back to it because when it works, it really works. There’s something about that combination of savory ground beef, tender rice, and those little bits of onion and garlic that just hits the spot after a long day. It’s the kind of meal that doesn’t ask for much from you but gives back everything. No fancy plating, no complicated techniques—just honest, filling food that makes you feel like you’ve got your act together even when you definitely don’t.
What finally clicked for me was realizing this isn’t a recipe you can rush or ignore. It needs your attention for about twenty minutes, and then it rewards you with something that tastes like you spent way more effort than you actually did. That’s the kind of trade-off I can get behind.
Why You’ll Love This Recipe
I’ve tested this ground beef and rice skillet more times than I care to count, and let me tell you—it’s the version I keep coming back to. Not because it’s fancy, but because it actually works every single time. Here’s why I think you’ll feel the same way:
- Quick & Easy: From start to finish, you’re looking at about 30 minutes. That’s less time than it takes to decide what to order for delivery.
- Simple Ingredients: Ground beef, rice, onion, garlic, broth, and a few pantry spices. No trips to specialty stores, no hunting down obscure ingredients.
- Perfect for Busy Weeknights: This is the recipe you pull out on Tuesday when you’ve got soccer practice, homework battles, and absolutely zero energy left.
- Crowd-Pleaser: My kids, who usually pick apart anything with “too many ingredients,” clean their plates with this one. Even my picky eater gives it two thumbs up.
- Unbelievably Satisfying: The rice soaks up all that beefy, savory goodness, and every bite feels like a warm hug. It’s comfort food that doesn’t weigh you down.
What makes this recipe different from all the other versions out there? It’s the technique. Instead of cooking the rice separately and mixing it in at the end (which always leaves you with dry rice and sad flavor), I cook the rice right in the same pan with the beef and broth. That means every single grain absorbs all that delicious flavor as it cooks. No bland bites, no separate pots to wash. It’s not just another version—it’s the version that actually delivers on its promise.
Honestly, this is the kind of meal that makes you close your eyes after the first bite. Not because it’s fancy, but because it tastes like exactly what you needed after a long day. It’s comfort food reimagined—simpler, faster, and with the same soul-soothing satisfaction that makes you feel like everything’s going to be okay.
What Ingredients You Will Need
This recipe uses straightforward ingredients that you probably already have in your kitchen. The magic happens when they come together in that skillet, so let’s talk about each one and why it matters.
- 1 pound ground beef (80/20): I prefer 80/20 because it has enough fat to keep the meat juicy and flavorful without being greasy. If you use leaner beef (like 93/7), you might need to add a tablespoon of oil to prevent it from drying out. I usually grab whatever’s on sale at my local grocery store, but I’ve had great results with both store-brand and organic options.
- 1 cup long-grain white rice, uncooked: Long-grain rice works best here because it stays fluffy and separate as it cooks. Basmati or jasmine rice are both excellent choices—they add a subtle fragrance that complements the beef beautifully. Avoid short-grain or sushi rice, which can turn gummy. I’ve tried brown rice too, but it needs about 20 extra minutes of cooking time and more liquid, so stick with white for the quick version.
- 1 medium yellow onion, diced: Yellow onions have the best balance of sweetness and sharpness for this dish. Dice them fairly small so they melt into the beef as it cooks. If you’re in a rush, you can use frozen diced onions—just add them straight to the pan without thawing.
- 3 cloves garlic, minced: Fresh garlic makes a real difference here. I know, I know, jarred garlic is convenient, but trust me on this one—fresh garlic adds a punch that pre-minced stuff just can’t match. If that’s all you have, use about 1 teaspoon.
- 2 cups beef broth: This is what the rice cooks in, so use a good-quality broth. I like Swanson or Kitchen Basics, but any brand works. Low-sodium is fine—you can always add more salt later. If you’re out of beef broth, chicken broth works in a pinch, though the flavor will be a bit lighter.
- 1 can (14.5 ounces) diced tomatoes, drained: The tomatoes add acidity and a little bit of sweetness that balances the richness of the beef. I prefer fire-roasted diced tomatoes for extra smoky flavor, but regular ones are perfectly fine. Drain them well so you don’t end up with soupy rice.
- 1 teaspoon paprika: Paprika adds a warm, slightly sweet flavor and gives the dish a beautiful color. Smoked paprika is amazing here if you have it—it adds a subtle smokiness that makes the whole skillet taste like it’s been cooking all day.
- 1 teaspoon dried oregano: Oregano brings an earthy, slightly peppery note that pairs beautifully with beef. Italian seasoning works as a substitute if that’s what you have on hand.
- ½ teaspoon salt: I start with this amount and adjust at the end. Different broths have different salt levels, so taste before you add more.
- ¼ teaspoon black pepper: Freshly ground is always better, but pre-ground works too.
- 2 tablespoons olive oil: For browning the beef and sautéing the vegetables. Any neutral oil works—vegetable, canola, or avocado oil are all fine.
- Optional garnishes: Fresh parsley, chopped green onions, or shredded cheddar cheese. These aren’t essential, but they add a nice finishing touch.
Equipment Needed
You don’t need a fancy kitchen to make this ground beef and rice skillet. Here’s what you’ll actually use:
- A large skillet or Dutch oven (12-inch): This is the most important piece of equipment. You need a pan with a tight-fitting lid and enough surface area to cook everything evenly. A 12-inch skillet is ideal—anything smaller and you’ll overcrowd the pan, which means the beef steams instead of browning. I use my trusty cast-iron skillet, but a stainless steel or non-stick pan works just as well. If you only have a smaller pan, cook the beef in batches.
- A wooden spoon or spatula: For breaking up the ground beef as it cooks. A wooden spoon gives you good leverage and won’t scratch your pan.
- A sharp knife and cutting board: For dicing the onion and mincing the garlic. A decent chef’s knife makes this job so much faster.
- Measuring cups and spoons: For the rice, broth, and spices. I’ve learned the hard way that eyeballing the rice-to-liquid ratio leads to disaster.
- A colander: For draining the diced tomatoes (if you’re using canned).
That’s it. No food processor, no fancy gadgets—just basic kitchen tools that you probably already own. If you don’t have a lid that fits your skillet, you can use a piece of aluminum foil tightly crimped around the edges. I’ve done it more times than I’d like to admit, and it works perfectly.
Preparation Method
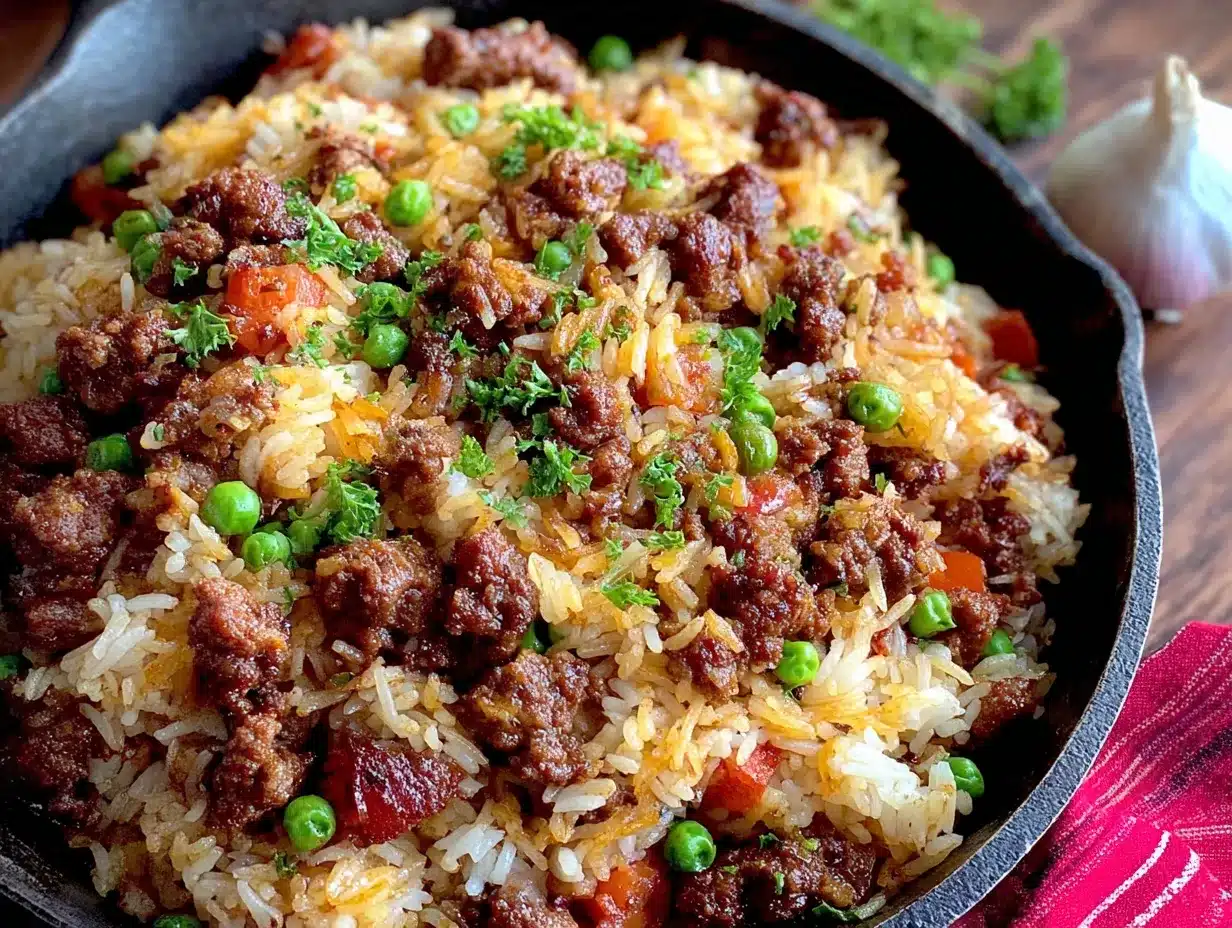
Let’s get cooking. I’ve broken this down into clear steps so you can follow along without any confusion. Trust me, if I can get this right after three failed attempts, you’ve got this.
- Heat the oil in your skillet over medium-high heat. Give it about a minute to get hot—you want it shimmering but not smoking. If you see wisps of smoke, your heat is too high. I learned this the hard way when I set off my smoke detector on attempt number two.
- Add the ground beef and break it apart with your spoon. Let it cook without moving it for about 2-3 minutes so it gets a nice brown crust on one side. This is where the flavor comes from. Then stir and continue cooking until it’s fully browned, about 5-6 minutes total. Don’t rush this step—undercooked beef that’s still pink in spots isn’t safe, and it won’t taste as good either.
- Remove the beef from the skillet with a slotted spoon and set it aside. Leave about 1 tablespoon of fat in the pan. If there’s too much, pour some off. If there’s not enough (which can happen with lean beef), add a splash more oil.
- Add the diced onion to the skillet and cook over medium heat for 3-4 minutes. Stir occasionally. You want the onion to soften and become translucent, but not brown. If it starts to brown too quickly, turn the heat down. The onion should smell sweet and fragrant, not burnt.
- Add the minced garlic and cook for 30 seconds. Garlic burns fast, so keep stirring. You’ll know it’s ready when you can smell it—that warm, pungent aroma that makes your kitchen smell amazing.
- Add the rice, paprika, oregano, salt, and pepper to the skillet. Stir everything together and cook for about 1 minute. This toasts the rice slightly and coats it in all those flavors. You’ll notice the rice starts to smell nutty and fragrant.
- Pour in the beef broth and the drained diced tomatoes. Stir to combine, scraping up any browned bits from the bottom of the pan. Those bits are pure gold—they’re called fond, and they’re packed with flavor.
- Bring the mixture to a boil. Once it’s bubbling, reduce the heat to low, cover the skillet with a tight-fitting lid, and let it simmer for 18-20 minutes. Do not lift the lid during this time—I know it’s tempting, but every time you lift the lid, you let steam escape, and that steam is what cooks the rice. Set a timer and walk away.
- After 18 minutes, check the rice. It should be tender and have absorbed most of the liquid. If it’s still crunchy, cover it and cook for another 2-3 minutes. If it’s done but there’s still liquid, remove the lid and let it cook for another minute or two to evaporate the excess.
- Return the cooked ground beef to the skillet. Stir everything together gently, making sure the beef is evenly distributed. Taste and adjust seasoning—add more salt or pepper if needed.
- Remove from heat and let it rest for 5 minutes. This resting time allows the flavors to meld together and the rice to firm up slightly. I know you’re hungry, but trust me on this one.
And you’re done. See? That wasn’t so bad. The whole process takes about 30 minutes from start to finish, and you’ve only got one pan to wash. That’s a win in my book.
Cooking Tips & Techniques
After burning this dish more times than I’d like to admit, I’ve picked up a few tricks that make all the difference. Here are the ones I wish someone had told me from the start:
Don’t skip browning the beef properly. I used to rush this step because I wanted to get dinner on the table faster. But here’s the thing—browning isn’t just about cooking the meat. It’s about creating flavor through the Maillard reaction, which is just a fancy way of saying that golden-brown crust equals deliciousness. Let the beef sit in the pan without stirring for a few minutes. You want those crispy, caramelized bits. They’re the foundation of the whole dish.
Use the right rice-to-liquid ratio. This is where I messed up the most in the beginning. Too much liquid and you get mushy, sticky rice. Too little and you end up with crunchy, undercooked grains. For long-grain white rice, the magic ratio is 1 cup of rice to 2 cups of liquid. Since we’re using 2 cups of beef broth plus the moisture from the tomatoes, it works out perfectly. If you’re using a different type of rice, adjust accordingly—brown rice needs more liquid and longer cooking time.
Resist the urge to peek. I know, I know—it’s hard. But every time you lift that lid, you’re letting out steam, and steam is what cooks the rice. If you absolutely have to check, do it quickly and put the lid back on immediately. Better yet, use a glass lid if you have one. That way you can see without disturbing anything.
Let it rest before serving. This is a lesson I learned from making risotto. Giving the dish a few minutes off the heat allows the rice to absorb any remaining liquid and firm up slightly. The result is a better texture and more concentrated flavor. Plus, it gives you time to set the table or pour yourself a glass of water.
Toast the rice for extra flavor. That 1-minute step where you cook the rice with the spices before adding the liquid? Don’t skip it. Toasting the rice adds a subtle nuttiness that elevates the whole dish. It’s a small step that makes a big difference.
Variations & Adaptations
One of the best things about this ground beef and rice skillet is how adaptable it is. I’ve played around with different versions, and here are some of my favorites:
Mexican-Style Skillet: Swap the oregano for 1 teaspoon of cumin and add ½ teaspoon of chili powder. Use fire-roasted diced tomatoes and stir in a can of drained black beans and a cup of frozen corn when you add the beef back in. Top with shredded cheese, fresh cilantro, and a squeeze of lime juice. This version is amazing with a dollop of sour cream.
Italian-Style Skillet: Use Italian seasoning instead of the oregano and paprika. Add ½ cup of grated Parmesan cheese when you stir the beef back in. Top with fresh basil and more Parmesan. If you have it, a splash of balsamic vinegar at the end adds a lovely tangy note.
Low-Carb Version: Replace the rice with cauliflower rice. You’ll need about 4 cups of frozen cauliflower rice. Add it in step 8 and cook for only 5-7 minutes, since cauliflower rice cooks much faster than regular rice. The texture is different, but it’s still satisfying and flavorful. I’ve made this for friends who are watching their carbs, and they didn’t even miss the rice.
Vegetarian Version: Swap the ground beef for a plant-based ground meat substitute or cooked lentils. Use vegetable broth instead of beef broth. The cooking time stays about the same. I’ve used both Beyond Meat and lentils, and honestly, the lentil version is my favorite—it adds a nice earthy flavor and extra fiber.
Spicy Version: Add ½ teaspoon of red pepper flakes along with the other spices. Or stir in a chopped jalapeño with the onion. If you really want heat, add a dash of cayenne pepper or your favorite hot sauce at the end. My husband loves this version, though I have to admit it’s a bit too hot for me.
Cheesy Version: Stir in 1 cup of shredded cheddar or Monterey Jack cheese when you add the beef back in. Let it melt into the rice for a creamy, indulgent finish. This is my kids’ absolute favorite version. Sometimes I’ll sprinkle extra cheese on top and pop the skillet under the broiler for a minute to get it bubbly and golden.
Serving & Storage Suggestions
This ground beef and rice skillet is incredibly versatile when it comes to serving. Here’s how I like to enjoy it:
Serving Temperature: Serve it hot, straight from the skillet. That’s the beauty of a one-pan meal—it stays warm for a surprisingly long time at the table. If you’re serving a crowd, you can keep it warm in a slow cooker on the “keep warm” setting.
Presentation: I like to serve it in bowls, almost like a hearty rice bowl. Top it with fresh parsley or chopped green onions for a pop of color. A sprinkle of shredded cheese and a dollop of sour cream never hurts either. If you’re feeling fancy, serve it with warm tortillas or crusty bread on the side.
Complementary Dishes: This skillet pairs beautifully with a simple side salad dressed with lemon vinaigrette. The acidity cuts through the richness of the beef and rice. If you want to keep it all in one pan, serve it with a side of steamed green beans or roasted broccoli. I also love serving it alongside some crispy air fryer corn on the cob with elote seasoning—the sweet corn and the savory beef skillet are a match made in heaven.
Storage: Leftovers keep well in the refrigerator for up to 4 days. Store them in an airtight container. The rice will absorb more liquid as it sits, so the texture will be slightly softer the next day, but the flavor actually gets better. I’ve been known to make a double batch just for leftovers.
Reheating: The best way to reheat this is in a skillet over medium heat with a splash of water or broth. Stir occasionally until heated through, about 5 minutes. You can also microwave it in 30-second bursts, stirring between each. If it seems dry, add a tablespoon of water before reheating. The flavors continue to develop overnight, so leftovers often taste even better than the first serving.
Freezing: This dish freezes surprisingly well. Let it cool completely, then transfer it to freezer-safe containers or zip-top bags. It will keep for up to 3 months. Thaw overnight in the refrigerator and reheat as directed above. I like to freeze individual portions for quick lunches—just grab one from the freezer in the morning and it’s ready to reheat by lunchtime.
Nutritional Information & Benefits
Here’s a rough estimate of the nutritional content per serving (based on 4 servings):
- Calories: Approximately 480
- Protein: 28 grams
- Carbohydrates: 45 grams
- Fat: 18 grams
- Fiber: 3 grams
- Iron: 25% of the Daily Value
- Vitamin C: 10% of the Daily Value
Health Benefits: This dish is a good source of protein, which helps keep you full and supports muscle health. The beef provides iron, which is essential for energy and oxygen transport in your body. The tomatoes offer vitamin C and lycopene, an antioxidant that supports heart health. And the rice provides carbohydrates for sustained energy throughout the day.
Dietary Considerations: This recipe is naturally gluten-free (just make sure your broth is certified gluten-free if needed). It’s also nut-free and egg-free. For a lower-carb option, use cauliflower rice as mentioned in the variations section. For a lower-fat version, use lean ground beef and drain off any excess fat after browning.
Potential Allergens: This recipe contains no common allergens, but always check your broth and spice blends for any hidden ingredients if you have specific concerns.
I’m not a nutritionist, so take these numbers as rough estimates. But I do feel good about serving this to my family—it’s a balanced meal with protein, carbs, and veggies all in one pan. That’s a win in my book.
FAQs
Can I use brown rice instead of white rice?
Yes, but you’ll need to adjust the cooking time and liquid. Brown rice typically requires about 40-45 minutes of cooking time and 2½ cups of liquid per cup of rice. Add the extra ½ cup of broth and cook covered for about 40 minutes, checking for doneness. The texture will be chewier and nuttier, which some people prefer.
Can I make this in a slow cooker?
You can, but the texture will be different. Brown the beef and onions in a skillet first, then transfer everything to the slow cooker with the remaining ingredients. Cook on low for 4-5 hours or on high for 2-3 hours. The rice will be softer and more porridge-like, but it’s still delicious. If you prefer firmer rice, add the rice during the last hour of cooking.
Can I use ground turkey or chicken instead of beef?
Absolutely. Ground turkey or chicken work well, though they’re leaner so you might need to add a tablespoon of oil to prevent sticking. The flavor will be milder, so consider adding a bit more seasoning. I’ve made this with ground turkey and added an extra teaspoon of paprika and a dash of Worcestershire sauce to boost the flavor.
Why is my rice mushy?
Mushy rice usually means too much liquid or overcooking. Make sure you’re using the right rice-to-liquid ratio (1 cup rice to 2 cups liquid) and that your lid fits tightly so steam doesn’t escape. Also, don’t stir the rice while it’s cooking—stirring releases starch and makes the rice gummy. If you end up with mushy rice anyway, try cooking it uncovered for a few minutes to let some moisture evaporate.
Can I add vegetables to this dish?
Yes, and I often do. Frozen peas and carrots are my go-to—add them in the last 5 minutes of cooking so they heat through but don’t get mushy. Diced bell peppers can be added with the onion. Chopped spinach or kale can be stirred in at the end until wilted. Adding vegetables not only boosts the nutritional value but also adds color and texture. If you’re looking for more ideas on packing veggies into meals, check out this healthy bento box lunch guide with hidden veggie recipes for inspiration.
Conclusion
This quick ground beef and rice skillet has become a staple in my kitchen for a reason. It’s fast, it’s forgiving, and it delivers every single time. After those first three burnt attempts, I honestly didn’t think I’d ever get it right. But once I figured out the technique—proper browning, the right liquid ratio, and the patience to let it cook undisturbed—it became my go-to for those nights when I need dinner on the table without a lot of fuss.
What I love most about this recipe is how customizable it is. You can make it spicy, cheesy, loaded with veggies, or keep it simple. It works for picky kids, busy parents, and anyone who just wants a satisfying meal without spending hours in the kitchen. And honestly, that’s the kind of recipe worth keeping close.
I’d love to hear how yours turns out. Did you add your own twist? Did your family love it? Drop a comment below and let me know—I read every single one. And if you’re looking for more quick dinner ideas, this healthy 30-minute ground beef and sweet potato hash is another favorite in our house. Happy cooking, friends—you’ve got this.
Pin This Recipe!

Best Quick Ground Beef and Rice Skillet Recipe

A quick and easy one-pan ground beef and rice skillet that’s perfect for busy weeknights. This savory, satisfying dish cooks in about 30 minutes with simple ingredients and delivers comforting flavor every time.
- Prep Time: 10 minutes
- Cook Time: 20 minutes
- Total Time: 30 minutes
- Yield: 4 servings 1x
- Category: Main Course
- Cuisine: American
Ingredients
- 1 pound ground beef (80/20)
- 1 cup long-grain white rice, uncooked
- 1 medium yellow onion, diced
- 3 cloves garlic, minced
- 2 cups beef broth
- 1 can (14.5 ounces) diced tomatoes, drained
- 1 teaspoon paprika
- 1 teaspoon dried oregano
- ½ teaspoon salt
- ¼ teaspoon black pepper
- 2 tablespoons olive oil
- Optional garnishes: fresh parsley, chopped green onions, or shredded cheddar cheese
Instructions
- Heat the oil in your skillet over medium-high heat until shimmering.
- Add the ground beef and break it apart with your spoon. Let it cook without moving for 2-3 minutes to get a brown crust, then stir and continue cooking until fully browned, about 5-6 minutes total.
- Remove the beef from the skillet with a slotted spoon and set aside. Leave about 1 tablespoon of fat in the pan.
- Add the diced onion to the skillet and cook over medium heat for 3-4 minutes until softened and translucent.
- Add the minced garlic and cook for 30 seconds, stirring constantly.
- Add the rice, paprika, oregano, salt, and pepper to the skillet. Stir and cook for about 1 minute to toast the rice.
- Pour in the beef broth and the drained diced tomatoes. Stir to combine, scraping up any browned bits from the bottom of the pan.
- Bring the mixture to a boil, then reduce heat to low, cover with a tight-fitting lid, and simmer for 18-20 minutes. Do not lift the lid during this time.
- After 18 minutes, check the rice. It should be tender and have absorbed most of the liquid. If still crunchy, cover and cook for another 2-3 minutes. If done but there’s still liquid, remove the lid and cook for another minute or two.
- Return the cooked ground beef to the skillet. Stir gently to combine. Taste and adjust seasoning if needed.
- Remove from heat and let it rest for 5 minutes before serving.
Notes
Don’t skip browning the beef properly for maximum flavor. Use the right rice-to-liquid ratio (1 cup rice to 2 cups liquid). Resist the urge to lift the lid while the rice cooks. Let the dish rest for 5 minutes before serving. For variations, try Mexican-style (add cumin, chili powder, black beans, corn), Italian-style (use Italian seasoning, Parmesan), low-carb (use cauliflower rice), vegetarian (use plant-based meat or lentils), spicy (add red pepper flakes or jalapeño), or cheesy (stir in shredded cheese).
Nutrition
- Serving Size: 1 serving
- Calories: 480
- Sugar: 5
- Sodium: 800
- Fat: 18
- Saturated Fat: 6
- Carbohydrates: 45
- Fiber: 3
- Protein: 28
Keywords: ground beef, rice, skillet, one-pan, quick dinner, weeknight meal, comfort food


