My neighbor Sarah asked why I couldn’t just put the brie in the oven whole and let people dig in. I was mid-sentence explaining why that wouldn’t work—something about even melting and presentation—when I stopped. She was holding a wheel of triple-cream brie, looking at me like I was overcomplicating things. And honestly? I was.
That was two Octobers ago, during our annual block party planning session. I had been stress-testing charcuterie board setups for weeks, convinced the perfect fall charcuterie board needed each element precisely placed. Sarah grabbed a baking dish, tossed the brie in, and said, “Let’s just try it.” Twenty minutes later, we were scooping warm, gooey cheese onto apple slices with our fingers, and I had to admit—she was right. The messy, communal approach made more sense than anything I’d been planning.
That moment changed how I think about entertaining in autumn. There’s something about the combination of Honeycrisp apples and warm brie that just works—the tart crunch cutting through that creamy richness in a way that feels like fall in every bite. I’ve refined that board over the past couple seasons, adding roasted nuts here, swapping in seasonal fruits there. But the core idea remains the same: this isn’t about perfect placement. It’s about putting good things on a board and letting people help themselves.
Maybe you’ve been there—overthinking a dinner party, stressing about presentation, forgetting that the whole point is actually enjoying the company. This board fixed that for me. And honestly, it’s become my go-to for everything from Thanksgiving appetizers to casual Sunday football gatherings. Let me show you how to build one that’ll have everyone hovering around your kitchen island.
Why You’ll Love This Recipe
This isn’t just another cheese board. After testing dozens of combinations across multiple seasons, I can tell you this version hits different. Here’s why it keeps showing up at my table:
- Comes together in under 15 minutes — No complicated cooking or fussy assembly. Most of the time is just letting the brie warm up in the oven while you arrange everything else.
- Simple ingredients, big impact — You can find everything at a regular grocery store. No specialty cheese shops or fancy online orders required.
- Perfect for fall gatherings — Whether it’s a Halloween party, Friendsgiving, or just a cozy Saturday night, this board screams autumn without trying too hard.
- Crowd-pleaser status — I’ve watched people who claim they don’t like brie go back for thirds. The warm, melty texture changes minds.
- Unbelievably delicious — The combination of sweet Honeycrisp apples, creamy brie, salty prosciutto, and crunchy candied pecans creates this flavor symphony that’s hard to beat.
What makes this board different from the dozens you’ll find online is the technique of warming the whole brie wheel. Most recipes have you slice it or bake it with toppings. But letting it soften in the oven whole creates this perfect, dippable texture that works with everything on the board. Plus, the contrast between warm cheese and cold, crisp apple slices? Chef’s kiss.
This is the kind of appetizer that makes people close their eyes after the first bite. It’s comfort food dressed up for company—elevated enough to impress, simple enough to actually enjoy making. For those nights when you want to feed people well without spending all day in the kitchen, this is your answer.
What Ingredients You Will Need
This recipe uses simple, seasonal ingredients to create something that feels special without the fuss. Most of these are pantry staples or easy fall finds at any grocery store.
For the Cheese & Protein
- 1 (8-ounce) wheel of brie — Go for a good quality double or triple-cream brie. I prefer the brand President for consistent melting, but any wheel will work. Look for one that’s slightly soft when you press it—that means it’s ripe and ready.
- 4 ounces prosciutto — Thinly sliced, ideally. The saltiness balances the sweet apples perfectly. You can substitute with soppressata or salami if prosciutto isn’t your thing.
- 4 ounces aged cheddar — Sharp white cheddar adds a nice contrast to the creamy brie. Cube it or slice it thin.
For the Fruits
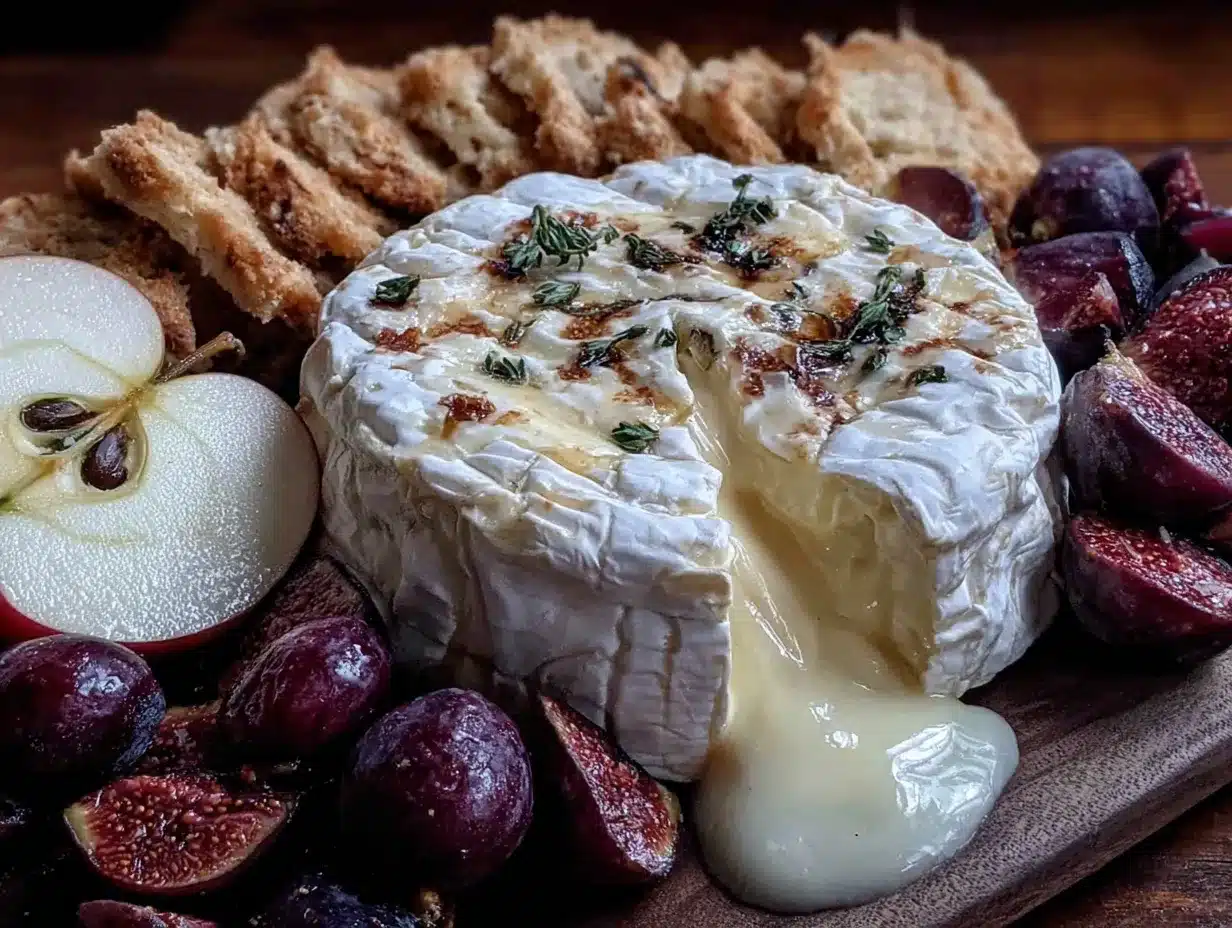
- 2 large Honeycrisp apples — These are non-negotiable in my book. Their sweetness and crunch hold up against the rich cheese. Slice them right before serving so they don’t brown. (A little lemon juice helps if you’re prepping ahead.)
- 1 cup seedless red grapes — Small clusters add color and a pop of sweetness.
- 1/2 cup dried figs or dates — Optional but amazing. Their chewy texture adds another layer to the board.
For the Crunch & Spread
- 1/2 cup candied pecans — Store-bought works great, but homemade is even better. I’ll share my quick version in the tips section.
- 1/4 cup honey — Local honey if you can find it. A drizzle over the warm brie right before serving is magic.
- 1/3 cup fig jam or apple butter — Either works beautifully. The fig jam is slightly more traditional, but apple butter screams fall.
- Crackers and bread — About 20-30 crackers (I like water crackers and seeded crackers) plus a sliced baguette. Crostini work great too.
Optional Garnishes
- Fresh rosemary sprigs — For that rustic fall look. Plus, the aroma is lovely.
- Pomegranate seeds — If they’re in season, these add beautiful color and a tart pop.
- Flaky sea salt — A sprinkle over the brie before serving elevates everything.
For substitutions, you can swap the brie for camembert if needed—it melts similarly. Use almond flour crackers for a gluten-free option, or rice crackers if that’s your preference. The apples can be replaced with pears in a pinch, though Honeycrisp really are the star here.
Equipment Needed
You don’t need much for this board, which is part of its charm. Here’s what I use:
- A large wooden board or platter — About 12×18 inches is ideal. A slate board or marble slab works too. I’ve even used a clean cutting board in a pinch.
- Small oven-safe dish — For warming the brie. A ramekin or small baking dish works perfectly.
- Paring knife and cheese knife — One for slicing apples, one for serving the brie. A good serrated knife helps with the baguette.
- Small bowls — For the jam, honey, and nuts. Keeps everything contained and pretty.
- Cheese spreader — Not essential, but nice for guests to use on the warm brie.
If you don’t have a wooden board, a large baking sheet lined with parchment paper works surprisingly well. I’ve done it for parties and no one noticed. The key is just having enough surface area to spread everything out.
Preparation Method
Let’s build this board step by step. Trust me, it’s easier than you think.
- Preheat your oven to 350°F (175°C). While it’s heating, take the brie out of the fridge. You want it to start coming to room temperature—about 15 minutes on the counter helps it warm more evenly.
- Place the brie in your oven-safe dish. Leave the rind on—it’s edible and helps the cheese hold its shape. Bake for 12-15 minutes, until the cheese is soft and slightly puffed. You’ll know it’s ready when you press the center gently and it gives way like a pillow. Don’t overbake it, or the cheese will start to leak out of the rind. I learned this the hard way after a particularly runny disaster last Thanksgiving.
- While the brie bakes, prep your fruits. Core the Honeycrisp apples and slice them into thin wedges—about 8 slices per apple. Toss them in a bowl with a squeeze of lemon juice if you’re worried about browning. Rinse the grapes and pat them dry. If you’re using dried figs, slice them in half lengthwise.
- Arrange the crackers and bread. Start by placing your small bowls on the board—one for the fig jam or apple butter, one for the honey, one for the candied pecans. Then fan out the crackers and baguette slices around them. Leave a clear space in the center or slightly off-center for the warm brie.
- Layer the meats and cheeses. Fold the prosciutto slices into loose ribbons or rosettes and place them in small clusters. Cube the aged cheddar and arrange it in a little pile. The goal is visual variety—different heights and textures make the board look abundant.
- Add the fruits. Scatter the apple slices and grape clusters around the board, filling in gaps. Tuck the dried figs in between the cheese and meat piles. Don’t overcrowd—you want people to be able to grab things without knocking everything over.
- Remove the brie from the oven. Carefully transfer the dish to the center of your board. Use oven mitts—that dish is hot. Drizzle the warm brie with honey and sprinkle with flaky sea salt and a few fresh rosemary leaves if you’re using them.
- Finish with garnishes. Sprinkle pomegranate seeds over the board if you have them. Add a few extra rosemary sprigs for that fall aesthetic. Step back and look at your creation—it should feel abundant but not chaotic.
- Serve immediately. The brie will stay warm for about 20-30 minutes. After that, it’s still delicious at room temperature—just not as melty. Place a cheese spreader next to the brie so guests can scoop it onto crackers or apple slices.
One thing I’ve learned: don’t stress about perfect placement. The beauty of a charcuterie board is that it looks gorgeous even when it’s a little messy. That’s part of the appeal—it feels approachable, not precious.
Cooking Tips & Techniques
After making this board more times than I can count, I’ve picked up a few tricks that make a real difference.
Don’t skip the room temperature step. I know it’s tempting to throw the brie straight from the fridge into the oven, but letting it sit out for 15 minutes helps it warm evenly. Cold brie straight into heat can lead to a weird texture—the outside gets too soft while the center stays firm. Trust me on this one.
Slice apples right before serving. Honeycrisp apples are crisp and juicy, which is exactly what you want. But they brown fast. Slice them last, toss them with a tiny bit of lemon juice if you’re prepping ahead, and arrange them just before the brie comes out of the oven. Your guests will thank you.
Make your own candied pecans. It’s embarrassingly easy and tastes so much better than store-bought. Just toss 1 cup of pecans with 2 tablespoons of maple syrup, a pinch of cinnamon, and a pinch of salt. Spread them on a baking sheet and roast at 350°F for 8-10 minutes, stirring halfway. Let them cool—they’ll crisp up as they sit. I made these for a party last month and someone asked if I’d bought them from a fancy bakery. Nope, just my oven and 10 minutes.
Watch the brie closely. Ovens vary, so start checking at 10 minutes. You want it soft and pillowy, not liquid. If the rion starts to split, pull it immediately. That’s your cue that it’s done. I’ve definitely left it in too long before and ended up with a puddle of cheese that was still delicious but impossible to serve gracefully.
Think about traffic flow. Place the warm brie where people can easily reach it without having to lean across the whole board. Put the crackers and apple slices nearby. You want the board to encourage grazing, not frustration.
Prep everything before the brie goes in. Once that cheese is warm, you want to serve it right away. Have all your bowls filled, fruits sliced, and meats arranged before you pop the brie in the oven. Then all you have to do is place the warm dish and add garnishes. This makes hosting so much less stressful.
Variations & Adaptations
One of the best things about this board is how flexible it is. Here are some ways to make it your own:
Dietary Adaptations
Gluten-free version: Swap the crackers and baguette for gluten-free crackers, rice cakes, or sliced cucumber rounds. The rest of the board is naturally gluten-free, so it’s an easy switch. I’ve done this for a friend with celiac disease and she said it was the best charcuterie board she’d had in years.
Vegetarian option: Skip the prosciutto and add more cheese—maybe some manchego or goat cheese. Roasted chickpeas or marinated artichoke hearts also add nice texture and flavor.
Seasonal Swaps
Late summer version: Use fresh figs instead of dried, and swap the apples for sliced peaches or plums. The brie with fresh fig and honey is absolutely stunning.
Winter holiday version: Add pomegranate seeds, roasted chestnuts, and a sprinkle of cinnamon over the warm brie. It feels extra festive and pairs beautifully with mulled wine.
Flavor Twists
Spicy kick: Drizzle the warm brie with hot honey instead of regular honey. Add some pickled jalapeños or red pepper flakes to the board. The sweet-heat combo is addictive.
Herb-infused brie: Before baking, top the brie with fresh thyme or rosemary and a drizzle of olive oil. The herbs infuse the cheese as it warms, adding an earthy note that’s lovely with the apples.
I tried a version last fall with fig jam and prosciutto wrapped around the brie before baking. It was delicious but messy—the prosciutto got a bit chewy. If you want to try it, wrap it loosely and check it early. Sometimes the simplest approach really is best.
Serving & Storage Suggestions
This board is best served immediately while the brie is warm and gooey. But here’s how to handle leftovers and prep ahead.
Serving temperature: The brie should be warm and melty, the apples cold and crisp, the crackers at room temperature. That temperature contrast is part of what makes each bite so satisfying. Set the board out about 20 minutes before guests arrive—everything except the brie can sit out comfortably.
What to serve alongside: This board pairs beautifully with a crisp white wine like Sauvignon Blanc or a light Pinot Noir. For non-alcoholic options, sparkling apple cider or a good herbal tea works wonderfully. I also like to have some marinated olives and cornichons on the side for a briny counterpoint.
Storage: Leftover brie can be refrigerated in an airtight container for up to 3 days. It won’t be as melty when reheated, but it’s still great on sandwiches or melted into pasta. Store apple slices separately—they’ll brown and get soft otherwise. Grapes keep for a day or two in the fridge. The crackers should be stored in an airtight container to stay crisp.
Reheating the brie: If you have leftover baked brie, pop it back in a 300°F oven for 5-7 minutes. It won’t be quite as perfect as the first time, but it’s still delicious. I’ve been known to eat cold brie straight from the fridge the next day—no judgment here.
Flavor development: Honestly, the brie is best right out of the oven. But the rest of the board components actually improve as they sit at room temperature for a bit. The flavors meld together, and the prosciutto softens slightly. If you’re making this for a party, you can assemble everything except the brie up to an hour ahead and just add the warm cheese right before serving.
Nutritional Information & Benefits
This board is indulgent, but it also has some surprising nutritional perks. Here’s a rough breakdown per serving (about 1/8 of the board):
- Calories: Approximately 420-480
- Protein: 14-18 grams
- Fat: 28-34 grams (mostly from cheese and nuts)
- Carbohydrates: 32-38 grams
- Fiber: 4-6 grams
- Sugar: 18-22 grams (natural from fruit and honey)
Health highlights: Brie is rich in calcium and protein, while Honeycrisp apples provide fiber and vitamin C. The candied pecans offer healthy fats and antioxidants. Prosciutto adds protein but is high in sodium, so enjoy in moderation. For a lighter option, use less cheese and more fruit and nuts.
Dietary considerations: This board contains dairy (brie, cheddar), gluten (crackers, bread), and nuts (pecans). For a dairy-free version, use vegan brie alternative or skip the cheese entirely and double up on fruits and meats. Always check labels if serving guests with allergies.
I’m not a nutritionist, but I believe in balance. This board is a treat, not an everyday meal. Pair it with a big salad or vegetable-heavy main dish, and you’ve got a satisfying, memorable meal that feels special without going overboard.
Conclusion
This fall charcuterie board has become my signature party dish for good reason—it’s simple, stunning, and absolutely delicious. The combination of warm, melty brie and crisp Honeycrisp apples is the kind of thing that makes people pause mid-conversation to take another bite. And honestly, that’s what good food should do.
Don’t be afraid to make this board your own. Swap in your favorite cheeses, use whatever fruit looks good at the market, adjust the quantities based on your crowd. The beauty of a charcuterie board is that there are no rules—just good ingredients arranged in a way that makes people want to dig in.
I’d love to hear how yours turns out. Did you try a different fruit? Add a new cheese? Forget the brie in the oven for too long? (We’ve all been there.) Drop a comment below and let me know—your version might inspire someone else’s next board. And if you’re looking for more fall entertaining ideas, check out my slow cooker apple butter or maple roasted butternut squash for dishes that pair perfectly with this board.
Happy grazing, friends. Here’s to good cheese, good company, and the season that brings us all together.
Frequently Asked Questions
Can I make this charcuterie board ahead of time?
Yes! You can prep all the components up to a day ahead—slice the cheese, wash the grapes, make the candied pecans. Store everything separately in the fridge. Just slice the apples and warm the brie right before serving. Assemble the board about 30 minutes before guests arrive, leaving the brie out of the oven until the last minute.
What if I can’t find Honeycrisp apples?
No worries! Fuji, Gala, or Pink Lady apples work well too. You want something sweet and crisp that won’t turn to mush when sliced. Avoid Granny Smith unless you love tart apples—they’ll work but the flavor balance shifts. Pears are also a fantastic substitute if apples aren’t available.
How do I keep the brie from leaking out of the rind?
Don’t overbake it. Check the brie at 10 minutes and pull it when it’s soft but still holding its shape. If the rind starts to split, it’s done. Also, make sure you’re using a good quality brie with a sturdy rind—cheaper bries sometimes have thinner rinds that are more prone to leaking. Baking it in a small dish helps contain any minor leakage.
Can I use a different type of cheese?
Absolutely. Camembert is the closest substitute and behaves similarly when baked. For a firmer option, try baked goat cheese or even warm feta. Just adjust the baking time—goat cheese needs less time (about 8-10 minutes), while feta can handle a bit longer. Each brings its own personality to the board.
How many people does this board serve?
This board serves about 6-8 people as an appetizer or 4-6 as a light meal. If you’re serving it as a main course alongside other dishes, it stretches further. For larger parties, double the brie and add more crackers and fruit. A good rule of thumb: plan for about 2-3 ounces of cheese and 1-2 ounces of meat per person for an appetizer portion.
Pin This Recipe!
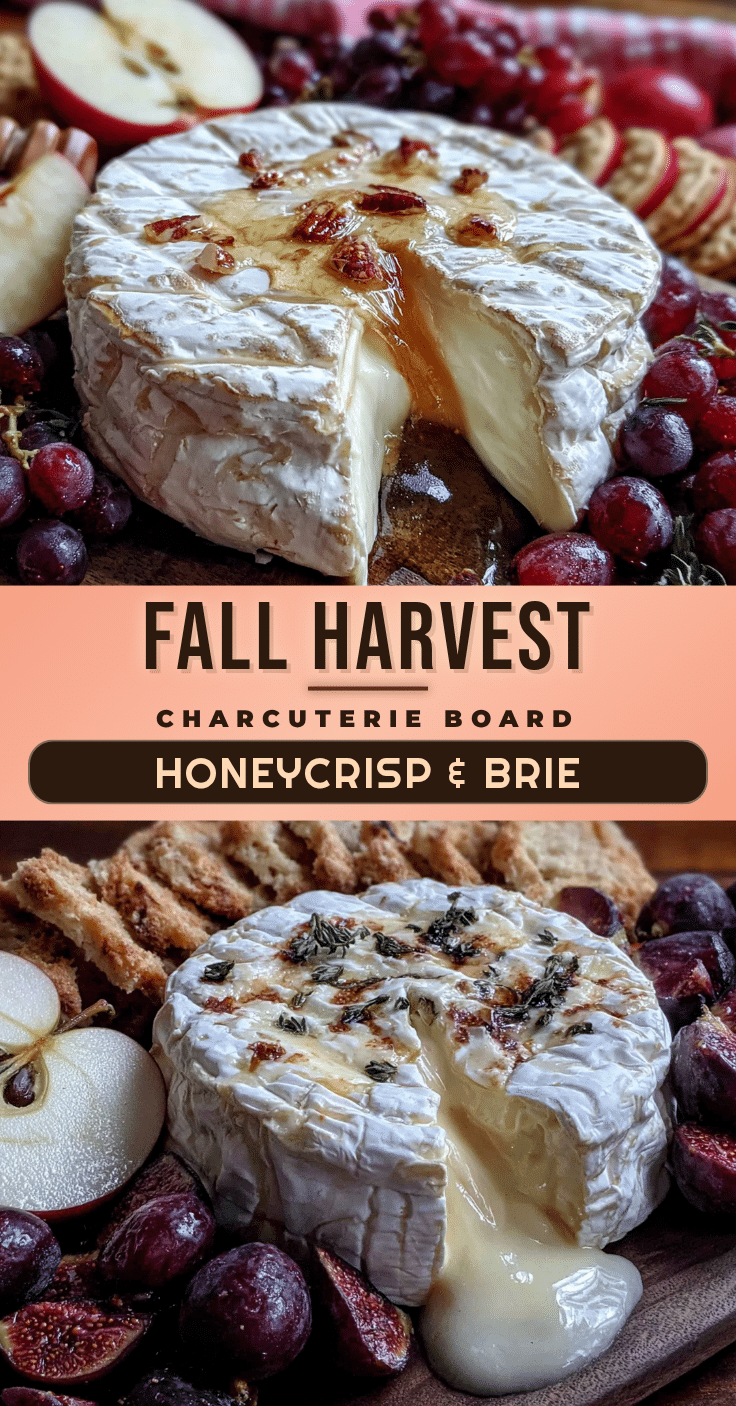
Best Fall Charcuterie Board: Easy Honeycrisp Apple & Brie Recipe
A simple yet stunning fall charcuterie board featuring warm, melty brie and crisp Honeycrisp apples, perfect for gatherings. This crowd-pleasing appetizer comes together in under 15 minutes with simple ingredients.
- Prep Time: 15 minutes
- Cook Time: 15 minutes
- Total Time: 30 minutes
- Yield: 6-8 servings 1x
- Category: Appetizer
- Cuisine: American
Ingredients
- 1 (8-ounce) wheel of brie
- 4 ounces prosciutto, thinly sliced
- 4 ounces aged white cheddar, cubed or sliced
- 2 large Honeycrisp apples, cored and sliced into thin wedges
- 1 cup seedless red grapes
- 1/2 cup dried figs or dates (optional)
- 1/2 cup candied pecans
- 1/4 cup honey
- 1/3 cup fig jam or apple butter
- 20–30 crackers (water crackers and seeded crackers)
- 1 sliced baguette
- Fresh rosemary sprigs (optional, for garnish)
- Pomegranate seeds (optional, for garnish)
- Flaky sea salt (optional, for garnish)
Instructions
- Preheat your oven to 350°F (175°C). Take the brie out of the fridge and let it sit at room temperature for about 15 minutes.
- Place the brie in a small oven-safe dish. Bake for 12-15 minutes, until the cheese is soft and slightly puffed. Do not overbake.
- While the brie bakes, core and slice the apples into thin wedges (about 8 slices per apple). Toss with a squeeze of lemon juice if desired. Rinse and pat dry the grapes. If using dried figs, slice them in half lengthwise.
- Arrange small bowls on a large wooden board or platter for the fig jam or apple butter, honey, and candied pecans. Fan out the crackers and baguette slices around the bowls, leaving a clear space in the center for the warm brie.
- Fold the prosciutto slices into loose ribbons or rosettes and place them in small clusters. Cube the aged cheddar and arrange it in a pile.
- Scatter the apple slices and grape clusters around the board, filling in gaps. Tuck the dried figs between the cheese and meat piles.
- Remove the brie from the oven. Carefully transfer the dish to the center of the board. Drizzle the warm brie with honey and sprinkle with flaky sea salt and fresh rosemary leaves if using.
- Finish with pomegranate seeds and extra rosemary sprigs if desired. Serve immediately with a cheese spreader.
- The brie will stay warm for about 20-30 minutes. After that, it is still delicious at room temperature.
Notes
Don’t overbake the brie; check at 10 minutes. Slice apples right before serving to prevent browning. For homemade candied pecans, toss 1 cup pecans with 2 tablespoons maple syrup, a pinch of cinnamon, and a pinch of salt, then roast at 350°F for 8-10 minutes. Prep all other components before baking the brie so you can serve immediately.
Nutrition
- Serving Size: 1/8 of board
- Calories: 420480
- Sugar: 1822
- Fat: 2834
- Carbohydrates: 3238
- Fiber: 46
- Protein: 1418
Keywords: fall charcuterie board, honeycrisp apple brie, baked brie, easy appetizer, fall entertaining, cheese board, prosciutto, candied pecans


