I had been looking for a way to make buffalo chicken dip feel like a meal, not just a snack you eat standing over the bowl. For a while, I just accepted that game-day dips meant pulling out a bag of chips and calling it dinner—which, let’s be honest, works until it doesn’t. You know that moment when you want the spicy, creamy, tangy goodness of buffalo chicken dip, but you also want something that sits on a plate and feels substantial? That gap existed for years in my kitchen.
It wasn’t a dramatic discovery. I had a batch of leftover buffalo chicken dip from a Sunday football thing, and a box of bell peppers sitting on the counter (they were starting to get that slight wrinkle that says “use me now”). I figured, why not stuff them? The first attempt was messy—the filling was too loose, the peppers were undercooked, and honestly, it fell apart. But that second try? That’s where things clicked. I adjusted the cream cheese ratio, pre-roasted the peppers just enough, and added a bit more shredded cheese on top to get that bubbly, golden crust.
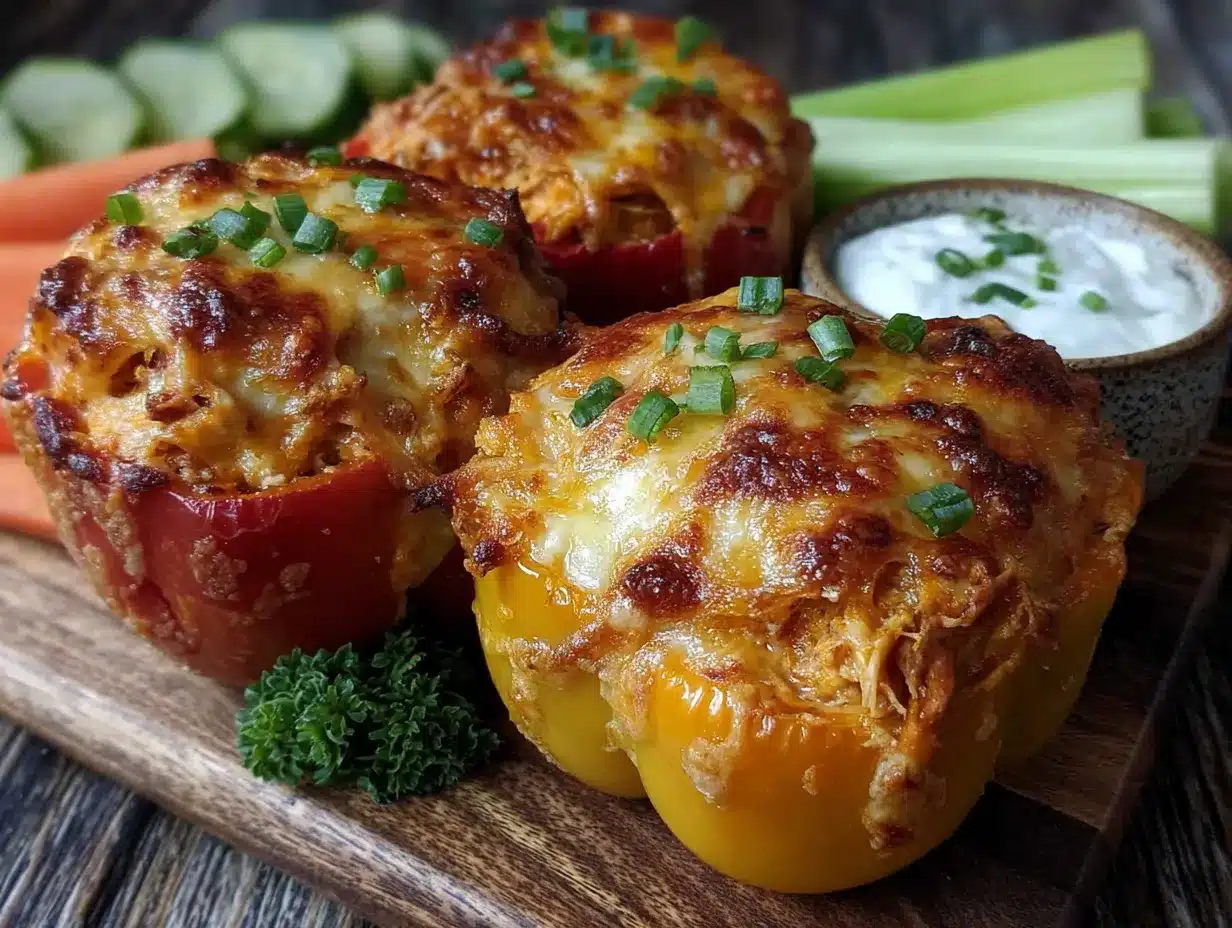
These cheesy buffalo chicken dip stuffed peppers aren’t fancy. They’re the kind of recipe you make when you want something that tastes like you put in effort, but really, you just combined two things you already love. The peppers get tender-sweet in the oven, the filling stays creamy and thick, and that little kick of buffalo heat cuts through everything. It’s the answer to a question I didn’t realize I’d been asking for years.
Why You’ll Love This Recipe
After making these stuffed peppers at least a dozen times (and tweaking them for friends, picky eaters, and even a Super Bowl party), I can honestly say this version is the one that works every time. Here’s why you’ll keep coming back to it:
- Quick & Easy: From start to table in about 35 minutes. No complicated steps, no weird techniques—just mix, stuff, and bake.
- Simple Ingredients: You probably have most of this stuff already. Cream cheese, shredded chicken, hot sauce, cheddar—nothing that requires a specialty grocery run.
- Perfect for Game Day or Dinner: Seriously, it works for both. Serve them as a main dish with a side salad, or cut them in half for party appetizers. They disappear either way.
- Crowd-Pleaser: I’ve served these to people who “don’t like spicy food” and they still went back for seconds. The cream cheese tames the heat just enough.
- Unbelievably Delicious: The combo of roasted bell pepper sweetness, creamy buffalo filling, and melted cheddar on top is next-level comfort food. It hits every texture note—soft, creamy, slightly crisp on the edges.
What makes this recipe different from the dozens of other stuffed pepper recipes out there? It’s the balance. Most buffalo chicken dips are too runny to hold up inside a pepper. This one is thick enough to scoop, sturdy enough to bake, and stays creamy without turning into a soupy mess. I tested it with different cream cheese ratios, different hot sauces, and even different pepper colors (red is sweetest, green is more bitter—both work, just depends on your mood).
This is the kind of recipe that makes you close your eyes after the first bite. It’s comfort food reimagined—spicier, cheesier, and way more satisfying than you’d expect from something that comes together in half an hour. Perfect for impressing guests without stress, or turning a simple Tuesday dinner into something memorable.
What Ingredients You Will Need
This recipe uses simple, mostly pantry-stable ingredients to deliver that bold buffalo flavor and creamy texture without any fuss. Here’s everything you’ll need:
For the Filling
- 2 cups cooked shredded chicken (rotisserie chicken works perfectly here; save yourself the effort)
- 8 ounces cream cheese, softened (full-fat gives the best creamy texture, but Neufchâtel works too)
- ½ cup buffalo hot sauce (I prefer Frank’s RedHot original—it’s the classic for a reason)
- ½ cup shredded cheddar cheese (sharp cheddar adds more flavor; mild works if you prefer subtle)
- ¼ cup crumbled blue cheese (optional, but highly recommended if you love that tangy kick)
- ¼ cup ranch or blue cheese dressing (adds moisture and that signature buffalo dip flavor)
- 1 teaspoon garlic powder
- ½ teaspoon onion powder
- Salt and black pepper to taste
For the Peppers
- 4 large bell peppers (any color—red and orange are sweetest; green gives a slightly bitter contrast that some people love)
- ½ cup shredded cheddar cheese (for topping; use a mix of cheddar and mozzarella if you want extra stretchiness)
- 1 tablespoon olive oil (for brushing the peppers before baking)
- Fresh chives or green onions, chopped (for garnish; adds a fresh pop of color)
Ingredient Tips & Substitutions: If you’re out of rotisserie chicken, you can boil two boneless chicken breasts for about 15 minutes and shred them with two forks—easy. For a lighter version, use reduced-fat cream cheese and Greek yogurt instead of ranch dressing. I’ve tested this with dairy-free cream cheese and it works, though the texture is slightly less creamy. For a gluten-free option, just make sure your hot sauce and dressing are certified gluten-free (most are). If you don’t have buffalo sauce, mix ⅓ cup hot sauce with 2 tablespoons melted butter—instant buffalo sauce.
One thing I learned the hard way: don’t skip softening the cream cheese. Cold cream cheese doesn’t mix evenly and leaves weird white lumps in your filling. Let it sit on the counter for 20 minutes, or microwave it in 10-second bursts until soft.
Equipment Needed
Nothing fancy here—just basic kitchen tools you probably already own:
- Baking dish (9×13 works perfectly; an 8×8 also works if you squeeze the peppers in snugly)
- Mixing bowl (medium-sized, for combining the filling)
- Sharp knife (for cutting the peppers in half and removing seeds)
- Cutting board
- Small spoon or spatula (for stuffing the peppers)
- Aluminum foil (for covering the dish during the first part of baking)
- Measuring cups and spoons
Budget-Friendly Alternatives: No baking dish? A cast-iron skillet works beautifully—just arrange the pepper halves snugly inside. No mixing bowl? Use a large measuring cup or even a clean plastic container. The key is just getting everything combined.
I’ve made these in a toaster oven before when my main oven was occupied with a cozy crockpot beef stew for a dinner party. Just adjust the temperature down by 25°F and check a few minutes early since toaster ovens run hot.
Preparation Method
Let’s get cooking. I’ll walk you through each step with the little tricks I’ve picked up along the way.
- Preheat your oven to 375°F (190°C). While it’s heating, get your peppers ready. Cut each bell pepper in half lengthwise through the stem. Scoop out all the seeds and white membranes with a spoon. Don’t worry about keeping the stems attached—they look nice but aren’t necessary.
- Brush the pepper halves with olive oil inside and out. Place them cut-side up in your baking dish. This step isn’t just for flavor—the oil helps the peppers soften evenly and prevents them from drying out. I learned this after my first batch came out with leathery edges.
- Bake the empty peppers for 10 minutes. This pre-roasting step is crucial. It starts the softening process so the peppers finish at the same time as the filling, instead of ending up crunchy while the filling is perfect. You want them just starting to soften, not fully cooked.
- While the peppers pre-bake, make the filling. In your mixing bowl, combine the softened cream cheese, buffalo sauce, ranch dressing, garlic powder, and onion powder. Mix until smooth and uniform. A fork works fine, but a spatula makes it easier to scrape the sides.
- Fold in the shredded chicken, ½ cup cheddar cheese, and blue cheese (if using). Mix until everything is evenly coated. Taste the filling at this point—it should be creamy, spicy, and tangy. If you want more heat, add another tablespoon of hot sauce. If it’s too spicy, stir in a little extra cream cheese.
- Divide the filling evenly among the 8 pepper halves. Use a small spoon to mound it up. Don’t be shy—pack it in there. The filling will settle slightly as it bakes, so a generous mound is perfect. I usually get about ¼ cup of filling per half.
- Top each stuffed pepper with the remaining ½ cup shredded cheddar cheese. Sprinkle it evenly over the filling. This creates that golden, bubbly crust that makes these peppers look absolutely irresistible.
- Cover the baking dish with aluminum foil and bake for 15 minutes. The foil traps steam and helps the peppers finish softening without burning the cheese topping.
- Remove the foil and bake for another 8-10 minutes, until the cheese is melted, bubbly, and starting to brown in spots. The filling should be hot throughout. If you want extra browning, switch the oven to broil for the last 1-2 minutes—but watch it carefully, because broiling goes from golden to burnt in seconds.
- Let them rest for 5 minutes before serving. This is important—the filling needs a moment to set up so it doesn’t slide right off the pepper. Sprinkle with fresh chives or green onions right before serving.
Sensory Cues: When the peppers are done, the edges should look slightly wrinkled and the cheese should be bubbly with golden-brown spots. You’ll smell the buffalo sauce mingling with roasted pepper sweetness—it’s a fantastic kitchen aroma. The filling should be hot and creamy, not runny. If you see liquid pooling in the dish, the filling was too loose (usually from too much dressing or not enough cream cheese).
Cooking Tips & Techniques
After making these cheesy buffalo chicken dip stuffed peppers more times than I can count, here are the things I wish someone had told me from the start:
Don’t overcook the peppers. The biggest mistake I made early on was baking them too long, thinking they needed to be super soft. They don’t. You want them tender but still holding their shape—think al dente pasta, not mushy. The pre-roasting step helps prevent this because it gives the peppers a head start without overdoing them.
Room temperature ingredients matter. I know, I know—every recipe says this. But with cream cheese especially, it’s not optional. Cold cream cheese won’t blend smoothly into the filling, and you’ll end up with lumpy pockets of cream cheese that don’t taste bad but definitely don’t look professional. Set it out 30 minutes before you start, or microwave it in 10-second bursts until it’s soft to the touch.
Use rotisserie chicken. This isn’t a brag about convenience—it genuinely tastes better. Rotisserie chicken is seasoned and juicier than boiled chicken breast. The extra flavor carries into the filling. If you’re cooking chicken from scratch, season the cooking water with salt, garlic, and a bay leaf. It makes a difference.
Balance the heat to your crowd. Buffalo sauce varies wildly in spiciness. Frank’s is medium-heat. If you’re using a hotter brand (like Melinda’s or Secret Aardvark), cut back on the amount and add more cream cheese to tame it. For a milder version, use only ⅓ cup hot sauce and add an extra tablespoon of ranch dressing.
Make the filling ahead of time. You can prep the filling up to 2 days in advance and keep it in the fridge. When you’re ready to bake, just stuff the peppers and add a few extra minutes to the baking time since the filling will be cold. This makes these peppers perfect for busy weeknights or party prep.
One failure I’ll admit: I once tried to skip the pre-roasting step to save time. The peppers came out crunchy on the inside and the filling was hot but the pepper was basically raw. Don’t do it. That 10-minute pre-roast is non-negotiable.
Variations & Adaptations
This recipe is super flexible. Here are some variations I’ve tried and loved:
- Low-Carb / Keto: Use full-fat cream cheese, skip the ranch dressing (use a little extra cream cheese instead), and top with extra cheddar. These are naturally low-carb since bell peppers have fewer carbs than you’d think. Perfect for keto meal prep.
- Extra Spicy: Add 1-2 teaspoons of cayenne pepper to the filling, use a habanero hot sauce instead of buffalo, and throw in some pickled jalapeños on top before baking. This version pairs beautifully with a homemade habanero peach hot sauce drizzled over the top for extra fruity heat.
- Vegetarian Option: Swap the chicken for 2 cups of cooked, shredded jackfruit (canned in brine, not syrup) or crumbled firm tofu. The texture is surprisingly similar when mixed with the creamy buffalo filling. You won’t miss the meat.
- Different Cheese: Try pepper jack for extra heat, smoked gouda for a deeper flavor, or a Mexican blend for a different vibe. I made a batch with smoked gouda once and it was incredible—the smokiness plays off the buffalo sauce beautifully.
- Air Fryer Method: Pre-roast the peppers in the air fryer at 350°F for 5 minutes. Stuff them, top with cheese, and air fry at 350°F for 8-10 minutes. They come out with slightly crispier edges and cook faster. Just don’t overcrowd the basket.
- Make It a Meal: Serve these peppers over a bed of rice, quinoa, or alongside a simple green salad. The creamy buffalo filling works like a sauce over grains. I’ve also chopped up leftover peppers and tossed them into a flavorful grilled corn street corn pasta salad for a next-day lunch that was ridiculously good.
Serving & Storage Suggestions
Serving: These peppers are best served warm, right out of the oven. Let them rest for 5 minutes (I know, the anticipation is real, but trust me). Arrange them on a platter with a sprinkle of fresh chives or green onions on top. They’re gorgeous as-is, but a dollop of sour cream or extra ranch dressing on the side is never a bad idea.
What to Serve With Them: A crisp green salad with a simple vinaigrette cuts through the richness perfectly. Celery sticks and carrot sticks are classic buffalo pairing—they add crunch and freshness. If you’re serving these for a party, they’re great alongside crispy smash burger tacos for a full spread that’ll impress everyone.
Storage: Leftover stuffed peppers keep beautifully in the refrigerator for up to 4 days. Store them in an airtight container. The flavors actually meld together overnight and get even better—the buffalo sauce soaks into the pepper a bit more, and everything becomes one cohesive, delicious bite.
Reheating: The oven is your best friend here. Reheat at 350°F for 10-12 minutes, covered with foil to prevent drying out. The microwave works in a pinch (2 minutes on high), but the peppers will be softer and the cheese won’t be as crispy. For a quick lunch, I’ve chopped up cold leftover peppers and thrown them into a tortilla with extra cheese for a buffalo chicken quesadilla—highly recommended.
Freezing: You can freeze these, but with a caveat. Freeze them before baking (stuff the peppers, wrap tightly in plastic wrap and foil, and freeze for up to 3 months). When you’re ready to bake, thaw overnight in the fridge and bake as directed, adding 5-10 minutes to the cooking time. Freezing after baking works too, but the peppers will be softer upon reheating.
Nutritional Information & Benefits
Here’s the approximate nutritional breakdown for one stuffed pepper half (based on 8 servings, using full-fat ingredients):
- Calories: 285
- Protein: 18g
- Fat: 20g
- Carbohydrates: 8g
- Fiber: 2g
- Sugar: 4g
Health Benefits: Bell peppers are packed with vitamin C—one red bell pepper has more vitamin C than an orange. They’re also rich in vitamin A and antioxidants. Chicken provides lean protein, and the cream cheese adds calcium. The capsaicin in buffalo sauce has metabolism-boosting properties and may help reduce inflammation. Is this a health food? Not exactly. But it’s a balanced meal with real nutritional value, especially if you pair it with vegetables on the side.
Dietary Considerations: This recipe is naturally low-carb and gluten-free. For a lower-fat version, use reduced-fat cream cheese and Greek yogurt instead of ranch dressing. The main allergens are dairy and (if using blue cheese) mold-ripened cheese. For a dairy-free version, use plant-based cream cheese and shredded vegan cheddar—the texture will be slightly less creamy but still delicious.
Personal Perspective: I don’t believe in labeling food as “good” or “bad.” These peppers are satisfying, flavorful, and made with real ingredients. They’re the kind of meal that keeps you full and happy without that heavy, weighed-down feeling. That’s a win in my book.
Conclusion
These cheesy buffalo chicken dip stuffed peppers are one of those recipes that just works. They’re easy enough for a busy Tuesday, impressive enough for a party, and flexible enough to adapt to whatever you have in the fridge. The combination of sweet roasted peppers, creamy buffalo filling, and melted cheese is honestly hard to beat.
I love this recipe because it bridges the gap between snack and meal—it’s comfort food that actually feels like dinner. Whether you’re feeding a crowd or just yourself with leftovers for days, these peppers deliver every single time.
Now I want to hear from you. Have you tried making these? Did you add your own twist? Drop a comment below and let me know how they turned out. And if you loved them, share this recipe with a friend who needs a new go-to dinner idea. Happy cooking!
Frequently Asked Questions
Can I use pre-shredded cheese?
You can, but freshly shredded cheese melts better and has a creamier texture. Pre-shredded cheese is coated with anti-caking agents that prevent it from melting as smoothly. If convenience wins, go ahead—it’ll still taste great, just not as gooey.
How do I prevent the peppers from getting too soft?
Don’t overbake them. The pre-roasting step helps, but the key is removing them from the oven while the peppers still have a little structure. They’ll continue softening slightly as they rest. Aim for tender but not mushy—think al dente.
Can I make these in a slow cooker?
I wouldn’t recommend it for the stuffed peppers themselves—they’d get too soft. But you can make the buffalo chicken dip filling in a slow cooker and serve it as a traditional dip with pepper strips for scooping. That’s a great option for parties.
What if I don’t like blue cheese?
Leave it out entirely. The recipe works perfectly without it. You can add extra cheddar or a tablespoon of cream cheese to compensate for the lost volume. No one will miss it.
Can I use ground chicken instead of shredded?
Absolutely. Cook 1 pound of ground chicken in a skillet until browned, drain any excess fat, and use it in place of shredded chicken. The texture will be different—more uniform and less stringy—but the flavor is still fantastic. Just make sure to season the ground chicken with salt and pepper while cooking.
Pin This Recipe!

Best Cheesy Buffalo Chicken Dip Stuffed Peppers Recipe

These cheesy buffalo chicken dip stuffed peppers combine tender roasted bell peppers with a creamy, spicy buffalo chicken filling, topped with melted cheddar cheese. Perfect for game day or a quick weeknight dinner, they’re easy to make and packed with flavor.
- Prep Time: 15 minutes
- Cook Time: 35 minutes
- Total Time: 50 minutes
- Yield: 8 servings 1x
- Category: Main Course
- Cuisine: American
Ingredients
- 2 cups cooked shredded chicken (rotisserie chicken works perfectly)
- 8 ounces cream cheese, softened
- ½ cup buffalo hot sauce (preferably Frank’s RedHot original)
- ½ cup shredded cheddar cheese
- ¼ cup crumbled blue cheese (optional)
- ¼ cup ranch or blue cheese dressing
- 1 teaspoon garlic powder
- ½ teaspoon onion powder
- Salt and black pepper to taste
- 4 large bell peppers (any color)
- ½ cup shredded cheddar cheese (for topping)
- 1 tablespoon olive oil
- Fresh chives or green onions, chopped (for garnish)
Instructions
- Preheat your oven to 375°F (190°C). Cut each bell pepper in half lengthwise through the stem. Scoop out all the seeds and white membranes with a spoon.
- Brush the pepper halves with olive oil inside and out. Place them cut-side up in a 9×13 baking dish.
- Bake the empty peppers for 10 minutes to start softening them.
- While the peppers pre-bake, make the filling: In a mixing bowl, combine the softened cream cheese, buffalo sauce, ranch dressing, garlic powder, and onion powder. Mix until smooth and uniform.
- Fold in the shredded chicken, ½ cup cheddar cheese, and blue cheese (if using). Mix until everything is evenly coated. Taste and adjust seasoning if needed.
- Divide the filling evenly among the 8 pepper halves, mounding it up with a small spoon.
- Top each stuffed pepper with the remaining ½ cup shredded cheddar cheese.
- Cover the baking dish with aluminum foil and bake for 15 minutes.
- Remove the foil and bake for another 8-10 minutes, until the cheese is melted, bubbly, and starting to brown in spots.
- Let them rest for 5 minutes before serving. Sprinkle with fresh chives or green onions right before serving.
Notes
Don’t skip pre-roasting the peppers—it ensures they soften evenly. Use room temperature cream cheese for a smooth filling. Rotisserie chicken adds extra flavor. For a milder version, reduce hot sauce to ⅓ cup and add extra ranch dressing. Leftovers keep in the fridge for up to 4 days; reheat in the oven at 350°F for 10-12 minutes.
Nutrition
- Serving Size: 1 stuffed pepper hal
- Calories: 285
- Sugar: 4
- Sodium: 650
- Fat: 20
- Saturated Fat: 10
- Carbohydrates: 8
- Fiber: 2
- Protein: 18
Keywords: buffalo chicken dip, stuffed peppers, cheesy, game day, easy dinner, low-carb, gluten-free


