Burning butter on purpose while the turkey was still raw in the oven when I realized I had completely forgotten to buy stuffing mix. Thanksgiving chaos at its finest, honestly. There I stood, staring at a loaf of slightly stale sourdough I’d meant to turn into croutons last week, a stick of butter sizzling away in the pan, and the faint smell of sage from the garden that I’d neglected to water. This wasn’t the plan. The plan was the boxed stuff. But the boxed stuff was still at the grocery store, and I was not about to put shoes on again.
So I grabbed the stale bread, chopped it into uneven cubes (some are always smaller, that’s just life), and watched that butter turn into liquid gold with little brown specks floating around. The smell hit me first—nutty, warm, almost like toasted hazelnuts. I tossed in fresh sage leaves that crackled and popped, and I thought, “Well, this is either going to save dinner or be a total disaster.”
Spoiler: It saved dinner. Actually, it stole the show. The turkey got polite nods. These brown butter sage stuffing muffins got actual silence while everyone ate. That’s the kind of quiet you want at a holiday table. Now I make them every year, sometimes just for a random Tuesday in November when I need a little comfort. They’re the best brown butter sage stuffing muffins I’ve ever had, and I say that without a hint of modesty. You’re going to feel the same way.
Why You’ll Love This Recipe
Let me tell you why these little muffins are about to become your new favorite side dish, or honestly, your main event if you’re like me and just want stuffing for dinner.
- Individual Portions: No more fighting over the crispy corner pieces. Everyone gets their own perfectly golden, crunchy-on-the-outside, soft-on-the-inside muffin. It’s the great equalizer at the dinner table.
- Brown Butter Magic: This isn’t just regular stuffing. The brown butter adds this deep, nutty, almost caramel-like flavor that regular melted butter just can’t touch. It’s a game-changer, and it’s surprisingly easy to do.
- Crispy Edges, Soft Center: Because they’re baked in a muffin tin, every single muffin gets maximum surface area for browning. That means more of those coveted crispy bits without any of the sogginess that plagues traditional stuffing.
- Make-Ahead Friendly: You can prep these a day ahead, keep them in the fridge, and pop them in the oven while the turkey rests. Less stress, more wine. That’s a win in my book.
- Endlessly Customizable: I’ve made these with sausage, with mushrooms, with dried cranberries, and even with a little crumbled bacon on top. They take to additions like a dream.
I’ve tested this recipe more times than I care to count. I’ve tried it with fresh bread, day-old bread, and even slightly-toasted bread. I’ve played with the liquid ratios until I got that perfect texture—moist but not wet, tender but not mushy. This isn’t just another stuffing recipe. It’s the one that gets requested every single year, the one that my brother-in-law asks for “just because.” And honestly, it’s the one that made me realize brown butter belongs in everything.
What Ingredients You Will Need
This recipe uses simple, wholesome ingredients to deliver that bold, savory flavor and satisfying texture without any fuss. Most of these are probably already in your pantry or fridge, which is exactly how I like to cook.
For the Stuffing Muffins
- 1 loaf (about 1 lb) sourdough bread, cut into ½-inch cubes: Day-old or slightly stale bread works best. It soaks up the liquid without turning into paste. If your bread is fresh, spread the cubes on a baking sheet and toast them at 300°F for 10-15 minutes to dry them out.
- ½ cup unsalted butter: Don’t use salted butter here. You want to control the salt level yourself, and brown butter can get salty fast if you’re not careful. I prefer Kerrygold or any European-style butter for its higher fat content, which browns more evenly.
- ¼ cup fresh sage leaves, roughly chopped: Fresh sage is non-negotiable here. Dried sage just doesn’t have the same aromatic punch, and it can get a little dusty-tasting. Look for leaves that are vibrant green and not wilted.
- 1 medium yellow onion, finely diced: About 1 cup. Yellow onions are my go-to for savory dishes because they have a good balance of sweetness and sharpness that mellows out beautifully when cooked.
- 2-3 celery stalks, finely diced: About 1 cup. Celery adds that classic stuffing crunch and a subtle bitterness that cuts through the richness of the brown butter.
- 3 cloves garlic, minced: Fresh garlic, not the jarred stuff. It makes a difference.
- 1 ½ cups low-sodium chicken or vegetable broth: Low-sodium is key so you can control the salt. Homemade broth is amazing here, but a good store-bought brand like Swanson or Kitchen Basics works perfectly.
- 1 large egg, lightly beaten: This helps bind everything together so the muffins hold their shape. No egg, and you’ll end up with a crumbly mess.
- 1 teaspoon salt: I use fine sea salt. Adjust to your taste, especially if you’re using salted broth.
- ½ teaspoon black pepper: Freshly ground is always better.
- ½ teaspoon dried thyme: Optional, but I love the earthy note it adds alongside the sage.
- ¼ cup freshly grated Parmesan cheese (optional): This is my secret weapon. It adds a salty, umami crust to the top of the muffins that is absolutely irresistible.
Ingredient Selection Tips
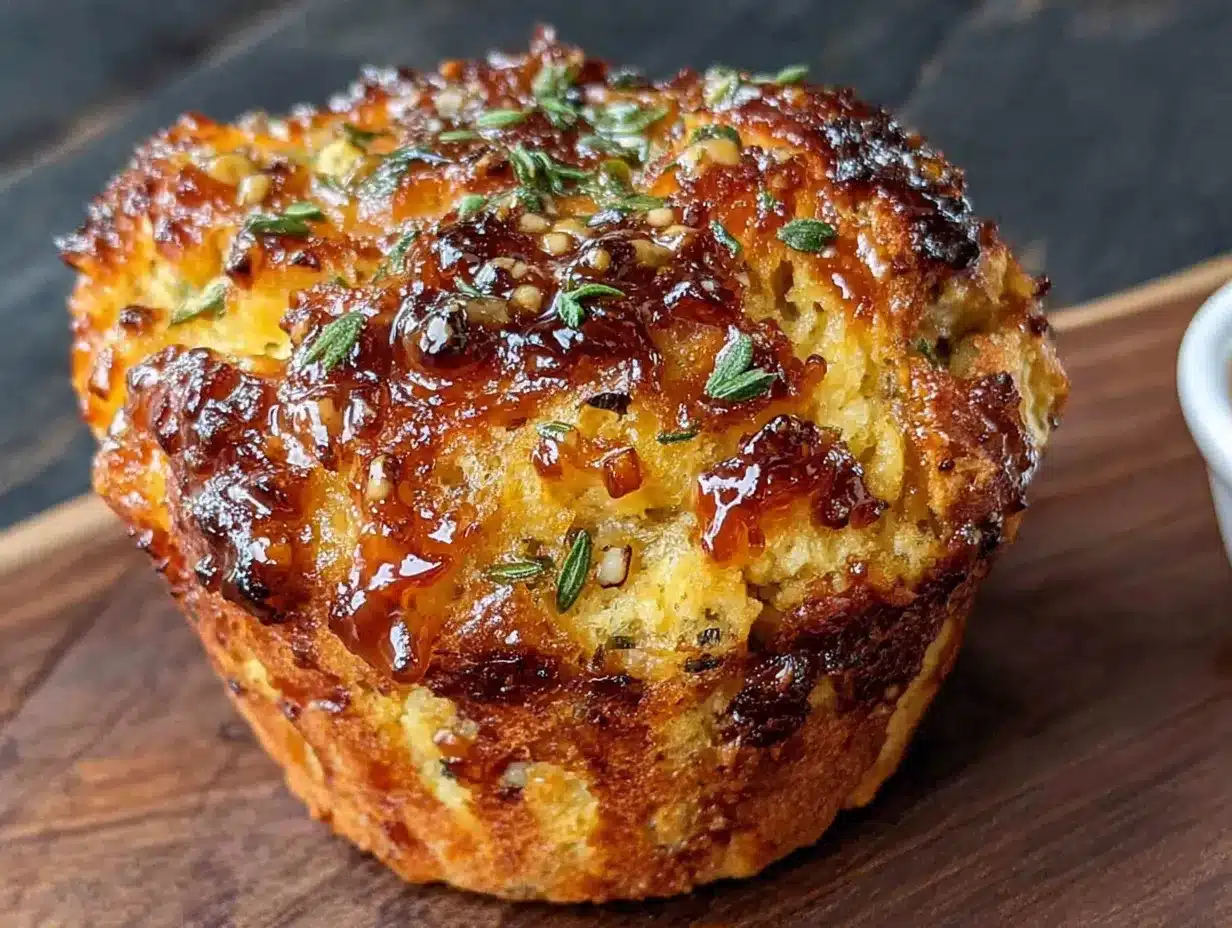
For the best brown butter sage stuffing muffins, start with good bread. A sturdy sourdough or a French country loaf holds up best. Avoid super soft sandwich bread—it will turn to mush. When choosing your sage, give the leaves a gentle pinch. They should release their scent immediately. If they don’t smell like much, they won’t taste like much either.
Equipment Needed
You don’t need a professional kitchen to pull these off. Here’s what you’ll need:
- 12-cup standard muffin tin: Non-stick is great, but I still recommend greasing it well. Trust me on this.
- Large skillet or sauté pan: For browning the butter and cooking the aromatics. A light-colored pan helps you see when the butter is properly browned.
- Large mixing bowl: For combining the bread cubes and the liquid mixture.
- Whisk: For beating the egg and mixing the broth.
- Wooden spoon or silicone spatula: For gentle folding. You don’t want to break up the bread cubes too much.
- Measuring cups and spoons: Accuracy matters in baking, even for savory muffins.
- Chef’s knife and cutting board: For dicing the onion, celery, and sage.
- Cooling rack: For letting the muffins cool slightly before serving. This helps them set.
If you don’t have a muffin tin, you can bake this mixture in a greased 8×8-inch baking dish. Just increase the baking time by about 10-15 minutes. But honestly, the muffin tin is what gives you those perfect crispy edges, so it’s worth the small investment if you don’t already own one.
Preparation Method
Alright, let’s get cooking. This is straightforward, but I’ll walk you through every step so you get perfect results on your first try.
- Preheat and Prep: Preheat your oven to 375°F (190°C). Generously grease a 12-cup muffin tin with butter or non-stick spray. Don’t be shy here. You want those muffins to slide right out.
- Dry the Bread: Spread the bread cubes in a single layer on a large baking sheet. Bake for 10-12 minutes, stirring halfway through, until they are dry and just starting to turn golden at the edges. This step is crucial. If your bread is too soft, it will absorb the liquid and turn into a soggy mess. Set aside to cool slightly.
- Brown the Butter: In a large skillet over medium heat, add the ½ cup of butter. Swirl the pan occasionally as it melts. The butter will foam up, then the foam will subside, and you’ll start to see little brown specks forming at the bottom of the pan. This is the milk solids toasting. It should take about 5-7 minutes. The moment it smells nutty and looks like liquid gold with brown flecks, remove it from the heat immediately. Burnt brown butter is a tragedy—it goes from perfect to bitter in seconds.
- Sizzle the Sage: Immediately add the chopped fresh sage leaves to the hot brown butter. They will crackle and pop. Let them sizzle for about 30 seconds, just until fragrant. This infuses the butter with that incredible sage flavor.
- Cook the Aromatics: Add the diced onion and celery to the skillet with the sage butter. Return to medium heat and cook, stirring occasionally, for 6-8 minutes, until the vegetables are softened and translucent. Add the minced garlic and cook for one more minute until fragrant. Season with ½ teaspoon of salt and the black pepper.
- Combine the Base: In a large mixing bowl, combine the dried bread cubes and the cooked onion-celery mixture. Toss gently to distribute the vegetables evenly.
- Make the Liquid Mixture: In a separate small bowl or liquid measuring cup, whisk together the chicken broth, the beaten egg, the remaining ½ teaspoon of salt, and the dried thyme (if using). Whisk until the egg is fully incorporated.
- Moisten the Bread: Pour the liquid mixture over the bread cube mixture. Use a large spoon or your hands (clean hands work best, honestly) to gently fold everything together. You want every cube to be moistened, but not swimming in liquid. Let the mixture sit for 5-10 minutes so the bread can absorb the liquid. It should look like a cohesive, slightly wet mixture. If it looks dry, add a splash more broth.
- Fill the Muffin Tin: Divide the stuffing mixture evenly among the 12 muffin cups. Press down gently with the back of a spoon to compact them slightly. This helps them hold their shape. If you’re using the Parmesan, sprinkle a generous pinch on top of each muffin now.
- Bake to Perfection: Bake for 20-25 minutes, until the tops are deeply golden brown and crispy to the touch. The edges should be visibly crunchy and pulling away from the sides of the tin slightly. Let them cool in the pan for 5 minutes before carefully running a knife around the edges and lifting them out.
Cooking Tips & Techniques
I’ve made this recipe probably a dozen times, and I’ve learned a few things the hard way. Here are my best tips so you skip the mistakes.
Don’t Rush the Brown Butter: This is the most important step. Keep the heat at medium, not high. High heat will burn the butter before the milk solids have a chance to toast. Swirl the pan constantly and watch for that color change. The moment you see those brown specks and smell that nutty aroma, pull it off the heat. It continues to cook from the residual heat of the pan.
Dry Bread is Your Friend: I cannot stress this enough. Wet bread equals mushy stuffing. If you forgot to leave your bread out overnight, just toast it in the oven. It’s a non-negotiable step for the best texture. I once skipped this step because I was in a hurry, and I ended up with stuffing that was more like savory bread pudding. Which is fine, but not what we’re going for here.
Let the Mixture Rest: After you add the liquid, let the stuffing sit for at least 5-10 minutes. This gives the bread time to absorb everything evenly. If you bake it right away, you’ll end up with dry pockets and wet spots. Patience pays off here.
Pack Them Firmly: When you fill the muffin cups, press the mixture down firmly. This helps the muffins hold their shape and creates that beautiful, compact texture. If you just spoon it in loosely, they’ll fall apart when you try to take them out of the tin.
Use a Muffin Tin Liner: If you’re worried about sticking, you can use parchment paper liners or even just grease the tin extra well. I’ve also had great success with silicone muffin pans—they release the muffins perfectly every time.
Variations & Adaptations
One of the best things about these stuffing muffins is how easy they are to adapt. Here are a few of my favorite variations.
Add Sausage: Brown ½ pound of ground Italian sausage (sweet or spicy) in the skillet before you cook the onions. Remove the sausage, then proceed with the recipe. Crumble the cooked sausage into the bread mixture. It adds so much savory depth and makes these muffins hearty enough to be a main dish. I love serving them alongside my cozy crockpot beef stew for the ultimate comfort meal.
Make it Vegetarian: Use vegetable broth instead of chicken broth. Add a cup of sautéed mushrooms (cremini or shiitake work great) along with the onions and celery. The mushrooms add that umami flavor that you’d miss from the meat.
Add Dried Fruit: For a sweet and savory twist, fold in ½ cup of dried cranberries or chopped dried apricots along with the bread cubes. The tartness of the fruit cuts through the richness of the brown butter beautifully. It’s a fantastic side for a holiday meal, especially if you’re also making my maple dijon chicken thighs.
Gluten-Free Option: Use a good quality gluten-free bread. I’ve had the best luck with a sturdy gluten-free sourdough or a multigrain loaf. Just make sure to dry it out well in the oven. The rest of the recipe stays the same.
Dairy-Free Adaptation: Substitute the butter with a high-quality vegan butter (like Miyoko’s or Country Crock Plant Butter) and skip the Parmesan. The browning process works similarly with vegan butter, though it might take a little longer.
Serving & Storage Suggestions
These muffins are best served warm, straight out of the oven, with those crispy edges and soft, savory centers. They’re the perfect side dish for any holiday table, but honestly, I eat them for breakfast the next day with a fried egg on top. Don’t judge until you try it.
Serving Suggestions: Serve these alongside roasted turkey, chicken, or pork. They also pair beautifully with a rich, creamy soup like my creamy tomato tortellini soup for a cozy fall meal. A drizzle of leftover gravy over the top is never a bad idea.
Storage: Store leftover muffins in an airtight container in the refrigerator for up to 4 days. They will lose some of their crispiness, but the flavor will still be amazing.
Reheating: The best way to reheat them is in the oven or an air fryer. Place them on a baking sheet and warm at 350°F for 8-10 minutes. This will help restore some of that crispy exterior. You can microwave them in a pinch, but they’ll be softer. I won’t tell anyone if you do.
Freezing: These muffins freeze beautifully. Let them cool completely, then place them on a baking sheet and freeze until solid. Transfer to a freezer-safe bag or container. They’ll keep for up to 3 months. To reheat from frozen, bake at 350°F for 15-20 minutes. This is my favorite trick for getting a jump on holiday prep.
Nutritional Information & Benefits
Let’s be real—this is stuffing. It’s a comfort food, not a health food. But it does have some redeeming qualities, and knowing what’s in it helps you enjoy it mindfully.
Estimated Nutritional Values (per muffin):
– Calories: 220
– Fat: 12g (7g saturated)
– Carbohydrates: 24g
– Fiber: 1g
– Protein: 5g
– Sodium: 420mg
Health Benefits: The sage in this recipe isn’t just for flavor. It’s been used for centuries in traditional medicine for its anti-inflammatory properties and is rich in antioxidants. The onions and garlic provide prebiotic fiber, which is great for gut health. And celery is a good source of vitamin K. So while this isn’t a salad, it’s not empty calories either. It’s a dish made from real, whole ingredients, and that counts for something.
Dietary Considerations: This recipe contains gluten (from the bread) and dairy (from the butter and optional Parmesan). For a gluten-free version, use gluten-free bread. For a dairy-free version, use vegan butter. It is also easily made vegetarian with vegetable broth.
Conclusion
These best brown butter sage stuffing muffins are more than just a side dish. They’re the kind of recipe that makes people close their eyes and sigh with happiness. They’re the reason I look forward to Thanksgiving, and the reason I make stuffing in July just because I’m craving that nutty, savory, crispy-on-the-outside goodness.
I really hope you give these a try. They’re forgiving, they’re delicious, and they’re guaranteed to impress. Don’t be afraid to make them your own—add your favorite mix-ins, play with the herbs, and serve them with whatever makes you happy. That’s what cooking is all about.
If you make these, I’d love to hear about it. Drop a comment below and tell me how they turned out, or share your own twist on the recipe. And if you’re looking for more cozy, comforting recipes, don’t forget to check out my brown butter banana bread—it uses the same magical ingredient in a sweet way. Happy cooking, friends!
Frequently Asked Questions
Can I make these stuffing muffins ahead of time?
Absolutely. You can assemble the muffins completely, cover the muffin tin with plastic wrap, and refrigerate for up to 24 hours before baking. Just add an extra 5-10 minutes to the baking time since you’re starting from cold. You can also bake them fully, let them cool, and reheat them as directed.
Why did my stuffing muffins turn out soggy?
This usually happens for one of two reasons. Either your bread wasn’t dried out enough before you started, or you added too much liquid. Make sure your bread cubes are thoroughly toasted and dry. When you add the broth mixture, it should moisten the bread, not pool at the bottom of the bowl. If it looks too wet, add a few more bread cubes to balance it out.
Can I use dried sage instead of fresh?
You can, but I really recommend fresh sage for this recipe. Dried sage has a more concentrated, slightly musty flavor that doesn’t bloom as beautifully in the brown butter. If you must use dried, use 1 tablespoon and add it with the dried thyme rather than sizzling it in the butter.
How do I get the muffins out of the pan without them falling apart?
The key is letting them cool in the pan for at least 5 minutes after baking. This allows them to set. Then, run a thin knife or offset spatula around the edge of each muffin before gently lifting them out. A well-greased pan is also essential. If you’re worried, use parchment paper muffin liners.
Can I double this recipe?
Yes, this recipe doubles beautifully. Just use two muffin tins or bake in batches. If you’re making a large batch for a crowd, you can also bake the entire mixture in a greased 9×13-inch baking dish. Bake at 375°F for 30-35 minutes, until the top is golden and crispy.
Pin This Recipe!
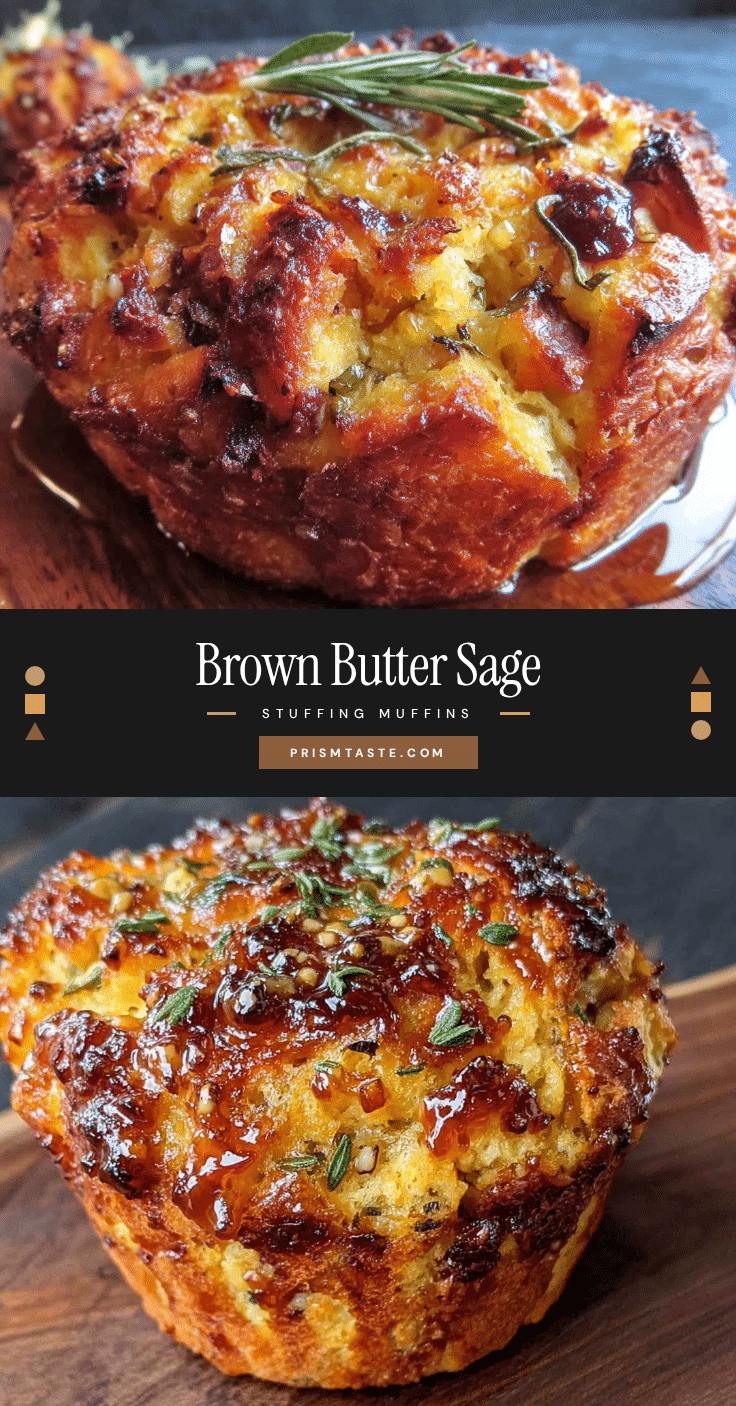
Best Brown Butter Sage Stuffing Muffins Recipe

These individual stuffing muffins are made with nutty brown butter, fresh sage, and crispy edges, perfect for Thanksgiving or any cozy meal. They’re easy to make ahead and endlessly customizable.
- Prep Time: 15 minutes
- Cook Time: 30 minutes
- Total Time: 45 minutes
- Yield: 12 servings 1x
- Category: Side Dish
- Cuisine: American
Ingredients
- 1 loaf (about 1 lb) sourdough bread, cut into ½-inch cubes
- ½ cup unsalted butter
- ¼ cup fresh sage leaves, roughly chopped
- 1 medium yellow onion, finely diced
- 2–3 celery stalks, finely diced
- 3 cloves garlic, minced
- 1 ½ cups low-sodium chicken or vegetable broth
- 1 large egg, lightly beaten
- 1 teaspoon salt
- ½ teaspoon black pepper
- ½ teaspoon dried thyme (optional)
- ¼ cup freshly grated Parmesan cheese (optional)
Instructions
- Preheat your oven to 375°F (190°C). Generously grease a 12-cup muffin tin with butter or non-stick spray.
- Spread the bread cubes in a single layer on a large baking sheet. Bake for 10-12 minutes, stirring halfway through, until dry and just starting to turn golden at the edges. Set aside to cool slightly.
- In a large skillet over medium heat, add the ½ cup of butter. Swirl the pan occasionally as it melts. The butter will foam, then the foam will subside, and you’ll see little brown specks forming at the bottom. Remove from heat immediately when it smells nutty and looks like liquid gold with brown flecks (about 5-7 minutes).
- Immediately add the chopped fresh sage leaves to the hot brown butter. Let them sizzle for about 30 seconds, just until fragrant.
- Add the diced onion and celery to the skillet with the sage butter. Return to medium heat and cook, stirring occasionally, for 6-8 minutes, until softened and translucent. Add the minced garlic and cook for one more minute until fragrant. Season with ½ teaspoon of salt and the black pepper.
- In a large mixing bowl, combine the dried bread cubes and the cooked onion-celery mixture. Toss gently to distribute the vegetables evenly.
- In a separate small bowl or liquid measuring cup, whisk together the chicken broth, the beaten egg, the remaining ½ teaspoon of salt, and the dried thyme (if using). Whisk until the egg is fully incorporated.
- Pour the liquid mixture over the bread cube mixture. Use a large spoon or your hands to gently fold everything together. Let the mixture sit for 5-10 minutes so the bread can absorb the liquid. It should look like a cohesive, slightly wet mixture. If it looks dry, add a splash more broth.
- Divide the stuffing mixture evenly among the 12 muffin cups. Press down gently with the back of a spoon to compact them slightly. If using Parmesan, sprinkle a generous pinch on top of each muffin now.
- Bake for 20-25 minutes, until the tops are deeply golden brown and crispy to the touch. Let them cool in the pan for 5 minutes before carefully running a knife around the edges and lifting them out.
Notes
Don’t rush the brown butter; keep heat at medium and watch for brown specks. Dry bread is crucial for texture. Let the mixture rest after adding liquid. Pack muffins firmly in the tin. For easy release, use parchment liners or grease well.
Nutrition
- Serving Size: 1 muffin
- Calories: 220
- Sugar: 2
- Sodium: 420
- Fat: 12
- Saturated Fat: 7
- Carbohydrates: 24
- Fiber: 1
- Protein: 5
Keywords: stuffing muffins, brown butter sage stuffing, Thanksgiving stuffing, individual stuffing, crispy stuffing muffins


