The pan came back to the kitchen with nothing but a spatula leaning against the edge. My sister-in-law had scraped every last bit of that brown butter pumpkin dump cake off the sides, and she wasn’t even sorry about it. “You’re making this for Thanksgiving,” she said, not asked. That was the moment I realized this dump cake had graduated from “let’s see what happens” to “non-negotiable family staple.”
I stumbled onto this recipe by accident last October. I had a can of pumpkin puree staring at me from the pantry, a box of yellow cake mix I bought on a whim, and absolutely zero energy for a layered dessert situation. Dump cakes were always that thing I made when I needed dessert fast—no judgment, all payoff. But I wanted something that tasted like I actually tried. So I browned the butter first. That one extra step, the one that takes maybe five minutes, turned a humble dump cake into something that made people close their eyes while eating it. I’m not exaggerating.
There’s something deeply satisfying about a dessert that looks like you spent hours on it when you really just stirred things together and let the oven do the heavy lifting. The brown butter gives it this nutty, almost caramel-like depth that plain butter just can’t touch. And the pumpkin? It keeps everything ridiculously moist without feeling heavy. This is the kind of dessert that shows up at potlucks and disappears before the savory dishes are even half-gone. I’ve watched it happen more times than I can count now.
So here it is—the best brown butter pumpkin dump cake you’ll ever make. Five ingredients. One pan. Zero fuss. And I promise, the hardest part is waiting for it to cool enough to eat.
Why You’ll Love This Recipe
I’ve tested this brown butter pumpkin dump cake at least a dozen times across three different ovens, two different altitudes, and one very questionable vintage baking dish from my grandmother’s collection. It worked every single time. That’s the kind of reliability I want in a dessert, especially during the chaos of fall baking season.
- Five Ingredients — You probably already have most of these in your kitchen right now. No specialty baking aisles required.
- Under 10 Minutes of Prep — I timed it. If you can stir and sprinkle, you can make this dump cake. The oven does literally everything else.
- Brown Butter Magic — That nutty, toasty flavor transforms a simple dump cake into something that tastes like you spent serious effort. It’s the cheapest upgrade you’ll ever make.
- Perfect for Fall Gatherings — Thanksgiving, Friendsgiving, cozy Sunday dinners, or just a random Tuesday when you need pumpkin in your life. This dump cake fits every occasion.
- Crowd-Pleasing Texture — The top gets slightly crisp and golden, the middle stays soft and almost pudding-like, and every bite tastes like autumn in a spoon.
- No Mixer Required — You don’t need a stand mixer, hand mixer, or any fancy equipment. A bowl, a whisk, and a spatula are all you need.
What makes this version different from every other pumpkin dump cake out there? It’s the brown butter. Most recipes skip this step, and honestly, they’re missing the whole point. Browning the butter adds a toasty, nutty richness that complements the warm pumpkin spices perfectly. It’s the difference between a good dessert and one people ask for by name. I’ve made this for my friend’s fall brunch and watched it compete with a homemade pecan pie. The pie had leftovers. The dump cake did not.
This is comfort food at its most honest—simple ingredients, honest technique, and a result that feels like a warm hug on a chilly October evening. You don’t need to impress anyone with fancy plating or complicated methods. You just need this brown butter pumpkin dump cake.
What Ingredients You Will Need
This recipe keeps things beautifully simple. Every ingredient has a job, and none of them are there just to take up space. Here’s what you need for the best brown butter pumpkin dump cake of your life.
- 1 cup (2 sticks) unsalted butter — This is the star of the show. You’ll brown it until it turns golden and smells like toasted nuts. I use unsalted so I can control the salt level, but if you only have salted butter on hand, just reduce the added salt by a pinch. Kerrygold is my go-to for the richest flavor, but any good-quality unsalted butter works beautifully.
- 1 can (15 oz) pumpkin puree — Make sure you grab pure pumpkin puree, not pumpkin pie filling. They look similar at the store, but the filling has added sugar and spices that will throw off the whole recipe. Libby’s is the classic choice, but store brands work just fine. I’ve used both with identical results.
- 1 cup granulated sugar — Regular white sugar adds just the right amount of sweetness without overpowering the pumpkin or the brown butter. You could substitute coconut sugar for a less refined option, but the texture will be slightly grainier.
- 2 teaspoons pumpkin pie spice — You can buy this pre-mixed, or make your own by combining 1 teaspoon cinnamon, ½ teaspoon ginger, ¼ teaspoon nutmeg, ¼ teaspoon allspice, and a pinch of cloves. I usually make my own because I like controlling the cinnamon-to-spice ratio, but store-bought works perfectly when you’re short on time.
- 1 box (15.25 oz) yellow cake mix — This is your shortcut to a perfectly tender, golden topping. Duncan Hines and Betty Crocker both work great. Don’t use a butter recipe cake mix—it changes the texture and makes the top too dense. Just a standard yellow cake mix. You’ll sprinkle it on dry, so don’t prepare the batter according to the box instructions.
- ½ cup chopped pecans (optional but highly recommended) — They add a lovely crunch that contrasts with the soft pumpkin layer. If you’re feeding someone with a nut allergy, leave them out or substitute pepitas for a similar texture.
- Optional for serving: vanilla ice cream, whipped cream, or a drizzle of caramel sauce — Not technically ingredients for the cake itself, but I’d be remiss not to mention them. A scoop of vanilla bean ice cream melting over a warm slice of this dump cake is a near-religious experience.
One quick note on the cake mix—don’t be tempted to use a spice cake mix instead of yellow. I tried that once, and the spices competed with the pumpkin pie spice in a way that tasted muddled. The yellow cake mix provides a neutral, buttery base that lets the brown butter and pumpkin shine. Trust me on this one.
Equipment Needed
You don’t need a fully stocked bakery kitchen to make this brown butter pumpkin dump cake. Here’s what you’ll actually use.
- 9×13-inch baking dish — Glass or ceramic works best because they conduct heat evenly and let you see the browning on the bottom. I use a Pyrex dish that’s survived countless moves and still looks new. Metal pans work too, but keep an eye on the baking time—they tend to cook a few minutes faster.
- Medium saucepan — For browning the butter. Light-colored stainless steel or enameled pans are ideal because you can see the butter change color. Dark nonstick pans make it harder to judge the color, which is how you end up with burnt butter instead of brown butter. Ask me how I know.
- Large mixing bowl — Any bowl big enough to hold the pumpkin mixture without splashing. I use a ceramic nesting bowl that’s probably older than I am.
- Whisk — For smoothing out the pumpkin puree and sugar. A fork works in a pinch, but a whisk makes it effortless.
- Spatula — Silicone or rubber, for scraping every last bit of brown butter out of the pan. Waste not, want not.
- Measuring cups and spoons — For precise measurements. I’ve learned the hard way that eyeballing brown butter is a recipe for disappointment.
- Cooling rack — Optional but helpful if you want the bottom of the dish to cool evenly. A folded kitchen towel works too.
If you don’t have a 9×13 dish, you can use a 10-inch cast iron skillet for a rustic look. Just adjust the baking time by about 5 minutes and check for doneness with a toothpick. I’ve done this before, and the slightly crispy edges from the cast iron are absolutely worth the extra effort.
Preparation Method
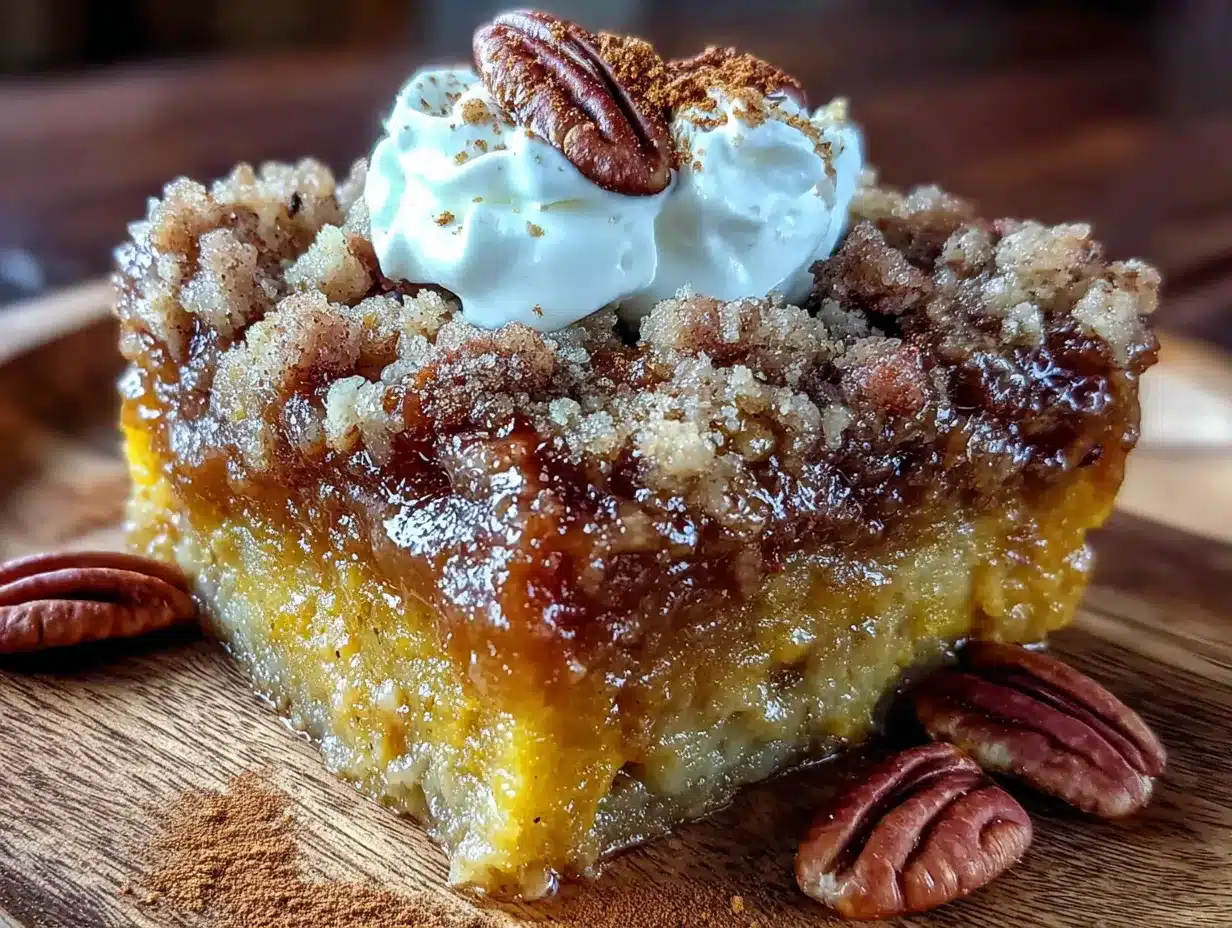
This brown butter pumpkin dump cake comes together faster than you’d expect from something that tastes this good. Follow these steps, and you’ll have a dessert that makes everyone think you spent hours in the kitchen.
- Preheat your oven to 350°F (175°C). Position the rack in the center of the oven. While it’s heating, lightly grease your 9×13 baking dish with butter or nonstick spray. Don’t skip this step—the pumpkin layer likes to stick if you’re not careful.
- Brown the butter. Place the 2 sticks of unsalted butter in a medium saucepan over medium heat. Let it melt completely, then continue cooking. Stir occasionally with a spatula or wooden spoon. After about 4-5 minutes, the butter will start to foam and turn golden. Watch closely—once you see small brown specks forming at the bottom of the pan and the butter smells nutty and toasty, remove it from the heat immediately. This happens fast, so don’t walk away. Pour the brown butter into a heatproof bowl to stop the cooking process. Set it aside to cool slightly while you prepare the pumpkin layer.
- Mix the pumpkin layer. In your large mixing bowl, combine the 15-ounce can of pumpkin puree, 1 cup granulated sugar, and 2 teaspoons pumpkin pie spice. Whisk until smooth and fully combined. It should look like a thick, glossy puree with no streaks of sugar or spice. Taste it—it should be sweet with a warm, spiced finish. If it tastes flat, add another pinch of pumpkin pie spice.
- Spread the pumpkin mixture in the baking dish. Pour the pumpkin mixture into your greased 9×13 dish. Use a spatula to spread it evenly across the bottom. It won’t look like much at this stage, but trust the process. The layer should be about ¼-inch thick and completely cover the bottom of the dish.
- Drizzle the brown butter over the pumpkin layer. Take your slightly cooled brown butter and drizzle it evenly over the pumpkin mixture. Don’t pour it all in one spot—move the bowl around so the butter covers the surface. Some of it will sink into the pumpkin, and that’s exactly what you want. It creates pockets of nutty richness throughout the cake.
- Sprinkle the dry cake mix on top. Open your box of yellow cake mix and sprinkle it evenly over the butter and pumpkin layer. Don’t stir it in. Don’t mix it. Just sprinkle it in an even layer, breaking up any clumps with your fingers. The dry cake mix is what creates that golden, slightly crisp topping as it bakes. If you stir it in, you’ll lose the texture entirely.
- Add the pecans (if using). Sprinkle the ½ cup chopped pecans evenly over the top of the dry cake mix. They’ll toast in the oven and add a wonderful crunch.
- Bake for 40-45 minutes. Place the dish in the preheated oven and bake until the top is golden brown and the edges are bubbling. The center should be set but still slightly jiggly—it will continue to set as it cools. If the top is browning too quickly around the 30-minute mark, tent the dish loosely with aluminum foil for the remaining baking time.
- Cool for at least 15 minutes. Remove the dish from the oven and place it on a cooling rack. Let it cool for at least 15 minutes before serving. This gives the pumpkin layer time to set properly. If you dig in too soon, it will be soupy. I know it’s hard to wait, but trust me—it’s worth it.
- Serve warm or at room temperature. Scoop into bowls or onto plates. Top with vanilla ice cream, whipped cream, or a drizzle of caramel sauce if you’re feeling fancy. The warm cake with cold ice cream is a texture combination that never gets old.
Pro tip from my own mistakes: The first time I made this, I used a dark metal pan and didn’t check the oven until the 45-minute mark. The edges were almost burnt while the center was still underdone. If you’re using a dark or nonstick metal pan, start checking at 35 minutes. Glass and ceramic dishes are more forgiving, so stick with those if you’re unsure.
Cooking Tips & Techniques
After making this brown butter pumpkin dump cake more times than I care to count, I’ve picked up a few tricks that make the process smoother and the results more consistent.
The brown butter window is real. You have about 30 seconds between perfectly browned butter and burnt butter. When you see the foam subside and the milk solids turn amber, pull it off the heat immediately. I once got distracted by my phone and ended up with butter that tasted like regret. Pour it into a cool bowl right away to stop the cooking process, or the residual heat from the pan will keep browning it.
Room temperature ingredients matter here. I know, I know—it feels like an unnecessary step. But cold pumpkin puree straight from the fridge doesn’t blend as smoothly with the sugar and spice. Let it sit on the counter for 15 minutes before you start. It makes a noticeable difference in how evenly the sugar dissolves.
Don’t overthink the cake mix layer. I’ve had readers ask if they should press the cake mix into the butter. No. Just sprinkle it gently. The butter will absorb into the dry mix as it bakes, creating that perfect golden crust. Pressing it down makes the top dense and gummy instead of light and crisp.
Check for doneness with a gentle jiggle. A toothpick test doesn’t work well for dump cakes because the pumpkin layer stays soft. Instead, gently shake the dish. The edges should be set and the center should jiggle slightly, like a firm custard. If the center looks liquid, give it another 5 minutes and check again.
Let it rest, seriously. I know the smell of brown butter and pumpkin filling your kitchen is intoxicating. But cutting into this dump cake too soon is the number one mistake people make. The pumpkin layer needs time to set, and the cake mix needs time to absorb the butter. Give it at least 15 minutes. Your patience will be rewarded with clean slices instead of a messy puddle.
Double the recipe for a crowd. This brown butter pumpkin dump cake disappears fast. If you’re bringing it to a gathering, make two—one for the table and one to hide in the kitchen for yourself. I speak from experience.
Variations & Adaptations
One of the best things about this brown butter pumpkin dump cake is how adaptable it is. Here are some variations I’ve tried and loved.
Gluten-Free Version: Substitute the yellow cake mix with a gluten-free yellow cake mix. I’ve tested this with King Arthur’s gluten-free yellow cake mix, and the texture was nearly identical to the original. Just make sure your pumpkin pie spice is also certified gluten-free if that’s a concern.
Dairy-Free Version: Use a high-quality vegan butter for browning. I’ve had good results with Miyoko’s and Country Crock plant-based butter sticks. They brown similarly to dairy butter, though the flavor is slightly different. Still delicious, just not as nutty.
Spice It Up: Add ½ teaspoon of cardamom or a pinch of cayenne pepper to the pumpkin mixture for a warming, unexpected kick. I tried this on a whim last fall, and it’s become my secret weapon for dinner parties. People always ask what’s different, and they can never quite place it.
Apple Pumpkin Dump Cake: Layer 1 cup of diced peeled apples (Granny Smith or Honeycrisp work best) over the pumpkin mixture before adding the cake mix. The apples soften as they bake and add little pockets of sweet-tart flavor. This is my favorite variation for early fall when apples are at their peak.
Chocolate Lover’s Version: Swap the yellow cake mix for a chocolate cake mix. The chocolate and pumpkin combination is surprisingly good—like a pumpkin brownie with a crunchy top. I was skeptical the first time I tried this, but it won over a room full of dessert skeptics.
Lower Sugar Option: Reduce the granulated sugar to ¾ cup and use a sugar-free yellow cake mix. The texture is slightly less tender, but the flavor still holds up. If you’re watching your sugar intake, this is a solid compromise that doesn’t sacrifice the essential dump cake experience.
Slow Cooker Method: Grease your slow cooker insert, layer the ingredients as directed, and cook on low for 3-4 hours or high for 1.5-2 hours. The top won’t get as crispy, but the cake will be incredibly moist and tender. Remove the lid for the last 30 minutes to help the top firm up. This is my go-to method when I need to free up oven space for a holiday feast.
Serving & Storage Suggestions
This brown butter pumpkin dump cake is forgiving when it comes to serving and storage, which is one of the many reasons I keep coming back to it.
Serving Temperature: Serve warm for the best texture and flavor. The pumpkin layer is soft and almost custard-like when warm, and the top is slightly crisp. At room temperature, the cake firms up and becomes more sliceable—perfect for packing in lunchboxes or serving at a buffet. I actually prefer it room temperature the next day because the flavors have had time to meld.
What to Serve With It: A scoop of vanilla bean ice cream is the classic pairing, and for good reason—the cold creaminess balances the warm, spiced cake perfectly. Whipped cream works beautifully if you want something lighter. For a truly indulgent experience, drizzle caramel sauce over the top and add a sprinkle of flaky sea salt. The salty-sweet combination with the brown butter is absolutely divine.
Complementary Dishes: This dump cake pairs wonderfully with a creamy witch’s brew pumpkin spice cold brew float for a full fall dessert experience. If you’re planning a cozy brunch, serve it alongside a cozy fall brown sugar cinnamon french toast casserole for a spread that screams autumn.
Refrigerator Storage: Cover the baking dish tightly with plastic wrap or aluminum foil, or transfer leftovers to an airtight container. The cake will keep in the refrigerator for up to 5 days. The texture softens slightly as it sits, but the flavor actually improves. I’ve found day two is often better than day one.
Freezer Storage: This brown butter pumpkin dump cake freezes beautifully. Let it cool completely, then wrap the entire dish (or individual portions) tightly in plastic wrap, followed by a layer of aluminum foil. Freeze for up to 3 months. To thaw, place in the refrigerator overnight or let it sit at room temperature for a few hours. Reheat individual portions in the microwave for 30-45 seconds, or warm the whole dish in a 300°F oven for 15-20 minutes.
Reheating Tips: The microwave is the fastest option, but it can make the top slightly soggy. For best results, reheat in a 350°F oven for 10-15 minutes. The top will crisp back up, and the pumpkin layer will warm through evenly. If you’re reheating a single serving, an air fryer at 325°F for 3-4 minutes works surprisingly well.
Nutritional Information & Benefits
Let’s be honest—this is a dessert, not a health food. But it does have some redeeming qualities worth mentioning.
Estimated Nutritional Values (per serving, based on 12 servings):
| Nutrient | Amount |
|---|---|
| Calories | ~380 |
| Total Fat | 18g |
| Saturated Fat | 10g |
| Carbohydrates | 52g |
| Fiber | 2g |
| Sugar | 35g |
| Protein | 4g |
| Vitamin A | 190% DV |
Health Benefits: Pumpkin is packed with vitamin A, which supports eye health and immune function. It’s also a good source of fiber, which helps with digestion and keeps you feeling full. The brown butter adds healthy fats that help your body absorb the fat-soluble vitamins in the pumpkin. The pecans provide magnesium and healthy omega-3 fatty acids.
Dietary Considerations: This recipe is vegetarian. For a gluten-free version, use a gluten-free yellow cake mix. For a dairy-free version, use vegan butter. It’s not suitable for a low-carb or keto diet due to the sugar and cake mix. If you’re watching your sugar intake, consider the lower sugar variation mentioned above.
Potential Allergens: This recipe contains dairy (butter) and gluten (cake mix). The pecans are optional but add a tree nut allergen. If you’re serving a crowd with dietary restrictions, make the gluten-free version and skip the nuts to accommodate more people.
I’m not a nutritionist, and I don’t pretend to be one. But I do believe that dessert can be part of a balanced life. This brown butter pumpkin dump cake is a treat, and treats are meant to be enjoyed without guilt. Eat a slice, savor every bite, and don’t overthink it.
Conclusion
This brown butter pumpkin dump cake has earned a permanent spot in my fall baking rotation, and I don’t see that changing anytime soon. It’s the dessert I bring to every gathering, the one I make when I need a quick win, and the one that consistently gets the most enthusiastic reactions from people who don’t even consider themselves pumpkin fans.
What I love most about this recipe is how honest it is. There’s no pretension, no complicated technique, no ingredient you have to hunt down at a specialty store. It’s just good butter, good pumpkin, and a few pantry staples coming together to create something genuinely special. The brown butter adds a depth of flavor that feels like a secret weapon, but it’s really just a simple step anyone can master.
I want you to make this your own. Add extra pecans if you love crunch. Skip them if you don’t. Swap the yellow cake mix for chocolate if that’s your thing. Serve it with ice cream, whipped cream, or nothing at all. The beauty of a dump cake is that it’s forgiving, adaptable, and always delicious. There’s no wrong way to enjoy it.
If you make this brown butter pumpkin dump cake—and I really hope you do—come back and let me know how it turned out. Did you add any twists? Did your family fight over the last piece? Did you hide a portion in the freezer for yourself? I want to hear all of it. Drop a comment below, share your photos, and tag me on social media. There’s nothing that makes my day quite like seeing someone else fall in love with a recipe the same way I did.
Happy baking, friends. May your kitchen smell like brown butter and pumpkin spice, and may your dessert disappear faster than you expect.
Frequently Asked Questions
Can I use pumpkin pie filling instead of pumpkin puree?
No, I don’t recommend it. Pumpkin pie filling already has sugar and spices added, which will make your dump cake overly sweet and throw off the spice balance. Stick with 100% pure pumpkin puree for the best results. They look almost identical in the store, so double-check the label before you buy.
Why is my dump cake soupy in the middle?
This usually happens for one of two reasons: either the cake wasn’t baked long enough, or it was cut into too soon. The pumpkin layer needs time to set, and the cake mix needs time to absorb the butter. Bake until the edges are bubbling and the center jiggles like a firm custard, then let it cool for at least 15 minutes before serving. If it’s still soupy after that, pop it back in the oven for another 5-10 minutes.
Can I make this brown butter pumpkin dump cake ahead of time?
Absolutely. You can make it a day ahead and store it covered in the refrigerator. The flavors actually meld together beautifully overnight. Reheat in a 350°F oven for 10-15 minutes before serving, or serve it at room temperature. I’ve also made the pumpkin mixture and browned the butter the night before, then assembled and baked the next day. Both methods work great.
Can I use a different cake mix flavor?
Yellow cake mix is my top recommendation because it has a neutral, buttery flavor that lets the brown butter and pumpkin shine. That said, I’ve successfully used white cake mix (slightly less rich but still good), spice cake mix (good but the spices can compete with the pumpkin pie spice), and chocolate cake mix (surprisingly delicious, like a pumpkin brownie). Avoid lemon or other fruit-flavored cake mixes—they clash with the pumpkin.
How do I know when the butter is properly browned?
Watch for three signs: the butter will foam up, then the foam will subside; the milk solids at the bottom of the pan will turn amber or golden brown; and the butter will smell nutty and toasty, almost like toasted hazelnuts. The whole process takes about 4-6 minutes over medium heat. Once you see those brown specks and smell that nutty aroma, pull it off the heat immediately. Pour it into a cool bowl to stop the cooking process, or the residual heat from the pan will keep browning it and could burn it.
Pin This Recipe!
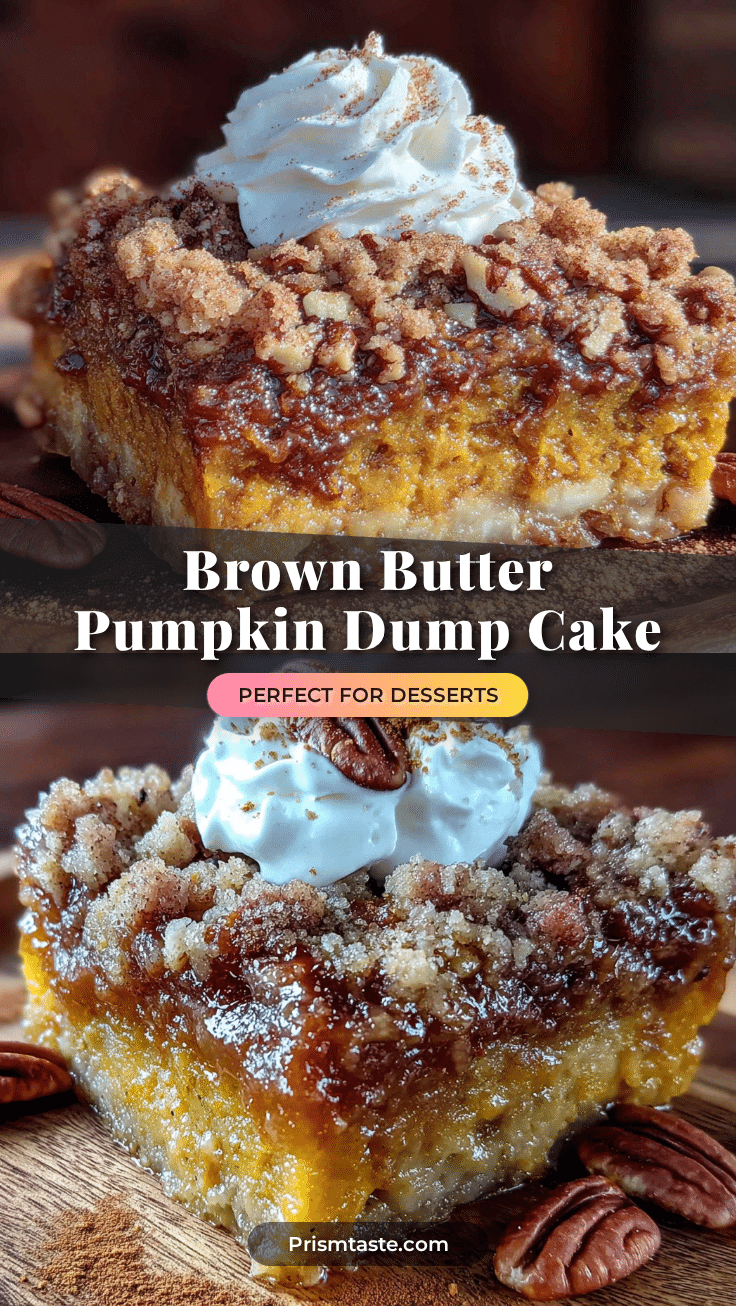
Best Brown Butter Pumpkin Dump Cake (Easy 5-Ingredient Recipe)
An incredibly easy 5-ingredient dump cake with brown butter, pumpkin, and a golden cake mix topping. Perfect for fall gatherings, this dessert comes together in under 10 minutes of prep and delivers a nutty, moist, crowd-pleasing treat.
- Prep Time: 10 minutes
- Cook Time: 45 minutes
- Total Time: 55 minutes
- Yield: 12 servings 1x
- Category: Dessert
- Cuisine: American
Ingredients
- 1 cup (2 sticks) unsalted butter
- 1 can (15 oz) pumpkin puree
- 1 cup granulated sugar
- 2 teaspoons pumpkin pie spice
- 1 box (15.25 oz) yellow cake mix
- ½ cup chopped pecans (optional)
- Optional for serving: vanilla ice cream, whipped cream, or caramel sauce
Instructions
- Preheat your oven to 350°F (175°C). Lightly grease a 9×13-inch baking dish with butter or nonstick spray.
- Brown the butter: Place the 2 sticks of unsalted butter in a medium saucepan over medium heat. Melt completely, then continue cooking, stirring occasionally, until the butter foams, turns golden, and smells nutty (about 4-5 minutes). Remove from heat immediately and pour into a heatproof bowl to stop cooking. Set aside to cool slightly.
- Mix the pumpkin layer: In a large mixing bowl, combine the pumpkin puree, granulated sugar, and pumpkin pie spice. Whisk until smooth and fully combined.
- Spread the pumpkin mixture evenly in the prepared baking dish.
- Drizzle the slightly cooled brown butter evenly over the pumpkin layer.
- Sprinkle the dry yellow cake mix evenly over the butter and pumpkin layer. Do not stir. Break up any clumps with your fingers.
- If using, sprinkle the chopped pecans evenly over the top.
- Bake for 40-45 minutes, until the top is golden brown and the edges are bubbling. The center should be set but still slightly jiggly. If browning too quickly, tent with foil after 30 minutes.
- Cool for at least 15 minutes before serving to allow the pumpkin layer to set.
- Serve warm or at room temperature. Top with vanilla ice cream, whipped cream, or caramel sauce if desired.
Notes
For best results, use a light-colored pan to monitor browning. Let the cake rest at least 15 minutes before serving to avoid a soupy texture. The brown butter step is crucial—watch closely to avoid burning. For a gluten-free version, use a gluten-free yellow cake mix. For dairy-free, use vegan butter.
Nutrition
- Serving Size: 1 slice (1/12 of cak
- Calories: 380
- Sugar: 35
- Fat: 18
- Saturated Fat: 10
- Carbohydrates: 52
- Fiber: 2
- Protein: 4
Keywords: pumpkin dump cake, brown butter, easy dessert, fall dessert, 5-ingredient recipe, Thanksgiving dessert


