That evening, I was rummaging through the fridge, half-expecting to find a tub of store-bought ice cream but only discovering a lonely can of sweetened condensed milk and some leftover caramel sauce. Honestly, I wasn’t even planning to make ice cream that night. But since it was too warm outside and the craving for something sweet was strong, I decided to throw together a quick, no-fuss dessert. The result? This easy creamy no-churn salted caramel ice cream that surprised even me.
At first, I was skeptical—no churning, really? Would it be that creamy? But after mixing the simple ingredients and freezing it overnight, I was greeted with a luscious, silky treat that tasted way better than anything from the freezer aisle. It quickly became my go-to dessert for those evenings when I want something homemade without the hassle.
What really hooked me was the balance between the buttery caramel sweetness and that subtle hit of saltiness, which made every spoonful feel indulgent yet perfectly balanced. I remember sharing it with a friend over a quick catch-up, and she insisted on getting the recipe right away. Somehow, this simple recipe became a small tradition — perfect for last-minute guests or when I want a comforting treat without the fuss. It’s the kind of recipe that feels like a little hug in a bowl, the kind I find myself coming back to again and again, especially when life gets a bit hectic.
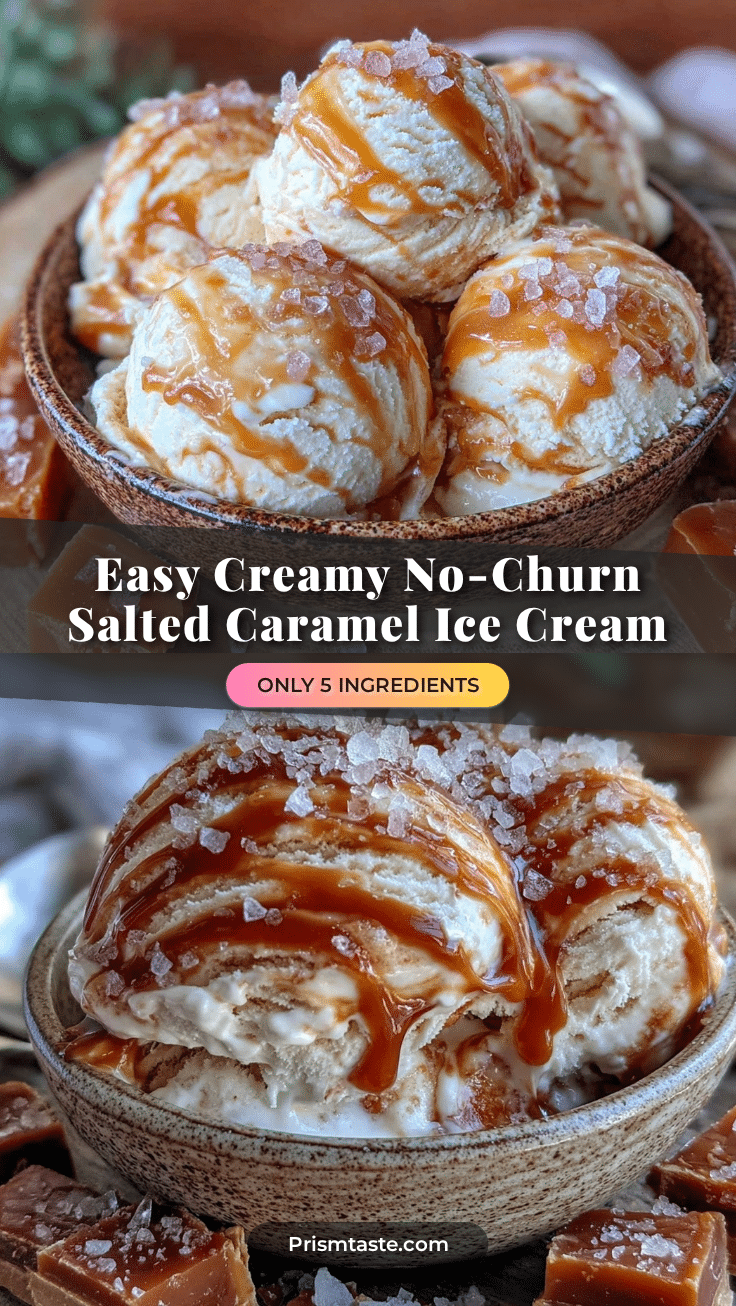
Why You’ll Love This Easy Creamy No-Churn Salted Caramel Ice Cream Recipe
This recipe isn’t just a dessert; it’s a quick win that anyone can pull off, even if you don’t own an ice cream maker or fancy kitchen gadgets. After testing several versions, I landed on this one because it nails the creamy texture without the usual fuss. Here’s why it’s become a staple:
- Quick & Easy: Takes under 10 minutes to prep, then just freeze. Perfect for busy nights or spontaneous cravings.
- Simple Ingredients: Uses pantry basics like sweetened condensed milk and caramel sauce — no obscure items needed.
- Perfect for Any Occasion: Whether it’s a cozy night in or a casual get-together, it’s always a hit without stealing the spotlight.
- Crowd-Pleaser: Kids and adults alike ask for seconds—and I mean it. It’s the kind of dessert that sparks smiles.
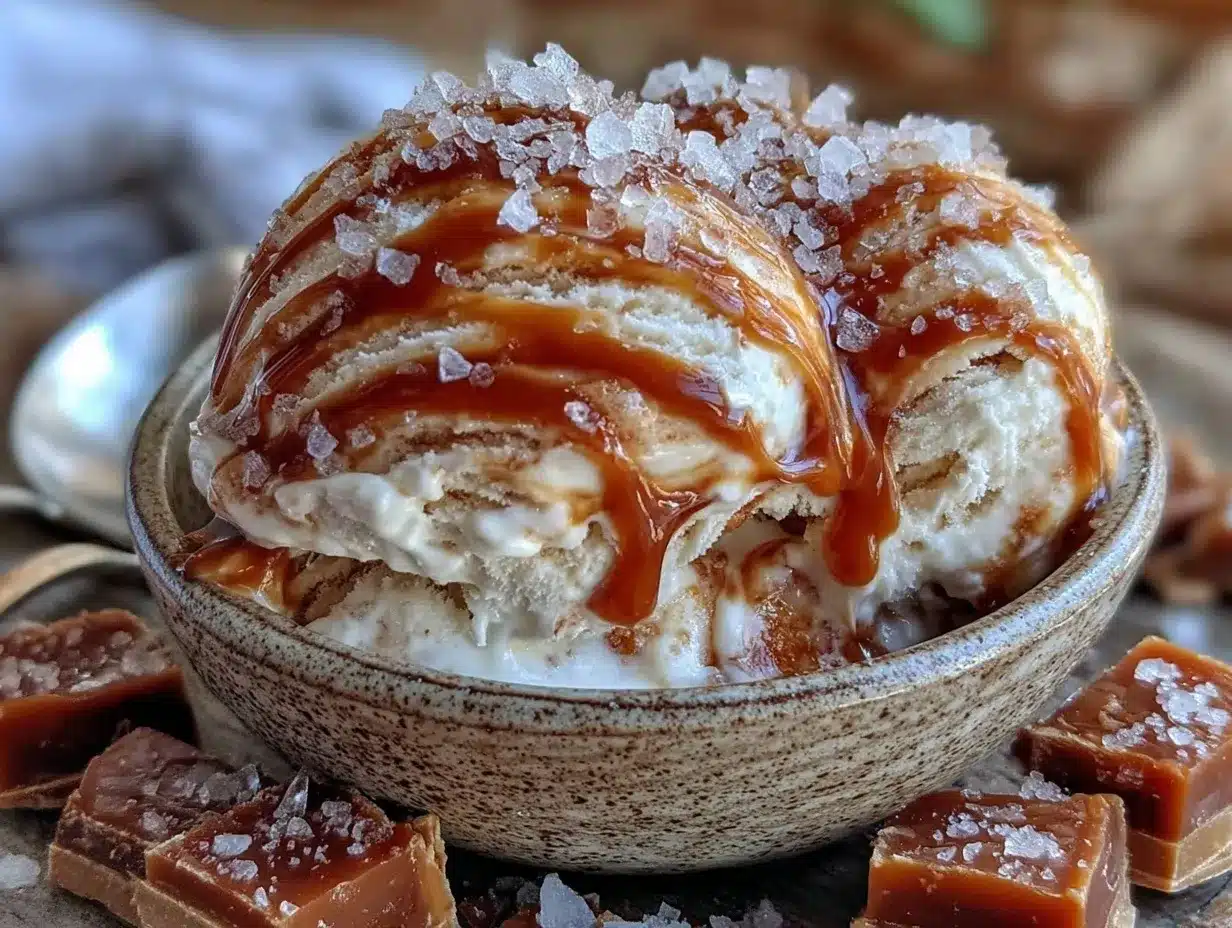
- Unbelievably Delicious: The salted caramel swirl adds that wow factor, giving this ice cream a rich, layered flavor.
This recipe stands out because of the no-churn technique that keeps the ice cream smooth and creamy — no icy bits or freezer burn. Plus, I use a pinch of sea salt to cut through the sweetness, which gives it a grown-up twist. Honestly, it’s the kind of treat that makes you close your eyes with the first bite and savor that perfect balance of sweet and salty. It’s a homemade dessert that feels fancy without any stress.
What Ingredients You Will Need for This No-Churn Salted Caramel Ice Cream
This recipe uses simple, wholesome ingredients to deliver bold flavor and satisfying texture without the fuss. Most of these are pantry staples, and a few can be swapped easily if needed.
- Sweetened Condensed Milk (1 can, 14 oz / 397 g) – the secret to creamy sweetness without adding extra sugar.
- Heavy Whipping Cream (2 cups / 480 ml) – for a rich, fluffy base that whips up beautifully. I prefer Organic Valley for the best texture.
- Salted Caramel Sauce (¾ cup / 180 ml) – homemade or store-bought. If you want to make it yourself quickly, a simple caramelized sugar drizzle with a pinch of sea salt works wonders.
- Vanilla Extract (1 tsp) – enhances the caramel flavor and adds depth.
- Sea Salt (½ tsp, or to taste) – this is the magic touch that balances the sweetness and brings out the salted caramel vibe.
Substitution notes: If you want a dairy-free version, try canned coconut cream whipped instead of heavy cream and use a vegan caramel sauce. For a less sweet option, reduce the amount of caramel sauce slightly or use a sugar-free variety.
Equipment Needed
- Mixing Bowl: A large bowl to whip the cream and fold in ingredients.
- Hand Mixer or Stand Mixer: For whipping the heavy cream to soft peaks. A whisk can work but requires more elbow grease.
- Spatula: To gently fold the condensed milk and caramel into the whipped cream without deflating it.
- Freezer-Safe Container: An airtight container or loaf pan lined with parchment paper to freeze the ice cream evenly.
If you don’t have a stand mixer, a handheld electric mixer is perfectly fine. And honestly, I’ve done this with a balloon whisk when in a pinch. The key is to get the cream nicely whipped, so it holds air and gives that creamy mouthfeel. Also, using a container with a flat bottom helps the ice cream freeze smoothly without weird lumps.
Preparation Method: Step-by-Step Guide to Perfect No-Churn Salted Caramel Ice Cream
- Chill your equipment: Place your mixing bowl and beaters in the fridge for 10–15 minutes before starting. Cold tools help the cream whip better.
- Whip the heavy cream: Pour 2 cups (480 ml) of heavy whipping cream into the chilled bowl. Using a hand or stand mixer, beat on medium-high speed until soft peaks form. This usually takes about 3-4 minutes. Don’t overbeat or it will turn grainy.
- Combine sweetened condensed milk and vanilla: In a separate bowl, stir together the 14 oz (397 g) can of sweetened condensed milk and 1 tsp vanilla extract until smooth.
- Fold condensed milk into whipped cream: Gently fold the condensed milk mixture into the whipped cream using a spatula. Do this slowly to keep the air you just whipped in. The mixture should be light and fluffy.
- Add sea salt to the mixture: Sprinkle ½ tsp sea salt evenly and fold it in. This step is key to giving that salted caramel flavor depth.
- Layer the ice cream and caramel sauce: Pour half of the ice cream base into your freezer-safe container. Drizzle ⅓ of the salted caramel sauce over it. Use a butter knife or skewer to gently swirl the caramel, creating pretty ribbons without fully mixing it in.
- Repeat layering: Add the remaining ice cream base and top with the rest of the caramel sauce. Swirl again lightly.
- Freeze overnight: Cover the container tightly with a lid or plastic wrap. Freeze for at least 6 hours, preferably overnight, until firm.
- Serving tip: Let the ice cream sit at room temperature for 5-10 minutes before scooping for easier serving and creamier texture.
Tip: If you want chunkier texture, fold in chopped pecans or toffee bits during the final fold step. Just don’t overdo it or it can weigh down the cream.
Cooking Tips & Techniques for the Best No-Churn Ice Cream
Whipping the cream properly is the heart of this recipe. I’ve learned the hard way that underwhipped cream leads to icy, dense ice cream, while overwhipping turns it into butter. Keep an eye on soft peaks — when the cream holds shape but still looks smooth and silky.
Folding the condensed milk in gently is another trick. You want to preserve as much air as possible for that fluffy, creamy finish. Take your time, and use a light hand.
About the caramel sauce — homemade is ideal if you have the time, but good-quality store-bought caramel works too. I like Trader Joe’s or Smucker’s for convenience. The salt is crucial; a pinch of flaky sea salt right at the end wakes up the flavors.
One mistake I made when I first tried this was freezing in a shallow container. It froze too fast and got icy. Using a deeper container and letting it freeze slowly overnight really changes the texture for the better.
Lastly, don’t rush the thawing before scooping. If the ice cream is rock hard, it won’t scoop smoothly and you’ll lose that creamy mouthfeel. Give it a few minutes to soften slightly, and you’ll see how creamy it really is.
Variations & Adaptations to Make This Recipe Your Own
- Chocolate Salted Caramel: Swirl in melted dark chocolate or cocoa powder with the caramel for a mocha twist.
- Nutty Crunch: Fold in toasted pecans, almonds, or crushed pretzels for texture and salty crunch.
- Dairy-Free Version: Use full-fat coconut cream whipped to soft peaks, and swap in a vegan caramel sauce. It’s a delightfully creamy vegan treat.
- Spiced Caramel: Add a pinch of cinnamon or cardamom to the caramel sauce for a warm, cozy flavor that’s perfect in fall.
- Swirled with Fruit: Try layering thin ribbons of raspberry or blackberry jam alongside the salted caramel for a fruity contrast. It reminds me a bit of the fresh flavors in my flash frozen peach smoothie.
One variation I adore is adding a splash of bourbon to the caramel – it gives a subtle depth and a grown-up flair that pairs beautifully with the creamy base. Just a teaspoon or two stirred in before freezing.
Serving & Storage Suggestions for Your Salted Caramel Ice Cream
This ice cream is best served chilled but not rock solid — let it sit for 5 minutes after removing from the freezer. Scoop into bowls or waffle cones for a classic presentation.
Pair it with a drizzle of extra caramel sauce, chopped nuts, or even some fresh berries for contrast. It’s a great companion to warm desserts too, like creamy Tuscan chicken pasta nights when you want something sweet afterward but not complicated.
Store leftovers in an airtight container in the freezer for up to 2 weeks. To avoid freezer burn, press a sheet of parchment paper directly on the surface before sealing the lid.
Reheat gently by leaving it out for a few minutes or warming the scoop with a spoon under hot water — this helps bring back the creamy texture and makes scooping easier.
Flavors often deepen after a day or two, making it even more luscious as it rests in the freezer.
Nutritional Information & Benefits of This No-Churn Salted Caramel Ice Cream
Per serving (about ½ cup / 125 ml), this ice cream provides roughly 300 calories, 15g fat, 35g carbohydrates, and 3g protein. It’s rich and indulgent, so a little goes a long way.
The heavy cream adds healthy fats that keep you satisfied, and the caramel sauce, while sweet, is used sparingly to balance flavor without overloading sugar. If you prefer, you can reduce the caramel amount to cut calories.
This recipe is gluten-free by default, making it a safe choice for those avoiding gluten. For dairy-free adaptations, coconut cream swaps make it suitable for vegan diets.
While it’s not a diet food, making your own ice cream lets you control ingredients and avoid preservatives or stabilizers found in commercial brands.
Conclusion
Easy creamy no-churn salted caramel ice cream has become my secret weapon for quick, homemade dessert magic. It’s simple enough to whip up on a whim but rich enough to impress anyone who tastes it. The balance of sweet caramel and sea salt creates a flavor that feels both indulgent and comforting, perfect for any season or occasion.
Feel free to experiment with mix-ins or swirls to match your mood — there’s something incredibly satisfying about customizing a recipe that’s already so foolproof. For me, it’s become the dessert that brings a little joy to busy days and cozy evenings alike.
If you try this recipe, I’d love to hear how you make it your own! Share your twists or favorite toppings—you never know who might be inspired to give it a go next.
Happy scooping!
Frequently Asked Questions about No-Churn Salted Caramel Ice Cream
Can I make this ice cream without heavy cream?
You can substitute full-fat coconut cream for a dairy-free option, but the texture will be slightly different—still creamy but with a coconut flavor.
How long can I store no-churn ice cream in the freezer?
It’s best enjoyed within 2 weeks for optimal flavor and texture. Keep it in an airtight container to prevent freezer burn.
Is it possible to make this recipe sugar-free?
Yes, use a sugar-free caramel sauce and unsweetened condensed milk alternatives, though the texture and sweetness will vary slightly.
Why is my no-churn ice cream icy or hard?
Usually from not whipping the cream enough or freezing too quickly in a shallow container. Whip to soft peaks and use a deeper container for best results.
Can I add mix-ins like nuts or chocolate chips?
Absolutely! Fold in chopped nuts, toffee bits, or chocolate chips gently before freezing to add texture and flavor.
Pin This Recipe!
Easy Creamy No-Churn Salted Caramel Ice Cream

A quick and easy no-churn ice cream recipe featuring a creamy texture with a perfect balance of buttery caramel sweetness and a subtle hit of saltiness. Ideal for homemade dessert without an ice cream maker.
- Prep Time: 10 minutes
- Cook Time: 0 minutes
- Total Time: 6 hours 10 minutes
- Yield: 8 servings 1x
- Category: Dessert
- Cuisine: American
Ingredients
- 1 can (14 oz / 397 g) sweetened condensed milk
- 2 cups (480 ml) heavy whipping cream
- 3/4 cup (180 ml) salted caramel sauce (homemade or store-bought)
- 1 tsp vanilla extract
- 1/2 tsp sea salt (or to taste)
Instructions
- Chill your mixing bowl and beaters in the fridge for 10–15 minutes before starting.
- Pour 2 cups (480 ml) of heavy whipping cream into the chilled bowl. Using a hand or stand mixer, beat on medium-high speed until soft peaks form (about 3-4 minutes). Do not overbeat.
- In a separate bowl, stir together the sweetened condensed milk and 1 tsp vanilla extract until smooth.
- Gently fold the condensed milk mixture into the whipped cream using a spatula, preserving the airiness.
- Sprinkle 1/2 tsp sea salt evenly and fold it into the mixture.
- Pour half of the ice cream base into a freezer-safe container. Drizzle 1/3 of the salted caramel sauce over it and gently swirl with a butter knife or skewer.
- Add the remaining ice cream base and top with the rest of the caramel sauce. Swirl lightly again.
- Cover the container tightly and freeze for at least 6 hours, preferably overnight, until firm.
- Before serving, let the ice cream sit at room temperature for 5-10 minutes for easier scooping and creamier texture.
Notes
Chill equipment before whipping cream for better results. Do not overbeat cream to avoid grainy texture. Use a deeper container to prevent icy texture. Let ice cream soften slightly before scooping. Optional mix-ins like chopped pecans or toffee bits can be folded in during the final fold step.
Nutrition
- Serving Size: About 1/2 cup (125 m
- Calories: 300
- Fat: 15
- Carbohydrates: 35
- Protein: 3
Keywords: no-churn ice cream, salted caramel ice cream, easy homemade ice cream, no ice cream maker dessert, creamy ice cream recipe