“You seriously made dirt for dessert?” my niece asked, eyes wide as she poked at the cup with a plastic spoon. Honestly, I wasn’t sure how these Tasty Graveyard Dirt Cake Cups with Gummy Worms would go over the first time I whipped them up. It was supposed to be a quick treat for a last-minute Halloween party, something that looked spooky but didn’t take forever to make. I grabbed the usual pudding, crushed chocolate cookies, and those gummy worms that seemed more like candy critters than food. I figured this would be a total gimmick, the kind of dessert that gets eaten once and forgotten.
But then, the first bite happened. The smooth creaminess of the pudding, the crumbly cookie “dirt,” and the chewy surprise of gummy worms all blended in a way that was strangely addictive. Kids and adults alike kept reaching for more. I made these three times that week, tweaking and playing with the layers until the balance felt just right. Now, every Halloween, these dirt cake cups have their own little fan club in my family — especially since they’re as fun to make as they are to eat.
What stuck with me, beyond the obvious fun factor, was how this simple recipe turned into a neat little ritual. It’s the kind of thing that brings out smiles, silly stories, and a bit of nostalgia for all of us (no matter how old). So, here’s how you can put together your own spooky, sweet, and downright tasty graveyard dirt cake cups. They’re perfect for that busy weeknight Halloween gathering or even a casual treat that gets everyone talking.
Why You’ll Love This Recipe
I’ve tried a bunch of Halloween desserts over the years, but these Tasty Graveyard Dirt Cake Cups with Gummy Worms keep winning for a few big reasons. Here’s why I keep coming back to this one:
- Quick & Easy: You can throw these together in about 20 minutes — honestly, they’re great for those frantic “I need dessert now” moments.
- Simple Ingredients: No need for obscure or expensive items. Most of the stuff is probably hanging out in your pantry already.
- Perfect for Parties: These cups are ideal for Halloween parties, classroom treats, or even a fun family night. They’re bite-sized and mess-free, which is a lifesaver.
- Crowd-Pleaser: Kids love digging out the gummy worms, adults appreciate the nostalgic twist, and everyone loves the creamy, chocolatey combo.
- Unbelievably Delicious: The texture is just right — crumbly cookie “dirt” layered with smooth, sweet pudding makes for a really satisfying bite.
What sets this recipe apart? It’s not just cookie crumbs and pudding thrown together. I like to fold in a little cream cheese into the pudding to give it that extra tang and richness. Plus, layering the dirt and pudding thoughtfully (instead of dumping it all at once) really amps up the fun and the flavors. I’ve even swapped in some crushed chocolate-covered pretzels for a salty kick once — trust me, that was a game-changer.
Honestly, these dirt cake cups aren’t just about dessert — they’re a little moment of Halloween magic you can make quickly without fuss. They bring out that playful side in everyone and somehow make the holiday feel more special.
What Ingredients You Will Need
This recipe uses simple, wholesome ingredients to deliver that bold, sweet flavor and satisfying texture without any fuss. Most are pantry staples, and you can easily swap a few to fit your preferences or dietary needs.
- For the “Dirt” Layer:
- Chocolate sandwich cookies (like Oreos), about 25 cookies, crushed finely (I prefer Nabisco Oreos for their consistent crunch)
- For the Creamy Filling:
- Instant chocolate pudding mix, 1 package (3.9 oz / 110 g)
- Milk, 2 cups (480 ml), whole milk gives the best creaminess but 2% works well too
- Cream cheese, 4 oz (115 g), softened (adds a nice tang and richness)
- Powdered sugar, 1/4 cup (30 g) — balances the cream cheese sharpness
- Whipped topping (like Cool Whip), 1 cup (240 ml), thawed (for lightness and fluffiness)
- For Decoration:
- Gummy worms, about 15-20 pieces (choose your favorite brand; I like the slightly sour ones for contrast)
- Mixing bowls (medium and large) — glass or metal works best for easy cleanup
- Electric mixer or handheld whisk — makes blending cream cheese and pudding smooth and effortless
- Measuring cups and spoons — accuracy is key for pudding and sugar balance
- Spatula — for folding whipped topping without deflating it
- Food processor or resealable plastic bag and rolling pin — to crush cookies finely (I sometimes use a coffee grinder for small batches)
- Clear plastic or glass cups (6 to 8 ounce size) — for assembling your dirt cups
- Refrigerator space — chilling really helps the flavors meld and makes the cups set nicely
- Crush the cookies: Place the chocolate sandwich cookies in a food processor and pulse until you get fine crumbs that look like dirt. If you don’t have a processor, put the cookies in a resealable bag and crush them with a rolling pin. Set the crumbs aside. (This should take about 5 minutes.)
- Make the cream cheese mixture: In a medium bowl, beat the softened cream cheese and powdered sugar together until smooth and creamy. This helps cut the richness and keeps the texture silky. (About 2-3 minutes with a mixer.)
- Prepare the pudding: In a separate bowl, whisk the instant chocolate pudding mix with 2 cups (480 ml) of milk according to package instructions. Whisk for at least 2 minutes to get it thickened properly.
- Combine pudding and cream cheese: Fold the pudding mixture into the cream cheese mixture gently until well combined. (Try not to overmix or you’ll lose some fluff.)
- Fold in whipped topping: Carefully fold 1 cup (240 ml) of thawed whipped topping into the pudding and cream cheese mixture. This adds lightness and keeps the filling airy. (Use a spatula and fold slowly.)
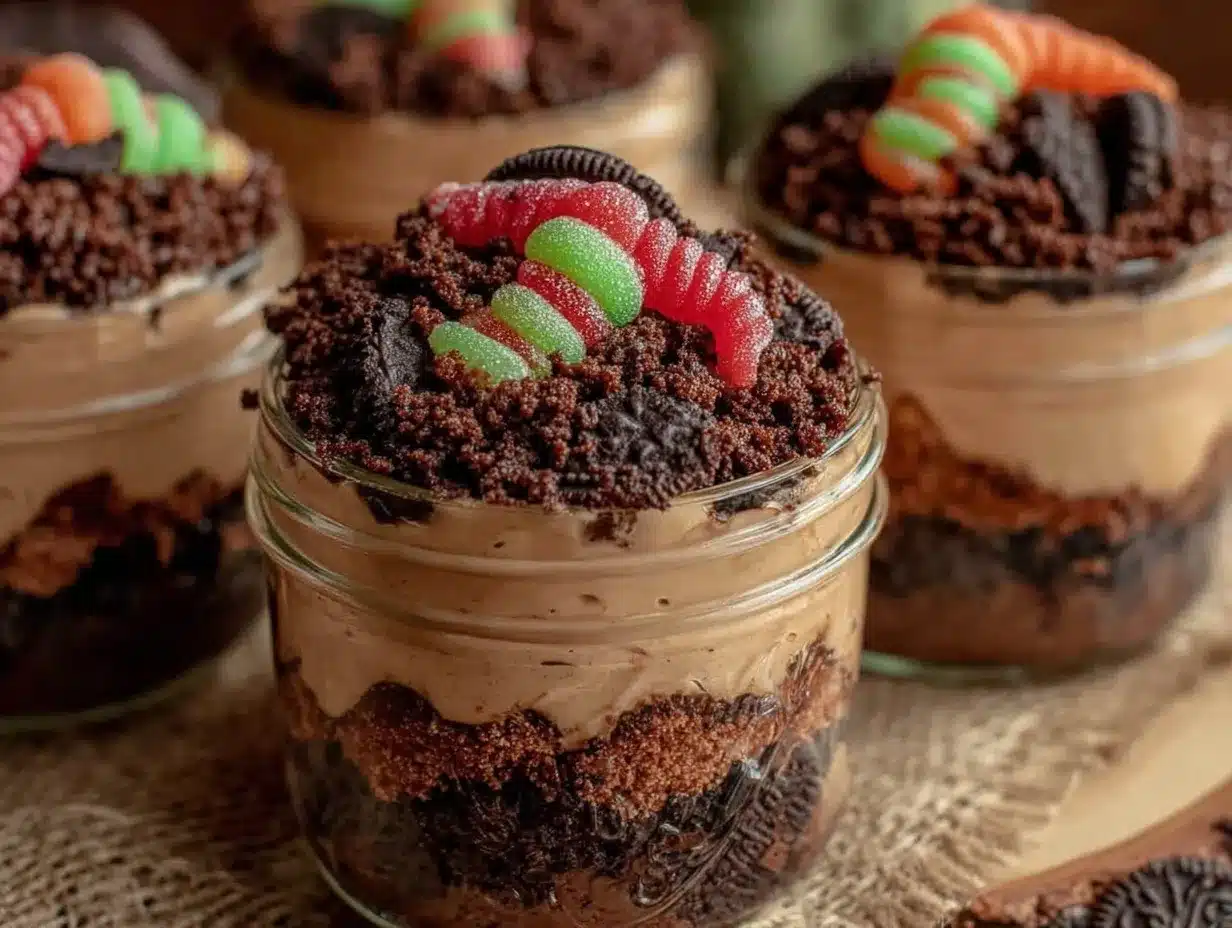
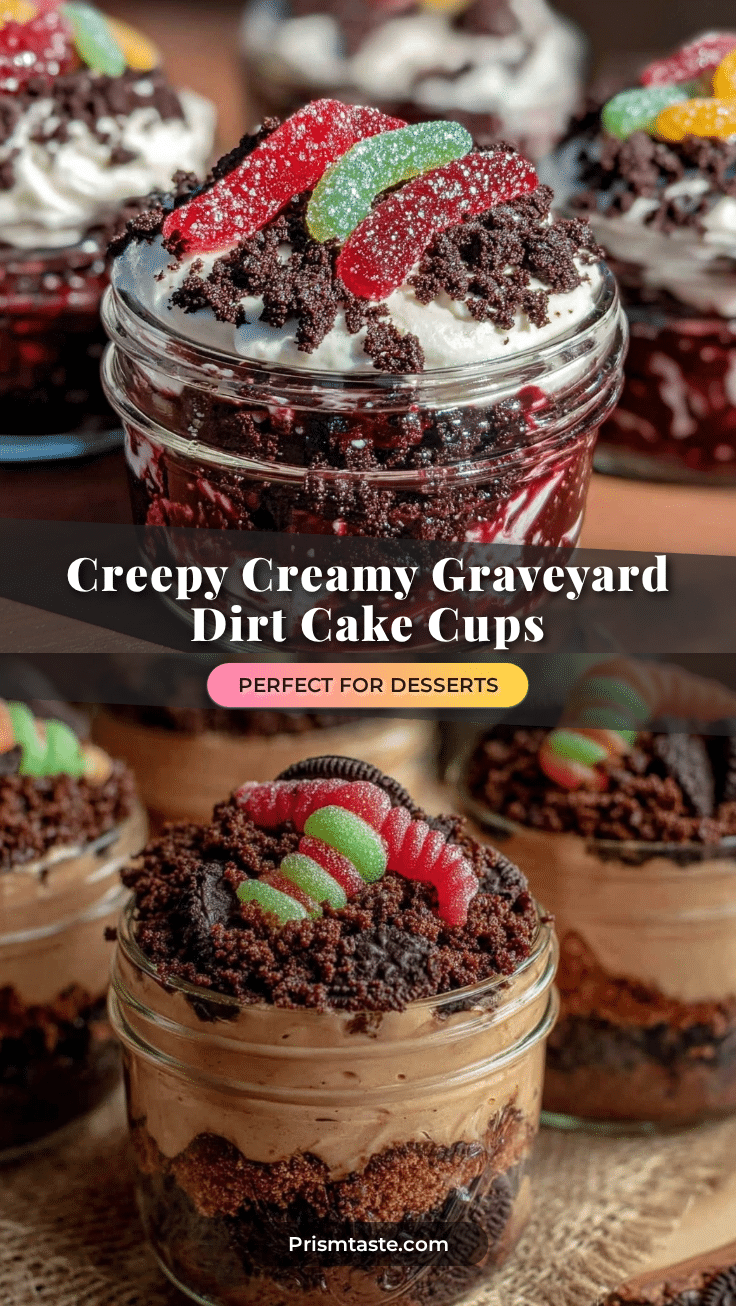
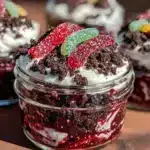
- Assemble the dirt cups: Start by spooning a layer of cookie crumbs into the bottom of each cup (about 1-2 tablespoons). Next, add a layer of the creamy pudding mixture (about 3 tablespoons). Repeat the layers once more, ending with cookie crumbs on top to look like fresh dirt.
- Decorate with gummy worms: Place 2-3 gummy worms on top of each cup, letting them peek out from the “dirt” for that spooky effect.
- Chill before serving: Refrigerate the cups for at least 1 hour to let them set and the flavors meld. They’re good up to 4 hours ahead, making them perfect for parties or prep in advance.
- Seasonal twists: Swap gummy worms for candy eyeballs or mini marshmallow ghosts around Christmas or birthday parties for a fun change.
- Flavor swaps: Use vanilla or butterscotch pudding instead of chocolate for a lighter, sweeter take. I’ve also tried mixing in a touch of espresso powder into the pudding to give it a mocha “earthy” flavor.
- Diet-friendly options: Gluten-free? Use gluten-free chocolate sandwich cookies or crushed gluten-free graham crackers. For dairy-free, try coconut milk pudding mixes and coconut whipped topping instead of dairy.
- Crunch factor: Add a layer of chopped nuts or crushed pretzels for a salty crunch. One time, I mixed crushed peanut butter cups in the layers — surprisingly delicious!
Ingredient tips: If you want a gluten-free version, you can find gluten-free chocolate sandwich cookies or use crushed gluten-free chocolate graham crackers instead. For a dairy-free option, try using coconut cream or dairy-free pudding mixes and coconut whipped topping.
Equipment Needed
If you don’t have an electric mixer, no worries — a sturdy whisk and some elbow grease will get the job done. I’ve also used a small blender to crush cookies in a pinch, but be careful not to turn them into powder.
Preparation Method
Pro tip: If your cream cheese isn’t soft enough, microwave it in 10-second bursts to avoid lumps. Also, if the cookie crumbs start to clump, just give them a quick stir before layering.
Cooking Tips & Techniques
One thing I learned the hard way was not to skip softening the cream cheese — it makes all the difference in getting a smooth, creamy filling without lumps. Also, folding in the whipped topping gently keeps the texture light and fluffy, which balances the dense cookie crumbs nicely.
Instant pudding mix is your friend here, but whisking it well is crucial. I always whisk mine a bit longer than the package says so it thickens fully and doesn’t end up runny. You know that slightly thick, mousse-like texture? That’s the goal.
Crushing the cookies finely (but not to dust) helps recreate that dirt look and feel. I usually do this in small batches to avoid over-processing. If you’re short on time, you can buy pre-crumbled chocolate cookie crumbs, but fresh crumbs taste way better.
Multi-tasking tip: While the pudding sets in the fridge, you can crush cookies and soften cream cheese — this way, you’re not waiting around. Also, assembling cups in layers rather than mixing everything makes the presentation way more fun — it’s part of the spooky vibe.
Lastly, for the gummy worms, I sometimes freeze them for a few minutes before placing on top. They hold their shape better and don’t sink into the pudding as easily.
Variations & Adaptations
Personally, I’ve played around with adding a drizzle of caramel sauce or chocolate ganache on top for extra indulgence. It’s not traditional dirt, but hey, sometimes you want a little extra on your creepy cup.
Serving & Storage Suggestions
These dirt cake cups are best served chilled — that creamy texture holds up nicely and the flavors meld together after a bit of fridge time. I like to serve them in clear plastic or glass cups so everyone can see the layers and gummy worms peeking out. It adds to the spooky vibe and makes for a great party presentation.
Pairing suggestions? They’re sweet and rich, so they go well with something tart or fizzy — a sparkling cider or a tangy fruit punch works great. If you want to serve a full Halloween spread, these cups balance well with savory treats like honey garlic pulled chicken sliders or slow cooker beef ragu, especially if you’re hosting a bigger get-together.
For storage, cover the cups tightly with plastic wrap or transfer to an airtight container. They keep well in the refrigerator for up to 3 days. Avoid freezing as the texture of the pudding changes and can get grainy.
When reheating (if you must), let them come to room temperature and give a gentle stir — but honestly, they’re best enjoyed cold and fresh.
Nutritional Information & Benefits
Each cup has roughly 250-300 calories, depending mostly on the amount of pudding and cookie crumbs you use. The cream cheese adds a nice dose of calcium and protein, while the cookies provide carbs for quick energy. Of course, the gummy worms add sugar, so this is definitely a treat dessert.
If you’re mindful of allergens, note that this recipe contains dairy and gluten unless you make the suggested swaps. Using whole milk and real cream cheese provides better texture and flavor, but you can adjust for low-fat or plant-based options.
From a wellness perspective, this dessert brings joy without complexity — sometimes that counts for a lot. It’s a sweet break that pairs well with balanced meals and doesn’t demand a ton of prep time or fancy ingredients.
Conclusion
These Tasty Graveyard Dirt Cake Cups with Gummy Worms have become a bit of a Halloween staple around here — and it’s easy to see why. They’re quick to make, fun to eat, and bring a playful twist to dessert that’s perfect for the spooky season or any time you want a little whimsy. Whether you stick to the classic recipe or try one of the variations, you’re in for a treat that’s both nostalgic and delicious.
I love how this recipe lets you get creative without stress, making it a go-to when I need a festive dessert on short notice. If you give these a try, I’d love to hear how you customize them — and of course, if the gummy worms make an appearance!
Happy haunting and happy baking!
FAQs About Tasty Graveyard Dirt Cake Cups with Gummy Worms
Can I make these dirt cake cups ahead of time?
Absolutely! They taste best after chilling for at least an hour, and you can prepare them up to 3 days in advance. Just keep them covered tightly in the fridge.
What if I don’t have instant pudding mix?
You can make homemade pudding from scratch, but it will take longer to set. Alternatively, use a pre-made pudding cup if you’re in a rush, though the texture might be a bit different.
Can I use different candies instead of gummy worms?
Definitely! Candy eyeballs, mini marshmallows, or even chocolate chips can work well depending on the occasion or your taste.
Is there a way to make this recipe dairy-free?
Yes! Swap dairy milk with almond or coconut milk and use dairy-free pudding mix and whipped topping. Cream cheese can be substituted with a vegan cream cheese alternative.
How do I keep the gummy worms from sinking into the pudding?
Try chilling the gummy worms in the freezer for a few minutes before placing them on top. This firms them up and helps them stay put longer.
Pin This Recipe!
Tasty Graveyard Dirt Cake Cups with Gummy Worms
A quick and easy Halloween dessert featuring layers of creamy chocolate pudding, cream cheese, and crushed chocolate sandwich cookies, topped with gummy worms for a spooky treat.
- Prep Time: 15 minutes
- Cook Time: 0 minutes
- Total Time: 1 hour 15 minutes
- Yield: 8 servings 1x
- Category: Dessert
- Cuisine: American
Ingredients
- 25 chocolate sandwich cookies (like Oreos), crushed finely
- 1 package (3.9 oz / 110 g) instant chocolate pudding mix
- 2 cups (480 ml) milk (whole or 2%)
- 4 oz (115 g) cream cheese, softened
- 1/4 cup (30 g) powdered sugar
- 1 cup (240 ml) whipped topping (like Cool Whip), thawed
- 15–20 gummy worms
Instructions
- Crush the chocolate sandwich cookies into fine crumbs using a food processor or by placing them in a resealable bag and crushing with a rolling pin. Set aside.
- In a medium bowl, beat the softened cream cheese and powdered sugar together until smooth and creamy (about 2-3 minutes).
- In a separate bowl, whisk the instant chocolate pudding mix with 2 cups of milk according to package instructions until thickened (at least 2 minutes).
- Fold the pudding mixture gently into the cream cheese mixture until well combined.
- Carefully fold in the thawed whipped topping using a spatula to keep the mixture light and airy.
- Assemble the dirt cups by layering 1-2 tablespoons of cookie crumbs at the bottom of each cup, followed by about 3 tablespoons of the creamy pudding mixture. Repeat the layers, ending with cookie crumbs on top.
- Decorate each cup with 2-3 gummy worms placed on top to peek out from the ‘dirt’.
- Refrigerate the cups for at least 1 hour before serving to let them set and flavors meld.
Notes
If cream cheese is not soft enough, microwave in 10-second bursts to avoid lumps. Crush cookies finely but not to powder for best texture. Chill gummy worms briefly before decorating to prevent sinking. Can be made gluten-free or dairy-free with ingredient substitutions.
Nutrition
- Serving Size: 1 cup
- Calories: 275
- Sugar: 28
- Sodium: 180
- Fat: 12
- Saturated Fat: 7
- Carbohydrates: 38
- Fiber: 2
- Protein: 4
Keywords: Halloween dessert, dirt cake, gummy worms, pudding cups, easy dessert, spooky treat, chocolate pudding, cream cheese dessert